
1. Introduction
This manual provides essential instructions for the proper use, maintenance, and replacement of your Respironics Philips DreamWisp Mask Replacement Cushion, Small size. This cushion is designed to be used with the Philips DreamWisp nasal CPAP mask system, providing a comfortable and effective seal for sleep apnea therapy. Regular replacement of the cushion is crucial for maintaining optimal performance and hygiene of your CPAP mask.
The DreamWisp cushion features a top-of-the-head tubing connection, allowing for greater freedom of movement during sleep. Its design aims to minimize facial contact while ensuring a secure seal.
2. Safety Information
Please read all instructions carefully before using the replacement cushion. Failure to follow these instructions may result in improper fit, reduced therapy effectiveness, or discomfort.
- Intended Use: This cushion is intended for use as a replacement part for the Philips DreamWisp nasal CPAP mask system for adult patients prescribed CPAP therapy.
- Compatibility: Ensure this cushion is the correct size (Small) and compatible with your specific DreamWisp mask frame.
- Inspection: Before each use, inspect the cushion for tears, cracks, discoloration, or any signs of wear. Replace immediately if damage is observed.
- Cleaning: Adhere strictly to the cleaning instructions to prevent skin irritation and maintain hygiene.
- Disposal: Dispose of the old cushion according to local regulations.
3. Package Contents
Your package should contain the following item:
- One (1) Philips DreamWisp Mask Replacement Cushion (Small)
4. Setup and Installation
Follow these steps to replace your DreamWisp mask cushion:
- Remove Old Cushion: Gently pull the existing cushion away from the mask frame. It is designed to detach easily.
- Align New Cushion: Take the new Small replacement cushion. Align the cushion's attachment points with the corresponding slots on the DreamWisp mask frame.
- Attach Cushion: Press the new cushion firmly onto the mask frame until it clicks securely into place. Ensure all edges are properly seated and there are no gaps.
- Inspect: Visually inspect the connection to ensure the cushion is fully attached and forms a complete seal around the frame.
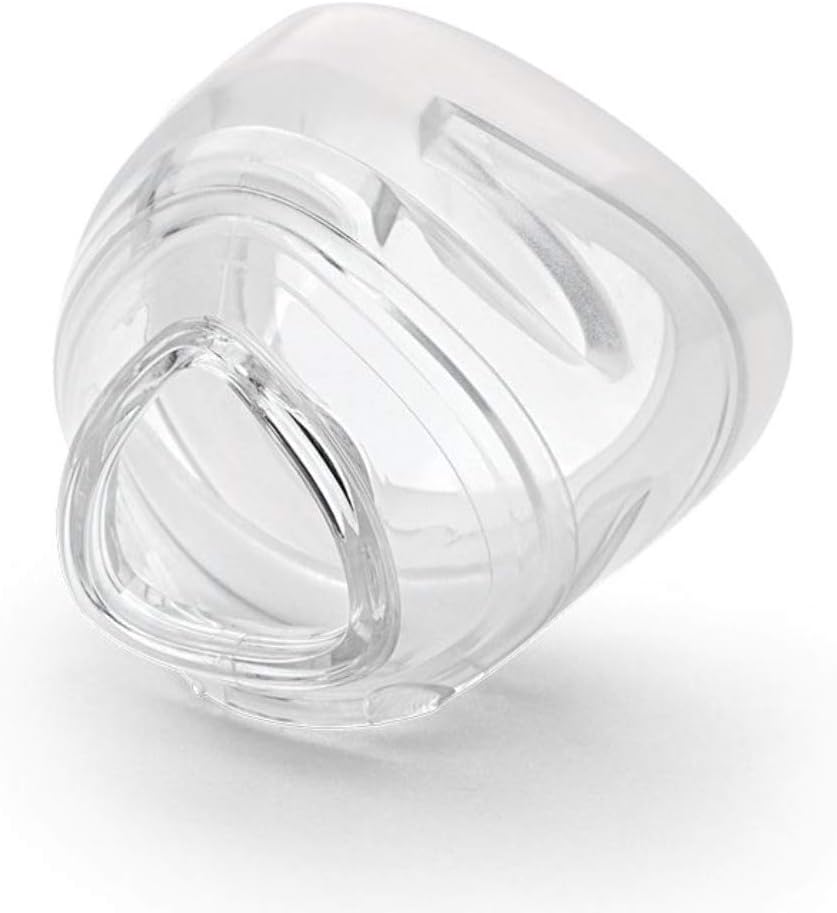
Image 1: Philips DreamWisp Small Replacement Cushion. This image shows the cushion, which is made of soft silicone, designed for comfortable and secure attachment to the DreamWisp mask frame.
5. Operating Instructions
Once the replacement cushion is installed, reassemble your DreamWisp mask system and perform a fit check:
- Wear the Mask: Place the mask on your face and adjust the headgear straps to achieve a comfortable and secure fit. The cushion should rest gently on your nose without excessive pressure.
- Connect Tubing: Connect your CPAP tubing to the mask's elbow connector.
- Start Therapy: Turn on your CPAP device.
- Check for Leaks: While lying down, check for any air leaks around the cushion. If leaks occur, gently adjust the headgear straps or reposition the mask. Avoid overtightening, as this can cause discomfort and lead to more leaks.
The top-of-the-head tubing connection allows for various sleeping positions without dislodging the mask or interfering with the tubing.
6. Maintenance and Cleaning
Proper cleaning and maintenance are essential for the longevity and hygienic use of your DreamWisp mask cushion. Always follow these instructions:
- Daily Cleaning: The cushion should be cleaned daily.
- Method: Hand Wash Only. Disconnect the cushion from the mask frame. Wash the cushion in warm water with a mild soap (e.g., dish soap). Avoid harsh detergents, bleach, alcohol-based solutions, or scented soaps, as these can damage the material and cause skin irritation.
- Rinsing: Rinse thoroughly with clean water to remove all soap residue.
- Drying: Allow the cushion to air dry completely out of direct sunlight before reattaching it to the mask frame. Do not use a clothes dryer.
- Replacement Frequency: It is recommended to replace the cushion every 1 to 3 months, or sooner if signs of wear, damage, or reduced seal performance are observed. Regular replacement ensures optimal therapy and hygiene.
7. Troubleshooting
If you encounter issues with your DreamWisp mask cushion, consider the following:
- Air Leaks:
- Ensure the cushion is correctly attached to the mask frame.
- Adjust headgear straps for a snug, but not overly tight, fit.
- Reposition the mask on your face.
- Inspect the cushion for damage or wear; replace if necessary.
- Discomfort or Red Marks:
- The headgear may be too tight. Loosen straps slightly.
- Ensure the cushion is clean and free of residue.
- Confirm you are using the correct cushion size (Small).
- Difficulty Attaching Cushion:
- Ensure the cushion and frame are dry and free of debris.
- Align the cushion carefully with the frame's attachment points before pressing.
8. Specifications
| Product Name: | Philips DreamWisp Mask Replacement Cushion |
| Size: | Small |
| Brand: | Respironics (Manufacturer: Philips Respironics) |
| Material: | Silicone (Fabric Type), Foam (Fill Material) |
| Intended Age Range: | Adult |
| Specific Use: | Sleep Apnea Therapy |
| Product Dimensions: | Approximately 1 x 1 x 1 inches |
| Item Weight: | Approximately 0.634 ounces (0.02 Kilograms) |
| Care Instructions: | Hand Wash Only |
9. Warranty and Support
For warranty information or technical support regarding your Philips DreamWisp Mask Replacement Cushion, please refer to the documentation provided with your original Philips DreamWisp mask system or contact Respironics customer service directly. Contact details can typically be found on the manufacturer's official website or on the product packaging.
Keep your purchase receipt as proof of purchase for any warranty claims.


