Introduction
Thank you for choosing the G-MARK GLXD4 Professional Karaoke Microphone Dual UHF Cordless Dynamic Mic System. This manual provides detailed instructions for setting up, operating, and maintaining your wireless microphone system to ensure optimal performance and longevity. Please read this manual thoroughly before using the product.
Product Overview
Key Features
- Frequency Adjustable: Dual UHF wireless system with selectable frequencies (520-580MHz) and PLL frequency synthesized technology for stable transmission and minimal interference. Operating range of 200-250 feet line of sight.
- G-MARK Proprietary Capsule: High-quality microphone capsule designed by G-MARK, effectively limiting feedback and interference, providing clear and powerful sound.
- Anti-interference Feature: Auto-scan function to find the least interference channel. Dual antenna design enhances anti-interference capabilities.
- Easy to Use: Plug and play with automatic frequency synchronization between receiver and microphones. Features adjustable volume control.
System Components

Figure 1: The G-MARK GLXD4 wireless microphone system, showing the receiver unit with two antennas and two handheld wireless microphones.
Package Contents
What's in the Box
- Host (Receiver) x 1
- Microphone x 2
- Power Supply x 1
- Instruction Manual x 1
- Audio Cable x 1

Figure 2: All components included in the G-MARK GLXD4 wireless microphone system package.
Setup
1. Unpacking
Carefully remove all components from the packaging and inspect them for any signs of damage. Retain the packaging for future storage or transport.
2. Powering the Receiver
Connect the included power supply to the DC 12V-16V input on the rear of the receiver unit. Plug the power supply into a suitable electrical outlet. The receiver's display should illuminate.
3. Installing Microphone Batteries
Each microphone requires two 1.5V AA batteries. Unscrew the bottom part of the microphone handle to access the battery compartment. Insert the batteries, ensuring correct polarity (+/-). Screw the handle back on securely.
4. Connecting to an Audio System
The receiver features XLR balanced outputs (BALANCED A, BALANCED B) and a 6.35mm AUX output. Connect the receiver to your amplifier, mixer, or karaoke machine using the appropriate audio cables. Ensure you connect to a MIC input, not an AUX input, on your audio device.
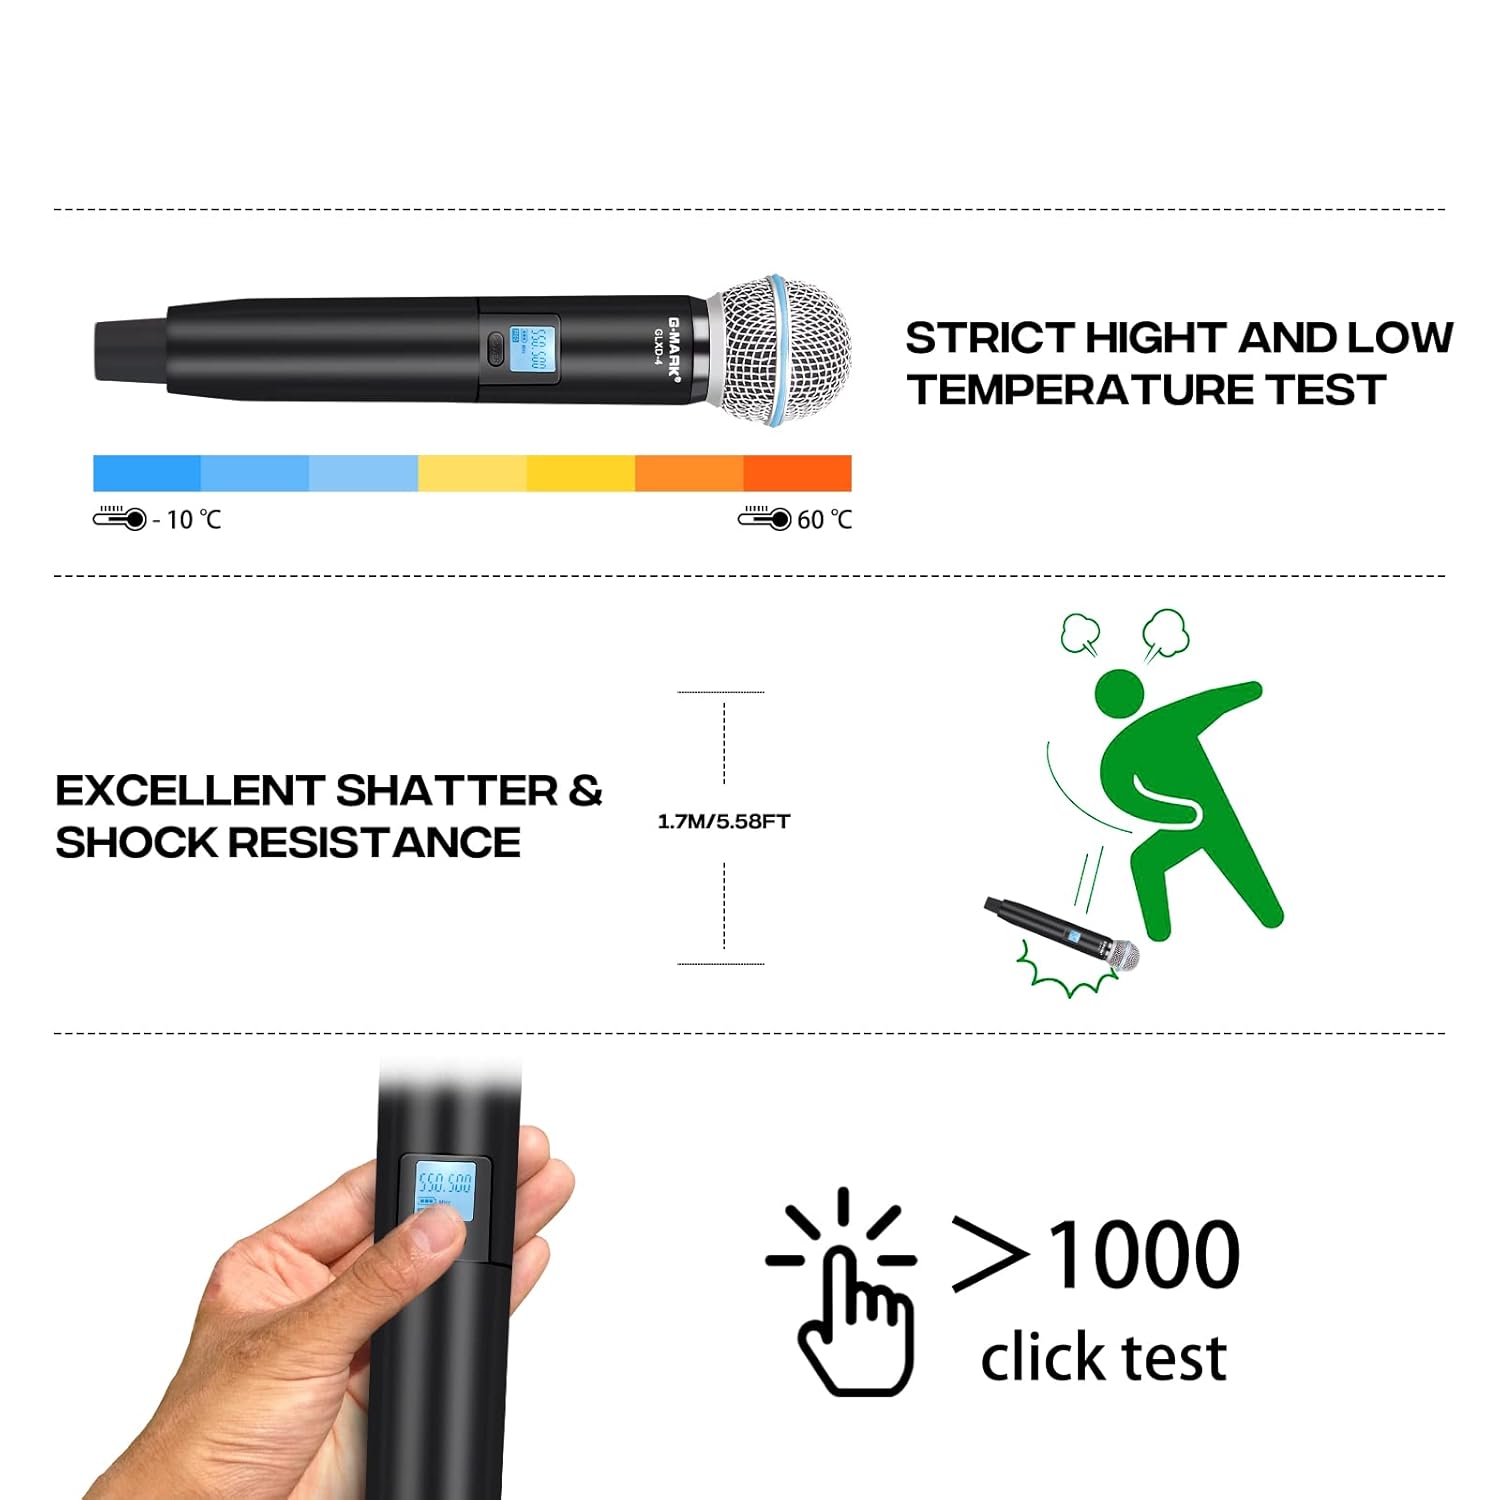
Figure 3: Connection diagram illustrating how to connect the receiver to a power supply and an audio device, and the microphones to the receiver.
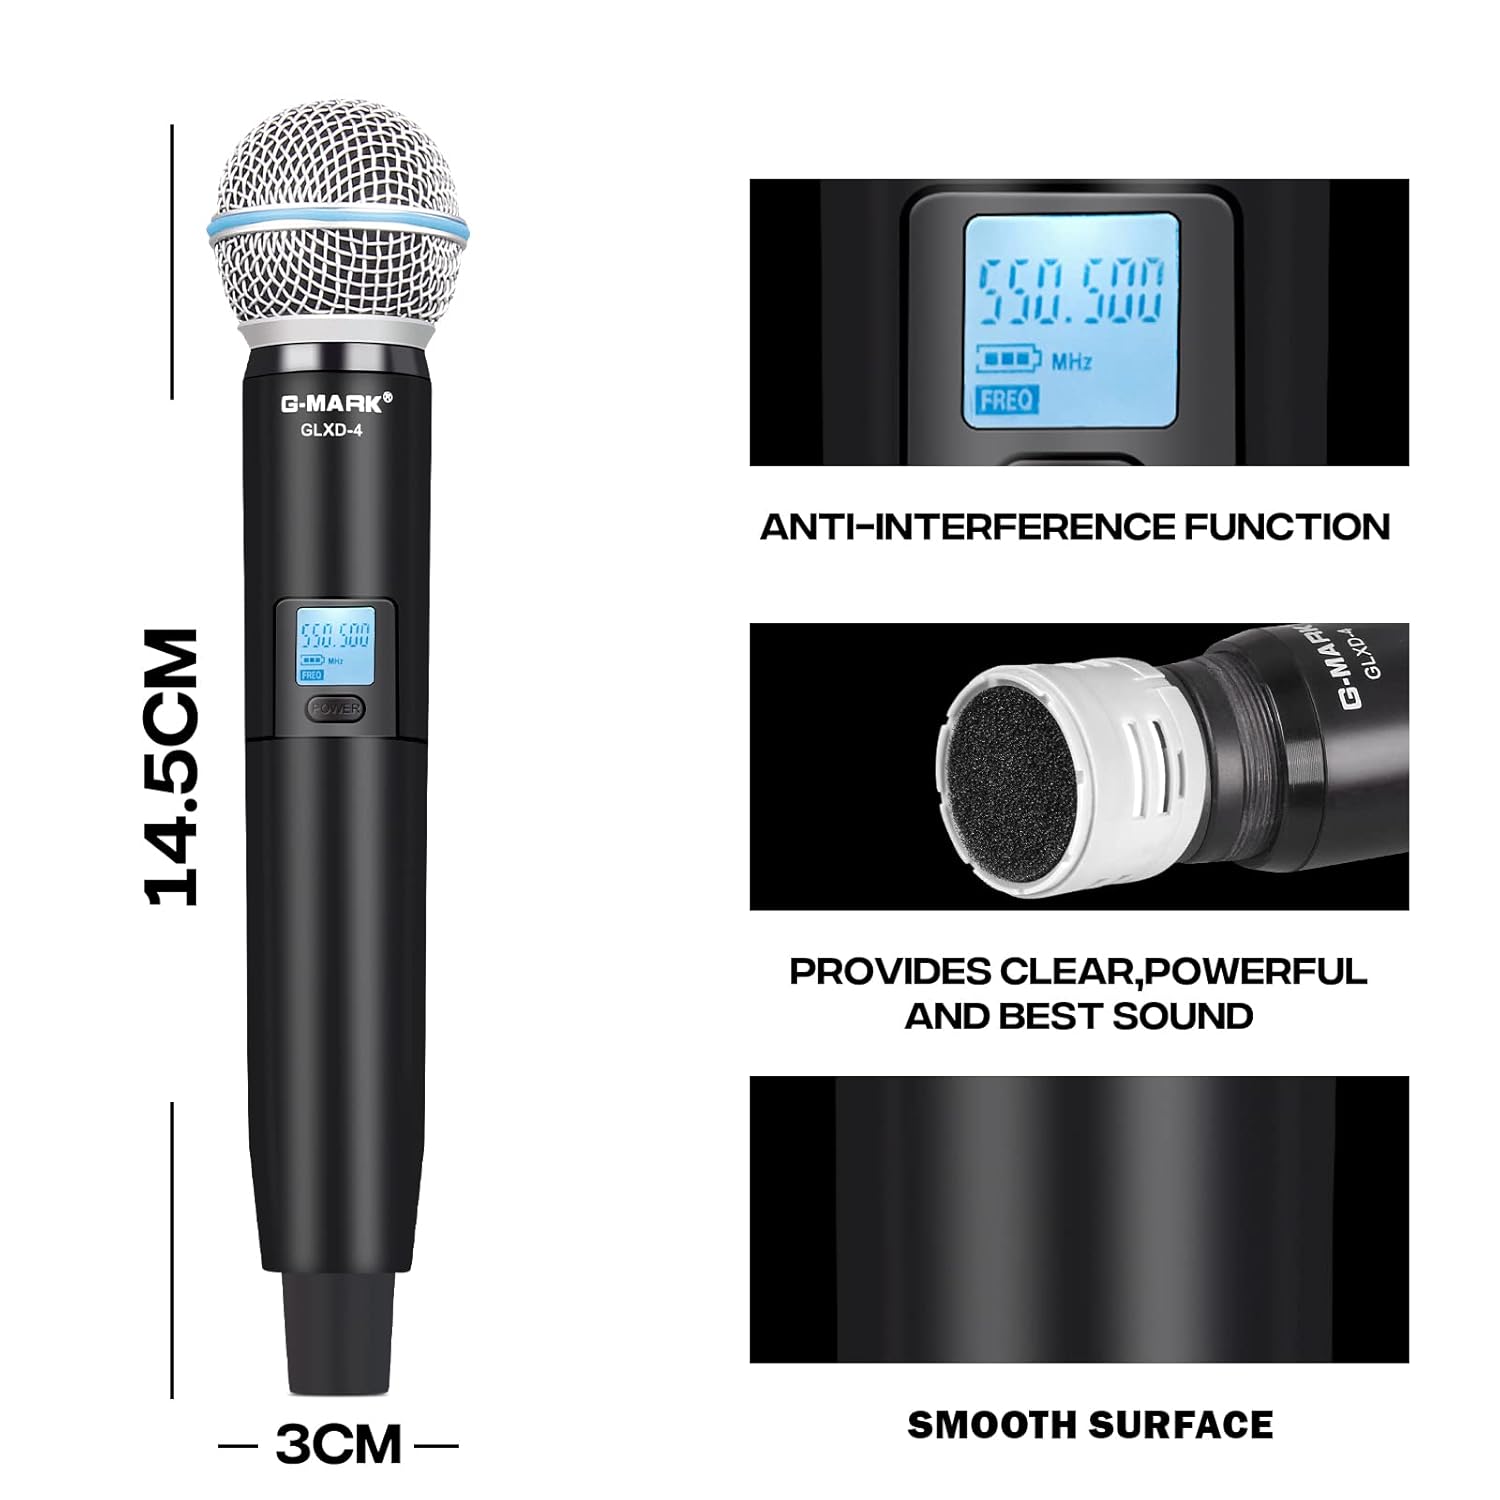
Figure 4: Detailed view of the receiver's front and rear panels, highlighting input/output ports and controls.
Operating Instructions
1. Power On/Off
Press the 'POWER' button on the receiver to turn it on. For the microphones, press and hold the power button on each microphone until the display illuminates.
2. Automatic Pairing
Once the receiver and microphones are powered on, they will automatically synchronize their frequencies. The microphone display will show the connected frequency.
3. Frequency Adjustment (If Needed)
If interference occurs or you need to change the frequency, use the 'SET' and 'UP'/'DOWN' buttons on the receiver to select a new frequency. Then, use the IR function (infrared) on the receiver and microphone to synchronize them. Refer to the receiver's display for current frequency information.
4. Volume Control
Adjust the individual volume levels for each microphone using the dedicated volume controls on the receiver. Fine-tune the overall system volume using your connected amplifier or mixer.

Figure 5: The system supports independent volume control for each microphone and offers a substantial operating range.

Figure 6: Key features of the microphone, including its anti-interference capabilities and sound quality.
Maintenance
Care and Storage
- Cleaning: Use a soft, dry cloth to clean the receiver and microphones. Do not use liquid cleaners or solvents.
- Battery Replacement: Replace microphone batteries when the low battery indicator appears on the microphone display to ensure uninterrupted performance.
- Storage: When not in use for extended periods, remove batteries from the microphones and store the system in a cool, dry place, away from direct sunlight and extreme temperatures.

Figure 7: The microphone is designed to withstand various environmental conditions and rigorous use.
Troubleshooting
Common Issues and Solutions
| Problem | Possible Cause | Solution |
|---|---|---|
| No sound from microphones | Microphones not powered on; Batteries low/dead; Receiver not powered on; Receiver not connected to audio input; Frequency mismatch. | Ensure microphones and receiver are powered on. Replace batteries. Check audio cable connections to MIC input. Re-synchronize frequencies. |
| Interference or static noise | Other wireless devices nearby; Frequency conflict; Obstructions. | Change to a different frequency using the auto-scan function. Move away from other electronic devices. Ensure clear line of sight between microphones and receiver. |
| Short operating range | Obstructions; Weak signal; Environmental factors. | Ensure clear line of sight. Avoid placing receiver near metal objects. Check antenna positioning. |
| Microphone display not working | Batteries dead or incorrectly inserted. | Replace batteries, ensuring correct polarity. |
Specifications
Technical Specifications
| Parameter | Value |
|---|---|
| Frequency Range | UHF 500MHz-590MHz |
| Frequency Stability | 10PPM |
| Occupied Bandwidth | ±150KHz |
| Signal to Noise Ratio | >105dB |
| Distortion | <0.5%@1KHz |
| Receiving Sensitivity | -105dBM |
| Frequency Response | 30Hz-20KHz |
| Receiver Power Supply | DC 12V-16V |
| Microphone Power Supply | DC 3V (1.5V AA*2) |
| Microphone Power Consumption | 130mA |
| Transmit Power | 10mW |
| Dynamic Range | >100dB |
| Microphone Type | Moving Coil Type, Unidirectional |
| Operating Range | 200ft – 250ft (line of sight) |
| Dimensions (Receiver) | 42 x 32 x 7 cm |
| Item Weight | 1.32 kg |
Warranty and Customer Support
The G-MARK GLXD4 Wireless Microphone System comes with a 12-month manufacturer assurance. This warranty covers defects in materials and workmanship under normal use.
For any troubleshooting assistance, replacement of discontinuous or defective parts, or general inquiries, please contact G-MARK customer service. Refer to the product packaging or official G-MARK website for the most current contact information.
Please retain your proof of purchase for warranty claims.