AireMax APA112C
AireMax Portable Air Conditioner User Manual
Model: APA112C
Product Overview
The AireMax Portable Air Conditioner (Model APA112C) is designed to provide efficient cooling and dehumidification for rooms up to 400 square feet. This versatile unit features multiple operating modes, a user-friendly LED display, and convenient portability with integrated wheels.
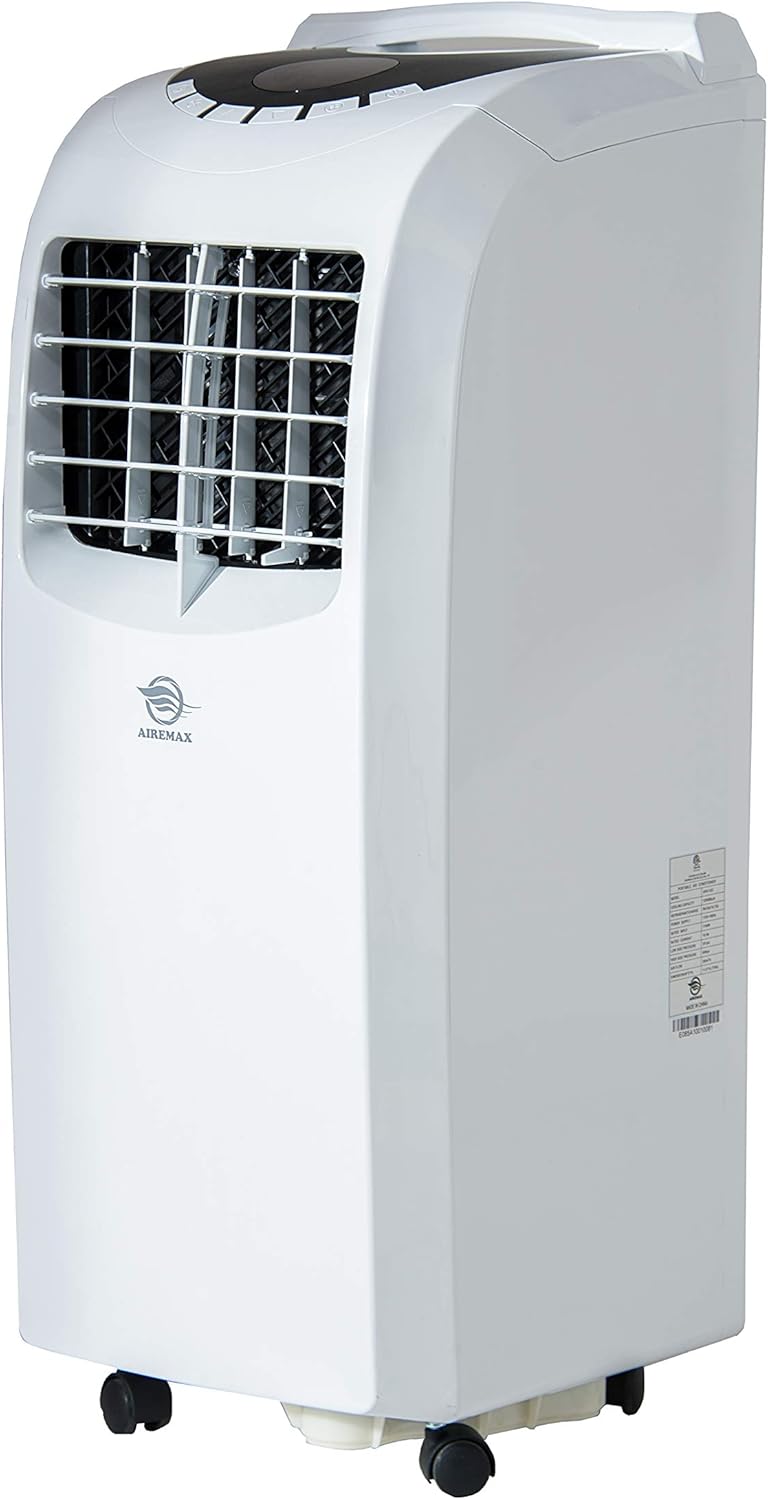
Figure 1: Front view of the AireMax Portable Air Conditioner, showing its compact design and casters for easy movement.
Included Components
Before beginning installation, ensure all components are present:
- Portable Air Conditioner Unit
- Remote Control
- Exhaust Hose
- Window Venting Kit (adjustable panel)
- Round Connector
- Adaptor
- User Manual (this document)

Figure 2: Key accessories for the portable air conditioner, including the exhaust hose and window venting kit.
Setup and Installation
Follow these steps to set up your portable air conditioner:
- Positioning: Place the unit on a flat, stable surface. Ensure there is at least 20 inches of space around the unit for proper airflow.
- Attach Exhaust Hose: Connect one end of the exhaust hose to the round connector, then attach the connector to the exhaust outlet on the back of the unit.
- Install Window Kit: Insert the adaptor into the other end of the exhaust hose. Adjust the window venting kit to fit your window opening (suitable for both vertical and horizontal windows). Secure the window kit in place.
- Connect Exhaust: Attach the exhaust hose adaptor to the opening in the window venting kit. Ensure a tight seal to prevent hot air from re-entering the room.
- Power Connection: Plug the power cord into a grounded electrical outlet.
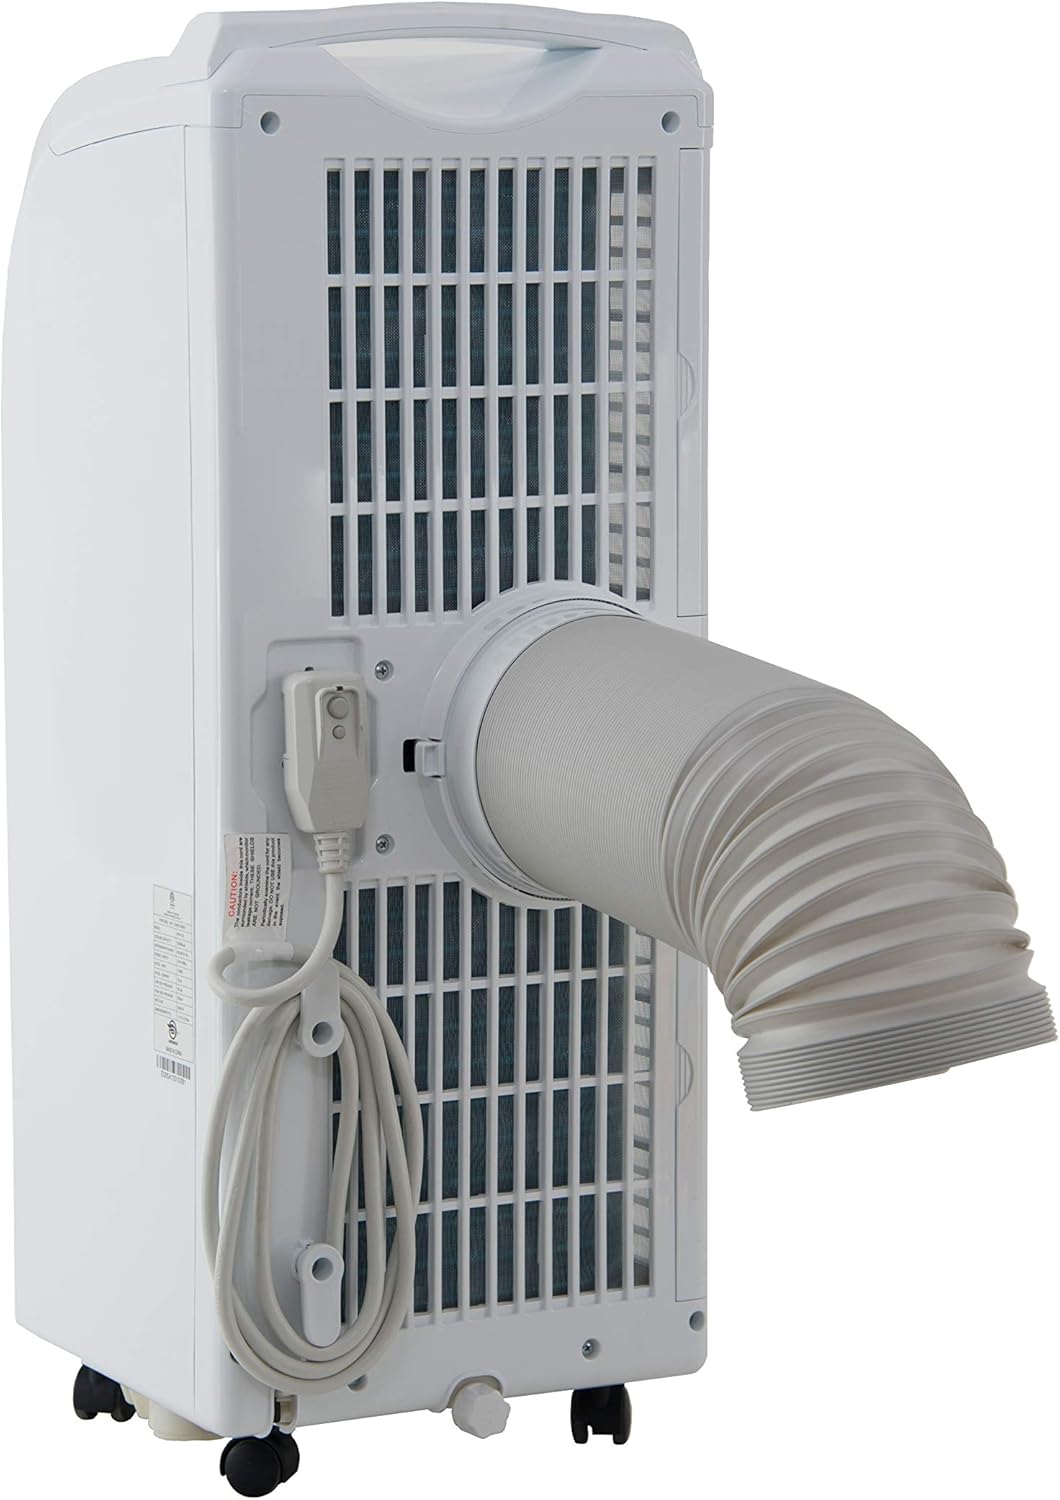
Figure 3: Rear view of the unit demonstrating the attachment of the exhaust hose for proper ventilation.
Operating Instructions
Your AireMax Portable Air Conditioner features an intuitive LED display and a multifunction remote control for easy operation.
Control Panel (LED Display)
The top-mounted LED display provides clear indications of the current settings and allows for direct control.
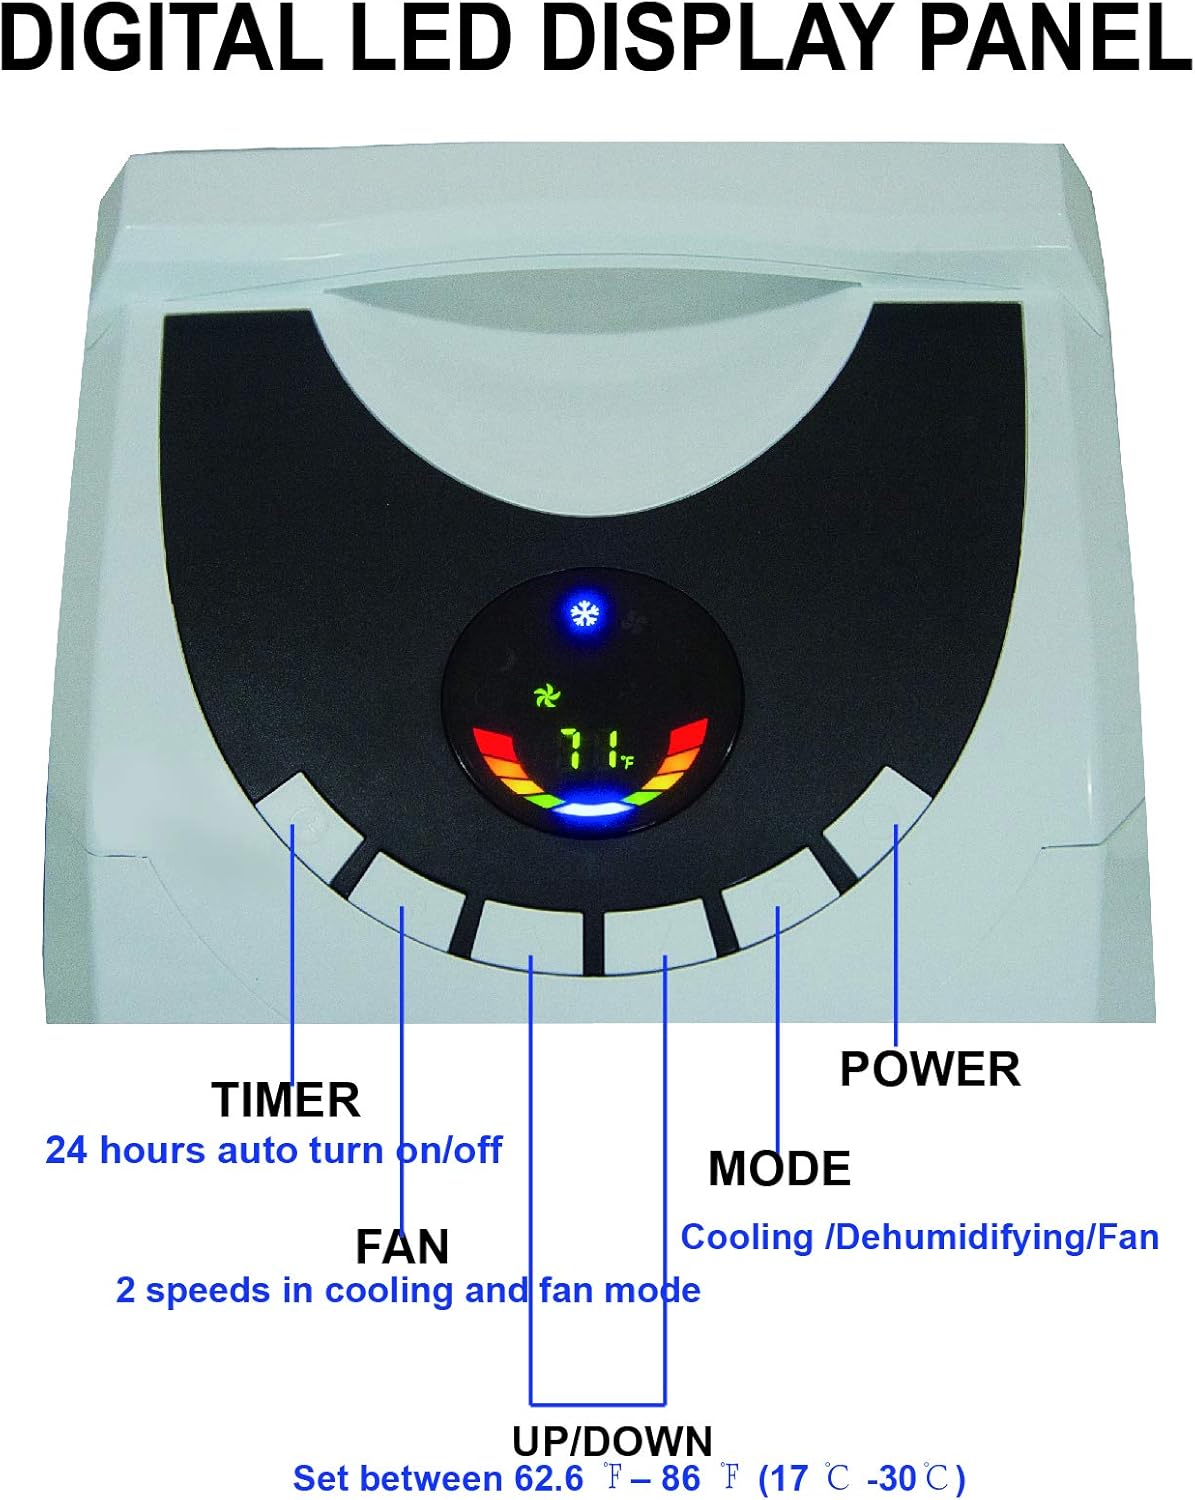
Figure 4: Close-up of the digital LED display panel, showing controls for Timer, Fan, Up/Down temperature, Mode, and Power.
- Power Button: Turns the unit on or off.
- Mode Button: Cycles through operating modes: Cool, Fan, and Dry (Dehumidify).
- Up/Down Buttons: Adjust the desired temperature setting (between 62.6°F and 86°F / 17°C and 30°C).
- Fan Button: Selects fan speed (High, Low) in cooling and fan modes.
- Timer Button: Sets the 24-hour auto turn on/off timer.
Remote Control
The included remote control provides convenient access to all functions from a distance.

Figure 5: The multifunction remote control, allowing adjustment of settings from a distance.
- All functions available on the control panel are also accessible via the remote.
- Includes dedicated buttons for High/Low fan speed, Sleep mode, and temperature unit conversion (°C/°F).
Maintenance
Regular maintenance ensures optimal performance and longevity of your air conditioner.
Filter Cleaning
The unit features dual filters to capture pet hair, dust, and other particles. Clean the filters periodically to maintain efficiency.
- Turn off and unplug the unit before cleaning.
- Locate the filter frames on the back of the unit.
- Remove the filter frames.
- Wash the filters with warm, soapy water. Rinse thoroughly.
- Allow filters to air dry completely before reinserting them.

Figure 6: Rear view highlighting the double filter frames and the drainage hose connection point.
Water Drainage
The unit features an auto-evaporation system, which typically handles most condensate. However, in highly humid environments, manual drainage may be required.
- When the internal water tank is full, the unit will stop operating and indicate a full tank.
- To drain, turn off and unplug the unit.
- Place a shallow pan or bucket under the drainage hose outlet at the bottom rear of the unit.
- Remove the drain plug to allow water to flow out.
- Replace the drain plug once all water has been removed.
- For continuous drainage in very humid conditions, a separate drainage tube (not included) can be connected to the drainage outlet.
Troubleshooting
Refer to this section for common issues and their solutions.
| Problem | Possible Cause | Solution |
|---|---|---|
| Unit does not turn on. | No power, power cord unplugged, full water tank. | Check power connection, ensure outlet is functional. Drain water tank if full. |
| Unit is running but not cooling. | Dirty air filter, exhaust hose not properly installed, room too large, windows/doors open. | Clean air filter. Ensure exhaust hose is securely connected and vented outside. Close all windows and doors. Verify room size is within unit's capacity. |
| Water leakage from unit. | Water tank is full, unit is not level, drainage hose is blocked or improperly connected. | Drain the water tank. Ensure the unit is on a level surface. Check drainage hose for kinks or blockages if continuous drainage is used. |
| Unit is noisy. | Unit not on a level surface, fan speed too high. | Place unit on a flat, level surface. Reduce fan speed. |
Specifications
Detailed technical specifications for the AireMax Portable Air Conditioner Model APA112C:
| Feature | Detail |
|---|---|
| Model Number | APA112C |
| Cooling Capacity | 12,000 BTU (6,500 BTU DOE) |
| Estimated Cooling Area | Up to 400 Sq. Ft. |
| Power Supply | 115V / 60Hz |
| Rated Power Consumption | 1140W / 10.4A |
| Dehumidifying Capacity | Up to 78 pints per day |
| Drainage | Auto-evaporation or manual |
| Air Louvers | Manual 2-way directional |
| Noise Level | 55 dB |
| Item Weight | 60.6 pounds |
| Product Dimensions (W x H x D) | 14.2 x 30 x 11.8 inches |
| Refrigerant | R 410A |
| Included Components | Air conditioner, remote control, exhaust hose, window venting kit, manual, round connector, adaptor |

Figure 7: Diagram illustrating the dimensions and key specifications of the unit.

Figure 8: Guide to selecting the correct cooling capacity based on room square footage, with adjustment factors.
Warranty and Support
The AireMax Portable Air Conditioner comes with a 1-year parts and labor warranty from the date of purchase.
For technical assistance, troubleshooting beyond this manual, or warranty claims, please contact AireMax customer support. Refer to your purchase documentation for specific contact details or visit the official AireMax website.
A digital version of this user manual is available for download here.
Related Documents - APA112C
 |
AIREMAX APA112C Portable Air-conditioner: Use and Care Manual Comprehensive use and care manual for the AIREMAX APA112C portable air conditioner, covering setup, operation, maintenance, troubleshooting, and warranty information. |
 |
AIREMAX Warranty Terms & Conditions - Official Product Information Detailed warranty terms and conditions for AIREMAX products, including how to make a claim, warranty exclusions, and important safety warnings. Visit airemaxusa.com for support. |
 |
Airemax APA112C Portable Air Conditioner Use and Care Manual Comprehensive guide for the Airemax APA112C portable air conditioner. Learn about features, operation, installation, maintenance, troubleshooting, and warranty information for optimal performance. |
 |
AIREMAX APE514C Portable Air Conditioner Use and Care Manual Comprehensive user manual for the AIREMAX APE514C portable air conditioner, covering safety, installation, operation, maintenance, and troubleshooting. |
 |
Airemax APE514C Portable Air Conditioner Use and Care Manual Comprehensive user manual for the Airemax APE514C portable air conditioner, covering installation, operation, maintenance, and troubleshooting. |
 |
AireMax Portable Air Conditioner User Manual (APH10CE / APH10CH) Comprehensive user manual for AireMax APH10CE and APH10CH portable air conditioners. Includes setup, installation, operation, maintenance, and troubleshooting instructions. |
Ask a question about this manual
Ask about setup, troubleshooting, compatibility, parts, safety, or missing instructions. Manuals+ will review the question and use this page’s manual context to help answer it.