1. Safety Information
Please read all instructions carefully before using the device and retain this manual for future reference. Improper use may result in electric shock, fire, or damage to the device.
- Do not expose the device to rain or moisture.
- Do not disassemble the device. Refer all servicing to qualified personnel.
- Use only the provided power adapter.
- Keep the device away from direct sunlight, heat sources, and strong magnetic fields.
- Ensure proper ventilation around the device.
- This device does not contain a battery and requires constant charging for operation.
2. Package Contents
Verify that all items listed below are included in your package:
- 1 x Ciglow 13-Inch Digital Photo Frame
- 1 x User Manual
- 1 x Remote Controller (battery included)
- 1 x Charger Adapter
- 1 x Bracket
3. Product Overview
3.1 Key Features
- 13-inch HD screen (1280*800 resolution) for clear image and video display.
- Supports various media formats for photos (JPG, JPEG), audio (MP, OGG, APE, FLAC, AC3, RA, AAC), and video (RM, RMVB, MKV, MOV, M4V, MPG, FLV, PMP, AVI, VOB, DAT, MP4, 3GP).
- Multi-functional: Photo slideshow, music player, video player, alarm clock, and calendar.
- Built-in 2*2W speakers for audio playback.
- Motion detection function: Automatically powers on/off when movement is detected within 1 meter.
- Supports external storage via USB and SD card (up to 32GB, SD card not included).
- Operated via on-device buttons or included remote control.
3.2 Front View
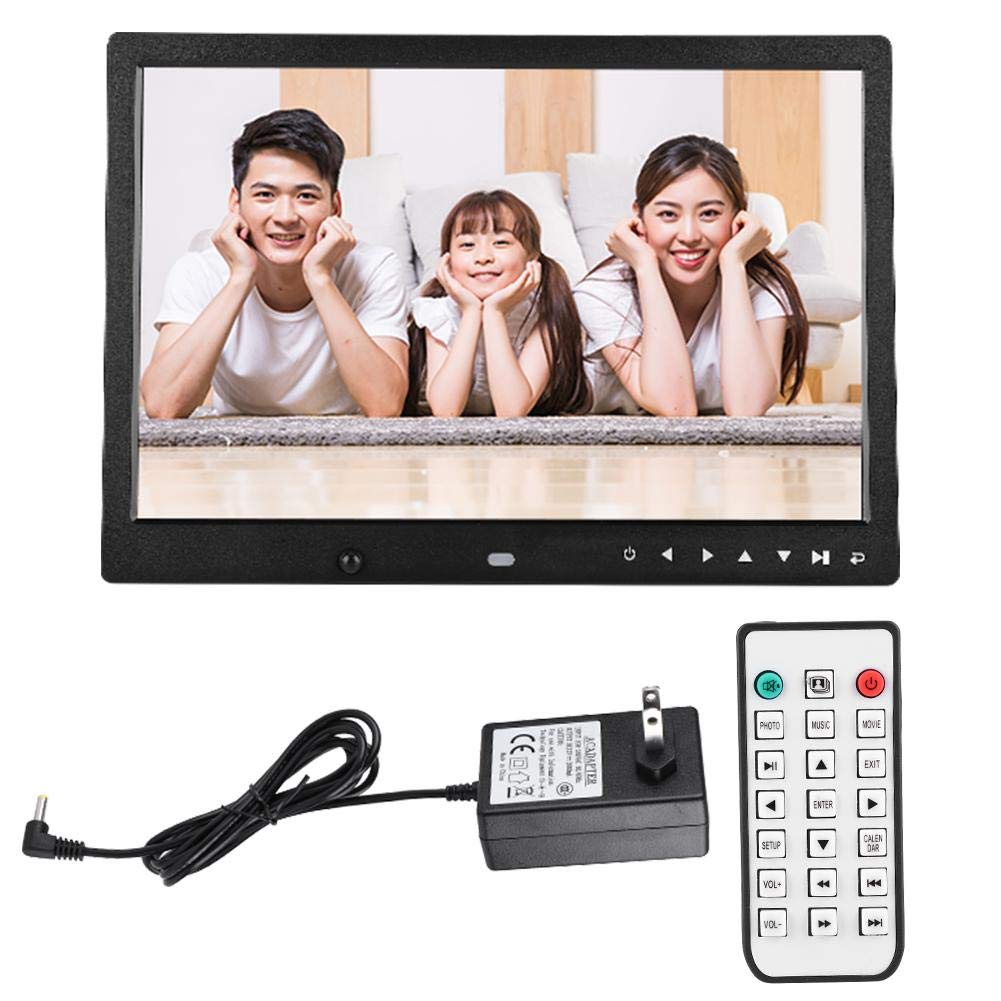
This image shows the front of the digital photo frame, highlighting the 13-inch display and the control buttons located below the screen. The buttons typically include power, navigation (up, down, left, right), enter, and menu/exit.
3.3 Side and Back Views (Ports and Controls)
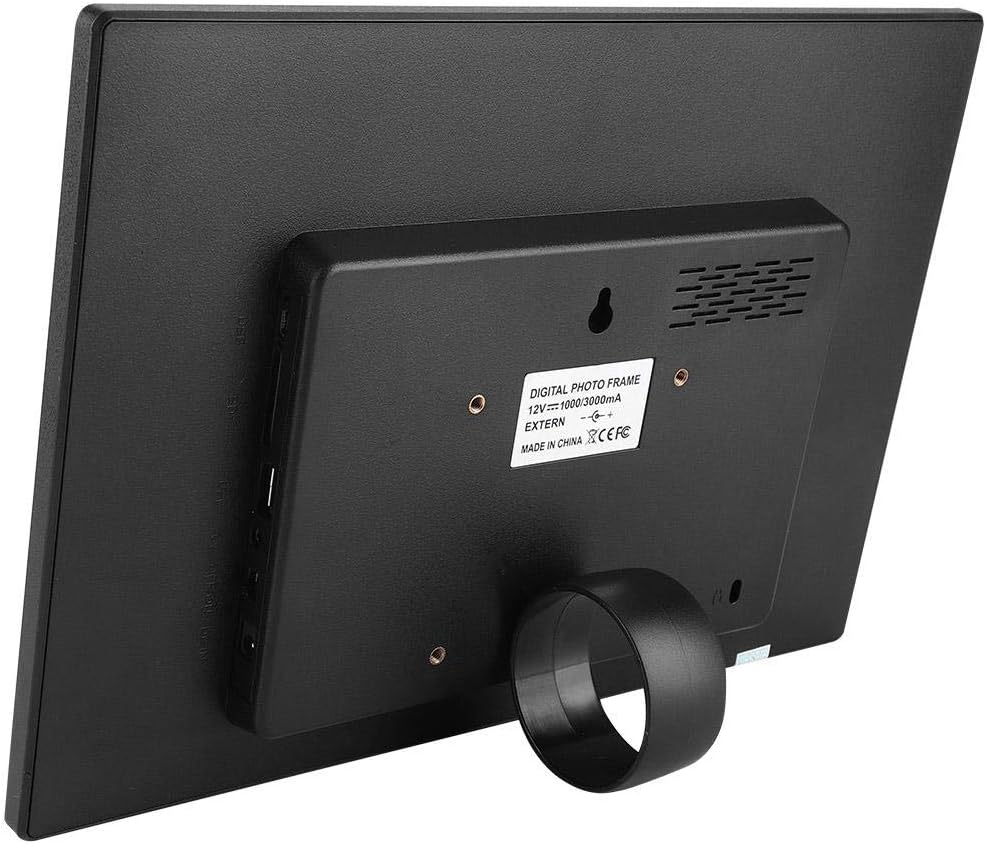
The side view illustrates the various input ports available on the frame, including a USB port for flash drives, an SD card slot for memory cards, and the DC power input jack. A 3.5mm audio jack is also present for external audio output.

The back of the frame features the removable stand for tabletop display and mounting holes for wall installation. The product label with model and power information is also visible.
3.4 Remote Control

The included remote control provides convenient access to all functions, including power, media selection (photo, music, movie), navigation, volume control, setup, and calendar functions.
4. Setup
4.1 Attaching the Stand
Insert the provided bracket into the designated slot on the back of the digital photo frame. Adjust the angle for optimal viewing on a flat surface.
4.2 Power Connection
- Connect the charger adapter to the DC IN port on the side of the frame.
- Plug the adapter into a standard AC 110-240V power outlet.
- The frame will automatically power on or can be turned on using the power button on the device or remote control.
4.3 Inserting Storage Media
- SD Card: Gently insert an SD card (up to 32GB, not included) into the SD card slot until it clicks into place. Ensure the card is inserted in the correct orientation.
- USB Drive: Insert a USB flash drive (up to 32GB, not included) into the USB port.
The frame will automatically detect the inserted media and prompt you to select a function (Photo, Music, Video).
5. Operating Instructions
5.1 Basic Navigation
Use the navigation buttons (Up, Down, Left, Right) on the frame or remote control to move through menus. Press the 'ENTER' button to confirm a selection. Use 'EXIT' or 'MENU' to return to the previous screen or main menu.
5.2 Photo Playback
- From the main menu, select 'Photo'.
- Choose the desired storage device (SD card or USB).
- Navigate to the folder containing your photos and select a photo to start the slideshow.
- During a slideshow, use the remote to pause, skip photos, or adjust settings.

This image illustrates the main menu interface with icons representing different functions like Photos, Music, Video, Calendar, and Clock, indicating the frame's multi-functional capabilities.
5.3 Music Playback
- From the main menu, select 'Music'.
- Choose the desired storage device.
- Select an audio file to begin playback.
- Use the remote control to adjust volume, skip tracks, or pause.

This image shows the digital photo frame playing music, indicated by the visual representation of musical notes. The frame's built-in speakers allow for direct audio output.
5.4 Video Playback
- From the main menu, select 'Video'.
- Choose the desired storage device.
- Select a video file to begin playback.
- Use the remote control to adjust volume, fast forward, rewind, or pause.
This video demonstrates the Ciglow Digital Photo Frame in use, showcasing its display capabilities and various functions. It provides a visual overview of the product's operation.
5.5 Calendar and Alarm Functions
- From the main menu, select 'Calendar' to view the current date and time.
- Access the 'Alarm' settings to set multiple alarms with customizable times and alarm tones.
5.6 Motion Detection
The frame features a motion detection function that can automatically turn the device on or off. This feature helps conserve energy.
- Go to the 'Setup' menu.
- Locate 'Motion Detection' settings.
- Enable or disable the function and set the auto-shutdown timer (1min/3min/5min) if no motion is detected.

This image illustrates the motion detection feature, where the frame can detect human presence and activate or deactivate accordingly. The detection distance is approximately less than 1 meter.
6. Maintenance
- Cleaning: Use a soft, dry cloth to clean the screen and frame. For stubborn marks, slightly dampen the cloth with water. Avoid using harsh chemicals or abrasive cleaners.
- Storage: When not in use for extended periods, disconnect the power adapter and store the frame in a cool, dry place.
- Media Handling: Always safely eject USB drives or SD cards from the frame's menu before physically removing them to prevent data corruption.
7. Troubleshooting
| Problem | Possible Cause | Solution |
|---|---|---|
| Frame does not power on. | Power adapter not connected or faulty. | Ensure the power adapter is securely connected to the frame and a working power outlet. Try a different outlet. |
| No image/video/audio from USB/SD card. | Incorrect file format; media not inserted correctly; corrupted media. | Check if files are in supported formats (JPG, MP4, MP3, etc.). Reinsert the SD card/USB drive. Try a different media card/drive. |
| Remote control not working. | Battery depleted; obstruction; remote not pointed at sensor. | Replace the remote control battery. Ensure no obstructions between the remote and the frame's IR sensor. Point the remote directly at the frame. |
| Motion detection not working. | Feature disabled; obstruction; distance too far. | Enable motion detection in the settings menu. Ensure the sensor is not obstructed. Maintain a detection distance of less than 1 meter. |
8. Specifications
| Feature | Detail |
|---|---|
| Model | XCLT-1309T |
| Screen Size | 13 Inches |
| Display Size | 283 x 177 mm (12.28"L x 8.54"W) |
| Resolution | 1280 x 800 (WXGA) |
| Aspect Ratio | 16:9 |
| Luminance | 250 cd/m² |
| Frame Material | Plastic + Metal (Acrylonitrile Butadiene Styrene) |
| Screen Material | LED |
| Connectivity Technology | USB |
| External Storage Support | SD Card, USB Drive (up to 32GB) |
| Audio Jack | 3.5mm |
| Speaker | Built-in 2*2W 8Ω |
| Control Method | Buttons, Remote Control |
| Power Source | Corded Electric (AC 110-240V) |
| Motion Detection Distance | <1m |
| Auto Shutdown Timer | 1min/3min/5min |
| Item Weight | 1.04 Kilograms |
| Supported Languages | Chinese, English, French, German, Russian, Spanish, Portuguese, Italian, Turkish, Swedish, Polish, Japanese, Korean, Dutch |
9. Warranty and Support
Specific warranty information for the Ciglow 13-Inch Digital Photo Frame (Model XCLT-1309T) is not provided in this manual. For warranty details, technical support, or service inquiries, please refer to the product packaging or contact the manufacturer directly through their official website or customer service channels.