
1. Introduction
The Aramox Cigarette Lighter TPMS is an intelligent tire pressure monitoring system designed to enhance driving safety by providing real-time tire pressure and temperature data. This system features a digital display that plugs into your vehicle's cigarette lighter socket and four internal sensors for accurate monitoring. It offers early warning for tire leakage, contributes to fuel efficiency, and extends tire lifespan.
2. Package Contents
Please verify that all items listed below are included in your package:
- 1 x TPMS Digital Display Screen
- 4 x Internal Sensors
- 4 x Air Faucets (Valve Stems)
- 4 x Screws
- 1 x User Manual (this document)
3. Specifications
| Feature | Specification |
|---|---|
| Item Type | Cigarette Lighter TPMS |
| Material | ABS (Acrylonitrile Butadiene Styrene) |
| Display Type | Digital |
| Input Voltage | 12V (Cigarette Lighter) |
| Working Voltage | 5V |
| Working Frequency | 433.9200MHz |
| Quiescent Current | ≤30uA |
| Dynamic Current | ≤8mA |
| Working Temperature | -40°C ~ +85°C |
| Pressure Detection Range | 0~99 psi (0~5 bar) |
| Sensor Battery Duration | Approximately 5 years (internal sensors) |
| Measurement Accuracy (Pressure) | ±1.5% |
| Measurement Accuracy (Temperature) | ±1°C |
| Dimensions (L x W x H) | Approximately 3.94 x 3.94 x 3.94 inches |
| Weight | Approximately 0.1 Kilograms |
| Model Number | c8b164c6-7704-4b61-b1cc-990ff49fc393 |
4. Setup and Installation
This system uses internal sensors, which require professional installation by a tire shop or mechanic for proper mounting and tire rebalancing. Do not attempt to install internal sensors yourself unless you have the necessary tools and expertise.
4.1 Internal Sensor Installation Steps (Professional Installation Recommended)
- Wring the Vent: Remove the existing valve stem from the wheel.
- Install Built-in Sensor: Mount the internal sensor onto the wheel rim, ensuring it is securely fastened and positioned correctly inside the tire.
- Pump Up the Tires: Inflate the tire to the manufacturer's recommended pressure.
- Tighten Air Nozzle: Ensure the new air nozzle (valve stem) is properly tightened to prevent air leaks.
- Dynamic Balance Testing: Perform dynamic wheel balancing to ensure smooth operation and prevent vibrations.
- Adjust the Tires: Make any final adjustments to tire pressure as needed.

Image: Installation steps for the built-in (internal) tire pressure sensors. This process typically requires professional tools and expertise.
4.2 Display Unit Setup
- Insert the TPMS digital display screen into your vehicle's 12V cigarette lighter socket.
- The display will power on automatically.
- The system will automatically detect and pair with the installed internal sensors. This may take a few minutes of driving for initial synchronization.
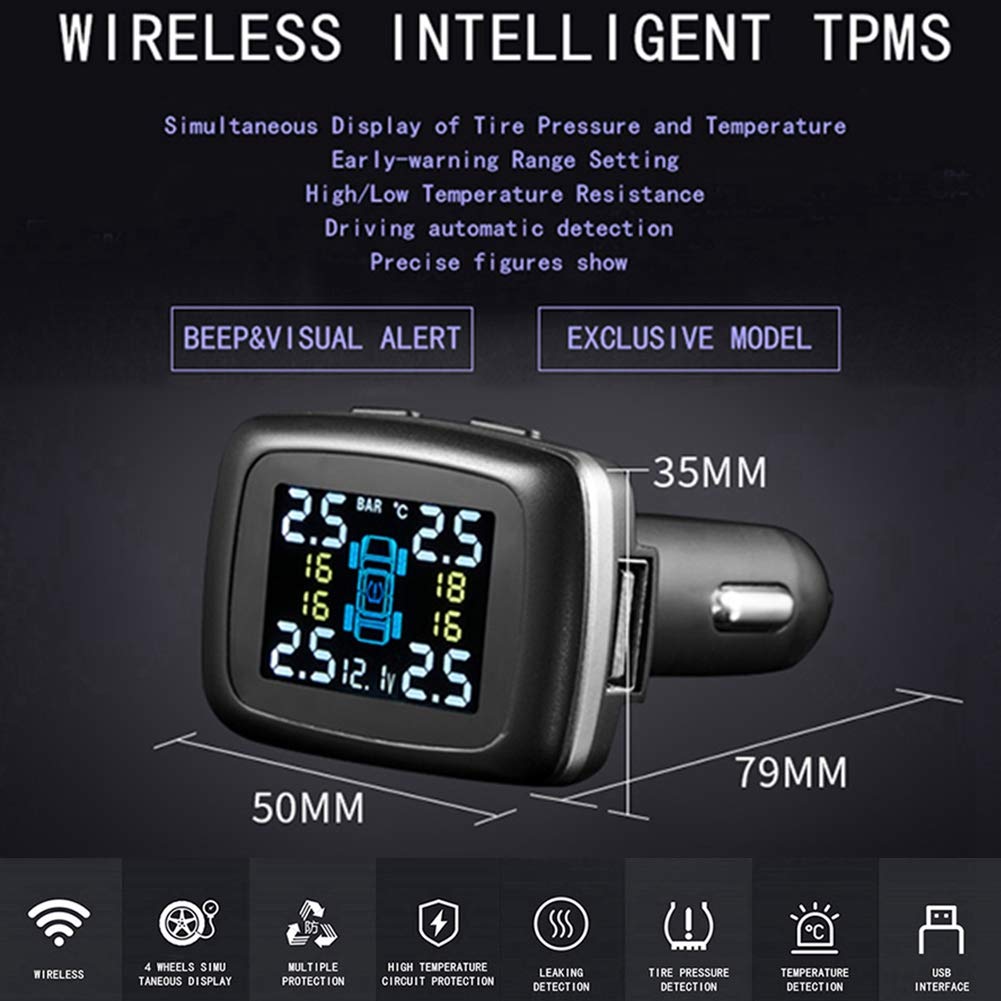
Image: The Aramox TPMS display unit, illustrating its compact design and simultaneous display of tire pressure and temperature for all four tires.

Image: A comparison highlighting the characteristics of built-in (internal) sensors, which are hidden inside the tire for anti-theft and better usage environment, versus external sensors.
5. Operating Instructions
Once installed and powered on, the TPMS display will show real-time tire pressure and temperature for all four tires.
5.1 Display Overview

Image: Detailed view of the TPMS display unit, indicating the 'SELECT KEY' buttons, pressure display area, battery voltage indicator, temperature display, and a USB charging port.
- Pressure Display: Shows the current pressure for each tire, typically in PSI or Bar.
- Temperature Display: Shows the current temperature for each tire, typically in °C.
- Battery Voltage: Indicates the vehicle's battery voltage.
- USB Port: Provides a convenient charging port for other devices.
- Select Keys: Used to navigate menus and adjust settings (e.g., pressure units, alarm thresholds). Refer to the on-screen prompts for specific functions.
5.2 Alerts and Warnings
The system provides visual and audible alerts for abnormal tire conditions:
- Low Pressure Warning: Alerts when tire pressure falls below the set threshold.
- High Pressure Warning: Alerts when tire pressure exceeds the set threshold.
- High Temperature Warning: Alerts when tire temperature exceeds the set threshold.
- Rapid Leakage Warning: Alerts for sudden and significant pressure drops.
- Sensor Battery Low Warning: Indicates when a sensor's battery needs replacement.
When an alert occurs, the display will typically flash the affected tire's data and emit an audible beep.
5.3 Setting Alarm Thresholds
Use the 'SELECT KEY' buttons to enter the settings menu. From there, you can adjust the high and low pressure thresholds and the high temperature threshold according to your vehicle's specifications and driving conditions. Consult your vehicle's manual for recommended tire pressures.
6. Maintenance
- Display Unit: Keep the display unit clean and free from dust. Avoid exposing it to extreme temperatures or direct sunlight for prolonged periods when not in use.
- Sensors: Internal sensors are designed for long-term use (approximately 5 years battery life). When a sensor battery is depleted, the sensor will need to be replaced by a professional.
- Tire Rotation: If tires are rotated, the TPMS system may need to be reprogrammed or reset to ensure the display accurately reflects the new tire positions. Consult a professional tire service for this procedure.
7. Troubleshooting
| Problem | Possible Cause | Solution |
|---|---|---|
| Display not turning on | No power from cigarette lighter socket; loose connection. | Check if the cigarette lighter socket is functional. Ensure the display unit is firmly plugged in. Check vehicle's fuse for the cigarette lighter. |
| No tire data displayed / Sensor error | Sensors not paired; sensor battery low/dead; sensor malfunction. | Drive for a few minutes to allow sensors to transmit data. If problem persists, consult a professional to check sensor batteries or for replacement. |
| Inaccurate readings | Incorrect pressure unit setting; sensor calibration issue. | Verify the pressure unit (PSI/Bar) setting on the display. Compare readings with a reliable tire gauge. If consistently inaccurate, professional recalibration or sensor replacement may be needed. |
| Display is dim or hard to read | Ambient light conditions; display brightness setting. | Adjust display brightness if available in settings. Reposition the unit to avoid direct sunlight. |
| Alarm sounds frequently without obvious issue | Alarm thresholds set too close to normal operating pressure/temperature. | Adjust alarm thresholds to appropriate levels based on vehicle manufacturer recommendations. |
8. Warranty and Support
Aramox provides a 12-month quality guarantee and customer service for this product. If you encounter any questions or issues, please do not hesitate to contact Aramox customer support. We are committed to assisting you until you are satisfied.
For support, please refer to the contact information provided with your purchase or visit the official Aramox website.