Introduction
This manual provides detailed instructions for the installation, operation, and maintenance of your G-Promise Solid Metal Shower Arm Diverter. This 3-way diverter is designed to enhance your showering experience by allowing you to easily switch water flow between a fixed showerhead and a handheld showerhead, or use both simultaneously. Constructed from solid metal, it ensures durability and reliable performance.
Package Contents
- 1 x Solid Brass Shower Arm Diverter (Chrome finish)
- 1 x Simple Metal Wrench for mounting
- 2 x Spare O-ring Washers
- 1 x Plumber's Tape
- 1 x Illustrated Manual
Specifications
| Material | Brass |
| Exterior Finish | Chrome |
| Item Dimensions (L x W x H) | 2.7 x 1 x 1.7 inches |
| Item Weight | 10.2 ounces |
| Inlet Connection Size | 1/2 IPS Female |
| Outlet Connection Type | 1/2 NPT Male (x2) |
| Number of Ports | 3 |
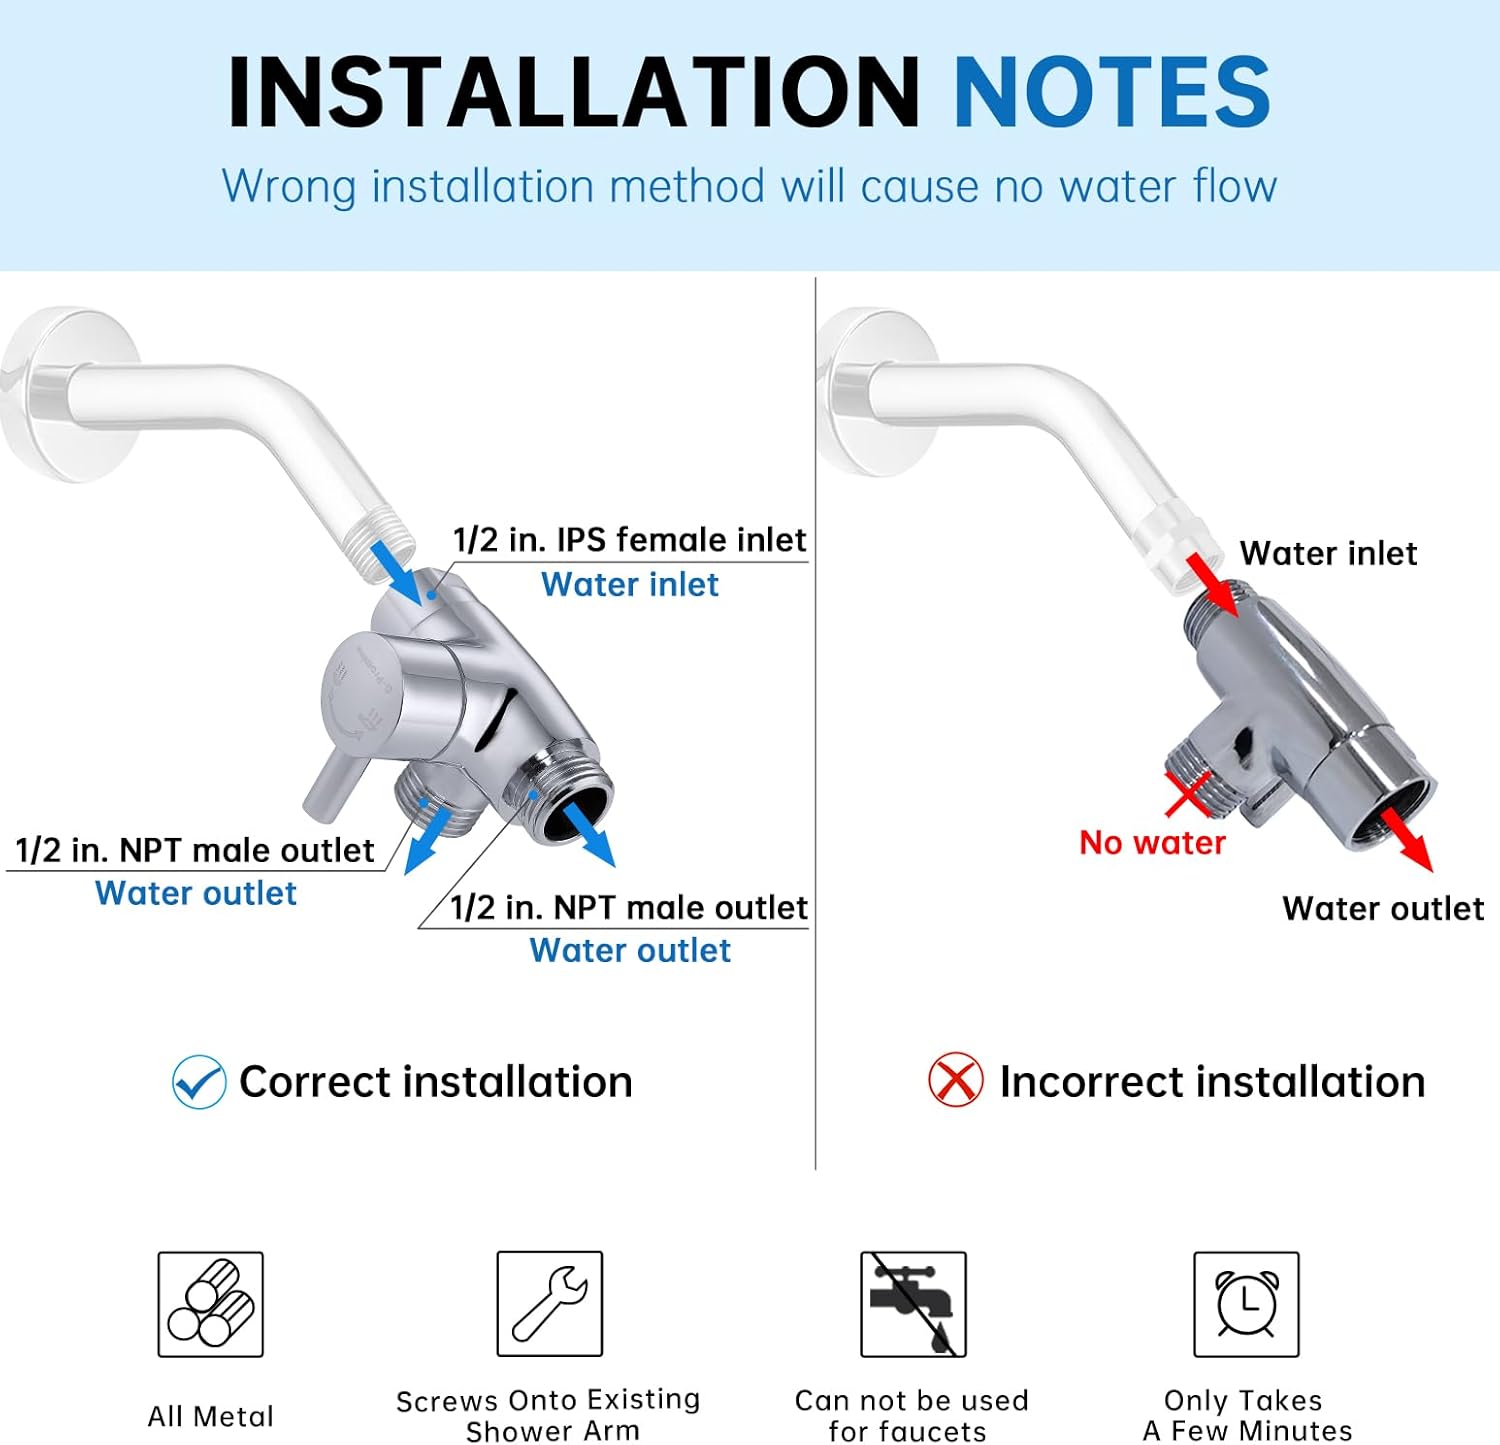
Installation Instructions
Follow these steps for a secure and leak-free installation. Ensure all connections are hand-tightened first, then use the provided wrench for a final snug fit. Always use plumber's tape on threaded connections to prevent leaks.
- Prepare the Shower Arm: Unscrew your existing showerhead from the shower arm. Clean any old plumber's tape or debris from the threads.
- Apply Plumber's Tape: Wrap plumber's tape clockwise around the threads of the shower arm where the diverter will connect.
- Attach the Diverter: Screw the female inlet of the G-Promise diverter onto the shower arm. Hand-tighten, then use the provided metal wrench to tighten it securely. Ensure the diverter is oriented correctly for your shower setup.
- Connect Handheld Shower Hose: Apply plumber's tape to the threads of your handheld shower hose. Screw the hose onto one of the 1/2 NPT male outlets of the diverter. Hand-tighten, then use the wrench.
- Connect Fixed Showerhead: Apply plumber's tape to the threads of your fixed showerhead. Screw the fixed showerhead onto the remaining 1/2 NPT male outlet of the diverter. Hand-tighten, then use the wrench.
- Test for Leaks: Turn on the water supply and check all connections for leaks. If any leaks are present, tighten the connection slightly until the leak stops.

Installation Video Guide
Video 1: Official product installation instructions demonstrating the step-by-step process for setting up the G-Promise shower arm diverter.
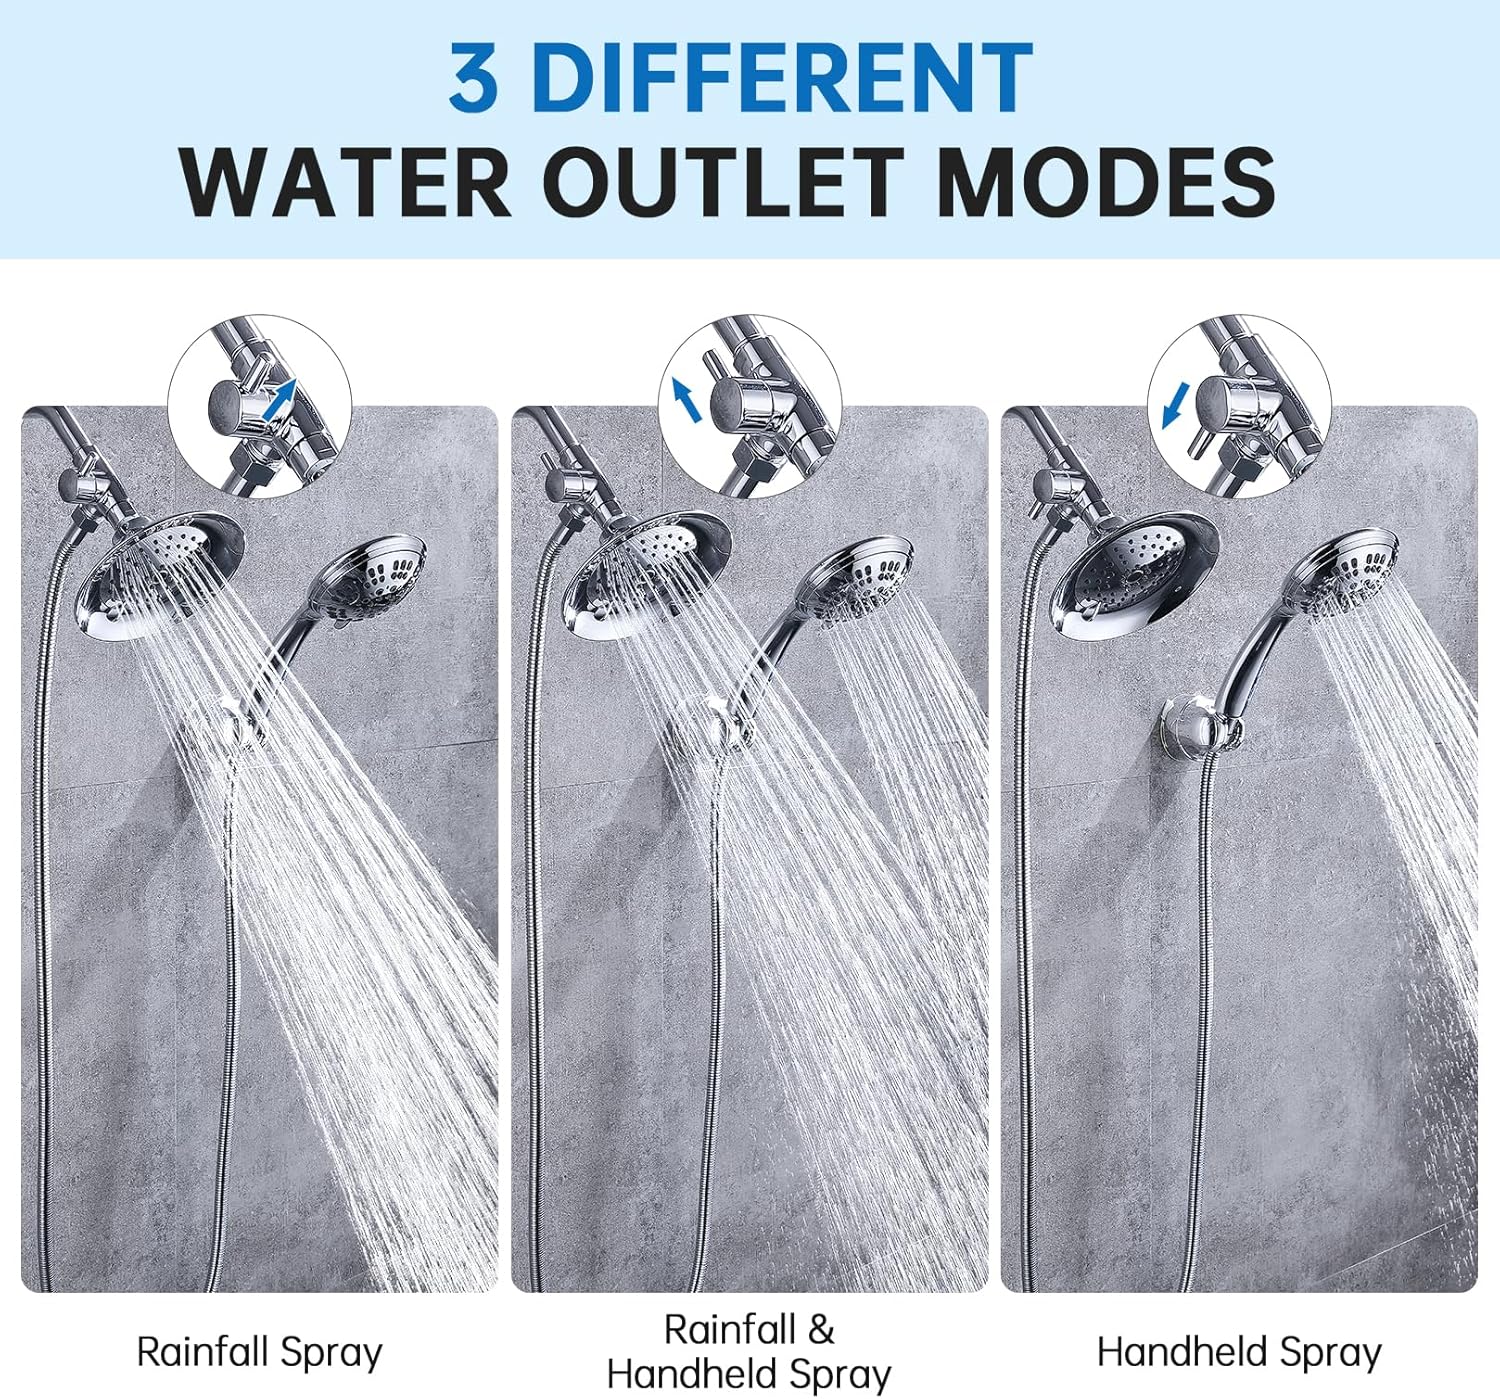
Operating Instructions
The G-Promise Shower Arm Diverter allows for flexible water flow control. Use the small lever on the side of the diverter to select your desired water outlet mode:
- Fixed Showerhead Only: Position the lever to direct water solely to your main fixed showerhead.
- Handheld Showerhead Only: Position the lever to direct water solely to your handheld showerhead.
- Both Showerheads Simultaneously: Position the lever to allow water to flow through both the fixed and handheld showerheads at the same time.
Note: This diverter does not have a shut-off function. Water will always flow from at least one outlet when the main shower valve is open.
Operation Video Guides
Video 2: A demonstration of the G-Promise Solid Metal Shower Arm Diverter in action, showcasing its functionality and ease of switching between water outputs.
Video 3: A comprehensive overview demonstrating how the shower arm diverter integrates and functions within a complete shower system.
Video 4: A user-friendly guide illustrating the simple installation process of the diverter to accommodate a shower wand, highlighting its operational benefits.
Maintenance
To maintain the appearance and functionality of your G-Promise Shower Arm Diverter, follow these simple guidelines:
- Regular Cleaning: Clean the diverter regularly with a soft cloth and mild soap or a non-abrasive bathroom cleaner. Avoid harsh chemicals or abrasive scrubbers, as these can damage the chrome finish.
- Hard Water Spots: For hard water spots, use a solution of equal parts white vinegar and water. Apply with a soft cloth, let it sit for a few minutes, then rinse thoroughly and dry.
- Check for Debris: Periodically check the sand filter tray inside the diverter for any accumulated debris that might affect water flow. Clean as necessary.
Troubleshooting
If you encounter any issues with your shower arm diverter, refer to the following common problems and solutions:
- Leaking Connections:
Cause: Loose connections or insufficient plumber's tape.
Solution: Ensure all threaded connections are securely tightened. Disassemble, reapply plumber's tape generously, and re-tighten. Check that rubber washers are properly seated. - Reduced Water Flow:
Cause: Debris or sediment buildup in the diverter or showerheads.
Solution: Check the sand filter tray inside the diverter for blockages and clean if necessary. Also, inspect your showerheads for mineral buildup and clean their nozzles. - Difficulty Switching Water Flow:
Cause: Mineral buildup or internal component issue.
Solution: Ensure the lever is free of mineral buildup. If the issue persists, contact customer support. - Incorrect Thread Sizing:
Cause: Incompatible shower arm or showerhead threads.
Solution: This diverter features one 1/2 IPS female inlet and two 1/2 NPT male outlets. Verify that your existing shower arm and showerheads have compatible 1/2 inch threads. Some users have reported receiving units with incorrect sizing; if this is the case, contact the seller for a replacement.
Warranty and Support
For warranty information, product support, or to inquire about replacement parts, please contact G-Promise customer service directly. Refer to the packaging or the G-Promise official website for contact details.


