1. Introduction
The labwork 12V Universal Fog Light Wiring Harness is designed to facilitate the installation of auxiliary fog lights on a wide range of vehicles. This pre-assembled kit includes a wiring harness, a 12V relay, an inline fuse holder with a fuse, and a laser rocker switch for convenient control of your fog lights. This manual provides essential information for safe and correct installation and operation.
2. Safety Information
Important Safety Precautions:
- Always disconnect the vehicle's battery (negative terminal first) before performing any electrical work to prevent electrical shock or damage to the vehicle's electrical system.
- Ensure all wiring connections are secure, properly insulated, and protected from moisture and heat to prevent short circuits and potential fire hazards.
- Do not exceed the specified voltage (12V) and current ratings (10A/20A) of the harness components. Overloading can cause damage or fire.
- If you are unsure about any installation steps or electrical wiring, consult a qualified automotive technician.
- Route wires carefully to avoid interference with moving parts, sharp edges, or hot engine components.
3. Package Contents
Verify that all components are present and undamaged before beginning installation.
- Pre-wired Fog Light Harness
- 12V 40A Automotive Relay
- Inline Fuse Holder with Fuse (10A or 20A)
- Laser Rocker Switch (Red, 12V 20A / 24V 10A DC)
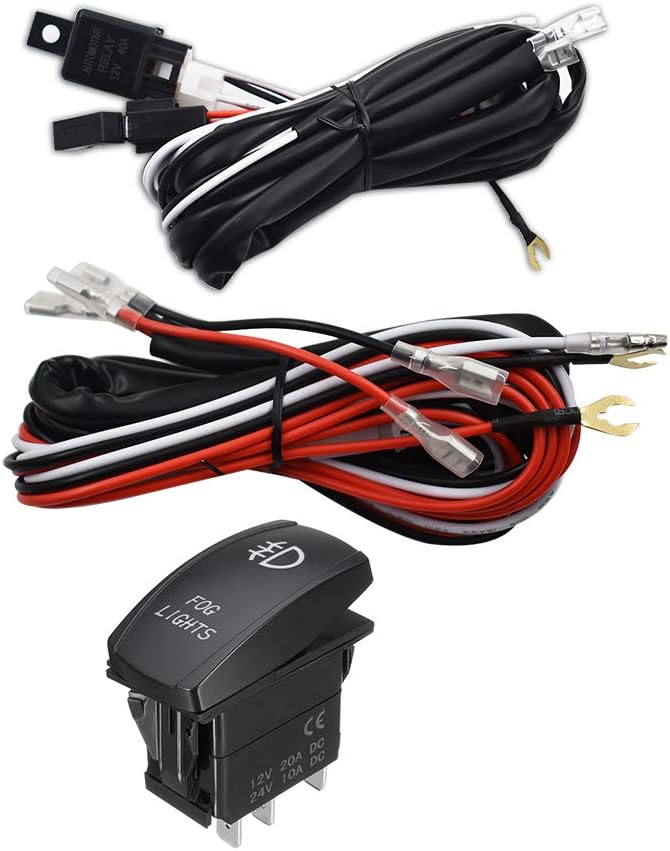
Image: Overview of the labwork 12V Universal Fog Light Wiring Harness kit.
4. Specifications
| Brand | labwork |
| Model | POA718421 |
| Operating Voltage | 12V (Harness), 12V/24V (Switch) |
| Current Rating | 10 Amps, 20 Amps (Fuse dependent) |
| Max Wattage | 300 Watts |
| Switch Type | Laser Rocker Switch |
| Switch Color | Red |
| Certification | CE Approved |
5. Setup and Installation
Before you begin: Ensure the vehicle's battery is disconnected. Plan your wire routing to avoid heat, sharp edges, and moving parts.
- Identify Components:
- Relay: The black box labeled "AUTOMOTIVE RELAY 12V 40A". This controls the power flow to your lights.
- Fuse Holder: The black plastic housing containing a green fuse. This protects the circuit from overcurrent.
- Rocker Switch: The "FOG LIGHTS" switch with a red illumination. This controls the ON/OFF function.
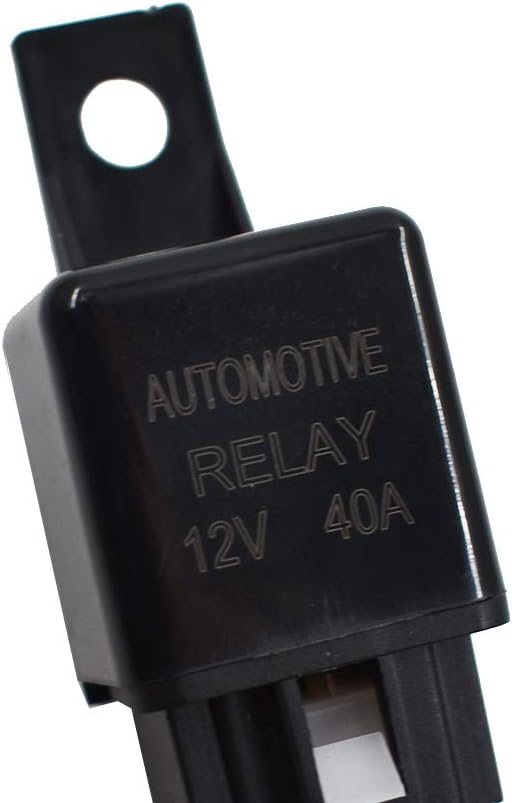
Image: Automotive Relay (12V 40A).

Image: Inline Fuse Holder with Fuse.

Image: Front of the Laser Rocker Switch.

Image: Rear of the Laser Rocker Switch with terminals.
- Connect to Power Source:
- Locate the main power input wire from the harness (usually a thicker red wire, often connected to the fuse holder). Connect this wire directly to the positive (+) terminal of your vehicle's 12V battery.
- Connect the ground wire from the harness (usually a black wire) to a suitable chassis ground point on the vehicle or the negative (-) terminal of the battery.
- Connect to Fog Lights:
- Identify the output wires from the harness designed to connect to your fog lights (typically two wires, one positive and one negative for each light, or a single positive output if lights are grounded separately).
- Connect these wires to the corresponding positive and negative terminals of your fog lights. Ensure proper polarity.
- Install and Connect the Rocker Switch:
- Choose a suitable location in your vehicle's dashboard or console for the rocker switch. Ensure it is easily accessible and does not interfere with vehicle operation.
- Cut an appropriate-sized opening for the switch if necessary.
- Connect the switch wires from the harness to the terminals on the back of the rocker switch. Refer to the wiring diagram provided with your specific harness if available, or follow standard rocker switch wiring conventions (power in, power out to relay, ground for illumination).
- Secure Components:
- Mount the relay in a secure, dry location away from excessive heat.
- Secure all wiring with zip ties or cable clamps to prevent chafing or damage.
- Reconnect Battery and Test:
- Once all connections are made and secured, reconnect the vehicle's battery (negative terminal last).
- Test the functionality of the fog lights using the rocker switch.
6. Operating Instructions
To operate your fog lights using the labwork wiring harness:
- Ensure the vehicle's ignition is in the ON or ACC position, depending on how the switch's power input is wired.
- Press the "FOG LIGHTS" rocker switch to the ON position. The switch will illuminate red, and your connected fog lights should turn on.
- Press the rocker switch to the OFF position to turn off the fog lights. The switch illumination will turn off.
7. Maintenance
Minimal maintenance is required for this wiring harness. Periodically perform the following checks:
- Inspect Wiring: Visually inspect all wires and connections for signs of wear, fraying, corrosion, or loose terminals. Repair or replace any damaged components immediately.
- Check Fuse: If the fog lights stop working, check the fuse in the inline fuse holder. If blown, replace it with a new fuse of the exact same amperage rating (e.g., 10A or 20A). Never use a fuse with a higher rating.
- Switch Cleanliness: Keep the rocker switch free from dirt, dust, and moisture to ensure proper operation.
8. Troubleshooting
| Problem | Possible Cause | Solution |
|---|---|---|
| Fog lights do not turn on. |
|
|
| Rocker switch does not illuminate. |
|
|
| Lights flicker or are dim. |
|
|
9. Warranty and Support
For any questions regarding installation, operation, or troubleshooting, please contact labwork customer support. Refer to your purchase documentation for specific warranty terms and conditions.
You can visit the official labwork store for more information: labwork Store