1. Introduction
This manual provides instructions for the proper installation and care of your ReadyWired Turntable Belt. This replacement belt is designed to restore optimal performance to your compatible Fisher turntable models.
Compatible Turntable Models: Fisher MT-100, MT-100C, MT-101, MT-890, MT-3010, MT-6020, MT-6010.
ReadyWired guarantees 100% compatibility with the listed models, ensuring your turntable operates as intended.
2. Safety Information
- Always disconnect the turntable from the power source before attempting any installation or maintenance.
- Handle the turntable and its components with care to avoid damage.
- Keep small parts away from children.
- If you are unsure about any step, consult a qualified technician.
3. Setup and Installation
Replacing a turntable belt typically involves accessing the platter and motor pulley. The exact steps may vary slightly depending on your specific Fisher turntable model. Refer to your turntable's original service manual for detailed instructions if available.
- Disconnect Power: Ensure your turntable is unplugged from the electrical outlet.
- Remove Platter: Carefully remove the turntable platter. This may involve lifting it directly or removing a retaining clip/screw. Place it on a soft, clean surface to prevent scratches.
- Locate Old Belt: Identify the old belt, which may be broken, stretched, or missing. Remove any remnants of the old belt from the platter sub-platter and motor pulley.
- Clean Surfaces: Gently clean the motor pulley and the rim of the sub-platter (where the belt sits) with a lint-free cloth and a small amount of isopropyl alcohol to remove any grease or residue. Allow to dry completely.
- Install New Belt: Carefully loop the new ReadyWired turntable belt around the motor pulley and the sub-platter. Ensure the belt is not twisted and sits evenly in the grooves.
- Reinstall Platter: Carefully place the main platter back onto the turntable spindle. Rotate the platter a few times by hand to ensure the belt is properly seated and moves smoothly.
- Test Operation: Reconnect the turntable to power and test its operation at both 33 1/3 and 45 RPM (if applicable) to confirm correct speed and smooth rotation.
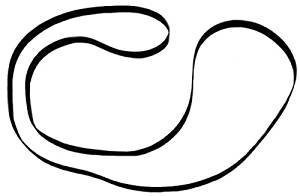
Image: A ReadyWired turntable belt, typically a black rubber band, designed for audio equipment. This image illustrates the product itself.
4. Operating with the New Belt
Once the ReadyWired turntable belt is correctly installed, your turntable should operate with accurate speed and reduced wow and flutter. The belt transmits power from the motor to the platter, enabling consistent rotation for playback of vinyl records.
- Ensure the turntable is on a stable, level surface.
- Select the correct speed (33 1/3 or 45 RPM) for your record.
- Place the record on the platter and lower the tonearm gently.
5. Maintenance
Proper maintenance can extend the life of your turntable belt and ensure consistent performance.
- Keep Clean: Periodically inspect the belt for dust or debris. Gently wipe it with a clean, dry, lint-free cloth if necessary. Avoid using harsh chemicals.
- Avoid Stretching: Do not overstretch the belt during installation or handling, as this can compromise its elasticity and performance.
- Storage: If the turntable is to be stored for an extended period, it is sometimes recommended to remove the belt to prevent it from developing flat spots or losing elasticity, though this is often not necessary for modern belts.
- Replacement: Turntable belts are wear-and-tear items. If you notice inconsistent speed, slipping, or a visible degradation of the belt material, it may be time for a replacement.
6. Troubleshooting
If you encounter issues after installing your new ReadyWired turntable belt, consider the following:
- Incorrect Speed (Too Fast/Too Slow):
- Ensure the belt is correctly seated on both the motor pulley and the sub-platter.
- Verify that the turntable's speed selector is set to the correct RPM.
- Check for any obstructions preventing smooth platter rotation.
- Slipping Belt:
- Clean the motor pulley and sub-platter rim thoroughly to remove any oil or residue.
- Ensure the belt is not twisted.
- If the belt is new and still slips, ensure it is the correct size for your specific turntable model.
- No Platter Movement:
- Confirm the turntable is powered on and the motor is receiving power.
- Check if the belt has come off the motor pulley or sub-platter.
- Ensure the motor is functioning (listen for a hum or feel for vibration).
7. Specifications
- Brand: ReadyWired
- Compatible Devices: Turntable (specifically Fisher MT-100, MT-100C, MT-101, MT-890, MT-3010, MT-6020, MT-6010)
- Product Dimensions: 4 x 3 x 1 inches (packaging/approximate)
- Item Weight: 0.634 ounces
- UPC: 303943688565
- Motor Type (Turntable): Belt-Driven
- Signal Format (Turntable): Phono
- Power Source (Turntable): Corded Electric
8. Warranty and Support
ReadyWired guarantees 100% compatibility for this turntable belt with the specified Fisher models. If you experience any issues with compatibility or product defects, please contact the seller or ReadyWired customer support.
This product is eligible for a return or replacement within 30 days of purchase, subject to the seller's return policy.
For further assistance, please refer to the contact information provided by your retailer or on the ReadyWired official website.