1. Introduction
This manual provides detailed instructions for the GVM RGB LED Video Lighting Kit 800D. This kit is designed for various photography and videography applications, offering adjustable color temperature, RGB color control, and special scene effects. Please read this manual thoroughly before operating the device to ensure proper use and longevity.
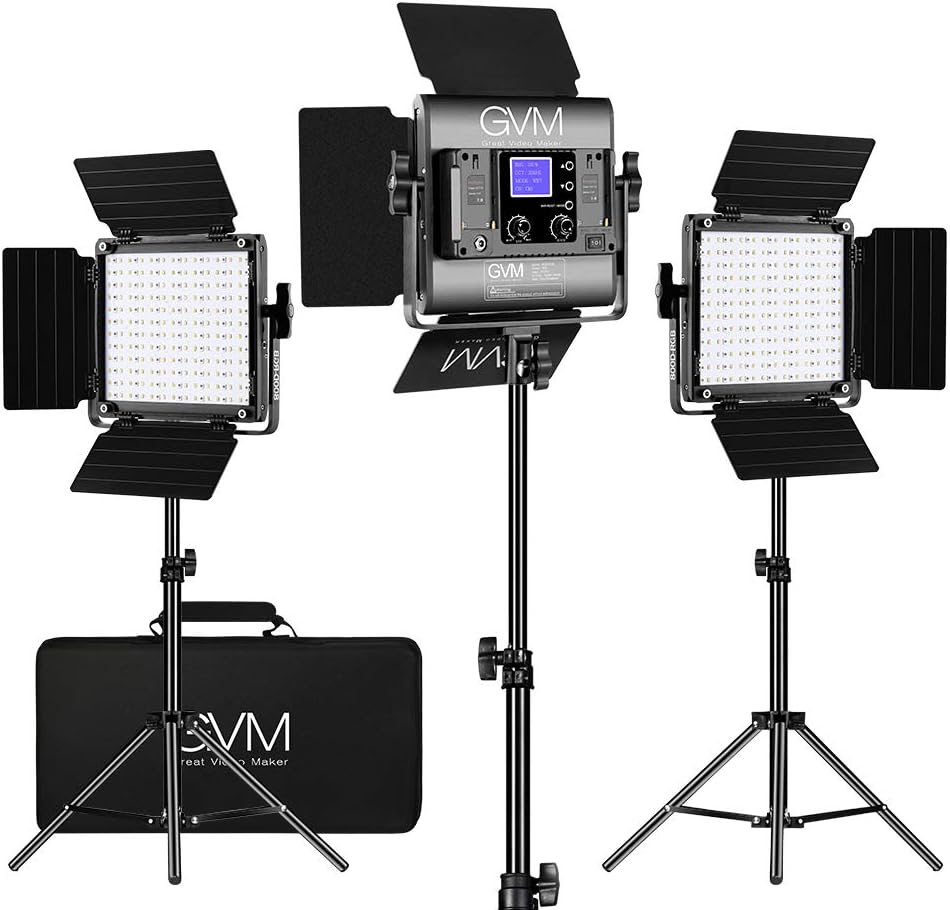
Figure 1.1: GVM 800D-RGB LED Video Lighting Kit (3-Pack). This image displays the three LED light panels, their accompanying light stands, and the carrying case.
2. Product Components
The GVM RGB LED Video Lighting Kit 800D (3-Pack) includes the following items:
- 3 x GVM 800D-RGB LED Video Light Panels
- 3 x Light Stands
- 3 x Power Adapters with Cables
- 3 x Diffusers
- 1 x Carrying Bag
- 1 x User Manual (this document)

Figure 2.1: Contents of the GVM 800D-RGB 3-Pack Kit. This image shows all components neatly laid out, including the three light panels, stands, power supplies, diffusers, and the carrying bag.
3. Key Features
The GVM 800D-RGB LED Video Lighting Kit offers the following functionalities:
- Dual Output Modes:
- CCT Mode: Adjustable color temperature from 3200K (warm) to 5600K (cool).
- HSI Mode: Adjustable hue, saturation, and intensity for full RGB color control.
- Integrated Controls: LCD digital display and physical knobs for brightness and color adjustments.
- App Control: Bluetooth connectivity for remote control via the GVM LED mobile application.
- Special Scene Effects: Eight pre-programmed lighting effects including TV, candle, police car, lightning, paparazzi, disco, party, and bad light bulb.
- Durable Construction: Aerospace aluminum alloy housing for effective heat dissipation and extended lifespan.
- Power Options: Operates via AC power adapter or compatible NP-F series batteries (not included).

Figure 3.1: GVM 800D-RGB LED Video Light Features. This image highlights the CRI 97+, 18 lighting modes, 3200K-5600K color temperature, and RGB capabilities.
4. Assembly and Setup
- Assemble the Light Stands: Extend the legs of each light stand to form a stable base. Adjust the height to the desired level and secure with the locking knobs.
- Attach the LED Panels: Mount each GVM 800D-RGB LED panel onto the top of a light stand. Secure the panel using the light holder locking knob located on the yoke of the light.
- Install Diffusers: Slide the white diffuser panel into the slots on the front of each LED light panel. Ensure it is securely in place.
- Connect Power:
- AC Power: Connect the provided power adapter to the DC Power input port on the back of the LED panel. Plug the other end of the adapter into a standard electrical outlet.
- Battery Power (Optional): If using batteries, insert two compatible NP-F series batteries (e.g., NP-F970) into the battery slots on the back of the LED panel. Ensure correct polarity. Note: Batteries are not included with the kit.
- Power On: Flip the ON/OFF switch on the back of the LED panel to the 'ON' position. The LCD display will illuminate.
5. Operating Instructions
5.1 Manual Control
The GVM 800D-RGB lights can be controlled directly using the knobs and buttons on the rear panel.

Figure 5.1: Rear Panel Controls of the GVM 800D-RGB Light. This diagram labels the battery slots, WiFi button, ON/OFF switch, brightness (BRT) knob, color temperature (CCT) knob, DC power input, and light holder locking knob.
- Brightness (BRT) Knob: Rotate this knob to adjust the light intensity from 0% to 100%.
- CCT/Mode Knob: This knob has multiple functions:
- Mode Selection: Press the knob to cycle through different operating modes (CCT, HSI, Scene, APP).
- CCT Adjustment: In CCT mode, rotate the knob to adjust the color temperature between 3200K and 5600K.
- HSI Adjustment: In HSI mode, rotate the knob to adjust Hue (0-360°), Saturation (0-100%), and Intensity (0-100%). Press the knob to switch between adjusting Hue, Saturation, and Intensity.
- Scene Selection: In Scene mode, rotate the knob to select from the available special lighting effects.
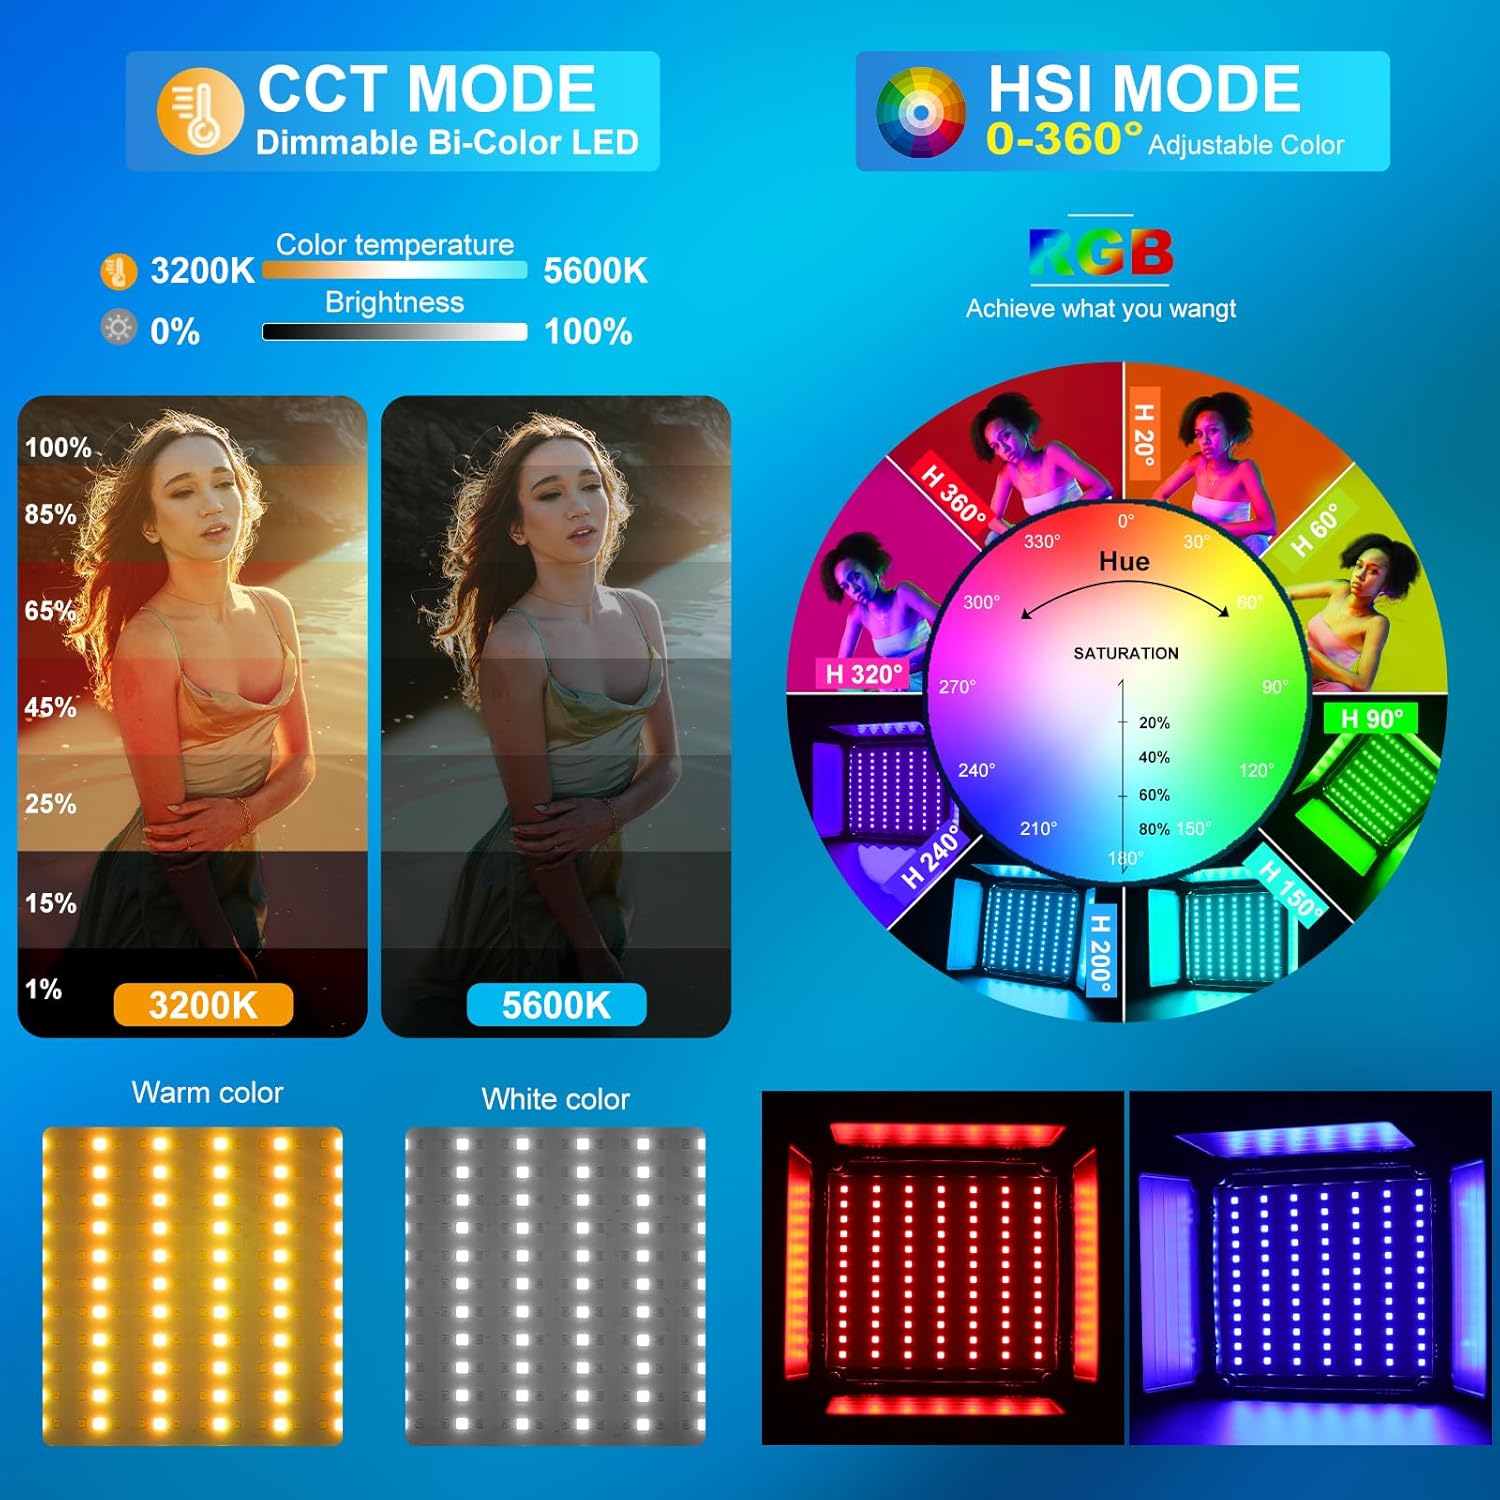
Figure 5.2: Color Temperature (CCT) and Hue Saturation Intensity (HSI) Modes. This graphic illustrates the range of color temperatures from warm to white and the full spectrum of RGB colors achievable through HSI adjustments.
5.2 Special Scene Effects
The GVM 800D-RGB lights include eight pre-programmed scene effects to simulate various environments:
- TV
- Candle
- Police Car
- Lightning
- Paparazzi
- Disco
- Party
- Bad Light Bulb
To activate these effects, navigate to Scene mode using the CCT/Mode knob and select the desired effect.

Figure 5.3: Eighteen Pre-programmed Lighting Scene Effects. This visual displays various simulated lighting scenarios such as lightning, cop car, candle, TV, bad bulb, disco, paparazzi, and party.
5.3 App Control
The GVM 800D-RGB lights can be controlled wirelessly via the GVM LED mobile application.
- Download the App: Search for "GVM LED" in your device's app store (Apple App Store or Google Play Store) and install it.
- Enable Bluetooth and GPS: Ensure Bluetooth and GPS are enabled on your mobile device.
- Set Light to APP Mode: On the GVM 800D-RGB light, press the CCT/Mode knob until "APP" mode is displayed on the LCD screen.
- Connect via App: Open the GVM LED app. It will automatically search for available lights. Select "BT_LED" from the list to connect.
- Control Functions: Once connected, you can adjust brightness, color temperature, HSI values, and select scene effects directly from the app interface. The app also supports master/slave control, allowing one light to act as a master to control other connected lights.
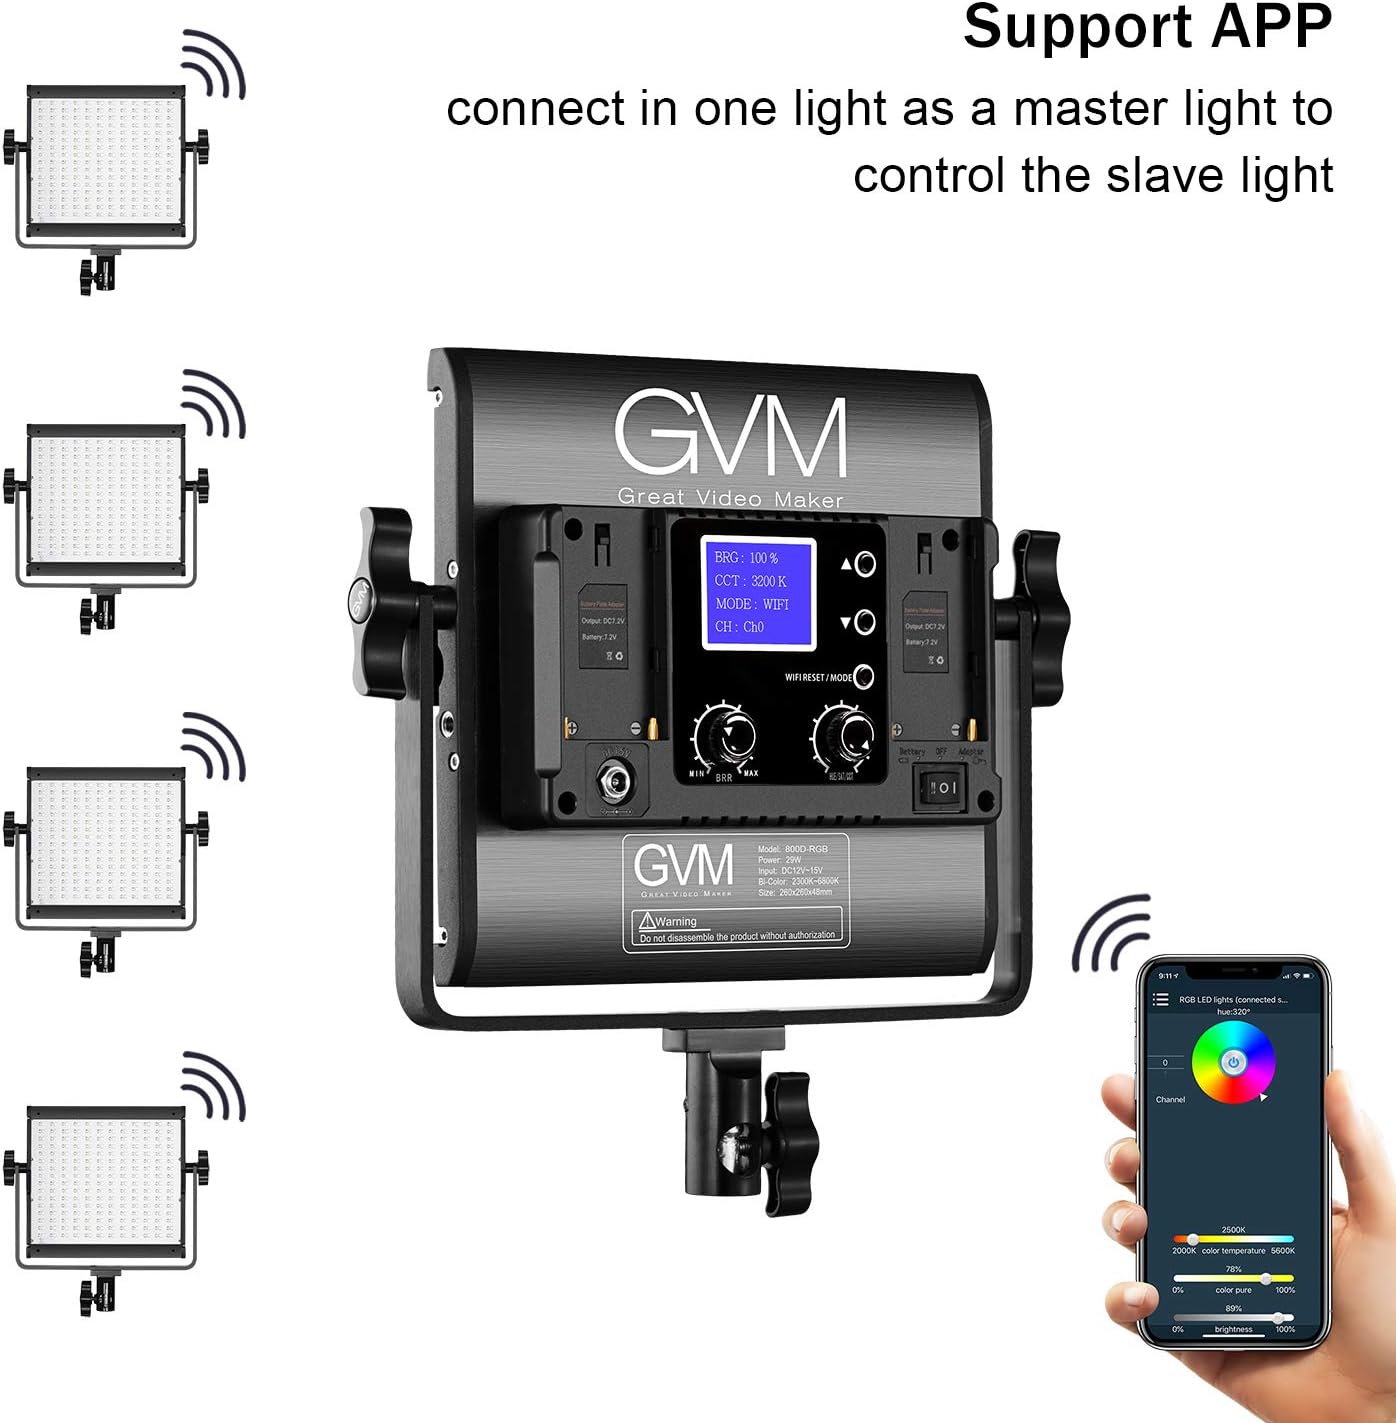
Figure 5.4: GVM LED App Control Interface and Master/Slave Setup. This image shows the mobile app interface for controlling the light's settings and illustrates how multiple lights can be linked for synchronized control.
6. Maintenance and Care
- Cleaning: Use a soft, dry cloth to clean the light panels and housing. Avoid using abrasive cleaners or solvents.
- Storage: When not in use, store the lighting kit in the provided carrying bag in a cool, dry place to protect it from dust and damage.
- Handling: Handle the lights and stands with care to prevent physical damage. Avoid dropping or subjecting them to strong impacts.
- Heat Dissipation: Ensure adequate ventilation around the light panels during operation to facilitate proper heat dissipation. Do not block the ventilation holes.
7. Troubleshooting
- Light Not Turning On:
- Check if the power adapter is securely connected to both the light and the power outlet.
- If using batteries, ensure they are fully charged and correctly inserted into both battery slots.
- Verify the ON/OFF switch is in the 'ON' position.
- App Connection Issues:
- Ensure Bluetooth and GPS are enabled on your mobile device.
- Confirm the light is set to "APP" mode on its LCD display.
- Restart the GVM LED app and try connecting again.
- If issues persist, try restarting the light and your mobile device.
- Inconsistent Light Output:
- Check all cable connections for looseness.
- If using batteries, ensure they have sufficient charge. Low battery power can affect performance.
8. Technical Specifications
| Model Number | 800D-RGB-3 |
| Product Dimensions | 9.1 x 9.1 x 9.1 inches (each light) |
| Item Weight | 23.6 pounds (total kit) |
| Color Temperature | 3200K-5600K |
| RGB Control | Hue (0-360°), Saturation (0-100%) |
| Connectivity | Bluetooth (App Control) |
| Power Source | AC Adapter (included), NP-F Series Batteries (not included) |
| Manufacturer | GVM Great Video Maker |
| Lifespan | Approximately 100,000 hours |
9. Warranty and Support Information
For warranty claims, technical support, or service inquiries, please contact GVM Great Video Maker directly. Refer to the product packaging or the official GVM website for the most current contact information and warranty policy details.