1. Introduction
This manual provides detailed instructions for the installation, operation, and maintenance of your Olideauto Automatic Window Opening System CSD300. Please read this manual thoroughly before installation and use to ensure proper function and safety. This system is designed to automate the opening and closing of windows, offering convenience and improved ventilation.
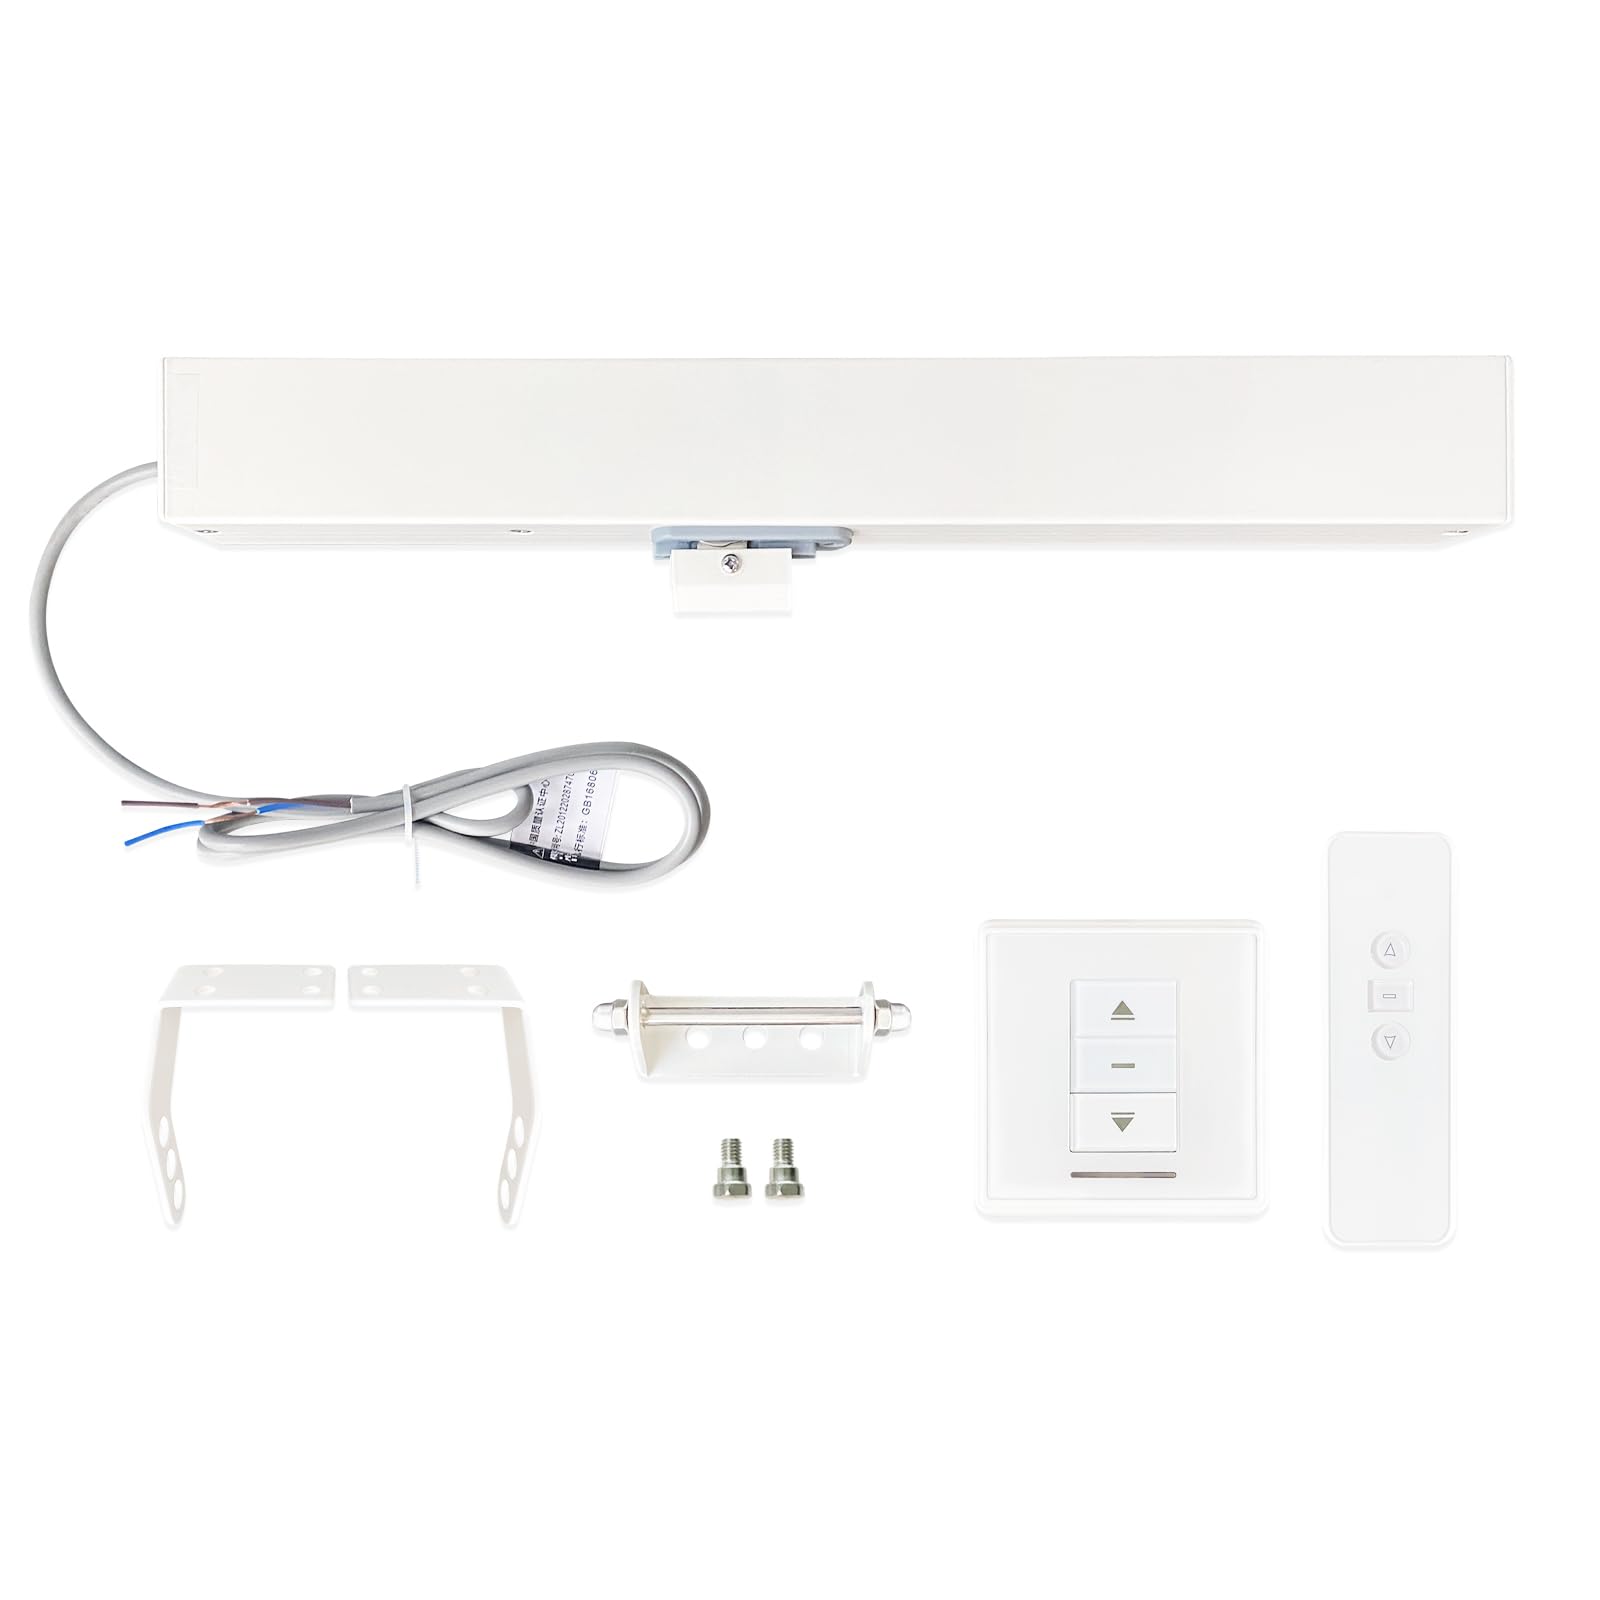
Image 1.1: The main unit of the Olideauto Automatic Window Opening System CSD300.
2. Product Features
- Durable Chain: Features a high-quality two-layer stainless steel chain for enhanced strength and corrosion resistance.
- Quiet Operation: Equipped with a short pitch chain (08B-2) to ensure low noise and stable operation.
- Overload Protection: The motor includes a built-in overload protection system to prevent burnout from high electrical current.
- Surface Treatment: The opener housing surface is treated with an electrophoretic process for durability.
- Wide Voltage Compatibility: Operates with an input voltage range of AC100V-AC240V.
3. Package Contents
Verify that all components listed below are present in your package:
- Electric Chain Window Opener Unit
- Receiver (Wall-mounted control unit)
- Remote Control
- Mounting Brackets and Hardware

Image 3.1: Overview of included components: electric chain window opener, receiver, remote control, and mounting brackets.
4. Setup and Installation
Proper installation is crucial for the safe and effective operation of the window opening system. It is recommended that installation be performed by a qualified professional.
4.1 Mounting the Opener
- Determine the optimal mounting position on your window frame, ensuring the chain can extend and retract freely without obstruction.
- Secure the mounting brackets to the window frame using appropriate fasteners.
- Attach the electric chain window opener unit to the mounted brackets.
- Connect the chain end to the window sash. Ensure a secure connection that allows for smooth window movement.

Image 4.1: The automatic window opener installed on a window, demonstrating the chain mechanism.

Image 4.2: An installed unit on a skylight, illustrating the compact design and integration.
4.2 Electrical Connection
The system requires an AC100V-AC240V power supply. Connect the opener to the receiver according to the wiring diagram provided in the separate wiring instructions (not included in this manual). Ensure all electrical connections are secure and comply with local electrical codes.
5. Operating Instructions
The window opening system can be operated using the wall-mounted receiver or the remote control.
5.1 Using the Receiver
The receiver typically features 'Up', 'Down', and 'Stop' buttons. Press the 'Up' button to open the window, 'Down' to close it, and 'Stop' to halt movement at any desired position.
5.2 Using the Remote Control
The remote control provides wireless operation. Ensure the remote control has functional batteries. The buttons on the remote control correspond to the functions on the receiver (Open, Close, Stop).
Video 5.1: Demonstration of the automatic window opener in action, showing a window opening and closing smoothly.
6. Maintenance
Regular maintenance ensures the longevity and optimal performance of your window opening system.
- Cleaning: Periodically clean the exterior of the opener unit and the chain with a soft, dry cloth. Avoid using abrasive cleaners or solvents.
- Chain Inspection: Inspect the stainless steel chain for any signs of wear, damage, or debris. Ensure it moves freely.
- Connection Check: Verify that all electrical connections are secure and that mounting hardware remains tight.
- Lubrication: Do not lubricate the chain or internal mechanisms unless specifically instructed by Olideauto support.
7. Troubleshooting
If you encounter issues with your Olideauto Automatic Window Opening System, refer to the following common problems and solutions:
| Problem | Possible Cause | Solution |
|---|---|---|
| Opener does not respond to remote/receiver. | No power, remote battery low, pairing issue. | Check power supply. Replace remote batteries. Re-pair remote with receiver (refer to separate pairing instructions). |
| Window movement is jerky or stops prematurely. | Obstruction, chain damage, motor overload. | Check for obstructions. Inspect chain for damage. Allow motor to cool if it has been continuously operated. |
| Unusual noise during operation. | Debris in chain mechanism, worn parts. | Clean chain and surrounding area. If noise persists, contact support. |
If the problem persists after attempting these solutions, please contact Olideauto customer support.
8. Specifications
Detailed technical specifications for the Olideauto Automatic Window Opening System CSD300 (Model SD300):
- Model Number: SD300
- Product Dimensions: 16.53 x 1.97 x 1.57 inches (420mm x 50mm x 40mm)
- Item Weight: 5.06 pounds
- Running Trip (Max Extension): Approximately 11.81 inches (300mm)
- Input Voltage: AC100V-AC240V
- Chain Type: Two-layer stainless steel, short pitch 08B-2
- Manufacturer: Chinentech Industrial Limited

Image 8.1: Dimensional drawing of the Olideauto Automatic Window Opener, indicating key measurements.
9. Warranty and Support
Olideauto is committed to providing high-quality products and excellent customer service.
9.1 Product Warranty
This product comes with a 60-month product warranty. Please retain your proof of purchase for warranty claims. The warranty covers defects in materials and workmanship under normal use.
9.2 Customer Support
For technical assistance, troubleshooting beyond this manual, or warranty inquiries, please contact Olideauto customer support. You can find more information and contact details by visiting the official Olideauto store: