SCITOO 112586-5206-1336473991
SCITOO Alternator Instruction Manual
Model: 112586-5206-1336473991
Brand: SCITOO
1. Product Overview
The SCITOO Alternator is a high-performance automotive replacement part designed to provide reliable electrical power to your vehicle's systems and recharge the battery. Engineered with precision and built to meet modern vehicle demands, this alternator ensures stable electrical supply for optimal vehicle operation.

Image: SCITOO Alternator, a key component for vehicle electrical systems.
2. Product Features and Components
This alternator is designed with robust features for durability and efficient performance:
- High-Performance Specifications: 12V Voltage, 90Amp Amperage, CW (Clockwise) Rotation, IR (Internal Regulator), IF (Internal Fan), 7-Groove Pulley.
- Quality Construction: Features 100% pure copper winding, strong power supply, and external insulating coating to prevent short circuits.
- Precision Manufacturing: CNC machined castings and bearings tested to OE standards ensure proper fit and long-lasting performance.
- Non-Slip Pulley: Designed for quiet operation.
- OEM Standard Connector: Ensures stable current output.

Image: Visual representation of the alternator's key specifications including 90 Amp, 12 Volt, Internal Fan, Internal Regulator, Clockwise rotation, and 7-Groove Pulley.

Image: Close-up view of the alternator's internal motor components, highlighting the 100% pure copper winding for strong and stable power supply, and external insulating coating.
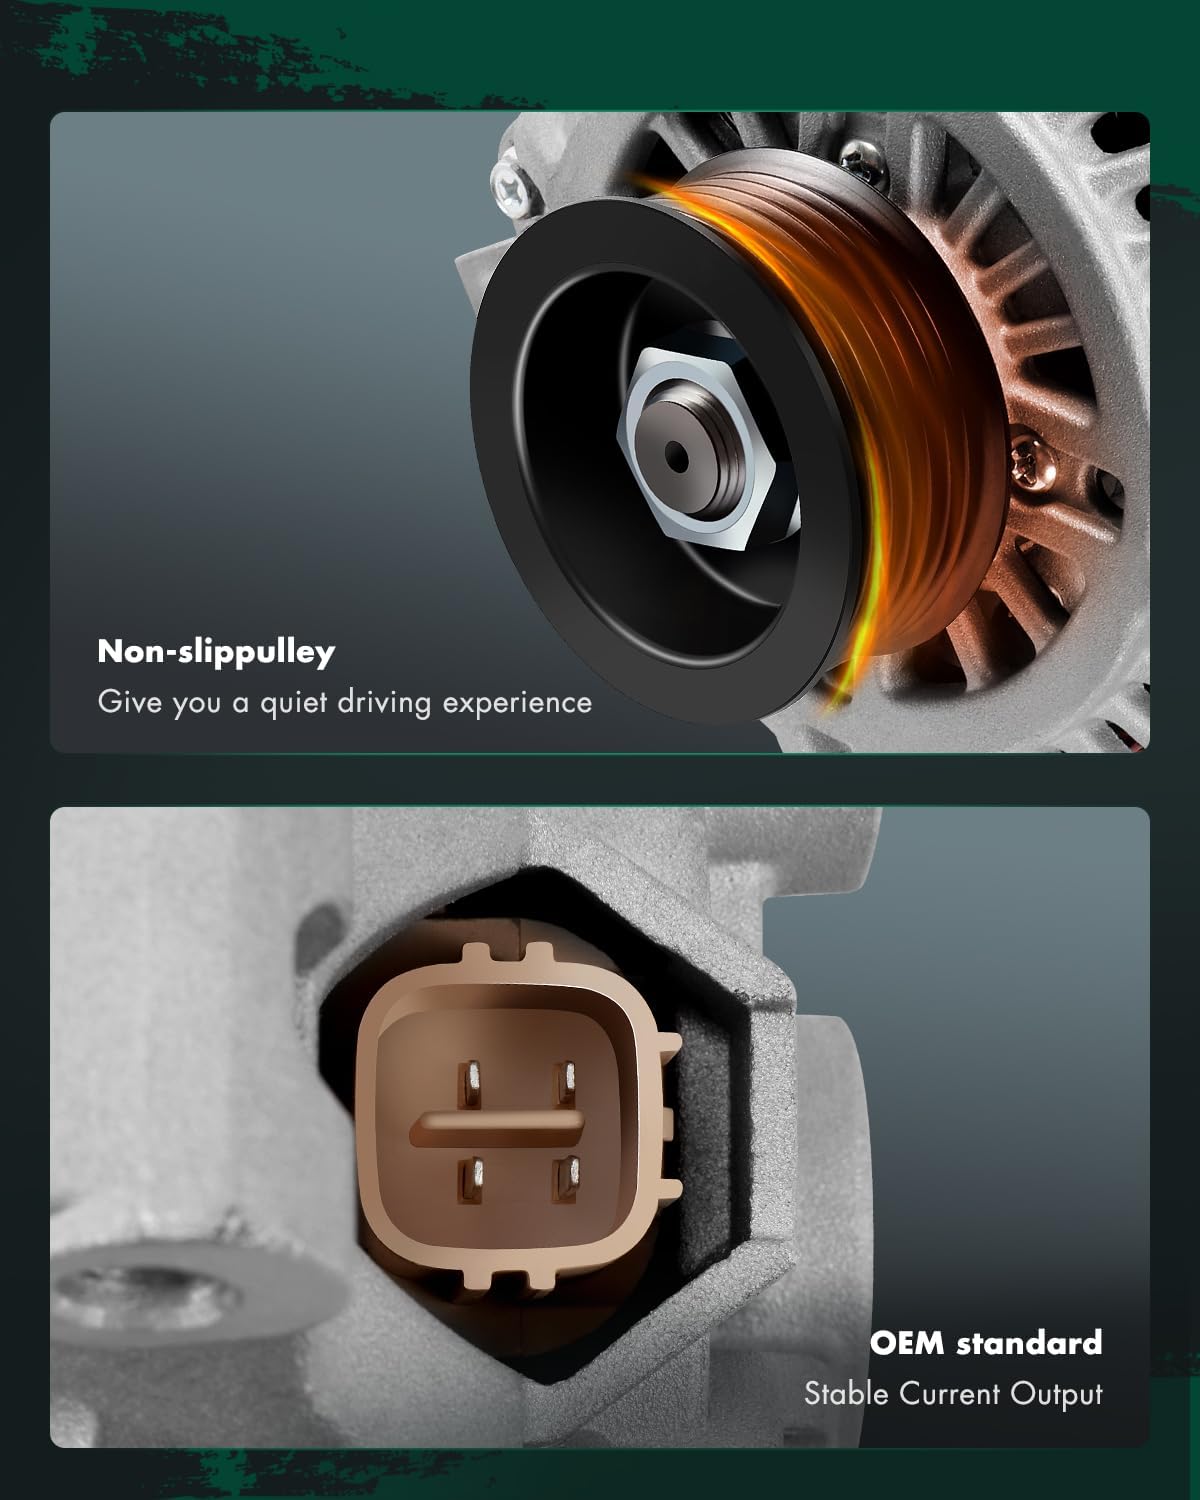
Image: Detailed view of the non-slip pulley for quiet operation and the OEM standard electrical connector ensuring stable current output.

Image: Exploded diagram showing the main components of the alternator: Pulley, Front Cover, Bearing, Rotor, Stator, Rectifier (Diode) Rack, Regulator Set, Fan, Shaft, and Rear Cover.
3. Compatibility and Fitment
This SCITOO Alternator is designed as a direct OEM replacement for the following vehicle models:
| Year | Make | Model | Alternator |
|---|---|---|---|
| 2002-2006 | Acura | RSX | 2.0L |
| 2002-2006 | Honda | CR-V | 2.4L |
Reference OE Numbers: 13966, 31100-PNC-004, 31100-PND-004, 31100-RJJ-004, AHGA65, AMT0172, A2TB7591, A2TC0691, 113712, AHGA55, AHGA61, 400-48040, A2TC0691A, 1-2530-01MI.
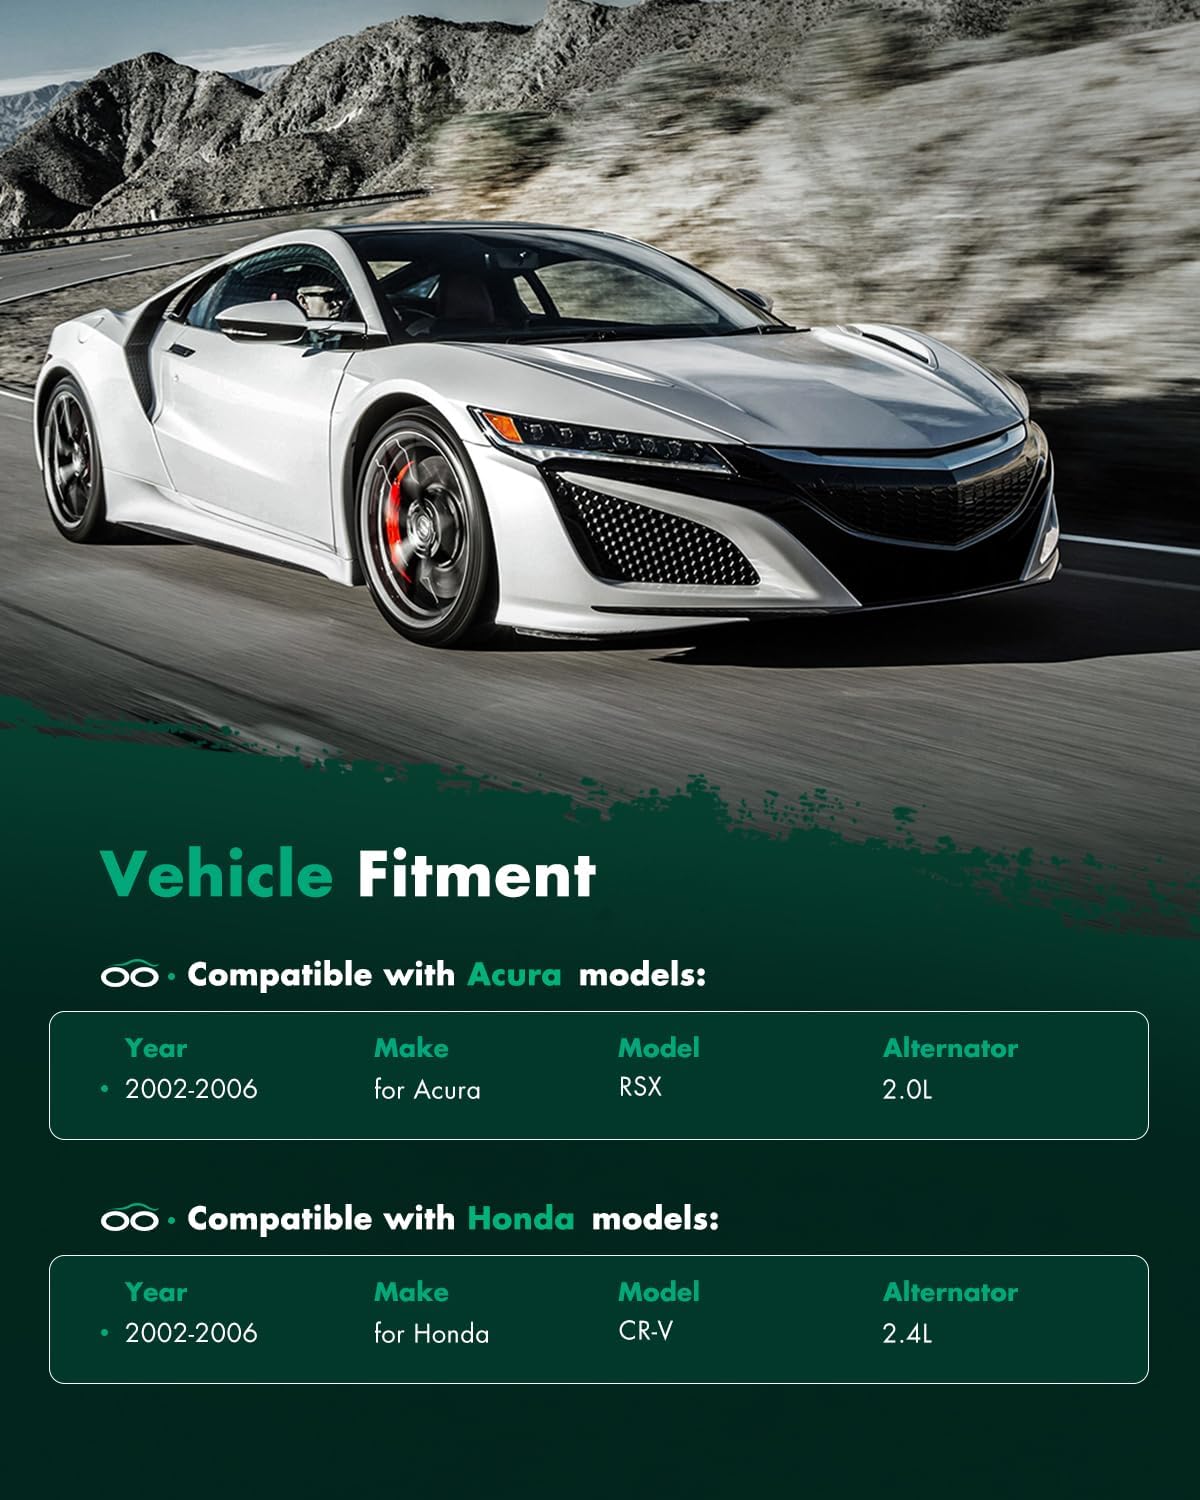
Image: Chart illustrating compatible Acura and Honda models for the alternator.
4. Installation Instructions
Proper installation is crucial for the alternator's performance and longevity. Follow these steps carefully. If you are unsure, consult a qualified mechanic.
Video: An animated guide demonstrating the installation process of the SCITOO Alternator.
- Disconnect the Battery: Before starting any work, disconnect the negative terminal of the vehicle's battery to prevent electrical shock or damage.
- Remove Tie Rod Screw: Locate and remove the tie rod screw that secures the old alternator.
- Loosen the Drive Belt: Loosen the tension on the drive belt (serpentine belt) that runs around the alternator pulley.
- Remove Output Wires: Carefully remove the two sets of output wires connected to the old alternator.
- Remove Old Alternator: Once all connections and fasteners are removed, carefully take out the old alternator from its mounting position.
- Install New Alternator: Position the new SCITOO Alternator in place, ensuring it aligns correctly with the mounting points.
- Connect Wires: Reconnect the output wires to the new alternator. Important: The wiring connection must be firm. If the output line falls off during operation, the alternator will burn out due to no load.
- Tighten Tie Rod Screw: Secure the alternator by tightening the tie rod screw.
- Adjust Drive Belt: Adjust the transmission belt to the correct tension. A belt that is too loose can lead to power loss, while a belt that is too tight can cause bearing damage.
- Reconnect Battery: Reconnect the negative terminal of the battery.
5. Operating Principles
The alternator is a key component of your vehicle's charging system. It converts mechanical energy from the engine's rotation into electrical energy to power the vehicle's electrical components and recharge the battery. When the engine is running, the alternator generates alternating current (AC), which is then converted to direct current (DC) by internal diodes (rectifier) before being supplied to the vehicle's electrical system and battery.

Image: Diagram showing the alternator connected to the car battery, illustrating the stable electrical power supply it provides to the vehicle.
6. Maintenance of AC Alternator and Regulator
To ensure the longevity and proper functioning of your alternator, the following inspections should be carried out regularly:
- Check the alternator drive belt for proper tension and wear.
- Check the connection of each wire to ensure they are secure and free from corrosion.
- Check for any unusual noise during operation.
- Check if the alternator is generating electricity (e.g., by monitoring battery voltage with the engine running).

Image: Visual checklist for regular maintenance of the alternator and regulator.
7. Troubleshooting Common Issues
If you experience any of the following symptoms, your alternator may require attention:
- Flickering Headlights: Indicates inconsistent power supply.
- Weak or Dead Battery: The alternator may not be charging the battery effectively.
- Strange Sounds: Grinding or whining noises can indicate worn bearings or other internal issues.
- Difficulty Starting Your Car: Often a symptom of a weak battery due to a failing alternator.
- Electric Failures: Malfunctioning electrical accessories or dashboard warning lights.
If you encounter these issues, it is recommended to have your vehicle's charging system inspected by a professional.

Image: Visual guide to common problems associated with a failing alternator, such as flickering headlights, weak battery, strange sounds, difficulty starting, and general electrical failures.
8. Important Precautions
Observe the following precautions when handling and using the alternator:
- The polarity of the battery must be negatively grounded and cannot be reversed, otherwise the electronic components of the alternator or regulator will be burned out.
- When the alternator is running, the fire test method cannot be used to check whether the alternator is generating electricity, otherwise the diode will be burned out.
- When the rectifier and stator winding are connected, it is strictly forbidden to use a megohmmeter or 220V AC power supply to check the insulation of the alternator.
- The connection between the alternator and the battery must be reliable. If it is suddenly disconnected, overvoltage will be generated to damage the electronic components of the alternator or regulator.
- Once the AC alternator or regulator is found to be faulty, it should be repaired immediately and the fault should be eliminated in time. It must not be run continuously.
- The regulator must be controlled by the ignition switch. When the alternator stops rotating, the ignition switch should be disconnected, otherwise the magnetic field circuit of the alternator will be connected all the time, which will not only burn the magnetic field coil, but also make the battery dead.

Image: Important precautions and warnings for the safe use and handling of alternators and their regulators.
9. Specifications
| Attribute | Value |
|---|---|
| Manufacturer | SCITOO |
| Brand | SCITOO |
| Model Number | 112586-5206-1336473991 |
| Item Weight | 12.02 pounds |
| Product Dimensions | 8.03 x 7.05 x 6.89 inches |
| Exterior | Smooth |
| OEM Part Number | 31100-PNC-004 31100-PND-004 31100-RJJ-004 AHGA65 AMT0172 A2TB7591 A2TC0691 113712 31100-PNC-004 31100-PND-004 AHGA55 AHGA61 400-48040 13966 A2TB7591 A2TC0691 A2TC0691A 1-2530-01MI |
| Special Features | Unit Type:Alternator;Voltage:12;Rotation:CW;Amperage:90;Regulator:IR;Brief: RSX 2.0L 2002-04, CR-V,2.4L 2002-04 ,7-GROOVE PULLEY,60mm OD |
| Amperage | 90 Amps |
| Voltage | 12 Volts |
| Date First Available | May 22, 2019 |
10. Warranty and Support
For warranty information and technical support, please refer to the official SCITOO website or contact their customer service directly. The product is designed for performance and durability, and the manufacturer stands behind its quality.
You can also refer to the Installation Manual (PDF) for additional details.
Ask a question about this manual
Ask about setup, troubleshooting, compatibility, parts, safety, or missing instructions. Manuals+ will review the question and use this page’s manual context to help answer it.