1. Introduction
Thank you for purchasing the Vbestlife 17-inch 1440x900 HD Digital Photo Frame. This device allows you to display your favorite photos, play music, and watch videos with high clarity. It also includes useful features such as a calendar and alarm clock. This manual provides essential information for proper setup, operation, and maintenance of your digital photo frame. Please read it thoroughly before use.
2. Safety Information
- Do not expose the device to rain or moisture to prevent fire or electric shock.
- Do not open the casing. Refer all servicing to qualified personnel.
- Use only the provided power adapter. Using an incorrect adapter may damage the device and void the warranty.
- Keep the device away from direct sunlight, heat sources, and extreme temperatures.
- Avoid placing heavy objects on the device.
- Clean the screen with a soft, dry cloth. Do not use liquid cleaners.
3. Package Contents
Please check the package for the following items:
- 1 x Vbestlife 17-inch Digital Photo Frame
- 1 x Detachable Bracket
- 1 x Remote Controller
- 1 x Power Adapter (AC100-240V, DC12V 1A-2A)
- 1 x User Manual

Image: All items included in the package.
4. Product Overview
The Vbestlife Digital Photo Frame features a 17-inch HD display and a user-friendly interface.
4.1 Front View
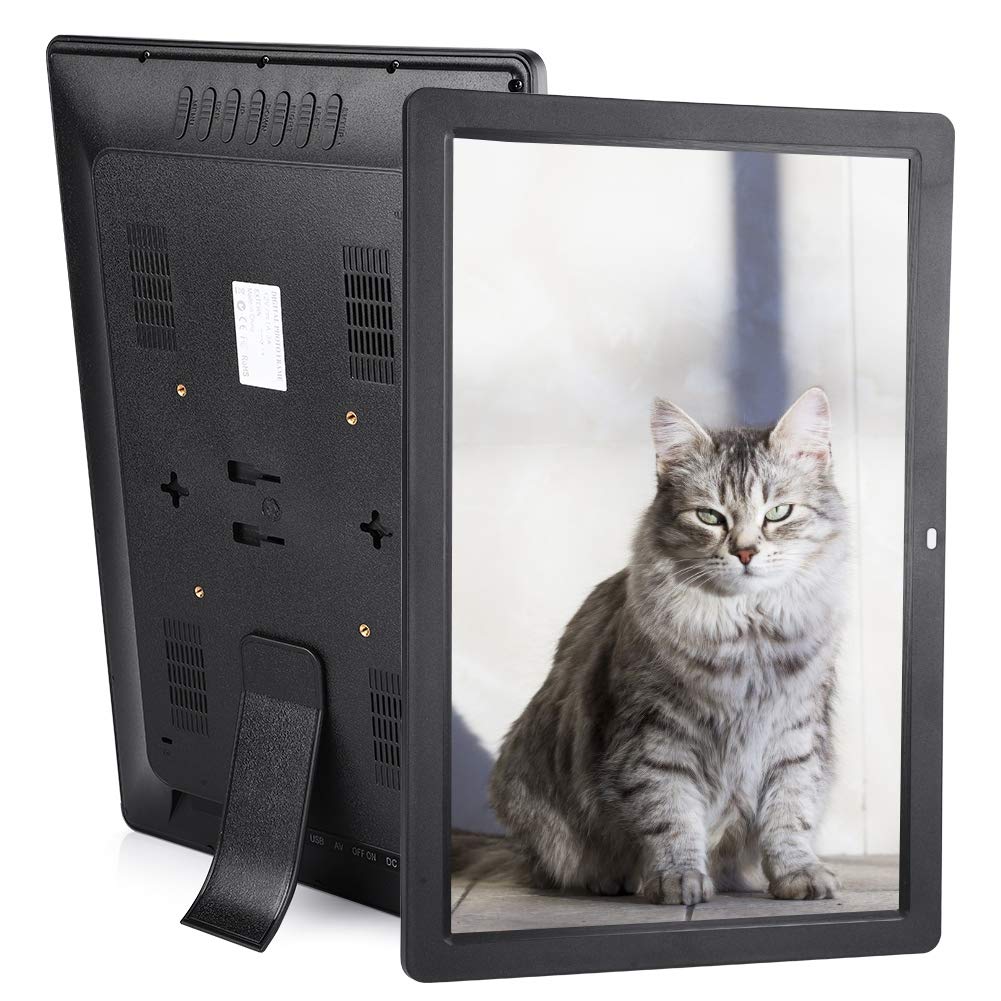
Image: Front view of the digital photo frame with remote control.
The front of the frame features the 17-inch display and a small indicator light.
4.2 Rear View and Ports

Image: Rear view highlighting ports and controls.
The rear panel includes:
- Operation Buttons: For basic navigation and control.
- Set Key: For accessing settings.
- Built-in Speaker: For audio playback.
- Wall Hanging Hole: For optional wall mounting (bracket sold separately).
- USB Ports: Two USB 1.1/2.0 interfaces for connecting USB drives.
- SD/MMC Card Slot: For inserting memory cards (supports up to 32GB).
- HDMI Port: For connecting to external displays (if supported, not explicitly mentioned for output).
- AV Port: For audio/video input/output.
- DC IN: Power adapter connection port.
4.3 Remote Control

Image: Remote control types (new and old models may be shipped randomly).
The digital photo frame comes with an infrared remote control for convenient operation. Please note that new and old remote control models may be shipped randomly. Both types provide full functionality.
5. Setup
5.1 Power Connection
- Connect the power adapter to the DC IN port on the back of the photo frame.
- Plug the power adapter into a standard electrical outlet.
- The frame will power on automatically or can be turned on using the power button on the remote or the frame itself.
5.2 Installing the Bracket
The detachable bracket allows the photo frame to stand on a flat surface.
- Locate the bracket and the corresponding slot on the back of the photo frame.
- Insert the bracket firmly into the slot until it clicks into place.
- Adjust the bracket to the desired angle for stable placement.
5.3 Inserting a Memory Card or USB Drive
The photo frame supports SD/MMC memory cards (up to 32GB) and USB drives.

Image: Inserting a memory card into the frame.
- Locate the SD/MMC card slot or USB port on the side/back of the frame.
- Insert your memory card or USB drive into the appropriate slot/port. Ensure it is inserted correctly.
- The frame should automatically detect the storage device.
- Note: For optimal performance, use a Class 6 or higher memory card.
6. Operating Instructions
6.1 Basic Navigation
Use the remote control or the buttons on the back of the frame to navigate the menus.
- Arrow Buttons: Navigate through menu options and files.
- OK/Enter Button: Select an option or confirm an action.
- MENU/SETUP Button: Access the main menu or settings.
- EXIT Button: Go back to the previous menu or exit current function.
- Volume Buttons: Adjust audio volume.
6.2 Photo Playback
The frame supports JPEG image format. It can display up to 1000 photos.
- From the main menu, select "Photo" or "Image".
- Choose the desired storage device (SD card or USB drive).
- Navigate to the folder containing your photos.
- Select a photo to view it, or start a slideshow.

Image: Photo playback on the digital photo frame.
6.3 Music Playback
The frame supports MP3 and WMA audio formats. You can play music while viewing photos.
- From the main menu, select "Music".
- Choose the storage device.
- Navigate to and select the desired audio file to play.
- Adjust volume using the remote control.
6.4 Video Playback
The frame supports MPEG, MP4, RMVB, and 1080P HD video formats.
- From the main menu, select "Video" or "Movie".
- Choose the storage device.
- Navigate to and select the desired video file to play.
- Use the remote for playback controls (play, pause, fast forward, rewind).
6.5 Calendar and Clock Functions
The digital photo frame includes a calendar and alarm clock function.

Image: Calendar and Clock display.
- From the main menu, select "Calendar" or "Clock".
- You can view the current date and time.
- Access settings to set the time, date, and alarm functions.
6.6 System Settings
Access the system settings to customize your photo frame experience.
- Language: Select from English, German, French, Italian, Spanish.
- Display Settings: Adjust brightness, contrast, aspect ratio.
- Slideshow Settings: Configure transition effects, display time.
- Time & Date: Set current time and date.
- Volume: Adjust speaker volume.
7. Maintenance
- Cleaning the Screen: Gently wipe the screen with a soft, lint-free cloth. Do not use abrasive cleaners or sprays directly on the screen.
- Cleaning the Frame: Use a soft, dry cloth to wipe the frame's surface.
- Storage: When not in use for extended periods, disconnect the power adapter and store the frame in a cool, dry place.
- Software Updates: Check the manufacturer's website for any available firmware updates.
8. Troubleshooting
| Problem | Possible Cause | Solution |
|---|---|---|
| Frame does not power on. | Power adapter not connected or faulty. | Ensure the power adapter is securely connected to both the frame and a working power outlet. Try a different outlet. |
| Memory card/USB drive not recognized. | Incorrect insertion; unsupported format; slow card speed; card capacity too large. | Reinsert the card/drive. Ensure it is formatted to a compatible file system (e.g., FAT32). Use a Class 6 or higher memory card (max 32GB). |
| No image/video displayed. | Unsupported file format; corrupted file. | Ensure files are in JPEG (images), MPEG/MP4/RMVB (videos). Try different files. |
| No sound. | Volume too low; audio file issue. | Increase volume using the remote. Ensure audio files are MP3/WMA. |
| Remote control not working. | Battery depleted; obstruction; remote not pointed at sensor. | Replace the CR2025 battery. Ensure no obstructions between remote and frame. Point remote directly at the frame's IR sensor. |
9. Specifications
| Feature | Detail |
|---|---|
| Material | Premium ABS |
| Screen Size | 17 inches |
| Resolution | 1440 x 900 HD |
| Aspect Ratio | 16:10 |
| Screen Type | TN Screen |
| Brightness | 220 cd/㎡ |
| Contrast Ratio | 1000:1 |
| Viewing Angle | pv45° |
| Display Area | Approx. 36.5 x 22.7 cm (14.4 x 8.9 inches) |
| Dimensions (L x W x H) | Approx. 41 x 27.2 x 2.9 cm (16.1 x 10.7 x 1.1 inches) |
| Control Type | Remote control + Button press control |
| Supported Image Format | JPEG |
| Supported Audio Format | MP3 / WMA |
| Supported Video Format | MPEG, MP4, RMVB, 1080p HD video |
| Audio Output | 1 |
| USB Interface | 2 x USB (1.1 or 2.0) |
| Memory Card Slot | 1 x SD/MMC card slot (Max 32GB) |
| Power Adapter | AC100-240V, DC12V 1A-2A |
| Built-in Speaker | 2 x 5W |
| Remote Battery Model | CR2025 |
| System Languages | English, German, French, Italian, Spanish |
| Product Weight | Approx. 1742g (61.4 ounces) |

Image: Product dimensions.
10. Warranty and Support
Vbestlife offers an 18-month manufacturer's quality guarantee for this product.
- Return/Refund Policy: You are eligible for an unconditional return or refund within 45 days of purchase.
- Technical Support: If you have any questions or concerns, please contact our customer support team. We aim to respond within 24 hours to ensure your satisfaction.
For further assistance, please refer to the contact information provided with your purchase or visit the official Vbestlife store page.