1. Introduction
The Caredy REX-C900 is an intelligent digital temperature control instrument designed for industrial applications. It features advanced PID control algorithms and fuzzy control technology to achieve precise and stable temperature regulation. This manual provides essential information for the safe and effective installation, operation, and maintenance of your REX-C900 temperature controller.
2. Product Overview
The REX-C900 features a high-brightness red and green dual digital display for Process Value (PV) and Set Value (SV). It supports a variety of sensor inputs and offers robust anti-interference capabilities.

Figure 2.1: Front view of the REX-C900 controller, showing the dual digital display for PV (red) and SV (green), along with control buttons.
Key Features:
- High brightness red/green dual digital display for PV and SV values.
- Universal input for various sensor types (Thermocouple K, J, R, B, E, N, T; RTD PT100, Cu50).
- Measurement accuracy of ±0.5%FS.
- Resolution: 1°C or 0.1°C.
- Sampling period: 3 times per second.
- Wide operating voltage range: AC100V-240V.
- Advanced PID control algorithm with fuzzy control for stable regulation.
- No overshoot self-tuning scheme.
3. Specifications
| Parameter | Value |
|---|---|
| Model | REX-C900 |
| Control Type | Temperature |
| Control Mode | Intelligent Temperature Controller |
| Actual Temperature Range | 0-1300°C |
| Measurement Error | 0.5°C |
| Operating Voltage | AC100-240V |
| Power Supply Voltage | AC85-AC264V 50HZ |
| Measurement Accuracy | ±0.5%FS |
| Input Type | Thermocouple (TC) K, J, R, B, E, N, T; Temperature Detector (RTD) PT100, Cu50 |
| Working Environment | 0-50°C, 30-85% RH (non-corrosive) |
| Power Consumption | <10 VA |
| Hole Size (Approx.) | 95 x 95 x 113mm / 3.7 x 3.7 x 4.4inch |
| Weight | 320g |
4. Setup and Installation
4.1 Dimensions and Mounting
Ensure adequate space for installation and ventilation. The controller requires a panel cutout of approximately 95mm x 95mm. Secure the unit using the provided mounting clips.

Figure 4.1: REX-C900 controller dimensions. Front panel: 95mm x 95mm (3.7 x 3.7 inches). Depth: 113mm (4.4 inches).
4.2 Wiring Instructions
WARNING: Ensure power is disconnected before performing any wiring. Incorrect wiring can cause damage to the unit or personal injury. Refer to the wiring diagram below for proper connections.

Figure 4.2: Wiring diagram for the REX-C900. Terminals 1-3 for power (AC110-220V), 9-10 for AL1, 11-12 for AL2, 5-8 for OUT, 13-16 for RTD/TC sensor inputs.
- Power Supply: Connect AC100-240V to terminals 1, 2, and 3 as indicated in the diagram.
- Sensor Input: Connect your thermocouple (TC) or RTD (PT100, Cu50) sensor to terminals 13-16. Ensure correct polarity for thermocouples.
- Output (OUT): Connect your control output device (e.g., solid-state relay, contactor) to terminals 5-8.
- Alarm Outputs (AL1, AL2): If using, connect alarm devices to terminals 9-10 (AL1) and 11-12 (AL2).
5. Operating Instructions
5.1 Display and Buttons
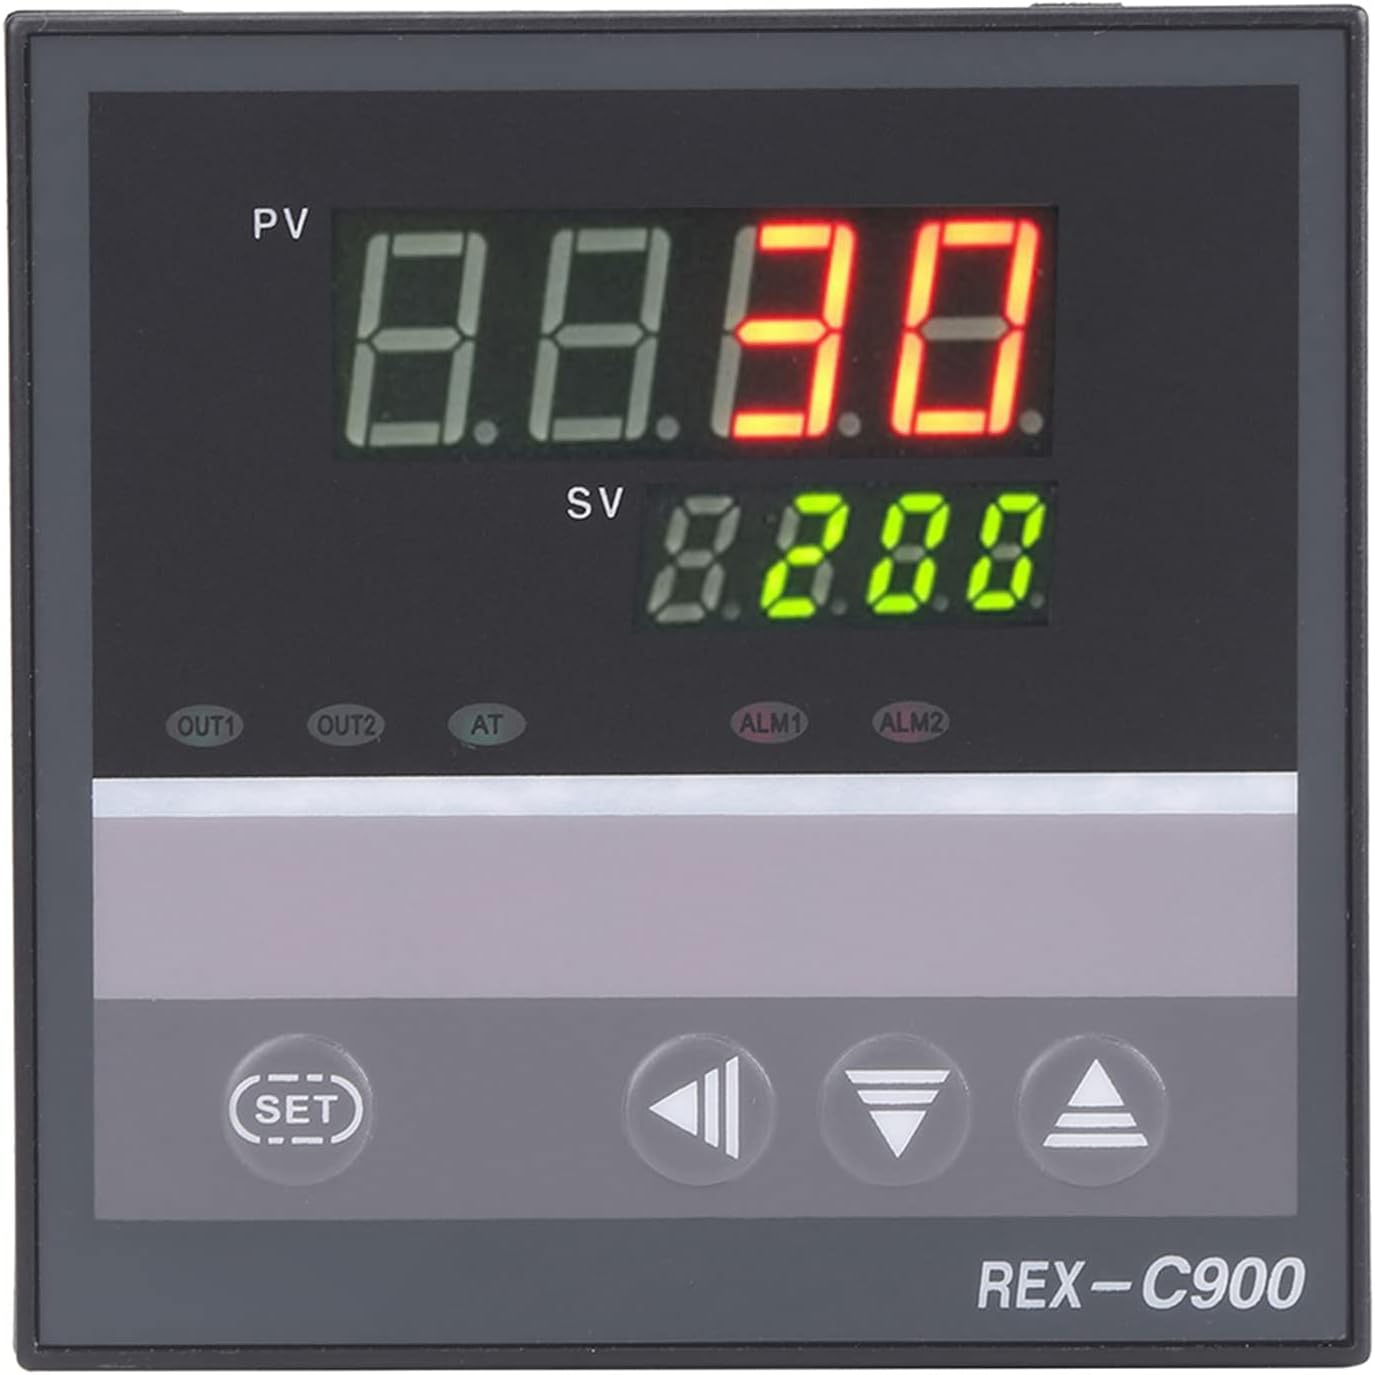
Figure 5.1: Front panel controls. PV (Process Value) is the upper red display, SV (Set Value) is the lower green display. Buttons include SET, Shift, Down, and Up arrows.
- PV (Process Value): Displays the current measured temperature (red).
- SV (Set Value): Displays the target temperature or parameter value (green).
- SET Button: Used to enter parameter setting mode and confirm selections.
- Shift Button (◀): Used to shift digits during parameter entry.
- Down Arrow Button (▼): Decreases parameter values.
- Up Arrow Button (▲): Increases parameter values.
5.2 Setting the Target Temperature (SV)
- Press the SET button briefly. The SV display will flash.
- Use the Up (▲) and Down (▼) arrow buttons to adjust the desired temperature.
- Use the Shift (◀) button to move the cursor to different digits for faster adjustment.
- Press the SET button again to confirm the new SV and exit the setting mode.
5.3 Advanced Parameter Settings
To access advanced parameters (e.g., PID constants, alarm settings, input type), press and hold the SET button for several seconds until the first parameter code appears on the PV display. Use the Up (▲) and Down (▼) buttons to navigate through parameters and the SET button to enter and confirm values. Refer to the full technical manual for a complete list of parameters and their functions.
5.4 Auto-Tuning (AT) Function
The REX-C900 features an auto-tuning function to optimize PID parameters for your specific heating system. To initiate auto-tuning, press and hold the AT button (if available, or a combination of buttons as per the full manual) until the AT indicator lights up. The controller will cycle through heating and cooling to determine optimal PID values. Once complete, the AT indicator will turn off.
6. Maintenance
The REX-C900 is designed for reliable operation with minimal maintenance.
- Cleaning: Periodically clean the front panel with a soft, dry cloth. Do not use abrasive cleaners or solvents.
- Environment: Ensure the operating environment remains within the specified temperature (0-50°C) and humidity (30-85% RH non-corrosive) ranges.
- Connections: Periodically check all wiring connections for tightness and signs of corrosion.
7. Troubleshooting
If you encounter issues with your REX-C900 controller, refer to the following common problems and solutions.
| Problem | Possible Cause | Solution |
|---|---|---|
| No display/Power off | No power supply or incorrect wiring. | Check power connections (AC100-240V) and ensure power is supplied. Verify wiring according to Figure 4.2. |
| PV display shows "HHHH" or "LLLL" | Sensor open circuit (HHHH) or short circuit/reverse connection (LLLL). | Check sensor wiring and connections. Ensure the correct sensor type is selected in parameters. Replace faulty sensor if necessary. |
| Temperature not stable or overshoots | PID parameters not optimized for the system. | Perform auto-tuning (Section 5.4) to optimize PID parameters. Ensure the control output device is functioning correctly. |
| Output not activating | Incorrect wiring, faulty output device, or set value not reached. | Verify output wiring. Check the status of the external output device. Ensure the SV is set correctly and the PV is within the control range. |
For further assistance, please contact Caredy customer support.
8. Warranty and Support
This product is covered by a standard manufacturer's warranty. For specific warranty terms and conditions, please refer to the documentation provided with your purchase or contact Caredy customer service.
For technical support, troubleshooting assistance, or inquiries regarding your REX-C900 temperature controller, please visit the official Caredy website or contact their customer support channels.