Introduction
This manual provides essential instructions for the safe and effective installation, operation, and maintenance of your Technical Precision replacement lamp and housing for the HITACHI CP-X417 projector. Please read this manual thoroughly before attempting any installation or operation to ensure proper function and to prevent damage to the product or your projector.
Safety Information
WARNING: Risk of electric shock and burns. Always disconnect power to the projector before attempting to replace the lamp. Allow the projector and old lamp to cool completely before handling.
- Ensure the projector is unplugged from the power outlet and has been off for at least 30 minutes to allow the lamp to cool.
- Do not touch the glass part of the new lamp directly with bare hands. Oils from your skin can reduce lamp life. Use gloves or a clean cloth.
- Dispose of old lamps according to local regulations. They may contain mercury.
- Do not operate the projector with the lamp cover removed.
Setup and Installation
Follow these steps carefully to replace the projector lamp.
- Prepare the Projector: Ensure the projector is turned off and unplugged from the power source. Allow it to cool down for at least 30 minutes.
- Locate the Lamp Cover: Refer to your HITACHI CP-X417 projector's original manual to locate the lamp cover. It is typically secured by one or more screws.
- Remove the Lamp Cover: Using an appropriate screwdriver, carefully loosen and remove the screws securing the lamp cover. Set the screws and cover aside in a safe place.
- Remove the Old Lamp: The old lamp module will have a handle or a set of screws holding it in place. Loosen these screws and gently pull the old lamp module straight out of the projector. Avoid forcing it.
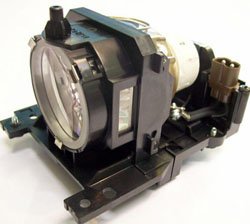
Figure 1: Technical Precision Replacement Lamp and Housing. This image shows the complete lamp module, ready for installation into the projector.
- Install the New Lamp: Carefully insert the new Technical Precision lamp module into the projector slot. Ensure it slides in smoothly and is seated firmly. Do not force it.
- Secure the New Lamp: Tighten the screws that hold the new lamp module in place.
- Replace the Lamp Cover: Reattach the lamp cover and secure it with the screws removed earlier. Ensure it is properly closed to prevent dust entry and ensure safe operation.
- Reset Lamp Timer: After replacing the lamp, it is crucial to reset the lamp timer in your projector's menu. Consult your HITACHI CP-X417 projector's manual for specific instructions on how to access and reset the lamp timer. This ensures accurate tracking of new lamp life.
Operating Instructions
Once the new lamp is installed and the lamp timer is reset, you can resume normal operation of your projector.
- First Use: The new lamp may appear slightly brighter or have a different color temperature during its initial hours of use. This is normal as the lamp stabilizes.
- Optimal Performance: To maximize lamp life and maintain optimal performance, avoid frequent on/off cycles. Allow the projector to run for at least 15-20 minutes before turning it off.
- Cool-down Period: Always allow the projector to complete its cool-down cycle after turning it off. Do not unplug the projector until the cooling fans have stopped.
Maintenance
Proper maintenance helps extend the life of your projector and the replacement lamp.
- Cleaning: Periodically clean the projector's air filters according to your projector's manual. Clogged filters can lead to overheating, which shortens lamp life.
- Lamp Housing: Do not attempt to open the lamp housing or replace the bare bulb inside the module. This replacement unit is designed as a complete module.
- Storage: If the projector will not be used for an extended period, store it in a cool, dry, dust-free environment.
Troubleshooting
If you encounter issues after installing the new lamp, refer to the following common problems and solutions:
| Problem | Possible Cause | Solution |
|---|---|---|
| Lamp does not turn on. |
|
|
| Image is dim or poor quality. |
|
|
| Projector displays a lamp error message. |
|
|
Specifications
Key specifications for the Technical Precision Replacement Lamp and Housing for HITACHI CP-X417:
- Brand: Technical Precision
- Model Name: CP-X417 LAMP & HOUSING
- Part Number: CP-X417 LAMP & HOUSING
- Material: Glass
- Item Package Quantity: 1
- Light Source Type: Projector lamps
- ASIN: B07RXR3FD2
Warranty and Support
For warranty information or technical support regarding your Technical Precision replacement lamp, please refer to the documentation provided with your purchase or contact Technical Precision customer service directly. Contact details are typically available on the manufacturer's website or through your retailer.
For general projector operation or issues unrelated to the lamp, please consult your original HITACHI CP-X417 projector manual or contact HITACHI support.