1. Introduction
The Jungle Care Hearing Aid Wax Guard Filters are designed to protect your hearing aids from common obstructions such as ear wax, dust, grease, and moisture. Regular replacement of these filters is crucial for maintaining the optimal performance and longevity of your hearing aids. This manual provides clear instructions for the proper use and maintenance of your wax guards.
These wax guards are compatible with various hearing aid brands, including Phonak, Resound, Widex, Unitron, and Jungle Care. For specific compatibility inquiries, please contact Jungle Care support.
2. Safety Information
- To prevent accidental ingestion, keep this product out of reach of infants and children. This product is not a toy or food item.
- Do not use the wax guard if you have a perforated eardrum or if any ointment is currently being used in the ear canal. Consult a medical professional if you have any existing ear conditions.
3. Product Overview
Each pack contains multiple wax guard filters and a specialized removal/insertion tool. The filters are made from durable PP (Polypropylene) material, designed to effectively block debris while allowing sound to pass through clearly.
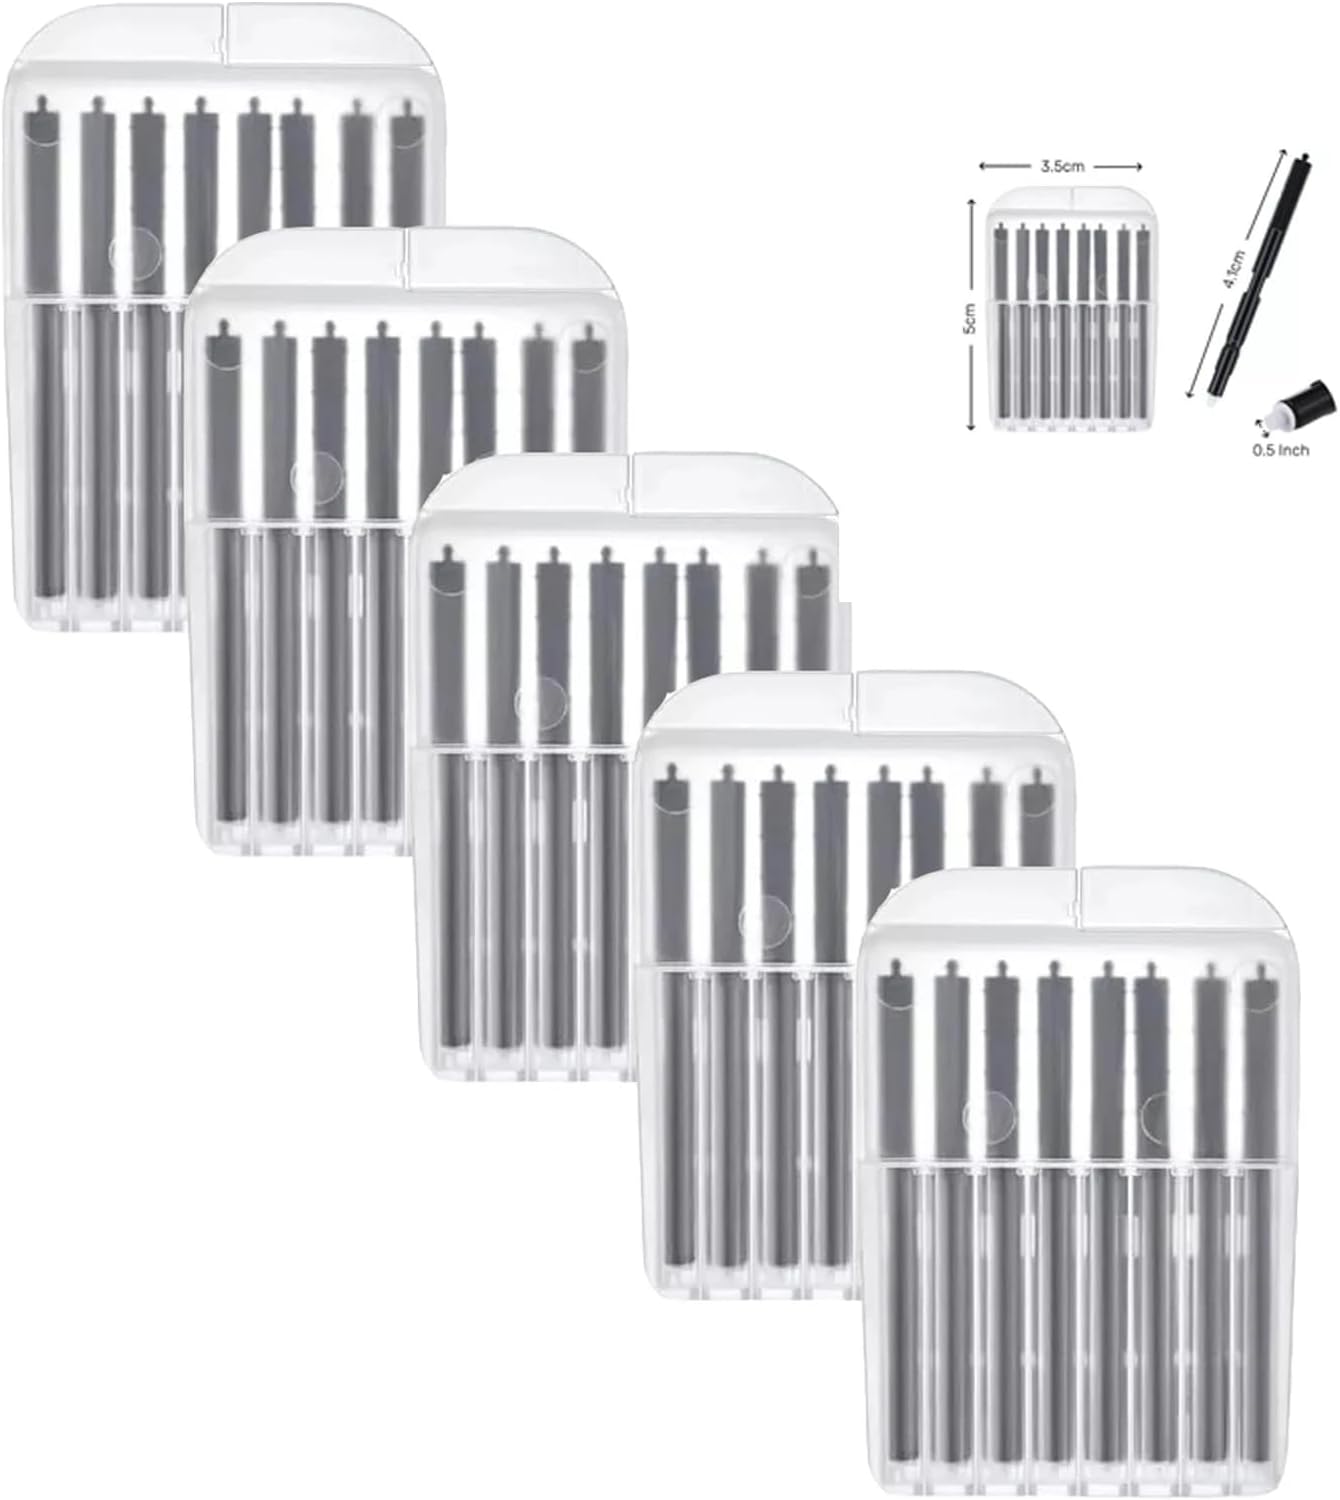
Figure 1: Overview of Jungle Care Hearing Aid Wax Guard Filters packaging.

Figure 2: A close-up view of an open pack, showing the individual wax guards and the dual-ended removal/insertion tool.

Figure 3: Detail of the universal type mesh cover on the wax guards, designed for effective filtration.
4. Wax Guard Replacement Instructions
Follow these steps to safely and effectively replace the wax guards in your hearing aid:
- Prepare the Tool: Take one stick from the box. The stick has two ends: one empty end for removing the old wax guard (Side A), and the other end containing a new wax filter for replacement (Side B).
- Remove Old Wax Guard: Gently insert the empty end (Side A) of the stick into the center of the existing wax guard on your hearing aid. Slowly rotate the stick and pull it out to extract the old, used wax guard. Dispose of the old wax guard responsibly.
- Insert New Wax Guard: Carefully insert the end of the stick with the new wax guard (Side B) into the opening where the old wax guard was removed.
- Release New Wax Guard: The new wax guard should automatically detach from the stick and remain securely in place within the hearing aid. If it does not separate easily, you may gently assist it with your fingernail.
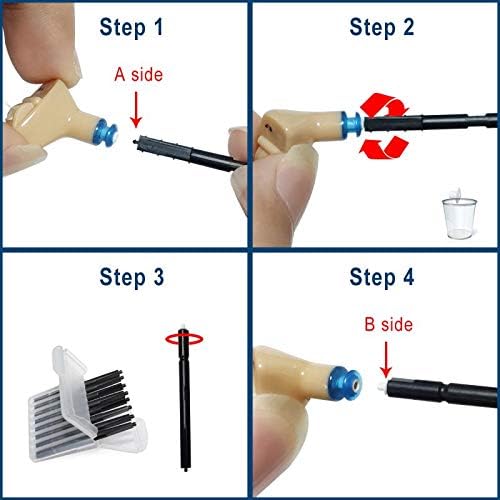
Figure 4: Visual step-by-step guide for replacing the wax guards.
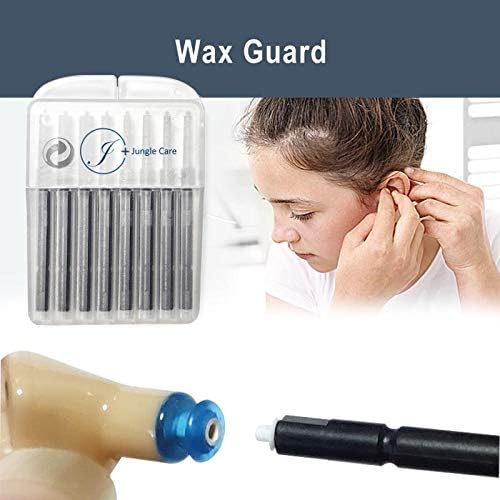
Figure 5: Demonstration of the wax guard replacement process on a hearing aid.
5. Maintenance
The frequency of wax guard replacement varies depending on individual ear canal conditions and wax production. It is recommended to replace the wax guard every week to every month. Always replace the filter before it becomes visibly full of ear wax or dust. Failure to do so may lead to the hearing aid's speaker becoming blocked, resulting in reduced sound quality or complete loss of function.
6. Troubleshooting
- Reduced Sound or No Sound: If your hearing aid's sound quality diminishes or stops working, the wax guard may be blocked. Replace the wax guard following the instructions in Section 4.
- Difficulty Inserting New Guard: Ensure the old wax guard is completely removed. If the new guard does not seat properly, gently rotate the tool or use a fingernail to assist separation from the stick.
- Compatibility Concerns: While these wax guards are broadly compatible, if you experience persistent issues or believe they are not fitting correctly, consult your hearing aid specialist or contact Jungle Care customer support.
7. Specifications
| Item Model Number | VIT-Otoscope-1 |
| Manufacturer | Jungle Care |
| Material | PP (Polypropylene) |
| Package Dimensions | 2.01 x 1.46 x 1.14 inches |
| Item Weight | 0.35 ounces |

Figure 6: Dimensions of the wax guard filter packaging.
8. Support
For further assistance, questions, or concerns regarding your Jungle Care Hearing Aid Wax Guard Filters, please contact Jungle Care customer support through their official channels. Refer to your product packaging or the retailer's website for contact information.