Introduction
This manual provides detailed instructions for the safe and efficient use of your BTY Mini Sewing Machine N5. Please read all instructions carefully before operating the machine to ensure proper function and longevity.

Image: The BTY Mini Sewing Machine N5 shown with its packaging and included accessories, such as bobbins, needles, and power adapter.
Setup
1. Unpacking and Placement
Carefully remove the sewing machine and all accessories from the packaging. Place the machine on a stable, flat surface. Ensure there is adequate lighting and space for comfortable operation.

Image: The BTY Mini Sewing Machine N5 displaying its compact dimensions (10.8 x 4.8 x 10.2 inches) and lightweight design (5.39 pounds), shown next to an iPad Mini for scale.
2. Power Connection
The machine can be powered by either the included 6V AC adapter or 4 AA batteries (not included).
- AC Adapter: Insert the DC plug into the power input jack on the machine and plug the adapter into a standard electrical outlet.
- Batteries: Open the battery compartment cover on the bottom of the machine and insert 4 AA batteries, ensuring correct polarity.
3. Identifying Parts

Image: A detailed diagram of the BTY Mini Sewing Machine N5, highlighting key components such as the stitch selection button, take-up lever, upper thread elastic adjustment knob, thread cutter, LED lamp, lock panel, scale, switch, drawer, slot groove, hand wheel, and reverse button.
4. Bobbin Winding
- Place an empty bobbin onto the bobbin winder spindle.
- Place a spool of thread onto the spool pin.
- Guide the thread through the bobbin winding tension disc.
- Wrap the thread around the empty bobbin a few times, then push the bobbin winder spindle to the right.
- Turn on the machine (low speed recommended) to wind the bobbin. Stop when the bobbin is full.
- Cut the thread and push the bobbin winder spindle back to the left.
5. Threading the Machine (Upper Thread)
- Raise the presser foot lever.
- Place a spool of thread onto the spool pin.
- Guide the thread through the upper thread guide.
- Pass the thread through the tension control dial.
- Thread the take-up lever from right to left.
- Guide the thread down through the needle bar thread guide.
- Thread the needle from front to back. Pull about 6 inches of thread through the needle eye.
6. Inserting the Lower Bobbin
- Open the bobbin cover plate.
- Insert the wound bobbin into the bobbin case, ensuring the thread unwinds in the correct direction (usually counter-clockwise).
- Pull the bobbin thread through the tension spring slot.
- Close the bobbin cover plate.
- Turn the hand wheel towards you to lower and raise the needle, catching the bobbin thread. Pull both upper and lower threads under the presser foot and towards the back.
Video: This video demonstrates the bobbin winding process, selection of different stitch types, and basic sewing operations including speed adjustment and backstitching on the BTY Mini Sewing Machine N5.
Operation
1. Stitch Selection
The BTY Mini Sewing Machine N5 features 12 built-in stitches. Rotate the stitch selection dial to choose your desired stitch pattern. Refer to the machine's diagram for stitch types:
- 1st-4th: Straight stitches for basic sewing.
- 5th-6th: Fancy stitches for decorative purposes.
- 7th-8th: Buttonhole stitches for creating buttonholes.
- 9th-12th: Overlock stitches for finishing seams.
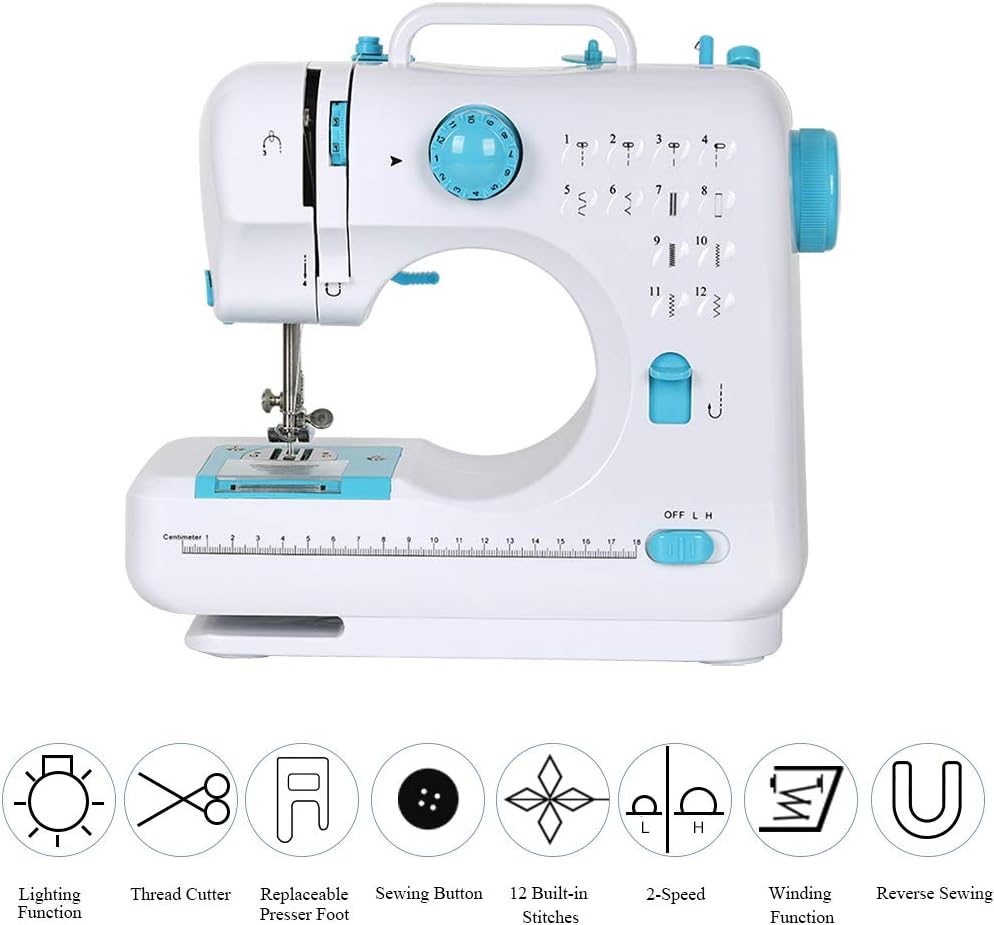
Image: The BTY Mini Sewing Machine N5 displaying its stitch selection dial with 12 distinct stitch patterns, along with icons representing other features like lighting, thread cutter, replaceable presser foot, sewing button, 2-speed control, winding function, and reverse sewing.
2. Speed Adjustment
Use the speed switch (OFF/L/H) to select between low (L) and high (H) sewing speeds. Always start with low speed, especially for beginners or intricate work.
3. Sewing
- Place the fabric under the presser foot.
- Lower the presser foot lever.
- Select your desired stitch and speed.
- Press the foot pedal or the hand switch to start sewing. Guide the fabric gently.
- To finish, press the reverse button for a few stitches to secure the seam, then stop the machine.
- Raise the presser foot and pull the fabric out. Use the built-in thread cutter to snip the threads.

Image: A close-up of hands guiding fabric through the BTY Mini Sewing Machine N5 during a sewing operation, demonstrating the machine in active use.
4. Additional Features
- LED Lighting: Provides illumination for your sewing area.
- Thread Cutter: A convenient blade located on the machine for quickly cutting threads.
- Reverse Stitch Function: Press and hold the reverse button to sew backward, securing the beginning and end of seams.
- Storage Drawer: A small drawer for storing accessories like bobbins and needles.
Maintenance
1. Cleaning
Regularly clean lint and dust from the bobbin area and under the needle plate using a small brush. Ensure the machine is unplugged before cleaning.
2. Needle Care
- Replace bent or dull needles immediately to prevent skipped stitches or fabric damage.
- Use the correct needle type and size for your fabric.
3. General Care
Store the machine in a dry, dust-free environment. Avoid dropping or subjecting the machine to impacts.
Troubleshooting
| Problem | Possible Cause | Solution |
|---|---|---|
| Machine not sewing / No power | Power adapter not connected, batteries dead, switch off. | Check power connections, replace batteries, ensure switch is ON. |
| Skipped stitches | Incorrect threading, bent needle, wrong needle for fabric, incorrect tension. | Re-thread the machine, replace needle, use appropriate needle, adjust tension. |
| Thread breaking | Incorrect tension, poor quality thread, needle bent/dull, incorrect threading. | Adjust tension, use good quality thread, replace needle, re-thread. |
| Fabric not moving | Presser foot not lowered. | Lower the presser foot. |
| Needle hitting bobbin carrier / Needle bending | Bobbin carrier out of alignment. | Remove two silver screws on the needle plate, take out the bobbin and bobbin carrier. Re-insert the bobbin carrier with the opening away from you. Replace the plate and screws. If issues persist, consult online resources for 'needle hitting bobbin' for visual guides. |
| Machine jams / Uneven stitches | Too thick fabric, incorrect tension, lint in bobbin area. | Avoid sewing overly thick fabrics (e.g., more than 2 layers of denim). Adjust tension. Clean bobbin area. |
Specifications
- Model: N5
- Product Dimensions: 4.8 x 10.8 x 10.2 inches
- Item Weight: 5.39 pounds
- Brand: BTY
- Color: Blue
- Material: Metal, Plastic
- Power Source: Corded Electric (6V AC adapter) / 4 AA Batteries (not included)
- Built-in Stitches: 12
- Speed Settings: 2 (Low, High)
- UPC: 758277046510
Warranty and Support
Your BTY Mini Sewing Machine N5 comes with the following guarantees:
- 15-day return policy.
- 30-day replacement for new products.
- 12-month warranty.
For any questions regarding your product or for support, please contact BTY customer service through the retailer's platform or the official BTY website.