1. Introduction
This manual provides detailed instructions for the installation, operation, and maintenance of your KASSADIN DASHCAM-E300 Dual 1080P Front and Rear Dash Cam. Please read this manual thoroughly before using the device to ensure proper functionality and safety. Keep this manual for future reference.

Image 1.1: Overview of the KASSADIN DASHCAM-E300 dash cam, rear camera, and suction cup mount.
2. Product Features
The KASSADIN DASHCAM-E300 is designed to provide comprehensive vehicle surveillance with advanced recording capabilities.
- Dual Camera System: Equipped with a 1080P front camera (170° wide-angle) and a 1080P rear camera (140° wide-angle) for simultaneous recording of front and rear views.
- Full HD Resolution: Records video at 1920 x 1080P at 30 frames per second, capturing clear details.
- 3-inch IPS Display: Provides real-time viewing and playback of recorded footage.
- Superior Night Vision: Features an F1.8 aperture and Wide Dynamic Range (WDR) technology, combined with a Sony sensor and 6-glass lens, to enhance clarity in low-light conditions and prevent overexposure.
- G-Sensor (Emergency Recording): Automatically detects sudden impacts or movements and locks the current video footage to prevent overwriting.
- Loop Recording: Ensures continuous recording by automatically overwriting the oldest unlocked files when the memory card is full.
- Parking Monitor: Activates recording automatically if an impact or vibration is detected while the vehicle is parked, providing surveillance even when the engine is off.

Image 2.1: Visual representation of the dash cam's main features.
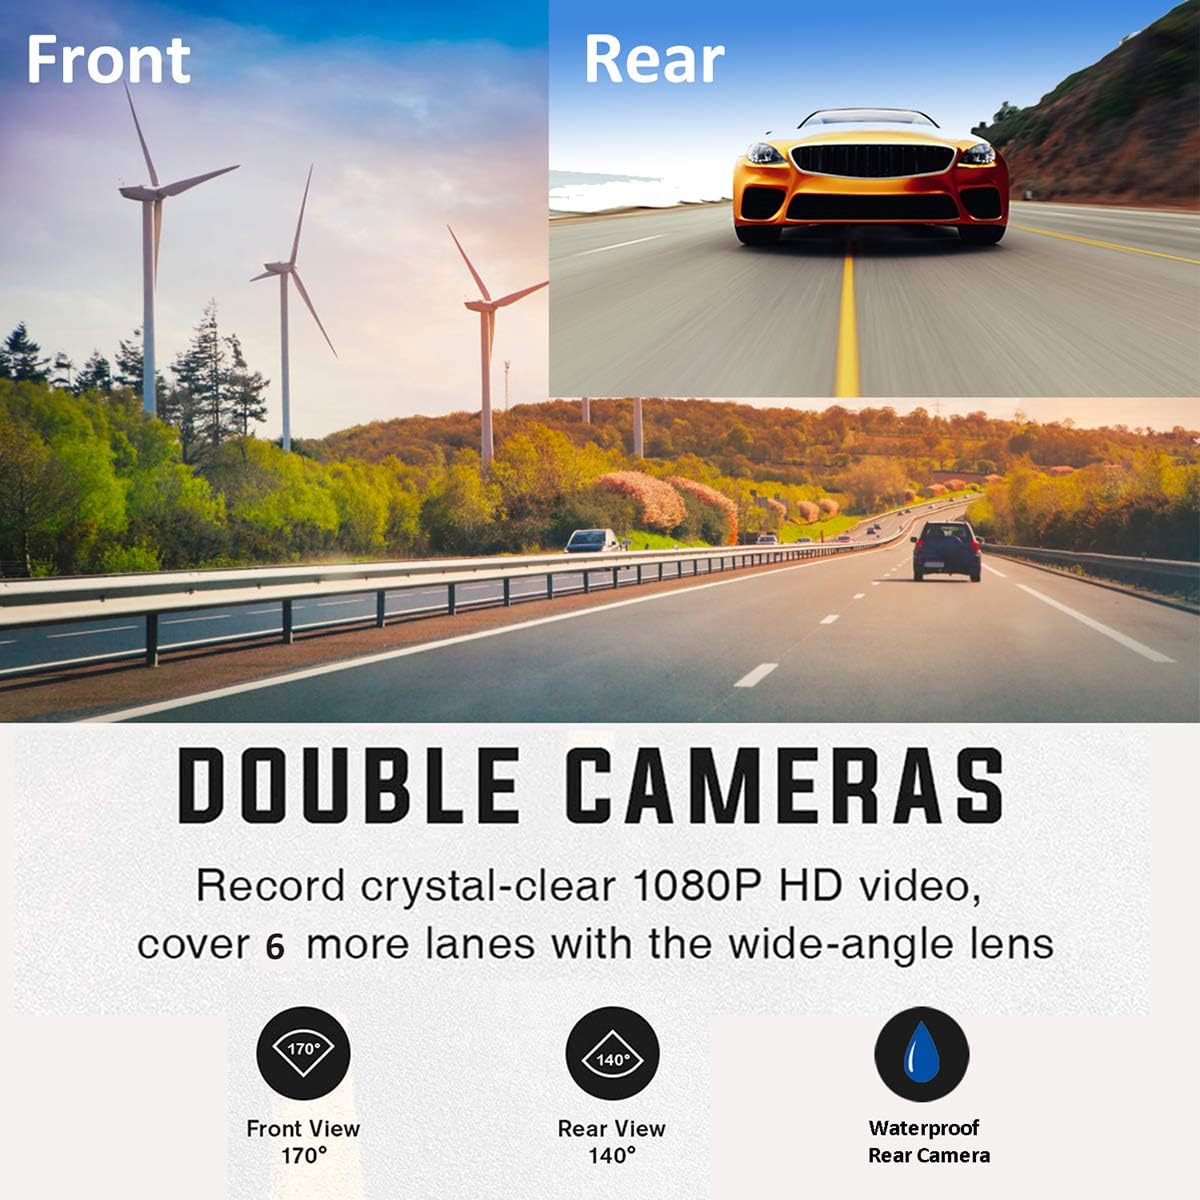
Image 2.2: Double camera system with wide-angle views for front and rear recording.

Image 2.3: Enhanced night vision capabilities for clear recording in low-light conditions.

Image 2.4: The 6-element lens structure designed for capturing sharp, detailed images.
3. Package Contents
Please check the package for the following items:
- KASSADIN DASHCAM-E300 Front Dash Cam
- Rear Camera with cable
- Car Charger
- Suction Cup Mount
- User Manual
4. Setup
4.1 Inserting the Memory Card
- Ensure the dash cam is powered off.
- Locate the TF (Micro SD) card slot on the side of the dash cam.
- Insert a Class 10 or higher Micro SD card (not included) into the slot until it clicks into place.
- To remove, gently push the card in until it springs out.
Important: Format the Micro SD card in the dash cam's settings menu before first use and periodically thereafter to ensure optimal performance.
4.2 Mounting the Dash Cam
- Clean the windshield area where you intend to mount the dash cam.
- Attach the suction cup mount to the dash cam.
- Press the suction cup firmly against the windshield and flip the lever to secure it.
- Adjust the camera angle to ensure a clear view of the road ahead.
4.3 Connecting Power
- Connect the car charger to the dash cam's USB port.
- Plug the other end of the car charger into your vehicle's 12V power outlet (cigarette lighter socket).
- The dash cam will automatically power on and begin recording when the vehicle's ignition is turned on.
4.4 Installing the Rear Camera
- Connect the rear camera cable to the HDMI port on the main dash cam unit.
- Route the rear camera cable discreetly along the vehicle's headliner and trim to the rear of the vehicle.
- Mount the rear camera on the rear windshield, ensuring a clear view. The rear camera is waterproof and can also be mounted externally near the license plate if desired (professional installation recommended for external mounting).

Image 4.1: Dash cam ports and buttons layout.
5. Operating Instructions
5.1 Power On/Off
- Automatic: The dash cam powers on and off automatically with the vehicle's ignition.
- Manual: Press and hold the 'POWER' button to manually turn the device on or off.
5.2 Recording Modes
- Normal Recording: Starts automatically when the device is powered on. Videos are recorded in continuous loops.
- Emergency Recording (G-Sensor): When the G-Sensor detects a sudden impact or collision, the current video segment is automatically locked and saved to a protected folder, preventing it from being overwritten by loop recording.
- Parking Monitor: When enabled, the dash cam will automatically turn on and record for 20 seconds if it detects a vibration or impact while the vehicle is parked. This video will also be locked.

Image 5.1: G-Sensor automatically locks accident footage.

Image 5.2: Parking monitor feature for surveillance when parked.
5.3 Menu Navigation
- Press the 'MENU' button to access settings.
- Use the 'UP' and 'DOWN' buttons to navigate through menu options.
- Press the 'OK' button to confirm a selection.
- Press the 'MODE' button to switch between video recording, photo mode, and playback mode.
6. Maintenance
6.1 Formatting the Micro SD Card
Regularly format your Micro SD card (at least once a month) to prevent data corruption and ensure smooth recording. This can be done through the dash cam's settings menu.
6.2 Cleaning the Device
Use a soft, dry cloth to clean the dash cam lens and screen. Avoid using abrasive cleaners or solvents that could damage the device.
7. Troubleshooting
- Dash cam does not power on: Ensure the car charger is properly connected and the vehicle's 12V power outlet is functioning. Check the power cable for damage.
- Recording stops or freezes: Format the Micro SD card. Ensure you are using a Class 10 or higher Micro SD card. Try a different Micro SD card.
- "Card Error" message: Format the Micro SD card. If the issue persists, the card may be faulty and require replacement.
- Poor video quality: Clean the camera lens. Ensure the protective film has been removed from the lens. Check settings for correct resolution.
- Rear camera not displaying: Ensure the rear camera cable is securely connected to the main unit's HDMI port. Check the cable for any damage.
8. Specifications
| Brand | KASSADIN |
| Model | DASHCAM-E300 |
| Dimensions | 8.5 x 5 x 3.5 cm |
| Weight | 420 g |
| Screen Size | 3 Inches |
| Screen Type | LCD |
| Video Resolution | 1080p |
| Front Lens Angle | 170 Degrees |
| Rear Lens Angle | 140 Degrees |
| Lens Type | Wide-Angle (6-glass elements) |
| Aperture | F1.8 |
| Memory Card | Secure Digital (Micro SD, Class 10 or higher) |
| Battery | Lithium Polymer (included) |
| Connectivity | HDMI, USB |
| Special Features | Parking Monitor, Night Vision, G-Sensor, Loop Recording, WDR |
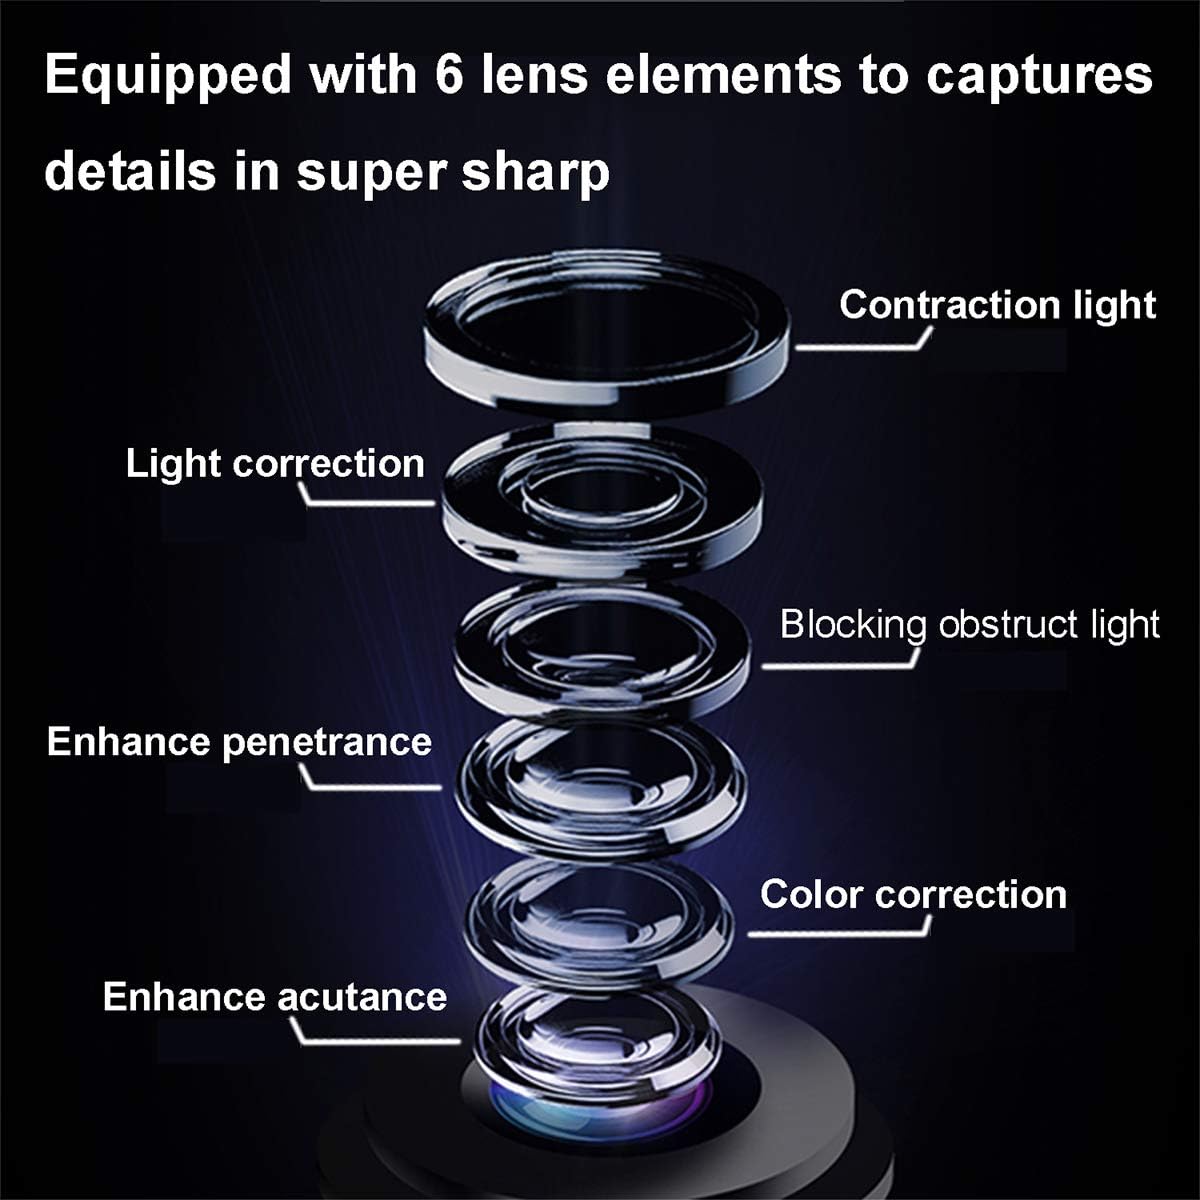
Image 8.1: Detailed view of the 6-layer lens elements.
9. Warranty and Support
9.1 Warranty Information
The KASSADIN DASHCAM-E300 comes with a 12-month warranty from the date of purchase. If the dash cam fails within this period, a replacement will be provided. Please retain your proof of purchase for warranty claims.
9.2 Customer Support
For any questions, technical assistance, or warranty claims, please contact KASSADIN customer service. Our qualified after-sales service team is available to assist you.
Contact Information: Please refer to the contact details provided on the product packaging or the official KASSADIN website.