SENLAN RS-10
SENLAN RGBW 4-in-1 LED Par Bar Wall Wash Stage Light User Manual
Model: RS-10
1. Introduction
Thank you for choosing the SENLAN RGBW 4-in-1 LED Par Bar Wall Wash Stage Light, Model RS-10. This device is designed for professional stage lighting applications, offering versatile control options and vibrant illumination. This manual provides essential information for the safe and efficient operation of your new lighting fixture. Please read it thoroughly before installation and use, and retain it for future reference.
2. Safety Instructions
- Electrical Safety: Ensure the power supply voltage matches the specified requirements (AC90V-240V/50-60Hz). Always disconnect power before cleaning, maintenance, or when not in use.
- Grounding: The fixture must be properly grounded to prevent electrical shock.
- Ventilation: Do not obstruct ventilation openings. Ensure adequate airflow around the unit to prevent overheating.
- Placement: Install the fixture in a dry location, away from moisture, excessive heat, or flammable materials. Avoid direct exposure to rain or splashing water.
- Handling: Do not look directly into the light source when the fixture is operating, as it may cause eye injury.
- Professional Installation: Installation and servicing should be performed by qualified personnel.
- Fuse Replacement: Only replace fuses with the specified type and rating (3A fuse).
3. Package Contents
Upon unpacking, please verify that all components are present and in good condition:
- SENLAN RGBW 4-in-1 LED Par Bar Wall Wash Stage Light (Model RS-10)
- Power Cable
- Mounting Brackets (pre-attached or included)
- User Manual (this document)
4. Product Overview
The SENLAN RS-10 is a high-performance LED par bar featuring 8 pieces of 4W RGBW 4-in-1 LEDs. Each LED is equipped with a 25-degree acrylic lens for focused light output. The fixture boasts a full aluminum housing designed for efficient passive cooling, ensuring silent operation without the need for a fan. It supports multiple control modes including DMX512, automatic operation, sound activation, and master/slave configurations.

Figure 4.1: Rear view of the SENLAN LED Par Bar. This image displays the back panel of the light fixture, highlighting the digital LED display, control buttons (MENU, UP, DOWN), DMX IN and DMX OUT ports, AC power input, and the fuse holder. The 'SENLAN' brand name is visible, along with CE and RoHS compliance markings.

Figure 4.2: Two SENLAN LED Par Bars in operation, casting red and blue light patterns onto a textured wall. The lights are connected via DMX cables, demonstrating their ability to work in tandem for synchronized effects.

Figure 4.3: Two SENLAN LED Par Bars projecting a vibrant blue wash onto a wall. This image illustrates the intensity and coverage of the blue component of the RGBW LEDs.
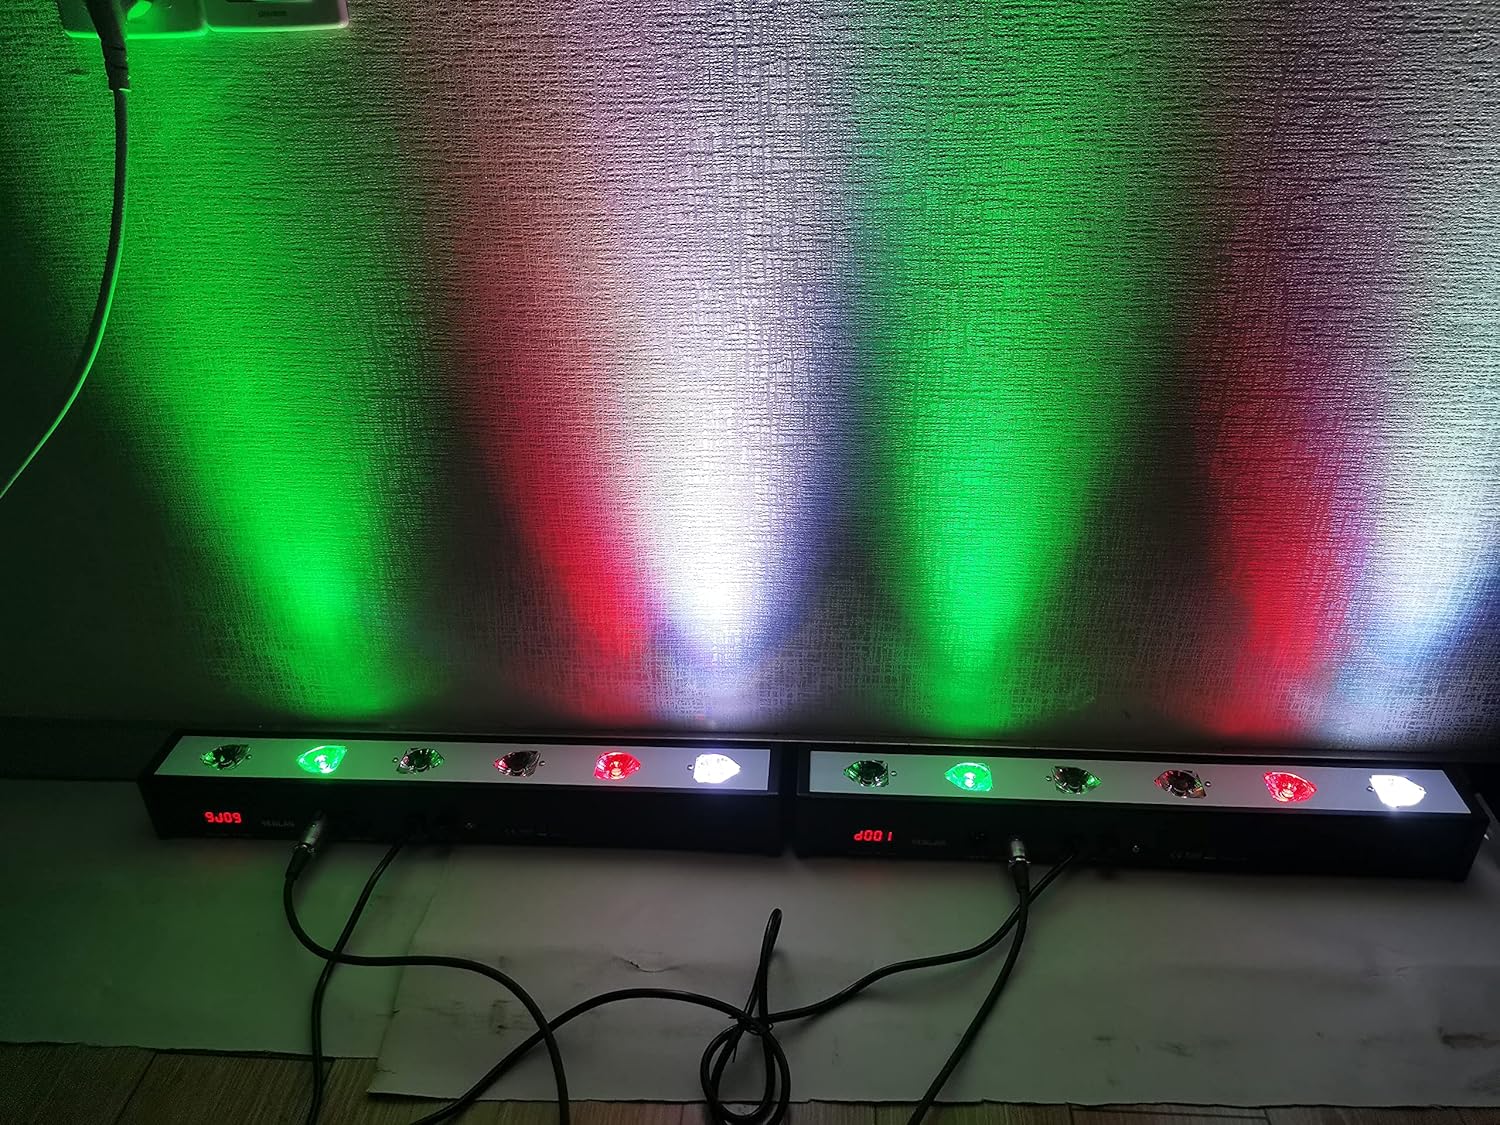
Figure 4.4: Two SENLAN LED Par Bars displaying a mix of green, red, and white light on a wall. This demonstrates the fixture's capability to produce various color combinations using its RGBW LEDs.

Figure 4.5: Two SENLAN LED Par Bars casting distinct green and red light beams onto a wall, showcasing the individual color output and beam separation.

Figure 4.6: Two SENLAN LED Par Bars creating a dynamic wall wash effect with a blend of multiple colors, illustrating the fixture's ability to produce a wide range of hues and gradients.
5. Setup
5.1 Mounting
The fixture can be mounted in various positions (e.g., on a truss, wall, or floor) using the integrated mounting brackets. Ensure that the mounting surface or structure can safely support the weight of the fixture. Use appropriate clamps or fasteners (not included) for secure installation. Always use a safety cable when suspending the unit.
5.2 Power Connection
Connect the provided power cable to the AC power input on the rear of the fixture. Plug the other end into a compatible power outlet (AC90V-240V/50-60Hz). Ensure the power source is stable and properly grounded.
5.3 DMX Connection (Optional)
For DMX control, connect a DMX controller to the DMX IN port of the first fixture using a 3-pin DMX cable. To link multiple fixtures, connect the DMX OUT of the first fixture to the DMX IN of the next, and so on. Terminate the last fixture in the chain with a DMX terminator if experiencing signal issues.
6. Operating Modes
The SENLAN RS-10 offers several operating modes, selectable via the digital LED display and control buttons on the rear panel.
6.1 DMX512 Control
This fixture supports 7 different DMX modes, allowing for precise control over each of the 8 RGBW LEDs individually. You can manually choose shades of each color (Red, Green, Blue, White) from 0-255, similar to using a DMX controller. Refer to the DMX channel chart (not provided in this general manual, typically found in a separate DMX protocol sheet) for specific channel assignments.
6.2 Automatic Operation
The fixture includes 24 different kinds of automatic run effects. These pre-programmed sequences allow for dynamic lighting displays without external control. You can select various patterns where one, two, three, or all four LEDs can run together in synchronized or alternating effects.
6.3 Sound Active Mode
In Sound Active mode, the fixture's lighting patterns and intensity respond to ambient sound. A built-in microphone detects audio signals, triggering dynamic light changes. This mode is ideal for parties or events where lighting needs to synchronize with music.
6.4 Master/Slave Mode
This mode allows multiple fixtures to operate in synchronization without a DMX controller. Designate one fixture as the 'Master' and others as 'Slaves'. The Master unit's selected mode (e.g., Automatic or Sound Active) will be replicated by all connected Slave units. Connect the DMX OUT of the Master to the DMX IN of the first Slave, and continue the chain.
6.5 Digital LED Display and Manual Mixology
The digital LED display on the rear panel allows you to navigate through menus and select operating modes and parameters. The onboard mixology feature enables manual adjustment of RGBW color values (0-255) directly on the unit, providing fine-tuned color customization even without a DMX controller.
7. Maintenance
7.1 Cleaning
Regular cleaning of the lenses and housing is recommended to maintain optimal light output and prevent overheating. Use a soft, lint-free cloth and a mild cleaning solution. Do not use abrasive cleaners or solvents.
7.2 Fuse Replacement
The fixture is equipped with a 3A fuse for protection. If the unit fails to power on, check and replace the fuse if necessary. To replace the fuse:
- Disconnect the power cable from the fixture.
- Locate the fuse holder near the AC power input on the rear panel.
- Twist or pull the fuse holder cap to remove it.
- Carefully remove the old fuse and insert a new 3A fuse.
- Securely replace the fuse holder cap.
Warning: Always use a fuse of the exact same type and rating (3A) to prevent damage to the fixture or fire hazard.
8. Troubleshooting
- No Power:
- Check if the power cable is securely connected to both the fixture and the power outlet.
- Verify the power outlet is functional.
- Inspect and replace the 3A fuse if blown (refer to Section 7.2).
- No Light Output:
- Ensure the fixture is receiving power.
- Check the selected operating mode. If in DMX mode, ensure the DMX signal is present and the DMX address is correctly set.
- If in manual mode, verify that color values are not set to zero.
- DMX Control Issues:
- Verify DMX cable connections and ensure they are 3-pin DMX cables, not standard microphone cables.
- Check the DMX address setting on each fixture. Each fixture should have a unique address if controlled individually.
- Ensure a DMX terminator is used on the last fixture in the chain.
- Test with a different DMX controller or cable.
- Sound Active Mode Not Responding:
- Ensure the ambient sound level is sufficient for the microphone to detect.
- Check if the sensitivity setting (if available) is adjusted correctly.
9. Specifications
| Feature | Specification |
|---|---|
| Light Source | 8pcs x 4W RGBW 4-in-1 LEDs |
| Beam Angle | 25 degrees (acrylic lens) |
| Housing Material | Full Aluminum |
| Cooling | Passive (no fan, silent operation) |
| Control Modes | DMX512 (7 modes), Automatic, Sound Active, Master/Slave |
| DMX Channels | Variable (depending on DMX mode) |
| Dimmer | 0-100% electronic dimmer |
| Color Temperature | Less than 6000K |
| Voltage | AC90V-240V / 50-60Hz |
| Wattage | 50W (Product Description), 32W (Specifications) |
| Fuse | 3A |
| Product Dimensions | 52 x 11 x 9 cm (from description) / 165"L x 45"W x 50"H (from specifications, likely incorrect unit) |
| Item Weight | 1.8 kg (from description) / 2.44 pounds (from specifications) |
| Model Number | RS-10 |
| Manufacturer | Casisy |
Note: Discrepancies in wattage and dimensions between product description and specifications have been noted. Please refer to the product packaging or manufacturer's official website for the most accurate information.
10. Warranty and Support
For warranty information and technical support, please refer to the documentation provided at the time of purchase or contact your retailer. Keep your proof of purchase for any warranty claims. For general inquiries or assistance, you may also visit the SENLAN brand's official support channels if available.