Olideauto Olide-120B
Olideauto Automatic Touchless Swing Door Opener User Manual
Model: Olide-120B
Brand: Olideauto
Product Overview
The Olideauto Olide-120B is an automatic touchless swing door opener system designed for convenient and hygienic access. It features activation via wired touchless hand sensor switches, allowing for hands-free operation. This system supports both automatic and manual modes, providing ease of use for all individuals, including those with mobility challenges. It is suitable for various environments such as offices, hospitals, elderly homes, and commercial locations.
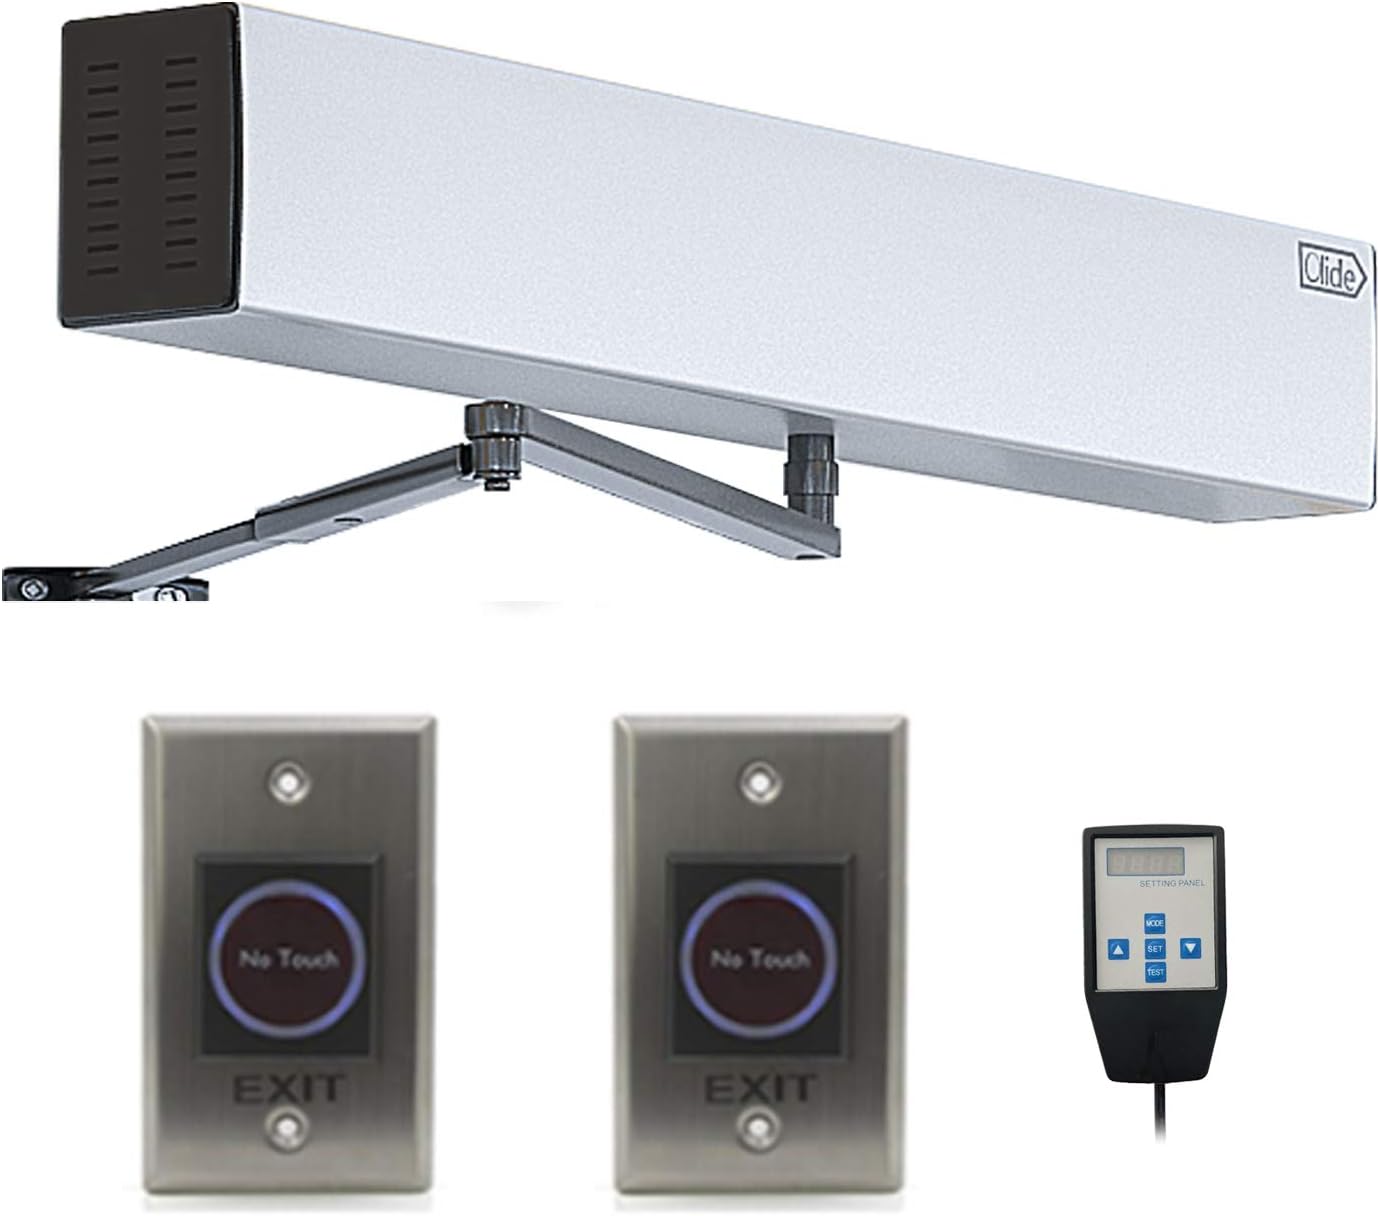
Image: The main components of the Olideauto automatic door opener system, including the primary opener unit, two "No Touch" hand sensor switches, and a handheld programmer.
Safety Information
Adhere to the following safety guidelines to ensure safe operation and prevent damage:
- Read all instructions carefully before installation and operation.
- Ensure power is disconnected before performing any installation or maintenance.
- This system is designed to automatically re-open the door if an object is detected in the closing path, enhancing safety.
- Installation should be performed by qualified personnel to ensure proper function and safety.
- Keep children and pets away from the door during operation.
- Do not attempt to modify the system components.

Image: An individual activating the touchless sensor to open a door, demonstrating the hands-free operation for safety and convenience.
Package Contents
Verify that all components are present in the package:
- Olide-120B Automatic Swing Door Opener Unit
- Push Arm (for inswinging and outswinging applications)
- 2 x Wired Touchless Hand Sensor Switches
- Handheld Programmer
- Power Cable
- Mounting Hardware (screws, anchors, etc.)
- User Manual (this document)

Image: A complete view of the Olideauto automatic door opener kit, showing the main unit, arms, two touchless sensors, handheld programmer, and cables.
Technical Specifications
| Feature | Specification |
|---|---|
| Model | Olide-120B |
| Voltage | 110-220 VAC +/-10% |
| Motor | DC 24V Brushless Motor |
| Power Consumption | 50W |
| Opening Time | 3-7 sec. @ 90 degrees |
| Hold Open Time | 1-30 sec. (Adjustable) |
| Max. Door Frame Depth | 200mm / 7.87" (with push arm) |
| Door Width | Max. 1200mm / 47.2", Min. 660mm / 26" |
| Max. Opening Angle | 120 degrees |
| Environment Temperature | -20°C to 50°C (-4°F to 122°F) |
| Operation Noise | Less than 55dB |
| Opener Size | 21.45''(L) x 3.35''(W) x 3.74''(H) |
| Item Weight | 19.96 pounds |
| Maximum Weight Capacity | 264 Pounds |
| Batteries (for sensors/remotes) | 2 x 12V batteries (included) |

Image: Technical diagram illustrating the dimensions of the Olideauto automatic door opener unit and its arm components.
Setup and Installation
For detailed installation instructions, please refer to the official Installation Manual PDF provided by Olideauto. A general overview of the installation process is provided below. Professional installation is recommended.
Important: Ensure power is OFF before beginning installation.
- Mount the Opener Unit: Securely mount the main door opener unit above the door frame. Ensure it is level and aligned with the door's swing path.
- Install the Arm Assembly: Attach the appropriate arm (inswing or outswing) to the opener unit and the door. Adjust the arm length and angle to ensure smooth door operation.
- Connect Sensor Switches: Wire the touchless hand sensor switches to the main opener unit according to the wiring diagram in the detailed manual. Position the sensors at a convenient height and location for activation.
- Power Connection: Connect the main power cable to the opener unit.
- Initial Configuration: Use the handheld programmer to set initial parameters such as opening speed, closing speed, and hold-open time.
- Test Operation: Carefully test the door's automatic and manual operation. Ensure safety features, such as obstacle detection, are functioning correctly.

Image: An illustration of the Olide-120B smart swing door opener installed in a commercial environment, highlighting the touchless sensor switch for activation.

Image: A visual comparison demonstrating the two primary installation configurations: outswing pull open and inswing push open, showing how the door opener adapts to different door types.
For the complete installation guide, please download the PDF manual: Installation Manual (PDF)
Operating Instructions
Automatic Mode
In automatic mode, the door will open automatically when the touchless hand sensor is activated.
- Approach the touchless hand sensor switch.
- Wave your hand within the detection range of the sensor (typically a few inches).
- The door will automatically open to the set opening angle.
- After the set hold-open time, the door will automatically close.
- The system will detect obstacles in the closing path and re-open the door for safety.

Image: A close-up view of the "No Touch" hand sensor switch being activated by a hand, illustrating the touchless operation.
Manual Mode
In manual mode, the door can be opened with minimal physical effort. This mode is particularly useful for individuals who prefer to push or pull the door themselves, or in cases of power outage.
- Gently push or pull the door.
- The door opener will assist in the movement, requiring very little pressure.
- The door will close slowly and safely.
Adjusting Settings with Handheld Programmer
The handheld programmer allows for fine-tuning of various operational parameters.
- Opening/Closing Speed: Adjust how quickly the door opens and closes.
- Hold Open Time: Set the duration the door remains open after activation.
- Push Force: Adjust the force required to manually open the door.
- Refer to the programmer's specific manual for detailed instructions on navigating its menu and adjusting settings.

Image: The reverse side of the hand sensor switch, displaying its internal wiring and components, which connect to the main door opener unit.
Maintenance
Regular maintenance ensures optimal performance and longevity of your Olideauto door opener.
- Cleaning: Periodically wipe down the door opener unit and sensor switches with a soft, damp cloth. Avoid abrasive cleaners or solvents.
- Inspection: Annually inspect all mounting hardware, arm connections, and wiring for any signs of wear, looseness, or damage. Tighten any loose screws.
- Sensor Check: Ensure the touchless sensors are clean and unobstructed. Test their responsiveness regularly.
- Battery Replacement: If your remote controls or wireless sensors use batteries, replace them as needed (2 x 12V batteries for included components).
- Professional Service: For any complex issues or internal component checks, contact a qualified technician.
Troubleshooting
| Problem | Possible Cause | Solution |
|---|---|---|
| Door does not open automatically. | No power; Sensor obstructed or faulty; Incorrect settings. | Check power supply; Clean sensor; Verify sensor wiring; Adjust settings with programmer. |
| Door opens or closes too slowly/quickly. | Speed settings incorrect. | Adjust opening/closing speed using the handheld programmer. |
| Door does not close completely. | Obstruction; Incorrect closing force/angle setting. | Remove obstruction; Adjust closing force or angle with programmer. |
| Door re-opens unexpectedly. | Obstacle detected; Sensor malfunction. | Check for obstructions; Clean sensor; If issue persists, contact support. |
| Excessive noise during operation. | Loose components; Lack of lubrication; Internal issue. | Check and tighten all mounting points and arm connections; Contact technical support if noise persists. |
Warranty and Support
Olideauto provides a 60-month (5-year) warranty on products, reflecting their commitment to quality and durability.
For technical assistance, troubleshooting, or warranty claims, please contact Olideauto customer support. USA technical phone support is available.
Visit the official Olideauto store for more information and contact details: Olideauto Store

Image: Olideauto's commitment to quality, highlighting 1 million non-stop operating tests, 30 years of innovation, 60 months warranty, and global presence in 108 countries.
Ask a question about this manual
Ask about setup, troubleshooting, compatibility, parts, safety, or missing instructions. Manuals+ will review the question and use this page’s manual context to help answer it.