1. Introduction
This manual provides essential information for the safe and effective use of the BURNDY BD18 Flexible Braid Jumper. Please read this manual thoroughly before installation and operation to ensure proper handling, maximize product lifespan, and prevent potential hazards.
2. Product Description
The BURNDY BD18 is a flexible braid jumper designed for electrical connections requiring flexibility and high current carrying capacity. It features a durable copper construction with tin plating for enhanced conductivity and corrosion resistance. Its design allows for movement and vibration absorption in various industrial and electrical applications.
Key Features:
- Flexible Design: Accommodates movement and vibration.
- High Current Rating: Rated for 190/225 Amperes.
- Durable Material: Constructed from copper with tin plating.
- Standard Ferrule: Features 0.44 inch ferrule holes for secure connections.
Product Images:
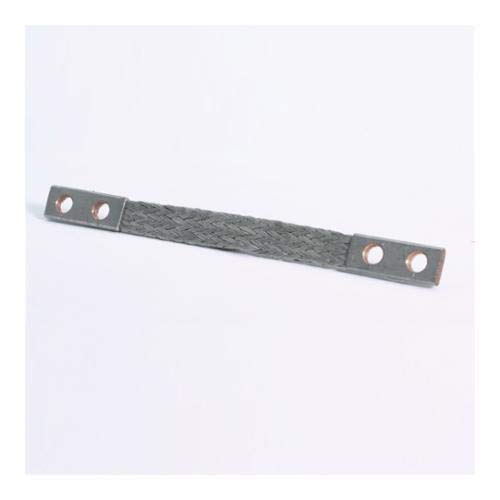
Figure 2.1: Top view of the BURNDY BD18 Flexible Braid Jumper, showing the braided copper conductor and the two tin-plated copper ferrules with pre-drilled holes at each end.
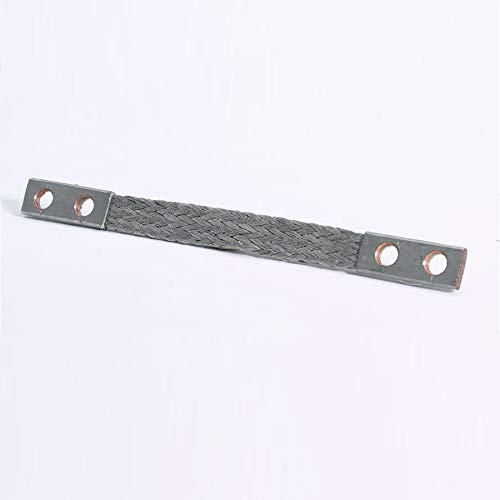
Figure 2.2: Angled view of the BURNDY BD18 Flexible Braid Jumper, highlighting the texture of the braided copper and the robust construction of the ferrule ends.
3. Safety Information
Always adhere to local electrical codes and safety regulations when installing or working with electrical components. Failure to do so may result in serious injury or property damage.
- Disconnect Power: Always ensure power is disconnected and locked out before beginning any installation or maintenance work.
- Use Proper Tools: Utilize insulated tools and appropriate personal protective equipment (PPE), including safety glasses and gloves.
- Qualified Personnel: Installation and maintenance should only be performed by qualified and experienced personnel.
- Inspect Components: Before installation, inspect the jumper for any signs of damage, corrosion, or manufacturing defects. Do not use damaged components.
- Proper Torque: Ensure all connections are torqued to the manufacturer's specifications to prevent loose connections and overheating.
4. Setup and Installation
The BD18 Flexible Braid Jumper is designed for straightforward installation in appropriate electrical systems. Follow these general steps for proper setup:
- Preparation: Ensure the mounting surfaces are clean, dry, and free of burrs or sharp edges.
- Positioning: Align the ferrule holes of the braid jumper with the corresponding mounting points on the electrical components.
- Secure Connection: Insert appropriate fasteners (e.g., bolts, screws) through the ferrule holes and secure them.
- Torque: Tighten fasteners to the recommended torque specifications for the specific application to ensure a secure and low-resistance electrical connection. Avoid over-tightening, which can damage the ferrule or mounting surface.
- Verify: After installation, visually inspect the connection to ensure proper alignment and tightness.
5. Operating Instructions
The BURNDY BD18 Flexible Braid Jumper is a passive electrical component. Once properly installed, its operation is inherent to the electrical system it is integrated into. It functions by providing a flexible, low-resistance path for electrical current, accommodating movement and vibration within the system without compromising electrical continuity.
No specific user interaction is required for its operation beyond ensuring it is correctly installed and maintained within the system's operational parameters.
6. Maintenance
Regular inspection and maintenance are crucial for the longevity and safe operation of the flexible braid jumper.
- Visual Inspection: Periodically inspect the jumper for signs of wear, fraying, corrosion, discoloration (indicating overheating), or physical damage.
- Connection Integrity: Check the tightness of the connections. Loose connections can lead to increased resistance and heat buildup.
- Cleaning: If necessary, gently clean the surface of the jumper and connections using a non-abrasive cleaner suitable for electrical components. Ensure the system is de-energized before cleaning.
- Replacement: Replace the jumper immediately if any damage, significant corrosion, or signs of overheating are observed. Do not attempt to repair damaged jumpers.
7. Troubleshooting
While the BD18 is a robust component, issues can arise from improper installation or external factors. Here are some common issues and their potential solutions:
| Problem | Possible Cause | Solution |
|---|---|---|
| Overheating at connection points | Loose connection; insufficient contact area; excessive current. | Ensure connections are properly torqued. Verify current load is within jumper's rating. Clean contact surfaces. |
| Visible corrosion on jumper or ferrules | Exposure to harsh environment; moisture. | Clean affected areas if minor. Replace jumper if corrosion is significant or structural. Improve environmental protection. |
| Fraying or breakage of braid strands | Excessive flexing; abrasion; fatigue. | Replace the jumper. Re-evaluate the application for excessive movement or abrasion points. |
| Difficulty in fitting or aligning | Incorrect jumper length/dimensions; misaligned mounting points. | Verify the correct BD18 model for your application. Check alignment of mounting points. |
8. Specifications
Detailed technical specifications for the BURNDY BD18 Flexible Braid Jumper:
| Attribute | Value |
|---|---|
| Brand | Burndy |
| Model Series | Type B |
| Current Rating | 190/225 A |
| Ferrule Length | 2-1/2 in |
| Ferrule Hole Diameter | 0.44 in |
| Ferrule Hole Spacing | 1-1/4 in |
| Overall Length | 18 in |
| Width | 0.94 in |
| Thickness | 0.13 in |
| Hole Center to End | 0.62 in |
| Stud Size | 7/16 in |
| Material | Copper |
| Plating | Tin Plated |
| ASIN | B07RDMJDL6 |
| Manufacturer | Hubbell |
| Date First Available | September 17, 2018 |
9. Warranty and Support
For information regarding product warranty, technical support, or service, please contact Burndy customer service or visit their official website. Keep your purchase receipt for warranty claims.
Manufacturer: Hubbell