Important Safety Information
Please read and understand all safety warnings before setting up or using the canopy tent. Failure to follow these instructions may result in injury or damage to the product.
- Ensure the shelter is securely anchored to withstand wind.
- Avoid prolonged UV exposure to maximize fabric lifespan.
- This product's fabric is flammable and should be kept away from open flames or heat sources.
- Do not use the canopy in extreme weather conditions, including heavy winds, storms, or snow.
Product Overview
Components List
- 1 x Instant Folding Frame
- 1 x Roof Cover
- 4 x Sidewalls (2 door panels, 2 window panels)
- 1 x Set of Stakes and Ropes
- 1 x Wheeled Carry Bag
Product Features
- One-Person Easy Setup: Features a central lock structure and an integrated folding frame, allowing for quick setup and takedown.
- Roll-Up Ventilated Windows: Unique mesh window design on sidewalls provides fresh air, outdoor views, and mosquito protection.
- Waterproof & Sun Protection: Crafted from durable 420D Oxford fabric with an advanced UV coating, offering 99% UV blockage (UPF 50+) and waterproof performance.
- Multi-Functional Sidewalls: Four detachable and interchangeable sidewalls (two door panels, two window panels) can be freely combined for weather protection or removed for ventilation.
- Easy Transport & Portability: The entire canopy and sidewalls fold down compactly and store in a wheeled carry bag for effortless transport and storage.
Setup Instructions
1. Unpacking
Carefully remove the canopy frame and all components from the wheeled carry bag. Lay the folded frame flat on the ground in your desired setup location.

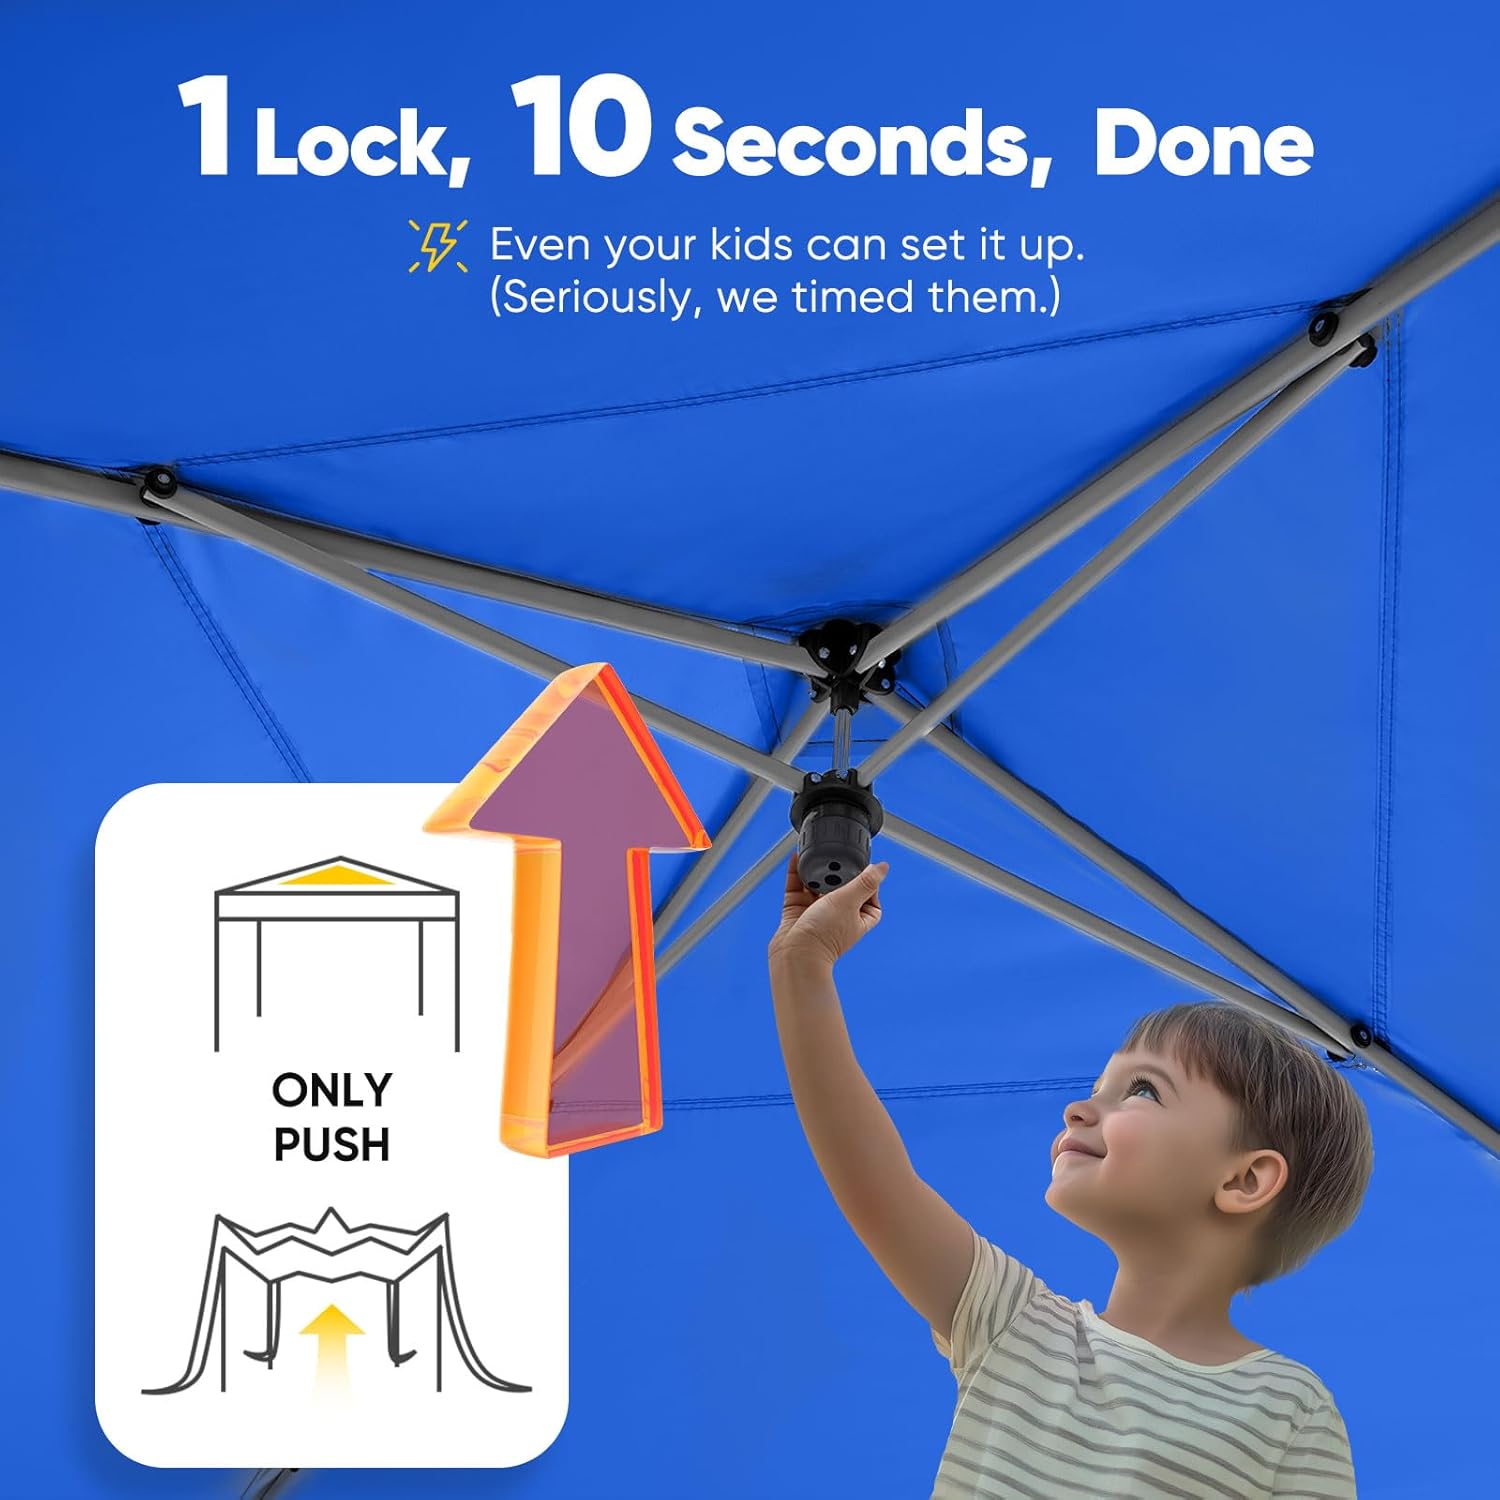
2. Frame Expansion
With a partner, gently pull the outer legs of the frame outwards until it is partially expanded. Step under the canopy and push up on the central lock mechanism until it clicks securely into place, fully expanding the frame.
3. Attaching the Canopy Top
Drape the roof cover over the expanded frame. Secure the corners and edges of the canopy top to the frame using the attached hook and loop fasteners. Ensure the fabric is taut to prevent water pooling.
4. Attaching Sidewalls
Attach the four sidewalls to the canopy frame using the integrated hook and loop fasteners. The sidewalls are interchangeable, allowing for flexible configuration with two door panels and two window panels. Zip them together for full enclosure or leave them open for access.

5. Securing the Canopy
Extend the legs to the desired height, ensuring each leg locks securely into place. Use the provided stakes and ropes to anchor the canopy firmly to the ground, especially in windy conditions. For additional stability, sandbags can be attached to the legs.

Video demonstrating the easy setup process of the Quictent pop-up canopy with sidewalls.
Video showcasing the waterproof features and sidewall attachment of the Quictent 10x10 pop-up canopy tent.
Operating Instructions
Adjusting Height
The canopy legs feature adjustable height settings. To adjust, press the release button on each leg and slide the inner leg to the desired height. Ensure the leg locks securely into one of the pre-drilled holes before use.
Using Roll-Up Windows
The sidewalls include roll-up mesh windows for ventilation and visibility. To open, unzip the window panel and roll it upwards, securing it with the attached toggles. To close, unfasten the toggles and zip the panel down completely.

Maintenance
Cleaning
Clean the canopy fabric and sidewalls with mild soap and water. Avoid using harsh chemicals, bleach, or abrasive cleaners, as these can damage the fabric and UV coating. Rinse thoroughly and allow all components to air dry completely before storage to prevent mildew and odors.
Storage
Before storing, ensure the canopy fabric, frame, and all accessories are clean and completely dry. Fold the canopy neatly and place all components back into the wheeled carry bag. Store the bag in a cool, dry place away from direct sunlight and extreme temperatures to prolong the product's lifespan.
Troubleshooting
Common Issues
- Difficulty expanding/collapsing frame: Ensure all locking mechanisms are disengaged before attempting to expand or collapse the frame. Apply even pressure when expanding or collapsing. If the frame is stiff, check for any obstructions or bent parts.
- Water pooling on canopy top: Verify that the canopy top is taut and properly secured to the frame at all attachment points. Adjust leg heights if necessary to create proper tension and ensure adequate drainage.
- Instability in windy conditions: Always use the provided stakes and ropes to anchor the canopy firmly to the ground. For added stability, especially on hard surfaces, utilize sandbags or other heavy objects on each leg. Never leave the canopy unattended in strong winds.
Informative video detailing five methods to reinforce and prevent collapse of a canopy tent.
Specifications
| Brand | Quictent |
| Material | Alloy Steel (Frame), 420D Oxford fabric (Canopy) |
| Color | Royal Blue |
| Item Weight | 42.7 Pounds |
| Item Dimensions (L x W x H) | 118"L x 118"W x 104"H (10x10ft) |
| Floor Area | 100 Square Feet |
| Ultraviolet Light Protection | 99.99% (UPF 50+) |
| Water Resistance Level | Waterproof |
| Frame Type | Pop-up |
| Closure Type | Hook & Loop, Zipper |
| Included Components | 1 Set of Stakes and Ropes, 1x Carry Bag, 1x Instant folding frame, 1x Roof Cover, 4x Sidewalls |
| Model Number | ML-KK-GM1203RB-S-GC-R1 |
Warranty and Support
Warranty Information
The Quictent Privacy 10x10 Pop-Up Canopy Tent comes with the following warranty:
- Lifetime Free Replacement for Ropes and Stakes.
- 6 Months Free Warranty for Roof, Sidewalls, Frame, and Poles.
- Lifetime Free Replacement for a few Natural-loss Parts.
- Lifetime 50% OFF Parts Supply exceeding the normal 6 months warranty period.
Please retain your proof of purchase for warranty claims.
Customer Support
For further assistance, parts replacement, or warranty claims, please contact Quictent customer support through the retailer where the product was purchased or visit the official Quictent website for contact information.