1. Introduction
Thank you for purchasing the X-BULL USAM-HPW002 Electric Pressure Washer. This manual provides essential information for the safe operation, assembly, maintenance, and troubleshooting of your pressure washer. Please read this manual thoroughly before first use and retain it for future reference.
1.1 Safety Information
WARNING: When using this product, basic precautions should always be followed to reduce the risk of injury, electric shock, and fire.
- Always wear appropriate personal protective equipment, including safety glasses, hearing protection, and protective clothing.
- Never point the spray gun at people, pets, or electrical devices.
- Ensure the power cord and plug are in good condition. Do not use if damaged.
- Connect the pressure washer only to a grounded outlet.
- Do not operate the pressure washer in the rain or near standing water.
- Keep children and bystanders away from the operating area.
- Always disconnect the power supply before performing any maintenance or cleaning.
1.2 Package Contents
Verify that all items listed below are included in your package. If any parts are missing or damaged, please contact customer support.
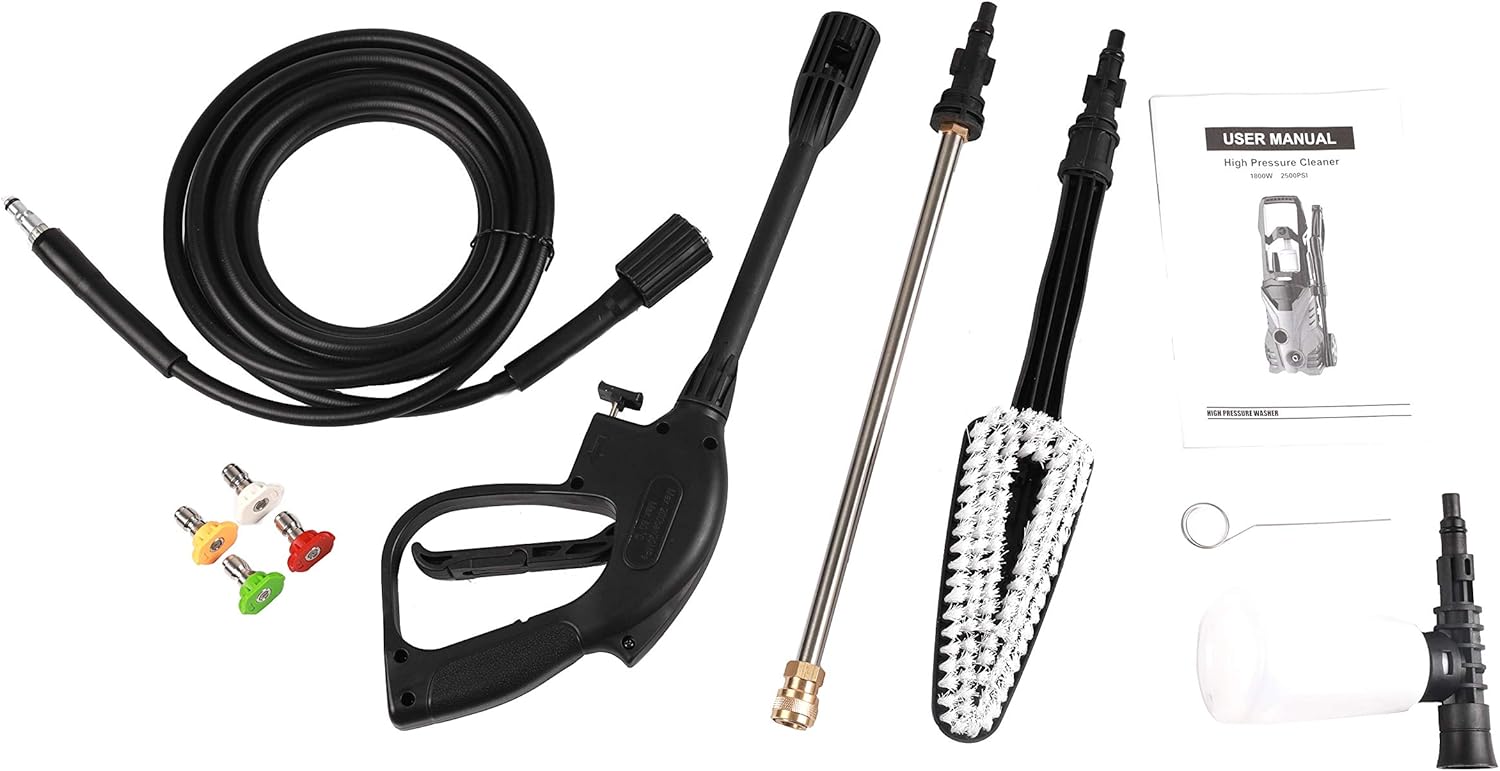
Figure 1.1: All included accessories and parts for the X-BULL USAM-HPW002 Electric Pressure Washer.
- X-BULL USAM-HPW002 Pressure Washer Unit
- High-Pressure Hose
- Spray Gun with Wand
- Adjustable Spray Nozzle
- Soap Dispenser Bottle
- Quick-Connect Nozzles (various degrees)
- Water Inlet Connector
- Nozzle Cleaning Pin
- User Manual
2. Setup and Assembly
Follow these steps to assemble and prepare your pressure washer for use.
2.1 Attaching the Handle and Wheels
The main body of the pressure washer is largely pre-assembled. Attach the handle and wheels if they are not already secured, following the diagrams in the included printed manual for specific fastener locations.
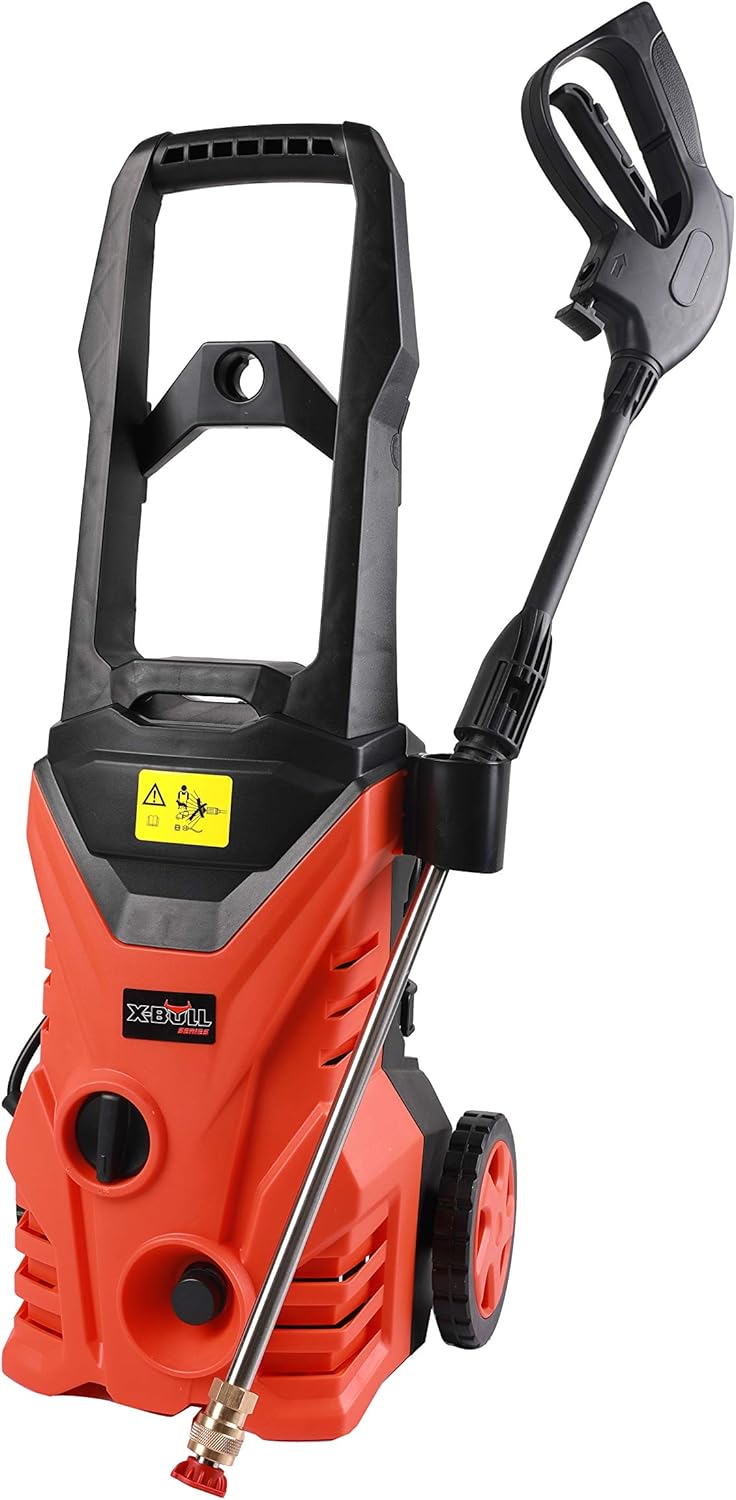
Figure 2.1: Front view of the X-BULL USAM-HPW002 Electric Pressure Washer.
2.2 Connecting the High-Pressure Hose
- Connect one end of the high-pressure hose to the high-pressure outlet on the front of the pressure washer unit. Tighten securely by hand.
- Connect the other end of the high-pressure hose to the inlet on the spray gun. Tighten securely by hand.
2.3 Assembling the Spray Gun and Wand

Figure 2.2: The spray gun and wand assembly.
- Attach the spray wand to the spray gun by twisting until it locks into place.
- Select the desired quick-connect nozzle (see Section 3.2 for nozzle selection) and insert it into the end of the spray wand until it clicks securely. Pull on the nozzle to ensure it is firmly seated.
2.4 Connecting the Water Supply
IMPORTANT: Do not run the pressure washer without a water supply connected and turned on, as this can damage the pump.
- Connect a standard garden hose (not included) to the water inlet connector on the pressure washer unit. Ensure the connection is tight to prevent leaks.
- Connect the other end of the garden hose to a water faucet.
- Turn on the water faucet completely.
- Squeeze the trigger on the spray gun to release air from the system until a steady stream of water flows out. This primes the pump.
2.5 Connecting to Power
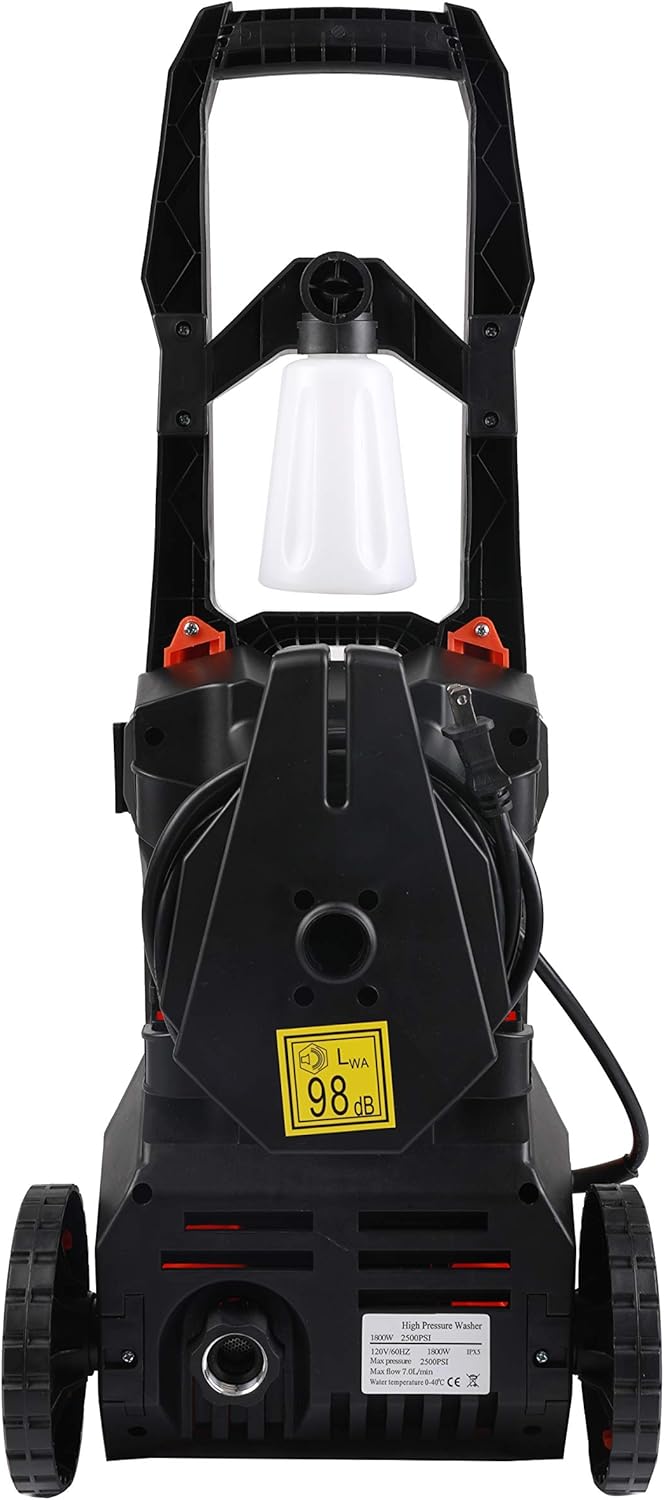
Figure 2.3: Rear view of the pressure washer showing the power cord and label.
Plug the pressure washer's power cord into a grounded electrical outlet. Ensure the outlet meets the voltage and amperage requirements specified on the product label.
3. Operating Instructions
Once assembled and connected, follow these steps for safe and effective operation.
3.1 Starting and Stopping the Unit
- To Start: Ensure the water supply is fully open and the pump is primed (water flowing from the gun). Turn the ON/OFF switch on the pressure washer to the 'ON' position. The motor will start when the trigger is squeezed.
- To Stop: Release the trigger on the spray gun. The motor will automatically shut off due to the Total Stop System (TSS). For complete shutdown, turn the ON/OFF switch to the 'OFF' position and disconnect from the power supply.
3.2 Using Spray Nozzles
The X-BULL pressure washer comes with various quick-connect nozzles for different cleaning tasks. Always test the spray pattern on an inconspicuous area before cleaning the main surface.

Figure 3.1: Quick-connect spray nozzles with different spray angles.
- Red (0-degree): Concentrated, high-impact stream for tough spots. Use with extreme caution.
- Yellow (15-degree): Narrow, powerful spray for intense cleaning of small areas.
- Green (25-degree): Medium-width spray for general cleaning tasks.
- White (40-degree): Wide, gentle spray for delicate surfaces.
- Black (Soap/Low Pressure): For applying detergent at low pressure.
To Change Nozzles: Ensure the pressure washer is off and the trigger is released to relieve pressure. Pull back the collar on the spray wand, remove the current nozzle, and insert the desired nozzle until it clicks into place.
3.3 Using the Soap Dispenser
- Fill the soap dispenser bottle with an appropriate pressure washer detergent.
- Attach the soap dispenser bottle to the designated inlet on the pressure washer or directly to the spray gun, depending on your model's design.
- Select the black (soap) nozzle.
- Turn on the pressure washer and squeeze the trigger to apply detergent.
- After applying detergent, switch to a high-pressure nozzle (e.g., green or yellow) to rinse the surface thoroughly.
3.4 Cleaning Techniques
- Always start with a wider spray pattern (e.g., 40-degree) and move closer or switch to a narrower pattern if more cleaning power is needed.
- Keep the spray gun moving to avoid damaging surfaces.
- Work from top to bottom when cleaning vertical surfaces to allow detergent to work effectively.
- Maintain a safe distance from the surface being cleaned, typically 6-12 inches, adjusting as needed.
4. Maintenance
Regular maintenance ensures optimal performance and extends the life of your pressure washer.
4.1 Cleaning the Nozzles
If a nozzle becomes clogged, use the included nozzle cleaning pin to clear any debris from the nozzle opening. Always ensure the pressure washer is off and disconnected from power before cleaning nozzles.
4.2 Water Inlet Filter
Periodically check and clean the water inlet filter to prevent debris from entering the pump. Remove the filter, rinse it with water, and reinsert it.
4.3 Storage
- Disconnect the water supply and power cord.
- Squeeze the trigger to release any remaining pressure in the system.
- Drain all water from the pump, hose, and spray gun to prevent freezing damage.
- Store the pressure washer in a dry, frost-free area.
- Coil the high-pressure hose and power cord neatly.
4.4 Winterization (for cold climates)
If storing the pressure washer in an area where temperatures may drop below freezing, it is crucial to winterize the unit to prevent damage.
- Disconnect all water connections.
- Pour pressure washer pump protector (available at hardware stores) into the water inlet.
- Briefly turn on the pressure washer (1-2 seconds) until the protector solution exits the high-pressure outlet.
- Store as described in Section 4.3.
5. Troubleshooting
This section addresses common issues you might encounter with your pressure washer.
| Problem | Possible Cause | Solution |
|---|---|---|
| Motor does not start | No power supply Thermal overload activated ON/OFF switch off | Check power connection and outlet Allow unit to cool down Turn ON/OFF switch to 'ON' |
| Low or no pressure | Insufficient water supply Clogged nozzle Air in pump Leaking connections | Ensure water faucet is fully open Clean nozzle with pin Prime pump by squeezing trigger until steady water flow Tighten all connections |
| Water leaks from connections | Loose connections Damaged O-rings | Tighten all hose and gun connections Inspect and replace O-rings if damaged |
| Motor runs intermittently | Air in pump Water supply restriction Bypass valve issue | Prime pump thoroughly Check garden hose for kinks or blockages Contact customer support |
6. Specifications
Technical specifications for the X-BULL USAM-HPW002 Electric Pressure Washer.
- Model: USAM-HPW002
- Brand: X-BULL
- Power Source: Corded Electric
- Motor: 1800-Watt
- Maximum Pressure: 2500 PSI (Pound per Square Inch)
- Flow Rate: 1.8 GPM (Gallons Per Minute)
- Weight: Approximately 24.25 lb (11 kg)
- Color: Orange
7. Warranty and Support
For warranty information, technical support, or to order replacement parts, please refer to the warranty card included with your product or contact X-BULL customer service directly. Keep your purchase receipt as proof of purchase.
Customer Support: Please visit the official X-BULL website or refer to the contact information provided in your product packaging for assistance.