1. Product Overview
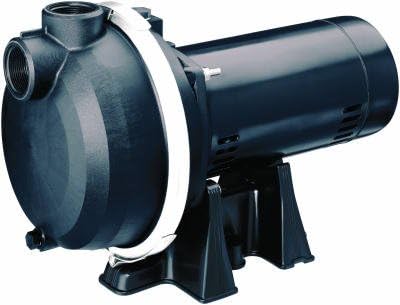
The MP 123341 Sprinkler Pump is a 1.5-HP motor pump designed for sprinkler systems, capable of operating at 115V or 230V and delivering up to 67 gallons per minute (GPM). This corrosion-resistant, self-priming pump is engineered for depths to water of 20 feet or less, featuring 1 1/2-inch suction and discharge ports. It is constructed with a fiberglass-reinforced thermoplastic pump housing for durability.
2. Safety Information
Read and understand all instructions before installing, operating, or performing maintenance on this pump. Failure to follow these instructions may result in serious injury or property damage.
2.1 Electrical Safety
- Ensure the power supply matches the pump's voltage requirements (115V or 230V).
- Always disconnect power before servicing the pump.
- All electrical wiring must comply with local codes and be performed by a qualified electrician.
- The pump must be properly grounded to prevent electrical shock.
2.2 General Safety
- Do not operate the pump dry; ensure the pump housing is filled with water before starting.
- Keep hands and clothing clear of moving parts.
- Protect the pump from freezing temperatures.
- Wear appropriate personal protective equipment (PPE) during installation and maintenance.
3. Setup and Installation
3.1 Unpacking and Inspection
Carefully remove the pump from its packaging. Inspect for any signs of shipping damage. If damage is found, contact your supplier immediately.
3.2 Location Selection
Install the pump on a firm, level surface. The location should be protected from direct weather exposure, well-ventilated, and easily accessible for maintenance. Ensure the pump is as close to the water source as possible to minimize suction lift.
3.3 Electrical Connection
The pump is factory-wired for 230V operation. For 115V conversion, refer to the detailed wiring diagram provided in the complete manual. All electrical connections must be made by a qualified electrician in accordance with national and local electrical codes. Ensure proper grounding.
3.4 Plumbing Connection
- Connect 1 1/2-inch piping to both the suction (inlet) and discharge (outlet) ports.
- A check valve or foot valve is required on the suction line to maintain prime; this is not included with the pump.
- Use thread sealant on all pipe connections to prevent leaks.
- Support all piping independently to avoid placing stress on the pump housing.
4. Operating Instructions
4.1 Priming the Pump
This pump is self-priming after the pump housing is initially filled. Before the first start-up, remove the priming plug (if present) or fill the pump casing through the discharge port until water overflows. Replace the plug or ensure the discharge line is full. The foot valve or check valve will help retain the prime.
4.2 Starting the Pump
Once primed and all connections are secure, restore power to the pump. The pump should start and begin moving water. Monitor for unusual noises or vibrations.
4.3 Shutting Down
To shut down the pump, simply disconnect the power supply. For extended periods of non-use, especially in freezing conditions, follow the winterization procedures outlined in the maintenance section.
5. Maintenance
Regular maintenance ensures optimal performance and extends the life of your pump.
5.1 Routine Checks
- Periodically inspect all plumbing connections for leaks.
- Check the electrical connections for corrosion or loose wiring.
- Listen for unusual noises during operation, which may indicate a problem.
5.2 Winterization
In areas subject to freezing temperatures, the pump must be drained to prevent damage. Disconnect power, open drain plugs, and disconnect plumbing lines to allow all water to escape. Store the pump in a warm, dry place if possible, or ensure it is completely dry before reassembly.
6. Troubleshooting
This section provides solutions to common operational issues. For problems not listed here, contact customer support.
| Problem | Possible Cause | Solution |
|---|---|---|
| Pump does not start | No power; tripped circuit breaker; faulty motor | Check power supply; reset breaker; consult electrician |
| Pump runs but no water flow | Pump not primed; air leak in suction line; clogged suction line/foot valve | Re-prime pump; check all suction connections for leaks; clear obstructions |
| Low water pressure | Partial prime; clogged impeller; undersized piping | Ensure full prime; inspect/clean impeller; verify pipe sizing |
| Excessive noise/vibration | Cavitation (air in pump); loose mounting; worn bearings | Check for air leaks in suction; tighten mounting bolts; contact service for bearing issues |
7. Specifications
- Model: 123341
- Motor: 1.5-HP
- Voltage: 115V/230V (factory-wired for 230V)
- Maximum Pumping Capacity: Up to 67 GPM
- Suction Depth: Up to 20 feet
- Suction Port: 1 1/2 inches
- Discharge Port: 1 1/2 inches
- Pump Housing Material: Fiberglass Reinforced Thermoplastic
- Item Weight: Approximately 35 pounds
- Product Dimensions: Approximately 13 x 23 x 15.5 inches
- Manufacturer: PENTAIR WATER
8. Warranty Information
This MP 123341 Sprinkler Pump comes with a 1 Year Warranty from the date of purchase. This warranty covers defects in materials and workmanship under normal use. It does not cover damage resulting from improper installation, misuse, abuse, neglect, accident, or unauthorized repairs. For warranty claims, please retain your proof of purchase and contact the manufacturer or authorized service center.
9. Customer Support
For technical assistance, replacement parts, or further information regarding your MP 123341 Sprinkler Pump, please contact the manufacturer's customer support. Have your model number and purchase date available when contacting support.