AODELAN ML-L7A
AODELAN Wireless Remote Control Camera Shutter Release ML-L7A
User Instruction Manual
Product Overview
The AODELAN ML-L7A is a wireless remote control designed for select Nikon cameras, offering convenient control over various camera functions from a distance. This compact and lightweight device enhances your photography experience by minimizing camera shake and providing flexibility in shooting.
It serves as a direct replacement for the Nikon ML-L7 remote, providing similar functionality and compatibility.

Figure 1: AODELAN ML-L7A Wireless Remote Control
Compatibility
This wireless shutter release is compatible with the following Nikon camera models:
- Nikon COOLPIX B600
- Nikon COOLPIX P1000
- Nikon COOLPIX A1000
- Nikon COOLPIX P950
- Nikon Z50
- Nikon Z30
- Nikon Z fc
- Nikon Z6 II (Requires camera system software update to version 1.40 or later)
- Nikon Z7 II (Requires camera system software update to version 1.40 or later)
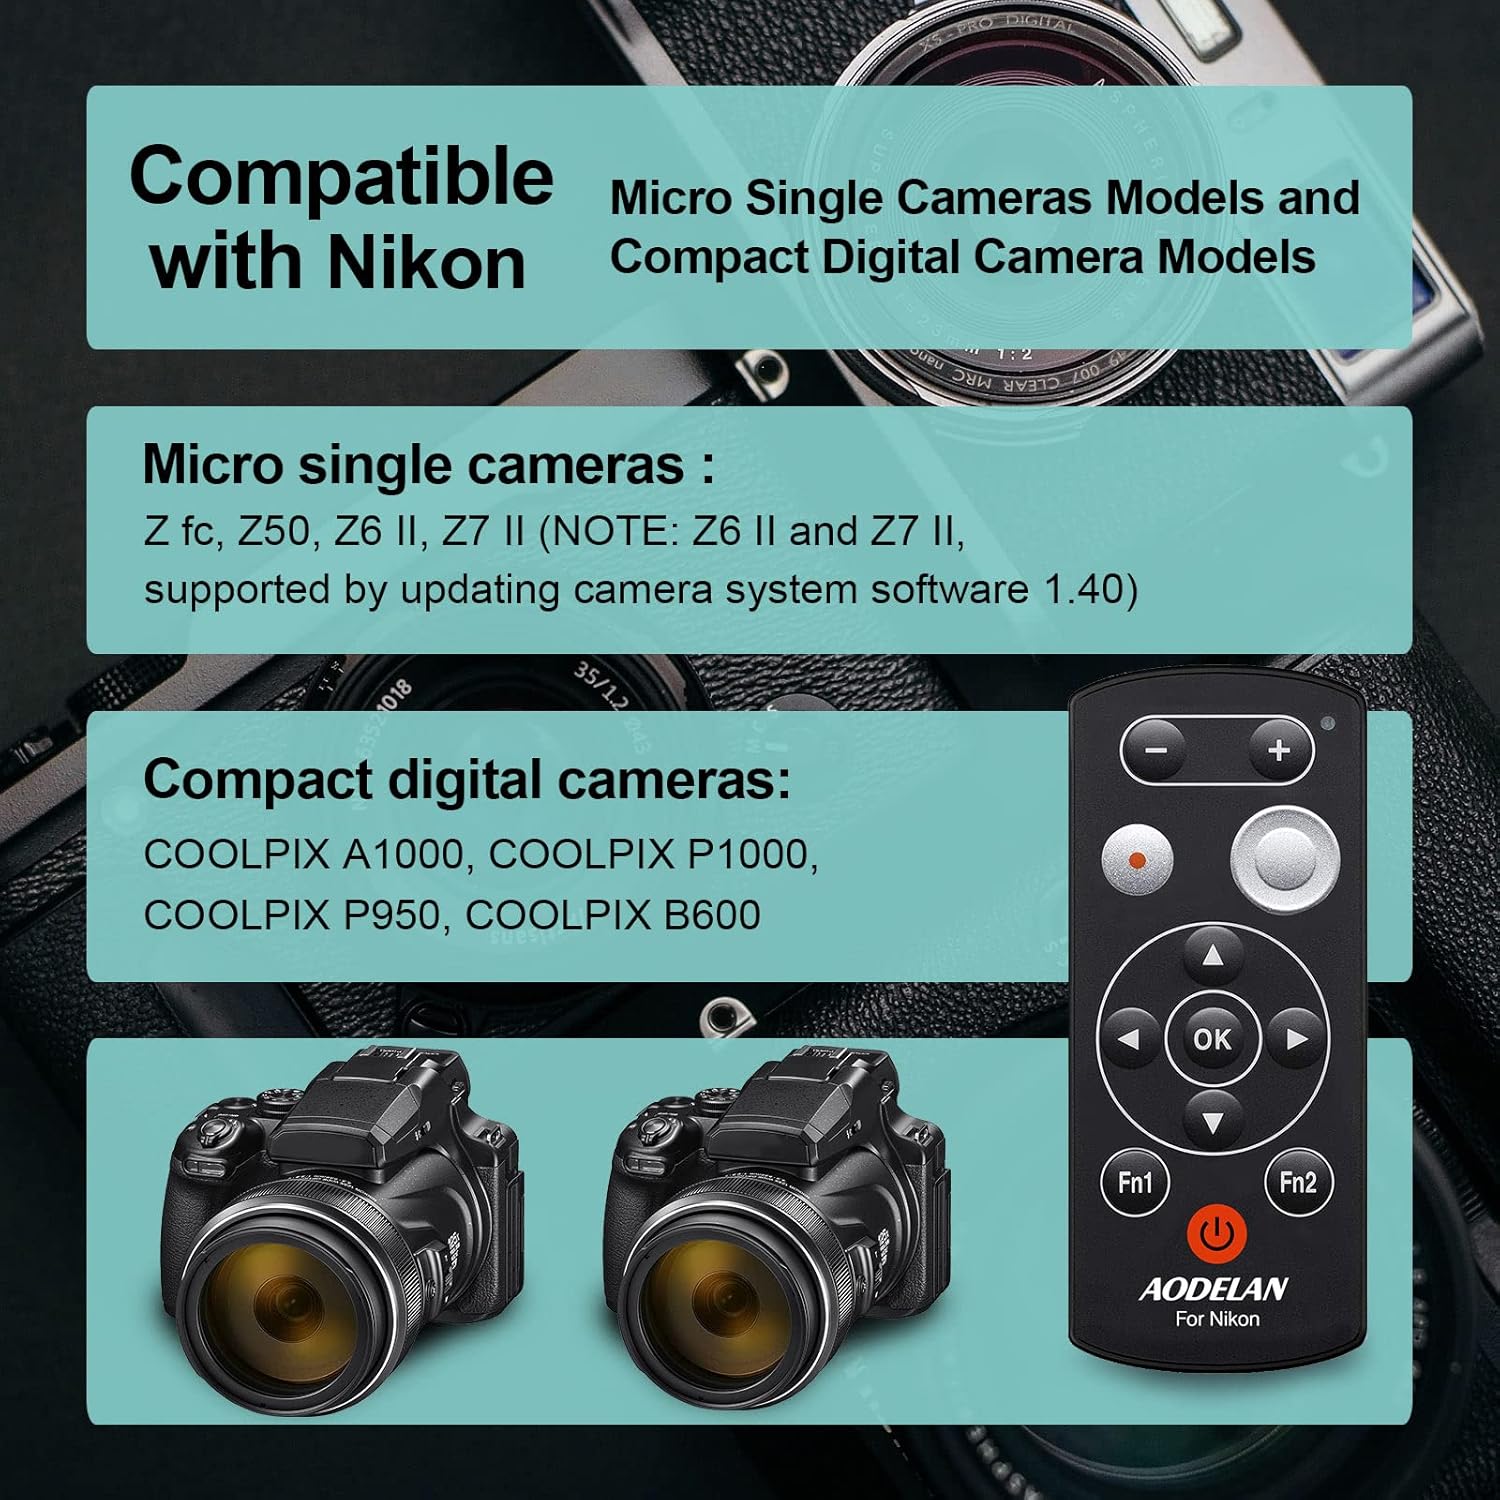
Figure 2: Compatible Nikon Camera Models
Setup and Pairing
1. Battery Installation
The ML-L7A remote control requires one CR2 battery (included). To install the battery:
- Locate the battery compartment on the back of the remote control.
- Open the battery cover.
- Insert the CR2 battery, ensuring the correct polarity (+/-) as indicated inside the compartment.
- Close the battery cover securely.
2. Pairing with Your Camera
To establish a wireless connection between the ML-L7A and your Nikon camera, follow these steps:
- Prepare the Camera: On your Nikon camera, navigate to the setup menu and enable the remote control function or Bluetooth pairing mode. Refer to your camera's specific instruction manual for detailed steps on enabling remote control pairing.
- Activate the Remote: Briefly press the power button (⑂) on the ML-L7A remote once. Do not hold the button, as this may activate Bluetooth sync mode. A status lamp (usually green) on the remote will illuminate to indicate it is powered on.
- Initiate Pairing: While the camera is in pairing mode, press and hold the power button on the ML-L7A remote for a few seconds until the status lamp blinks rapidly, indicating it is searching for a connection.
- Confirm Connection: Once the remote and camera successfully pair, the status lamp on the remote will typically stop blinking and remain solid, and your camera may display a confirmation message.
Note: For optimal performance and to prevent frequent re-pairing, it is recommended to adjust your camera's power-saving settings to prevent it from entering sleep mode too quickly when using the remote.
Operating Instructions
The ML-L7A remote control provides comprehensive functionality for various camera operations. The operating range is up to 30 meters (98 feet).

Figure 3: ML-L7A Remote Control Button Layout
- Shutter Release:
Press the large circular shutter-release button (labeled '4' in Figure 3) to take a photo. This minimizes camera shake, especially useful for long exposures or macro photography.
- Movie Record Button:
Press the red circular movie record button (labeled '3' in Figure 3) to start video recording. Press it again to stop recording.

Figure 4: Shutter Release and Movie Recording
- Zoom Control:
Use the '+' and '-' buttons (labeled '1' in Figure 3) at the top of the remote to zoom in and out. Long press the '+' button to zoom in and long press the '-' button to zoom out.

Figure 5: One-Button Zoom Functionality
- Delayed Shooting:
The remote supports delayed shooting (e.g., 3-second or 10-second delay). This function is typically set via your camera's menu, and the remote then triggers the countdown.
- Exposure Compensation:
Adjust exposure brightness using the remote. This function is usually controlled via the multi-selector (labeled '5' in Figure 3) in conjunction with camera settings.
- Multi-selector and OK Button:
The directional buttons (up, down, left, right) and the 'OK' button (labeled '5' and '6' in Figure 3) on the remote function similarly to the corresponding buttons on your camera, allowing navigation through menus and selection of options.
- Fn1 and Fn2 Buttons:
These customizable function buttons (labeled 'Fn1' and 'Fn2' in Figure 3) can be assigned specific camera functions through your camera's settings, providing quick access to frequently used features.
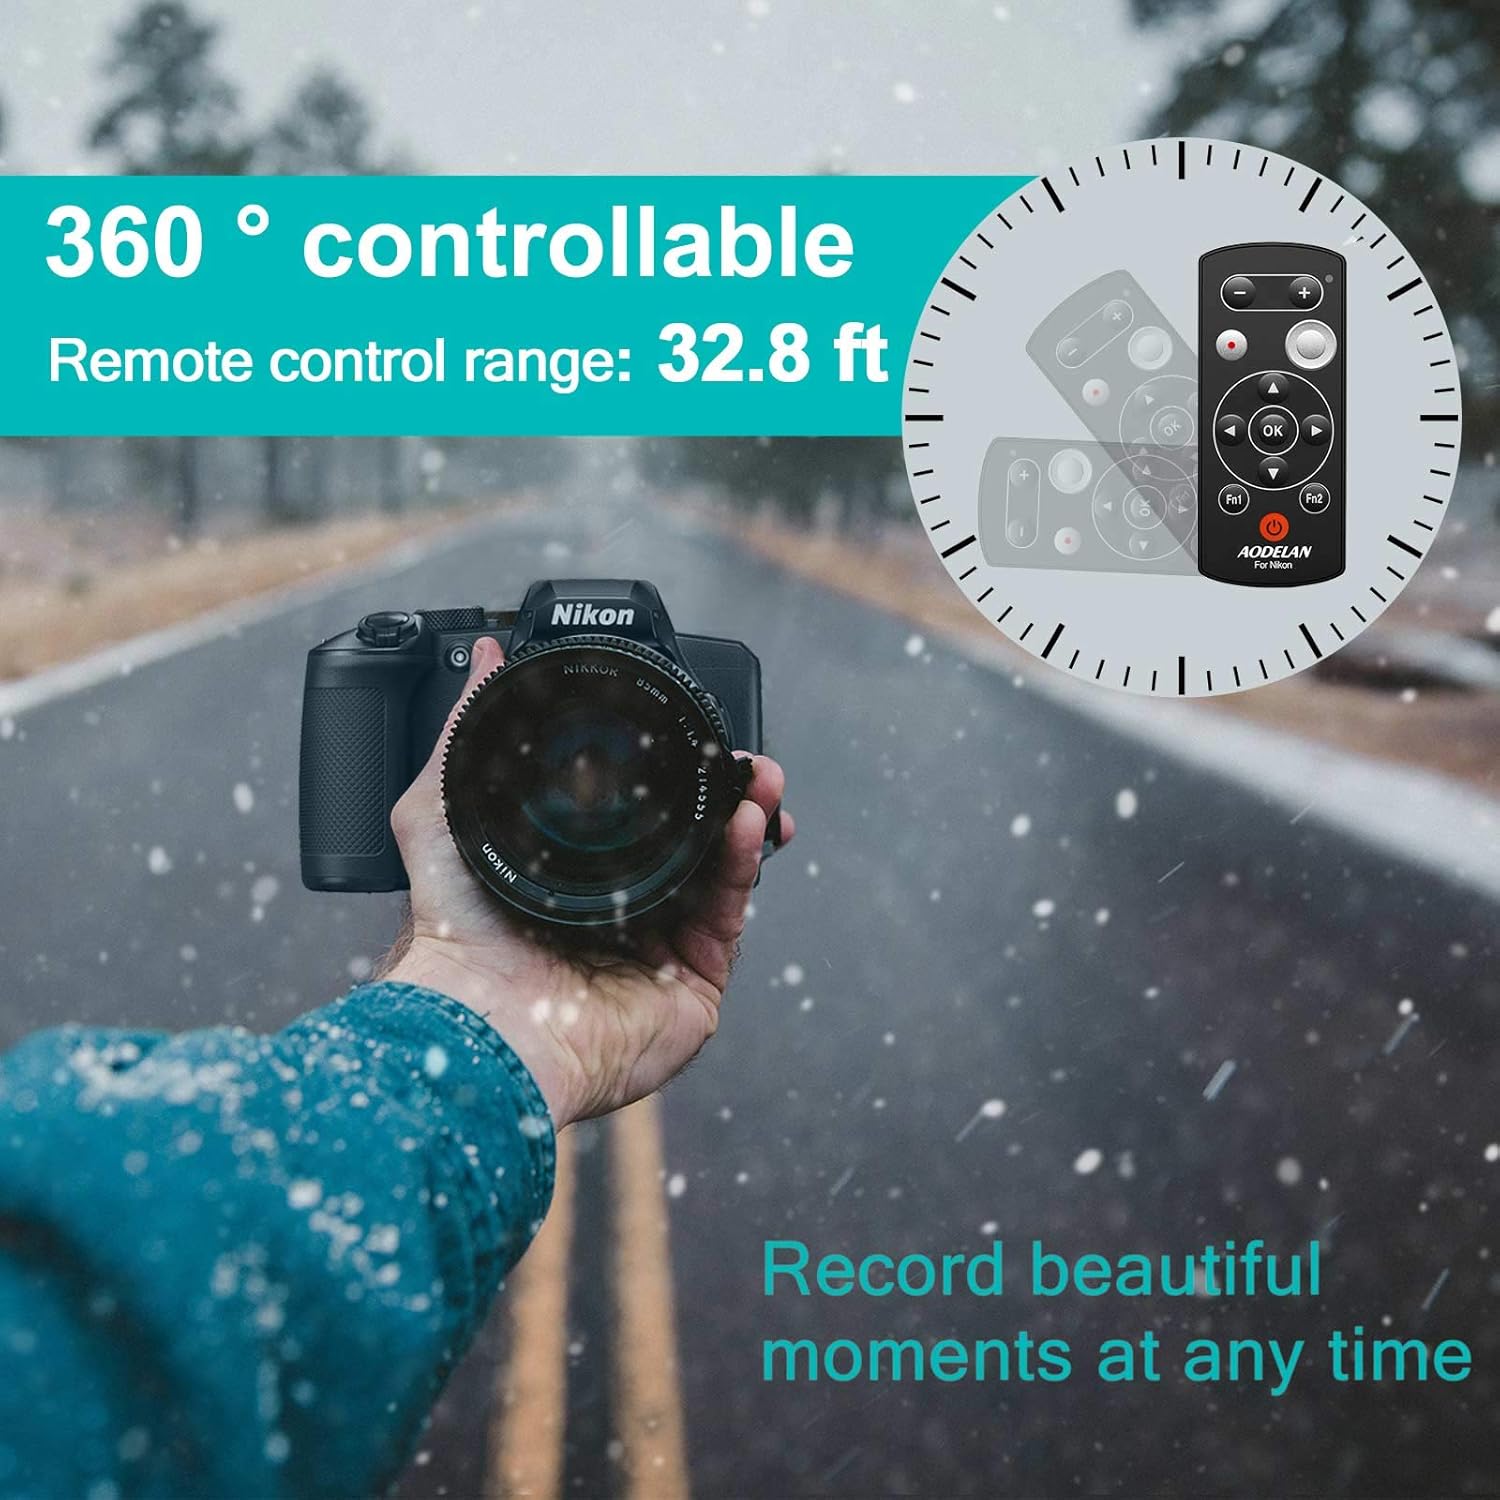
Figure 6: Remote Control Range and Versatility
The remote control is designed to be practical for various shooting scenarios, including zoom control, still shooting, movie recording, flash mode selection, self-timer setting, and adjusting tones, saturation, brightness, and dynamic D-Lighting.

Figure 7: Practical Functions of the ML-L7A Remote
Maintenance
- Cleaning: Use a soft, dry cloth to clean the remote control. Do not use liquid cleaners or solvents.
- Storage: Store the remote in a cool, dry place away from direct sunlight and extreme temperatures.
- Battery Replacement: If the remote's performance degrades or the status lamp does not illuminate, replace the CR2 battery. Dispose of used batteries responsibly.
- Handling: Avoid dropping the remote or subjecting it to strong impacts.
Troubleshooting
| Problem | Possible Cause | Solution |
|---|---|---|
| Remote does not power on. | Dead or incorrectly installed battery. | Replace the CR2 battery, ensuring correct polarity. |
| Remote does not connect to camera. |
|
|
| Remote loses connection frequently. | Camera's sleep mode or power-saving settings. | Adjust camera settings to extend the time before it enters sleep mode or turns off. You may need to re-pair if the camera goes to sleep. |
| Zoom or other functions not working. |
|
|
Specifications
| Feature | Detail |
|---|---|
| Model | ML-L7A |
| Dimensions | 1 x 0.5 x 3.1 inches (2.54 x 1.27 x 7.87 cm) |
| Weight | 1.06 ounces (30 grams) |
| Wireless Technology | Bluetooth |
| Operating Range | Up to 30 meters (98 feet) |
| Battery Type | 1 x CR2 (included) |
| Compatible Devices | Nikon COOLPIX B600, P1000, A1000, Z50, Z30, P950, Z fc, Z6 II, Z7 II |
| Manufacturer | AODELAN |
| Country of Origin | China |

Figure 8: Compact and Lightweight Design

Figure 9: What's Included in the Package
Warranty and Support
AODELAN products are manufactured with quality and reliability in mind. For any product-related inquiries, technical assistance, or support, please contact AODELAN customer service. The manufacturer is committed to providing customer satisfaction.
For specific warranty details and to reach support, please refer to the contact information provided on the official AODELAN website or the documentation included with your product.
Manufacturer: AODELAN
Ask a question about this manual
Ask about setup, troubleshooting, compatibility, parts, safety, or missing instructions. Manuals+ will review the question and use this page’s manual context to help answer it.