
Philips HD4515/63
Philips HD4515/63 Viva Collection Rice Cooker User Manual
Model: HD4515/63 | Brand: Philips
1. Introduction
This manual provides essential information for the safe and efficient operation of your Philips HD4515/63 Viva Collection Rice Cooker. Please read it thoroughly before first use and keep it for future reference.
1.1 Product Overview
The Philips HD4515/63 Viva Collection Rice Cooker is designed to cook a variety of grains, including rice, multigrain, and beans, with consistent results. It features an ultra-thick inner pot for optimal heat distribution and a large digital display for easy program selection.
1.2 What's Included
- 1 x Philips HD4515/63 Rice Cooker Unit
- 1 x Inner Pot (5 layers, non-stick coating)
- 1 x Measuring Cup
- 1 x Spatula
- 1 x Steaming Tray/Basket
- 1 x Instruction Manual (this document)
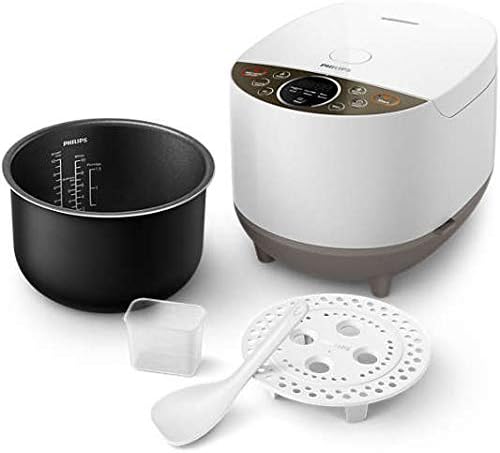
Figure 1.1: The Philips HD4515/63 Rice Cooker shown with its included accessories: the main unit, inner pot, measuring cup, spatula, and steaming tray.
2. Safety Information
Important Safety Precautions:
- Always ensure the voltage indicated on the appliance corresponds to the local mains voltage before connecting.
- Do not immerse the main unit, cord, or plug in water or any other liquid.
- Keep the appliance out of reach of children.
- Do not operate the appliance if the plug, mains cord, or the appliance itself is damaged.
- Always unplug the appliance after use and before cleaning.
- Use only accessories recommended by Philips.
- Do not place the appliance on or near a hot gas or electric burner, or in a heated oven.
- Ensure the inner pot is properly seated before cooking.
- Be cautious of hot steam escaping from the steam vent during operation.
3. Product Components and Controls
3.1 Main Unit

Figure 3.1: Angled view of the Philips HD4515/63 Rice Cooker, highlighting its compact design and control panel.

Figure 3.2: Front view of the rice cooker, showing the digital display and various function buttons clearly.
3.2 Inner Pot
The inner pot features a 5-layer construction with a durable non-stick coating, designed for excellent thermal conductivity and heat retention. It has measurement markings for different rice types.
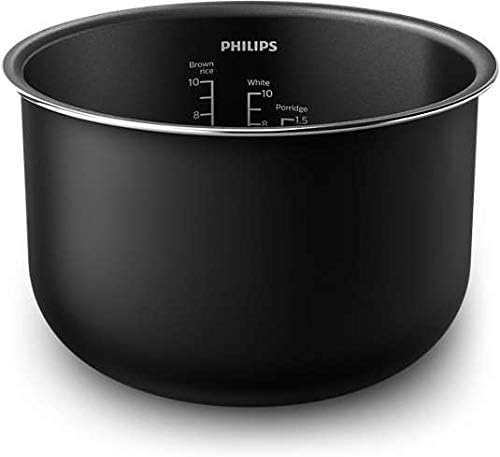
Figure 3.3: Close-up of the inner pot, showing the non-stick interior and clear markings for water levels for different types of rice (Brown Rice, White Rice, Porridge).

Figure 3.4: Diagram illustrating the strong, constant heat distribution within the inner pot, ensuring even cooking.
3.3 Control Panel
The large digital display and intuitive buttons allow for easy selection of cooking programs and settings.
- Digital Display: Shows cooking time, selected program, and other indicators.
- Menu Button: Cycles through available cooking programs (Rice, Multigrain, Beans, Porridge, etc.).
- Start Button: Initiates the selected cooking program.
- Keep Warm/Cancel Button: Activates the keep warm function or cancels the current program.
- Timer Button: Sets a delayed start time.
- Hr/Min Buttons: Adjust hours and minutes for timer settings.
4. Setup and First Use
4.1 Unpacking
Carefully remove all packaging materials. Retain packaging for future storage or transport if needed. Check that all listed components are present and undamaged.
4.2 Cleaning Before First Use
- Wash the inner pot, spatula, measuring cup, and steaming tray with warm soapy water.
- Rinse thoroughly and dry all parts completely.
- Wipe the exterior of the main unit with a damp cloth. Do not immerse the main unit in water.
4.3 Assembly
- Place the rice cooker on a stable, flat, heat-resistant surface.
- Ensure the inner pot is clean and dry before placing it into the main unit.
- Gently place the inner pot into the heating element cavity, ensuring it sits correctly.
- Close the lid securely.

Figure 4.1: Illustrates the action of opening the lid of the rice cooker, revealing the inner pot and heating plate.

Figure 4.2: Shows how to detach the inner lid for thorough cleaning, ensuring hygiene and proper maintenance.
5. Operating Instructions
5.1 Basic Rice Cooking
- Measure the desired amount of rice using the provided measuring cup. Rinse the rice thoroughly until the water runs clear.
- Place the rinsed rice into the inner pot.
- Add the appropriate amount of water according to the markings inside the inner pot or your preference. For white rice, refer to the "White" markings.
- Place the inner pot into the rice cooker and close the lid securely.
- Plug the power cord into a wall outlet. The display will light up.
- Press the "Menu" button repeatedly to select the desired program (e.g., "White Rice").
- Press the "Start" button to begin cooking. The indicator light for the selected program will illuminate.
- Once cooking is complete, the cooker will automatically switch to "Keep Warm" mode.
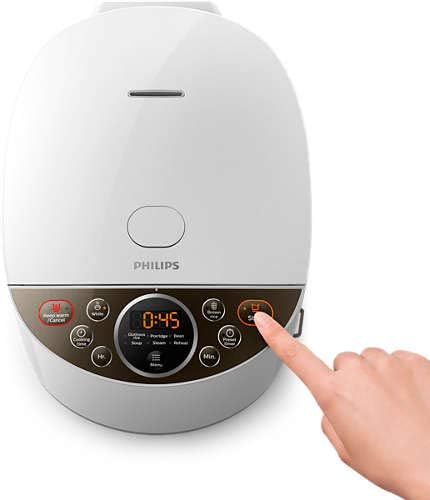
Figure 5.1: Demonstrates the action of pressing the 'Start' button on the control panel to begin a cooking cycle.
5.2 Using Other Programs (Multigrain, Porridge, Beans)
The rice cooker offers 8 multifunction programs. Follow steps 1-5 from "Basic Rice Cooking". Instead of "White Rice", select the appropriate program using the "Menu" button. Adjust water levels as per recipe or grain type.
5.3 Delay Timer Function
- Prepare ingredients in the inner pot as usual.
- Press the "Timer" button. The display will show a default delay time.
- Use the "Hr" and "Min" buttons to adjust the desired delay time. This is the time until cooking finishes.
- Press the "Menu" button to select the cooking program.
- Press "Start" to confirm the delay timer and program. The timer will count down, and cooking will begin automatically when the set time is reached.
5.4 Keep Warm Function
After cooking, the appliance automatically enters "Keep Warm" mode for up to 12 hours. To manually activate or deactivate, press the "Keep Warm/Cancel" button.
6. Maintenance and Cleaning
Regular cleaning ensures optimal performance and extends the lifespan of your rice cooker. Always unplug the appliance and allow it to cool completely before cleaning.
6.1 Inner Pot and Accessories
- The inner pot, spatula, measuring cup, and steaming tray are dishwasher safe, but hand washing is recommended to preserve the non-stick coating.
- Use a soft sponge and mild dish soap. Avoid abrasive cleaners or metal scouring pads that can damage the non-stick surface.
- Rinse thoroughly and dry completely before storing.
6.2 Main Unit
- Wipe the exterior of the main unit with a soft, damp cloth.
- Clean the heating plate inside the cooker with a damp cloth. Do not use abrasive materials.
- Ensure no food particles are lodged around the heating element.
- Never immerse the main unit in water or any other liquid.
6.3 Inner Lid
The inner lid can be detached for thorough cleaning. Refer to Figure 4.2 for guidance on removal. Wash with warm soapy water, rinse, and dry before reattaching.
7. Troubleshooting
| Problem | Possible Cause | Solution |
|---|---|---|
| Rice is too hard/undercooked. | Not enough water; cooking time too short; inner pot not seated correctly. | Add more water next time; ensure inner pot is fully inserted; select appropriate program. |
| Rice is too soft/mushy. | Too much water. | Reduce water next time; ensure correct water-to-rice ratio. |
| Cooker does not turn on. | Not plugged in; power outage; faulty outlet. | Check power connection; test outlet with another appliance; contact service if problem persists. |
| "Keep Warm" function not working. | Function not activated; power interruption. | Press "Keep Warm/Cancel" button; ensure continuous power supply. |
8. Specifications
- Model: HD4515/63
- Brand: Philips
- Capacity: 1.8 Liters
- Material: Plastic (exterior), Non-stick coated metal (inner pot)
- Dimensions (L x W x H): 42.7 x 34 x 29.8 cm
- Weight: 4.16 kg
- Special Features: 3.0mm ultra thick inner pot, 5 layers non-stick coating, 8 multifunction programs, Large digital display, 12-hour keep warm function.
- Included Components: Spatula, Bowl, Instruction Manual, Measuring Cup, Steaming Tray/Basket
- Care Instructions: Hand Wash (inner pot and accessories)
9. Warranty and Support
Philips products are manufactured to the highest standards and come with a standard manufacturer's warranty. For detailed warranty information, please refer to the warranty card included with your purchase or visit the official Philips website for your region.
For technical support, troubleshooting assistance, or to inquire about spare parts, please contact Philips Customer Service. Contact details can typically be found on the Philips website or in the product packaging.
Online Support: www.philips.com/support
Ask a question about this manual
Ask about setup, troubleshooting, compatibility, parts, safety, or missing instructions. Manuals+ will review the question and use this page’s manual context to help answer it.