1. Introduction
Thank you for choosing the AODELAN Wireless Flash Trigger Transmitter and Receiver. This device is designed to provide versatile and reliable off-camera flash control for photographers. Operating on a 2.4GHz frequency, it offers a communication range of up to 200m and supports a maximum sync speed of 1/250s, ensuring consistent performance without requiring direct line-of-sight. It features 8 selectable channels and an 'all channels' button for triggering multiple flash units simultaneously.
This manual will guide you through the setup, operation, and maintenance of your new wireless flash trigger system.
2. Package Contents
Please verify that all items listed below are included in your package:
- Transmitter x 1
- Receiver x 1
- 3.5 to 3.5mm sync cable x 1
- 3.5mm to PC plug cable x 1
- 1/4" mono plug socket x 1
- Lanyards x 2
- Carrying pouch x 1
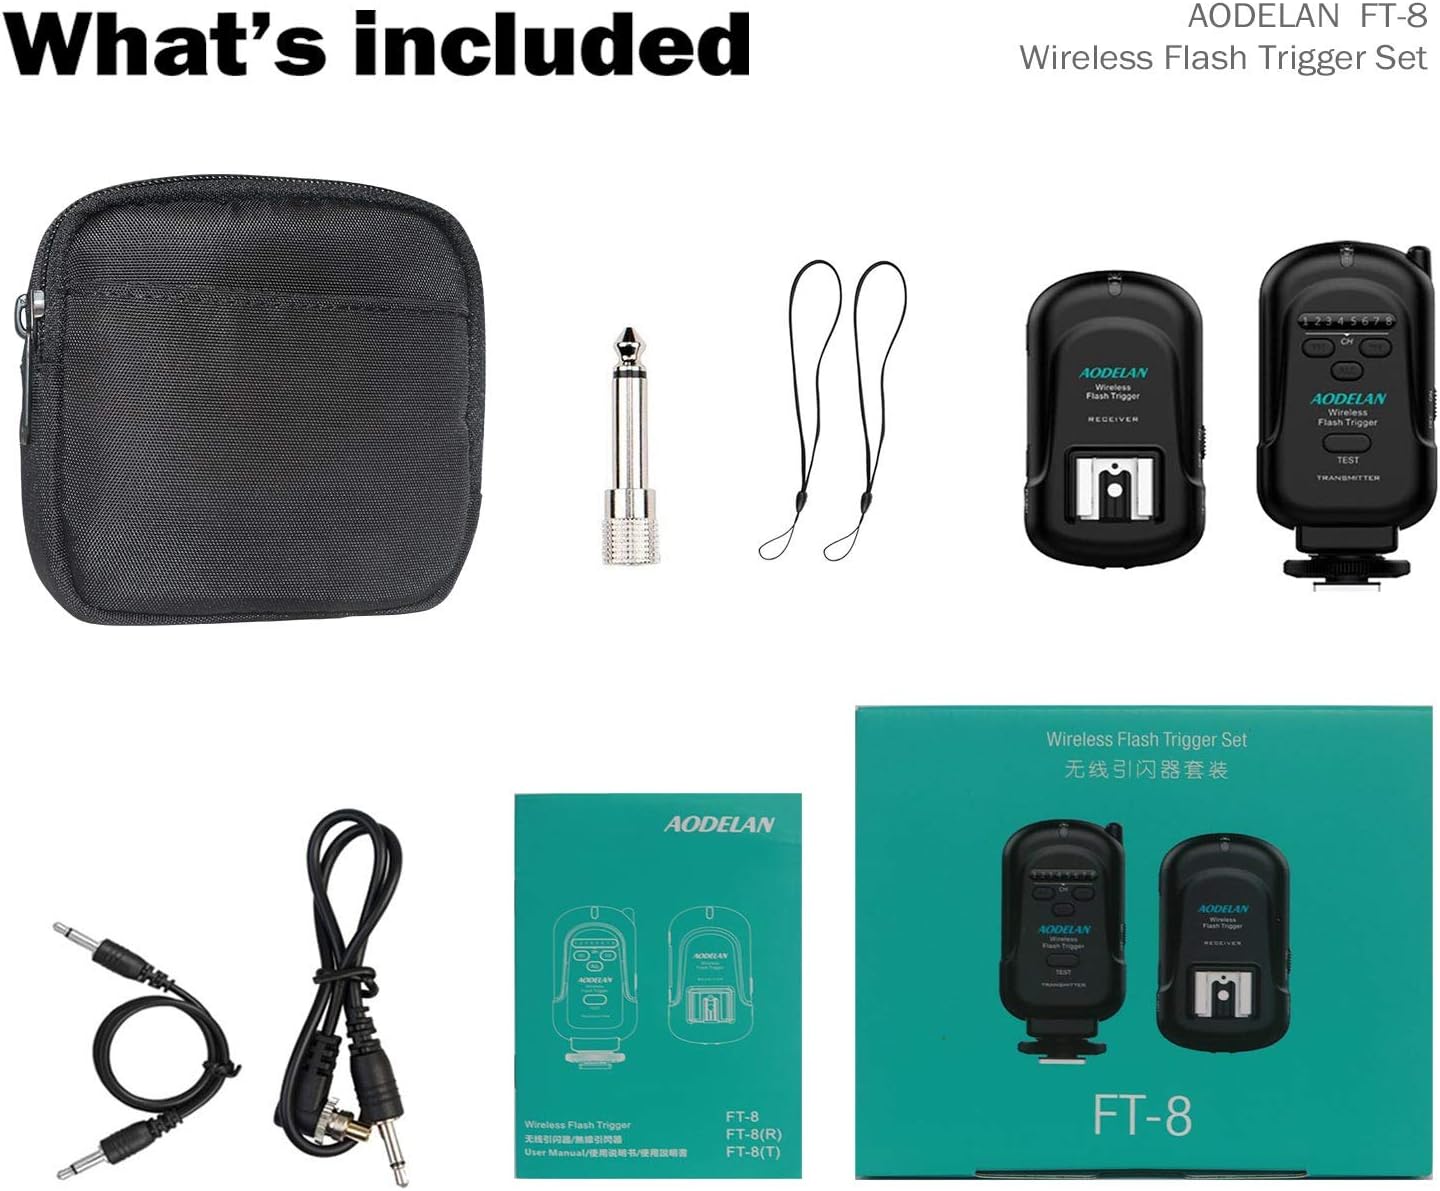
Image: All components included in the AODELAN Wireless Flash Trigger Set, neatly arranged with their respective accessories.
3. Product Features
- Wide Compatibility: Compatible with most hot shoe flashes (except for Sony) and cameras with standard hot shoe mounts or 3.5mm ports.
- 2.4GHz Frequency Wireless: Operates on a 2.4GHz frequency, reducing interference and providing a communication range of up to 200m with a max sync speed of 1/250s.
- 8-Channel Control: Control specific or multiple flash units simultaneously with 8 selectable channels. Features an "all channels" button to trigger all receivers at once.
- Easy to Use: Designed with an internal antenna and LED indicators for quick setup. The rotating transmitter can be used upright or in a low-profile down position.
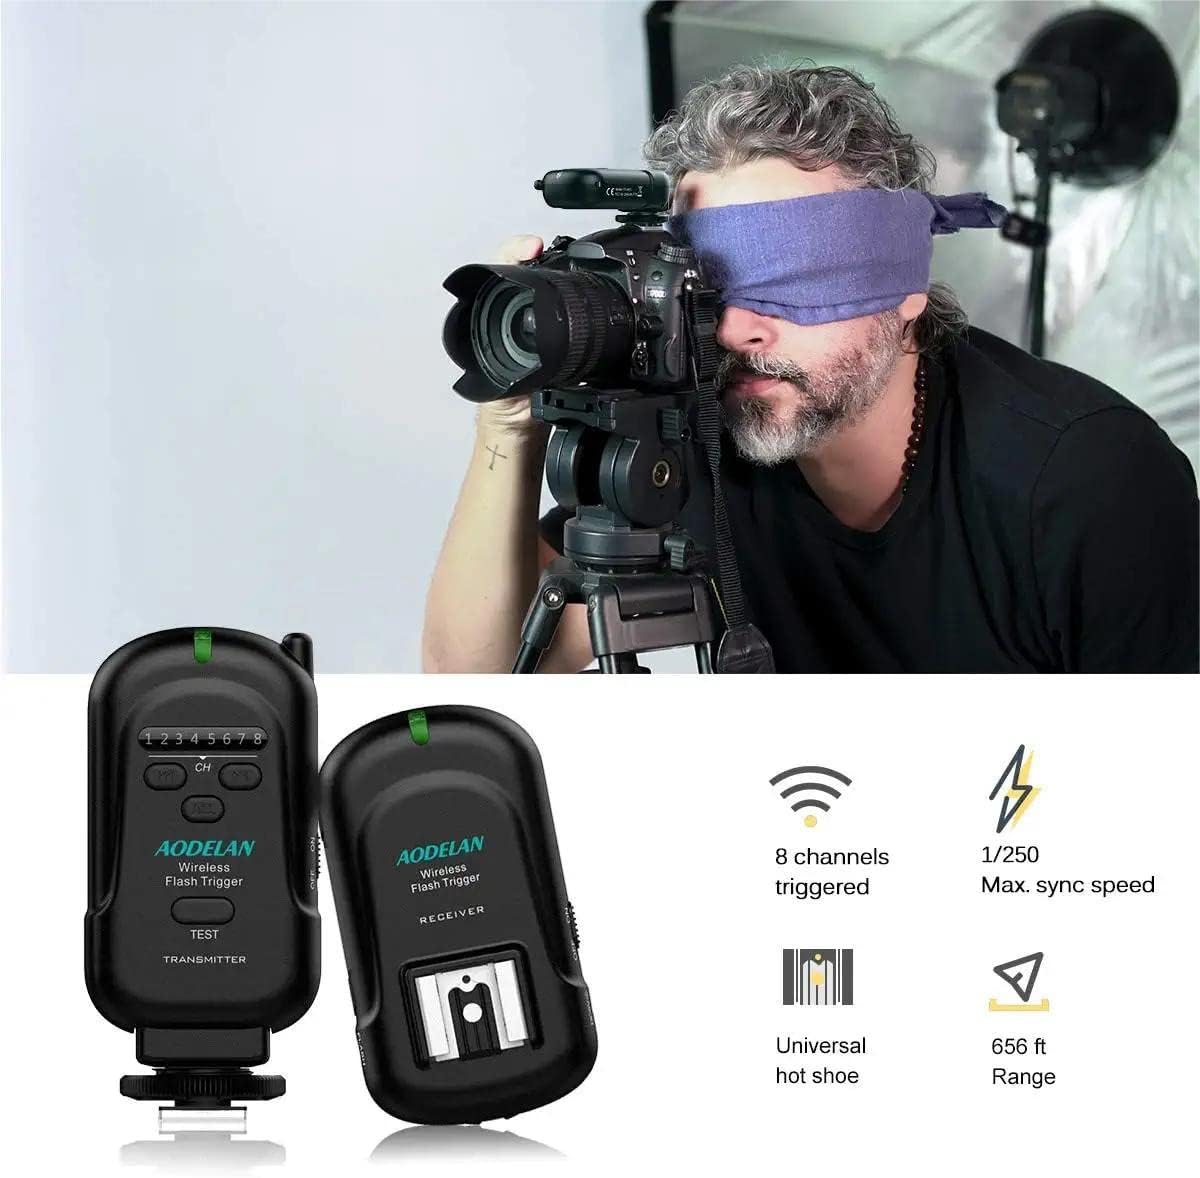
Image: The AODELAN Wireless Flash Trigger system in use, demonstrating its wireless functionality and key specifications.
4. Setup Instructions
4.1 Battery Installation
Both the transmitter and receiver require 2x AAA batteries (not included). To install:
- Locate the battery compartment cover on the back of the unit.
- Slide the cover open.
- Insert 2x AAA batteries, ensuring correct polarity (+/-).
- Close the battery compartment cover securely.
4.2 Connecting the Transmitter to your Camera
The transmitter connects to your camera's hot shoe.
- Ensure your camera is turned off.
- Slide the transmitter onto your camera's hot shoe mount.
- Tighten the locking ring on the transmitter to secure it in place.
4.3 Connecting the Receiver to your Flash Unit
The receiver can be connected to your flash unit either wirelessly via its hot shoe or wired via a sync cable.
Wireless Connection (Hot Shoe)
- Turn off your flash unit and the FT-8 receiver.
- Slide the flash unit into the receiver's hot shoe mount.
- Lock the flash unit with its locking mechanism.
- Turn on the flash unit and the FT-8 receiver.
- Set the flash unit to Manual mode.
Wired Connection (Sync Cable)
- Turn off your flash unit/strobe and the FT-8 receiver.
- Connect the 3.5mm to 3.5mm sync cable to the receiver's 3.5mm Sync Port.
- Connect the opposite end of the cable to your flash unit or studio strobe. If your studio strobe has a larger 6.3mm port, use the included 1/4" mono plug socket adapter.
- Set the flash unit/strobe to Manual mode.

Image: Illustration of wireless hot shoe connection and wired sync cable connection for the receiver.
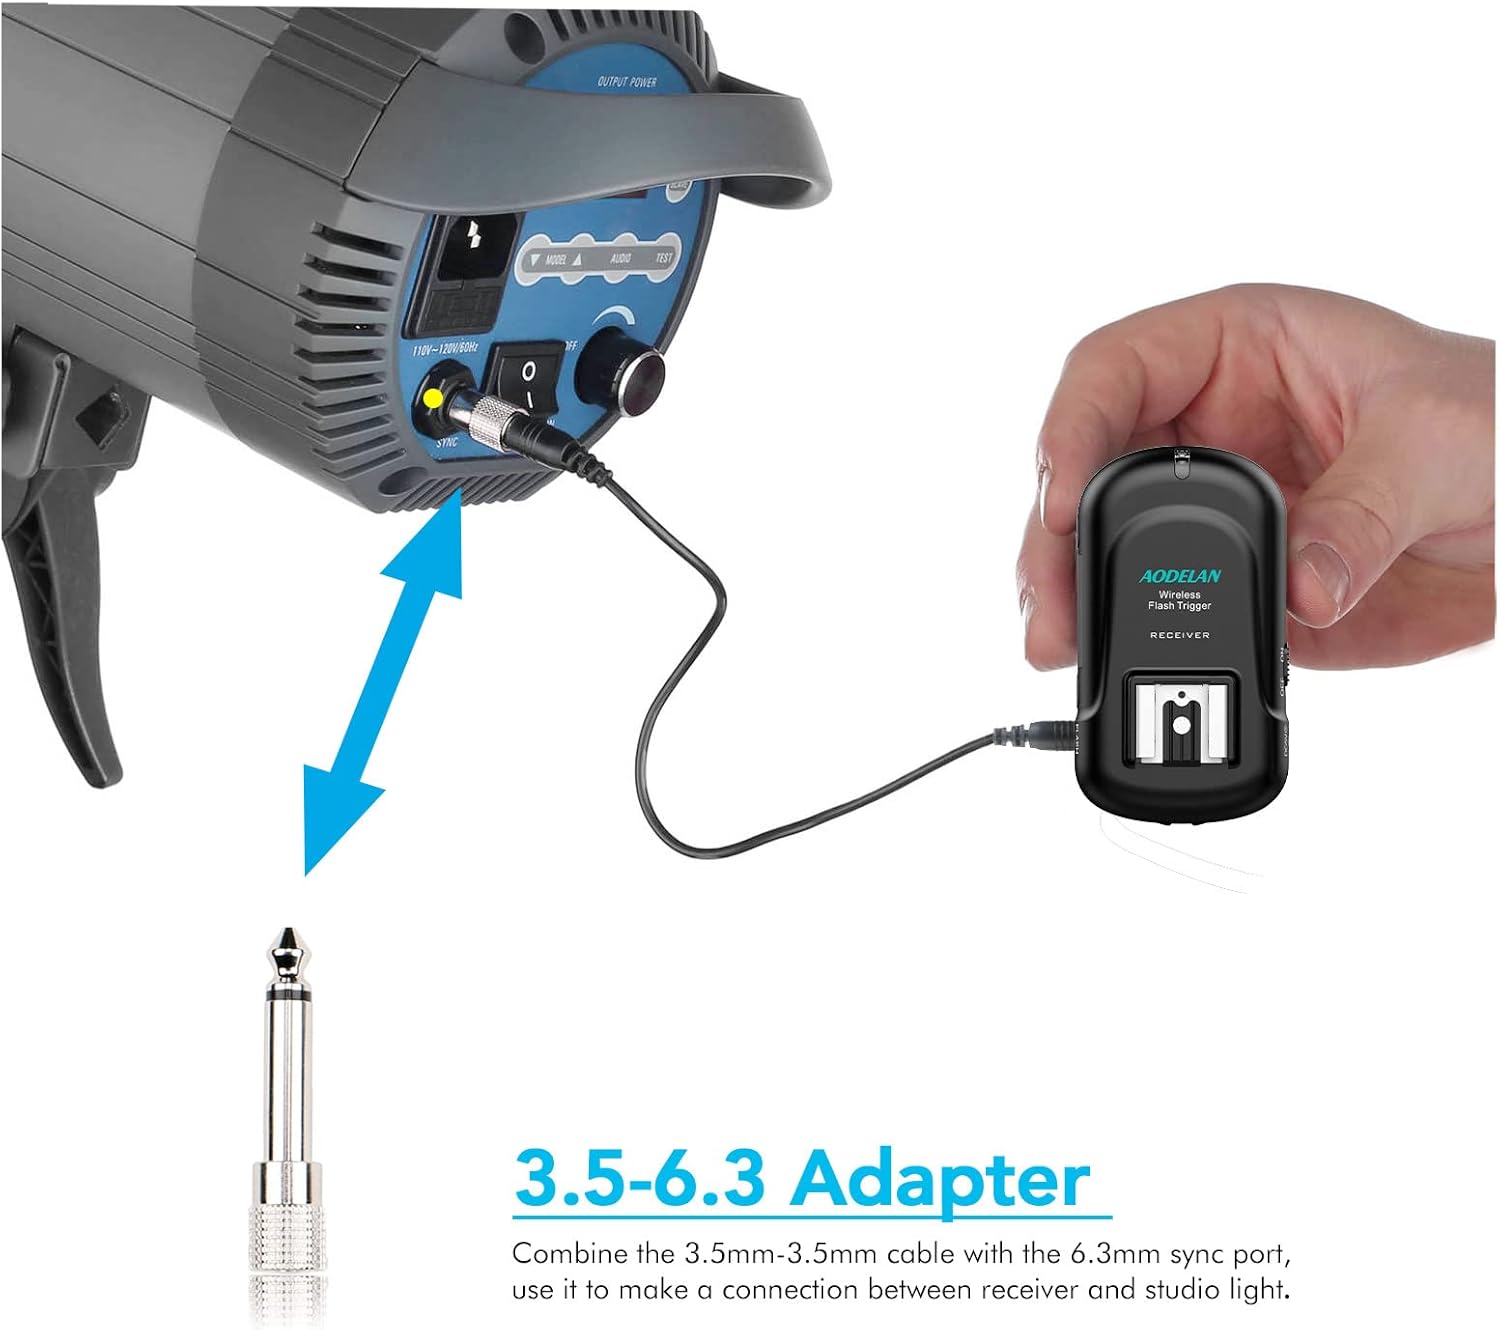
Image: The 3.5-6.3mm adapter cable connecting the receiver to a studio light.
5. Operating Instructions
5.1 Powering On/Off
Locate the ON/OFF switch on the side of both the transmitter and receiver. Slide the switch to 'ON' to power on the units. The status LED will light up.
5.2 Channel Selection
Both the transmitter and receiver have 8 selectable channels (1-8). To ensure proper communication, the transmitter and receiver must be set to the same channel.
- Use the 'CH' buttons (left/right arrows) on the transmitter and receiver to select the desired channel.
- To trigger all receivers simultaneously, press the 'ALL' button on the transmitter.
5.3 Triggering the Flash
Once the transmitter and receiver are powered on and set to the same channel:
- Press the shutter button on your camera. The transmitter will send a signal to the receiver.
- Alternatively, press the 'TEST' button on the transmitter to manually fire the connected flash unit.
Image: Front, side, and bottom views of the transmitter, detailing its controls and features.
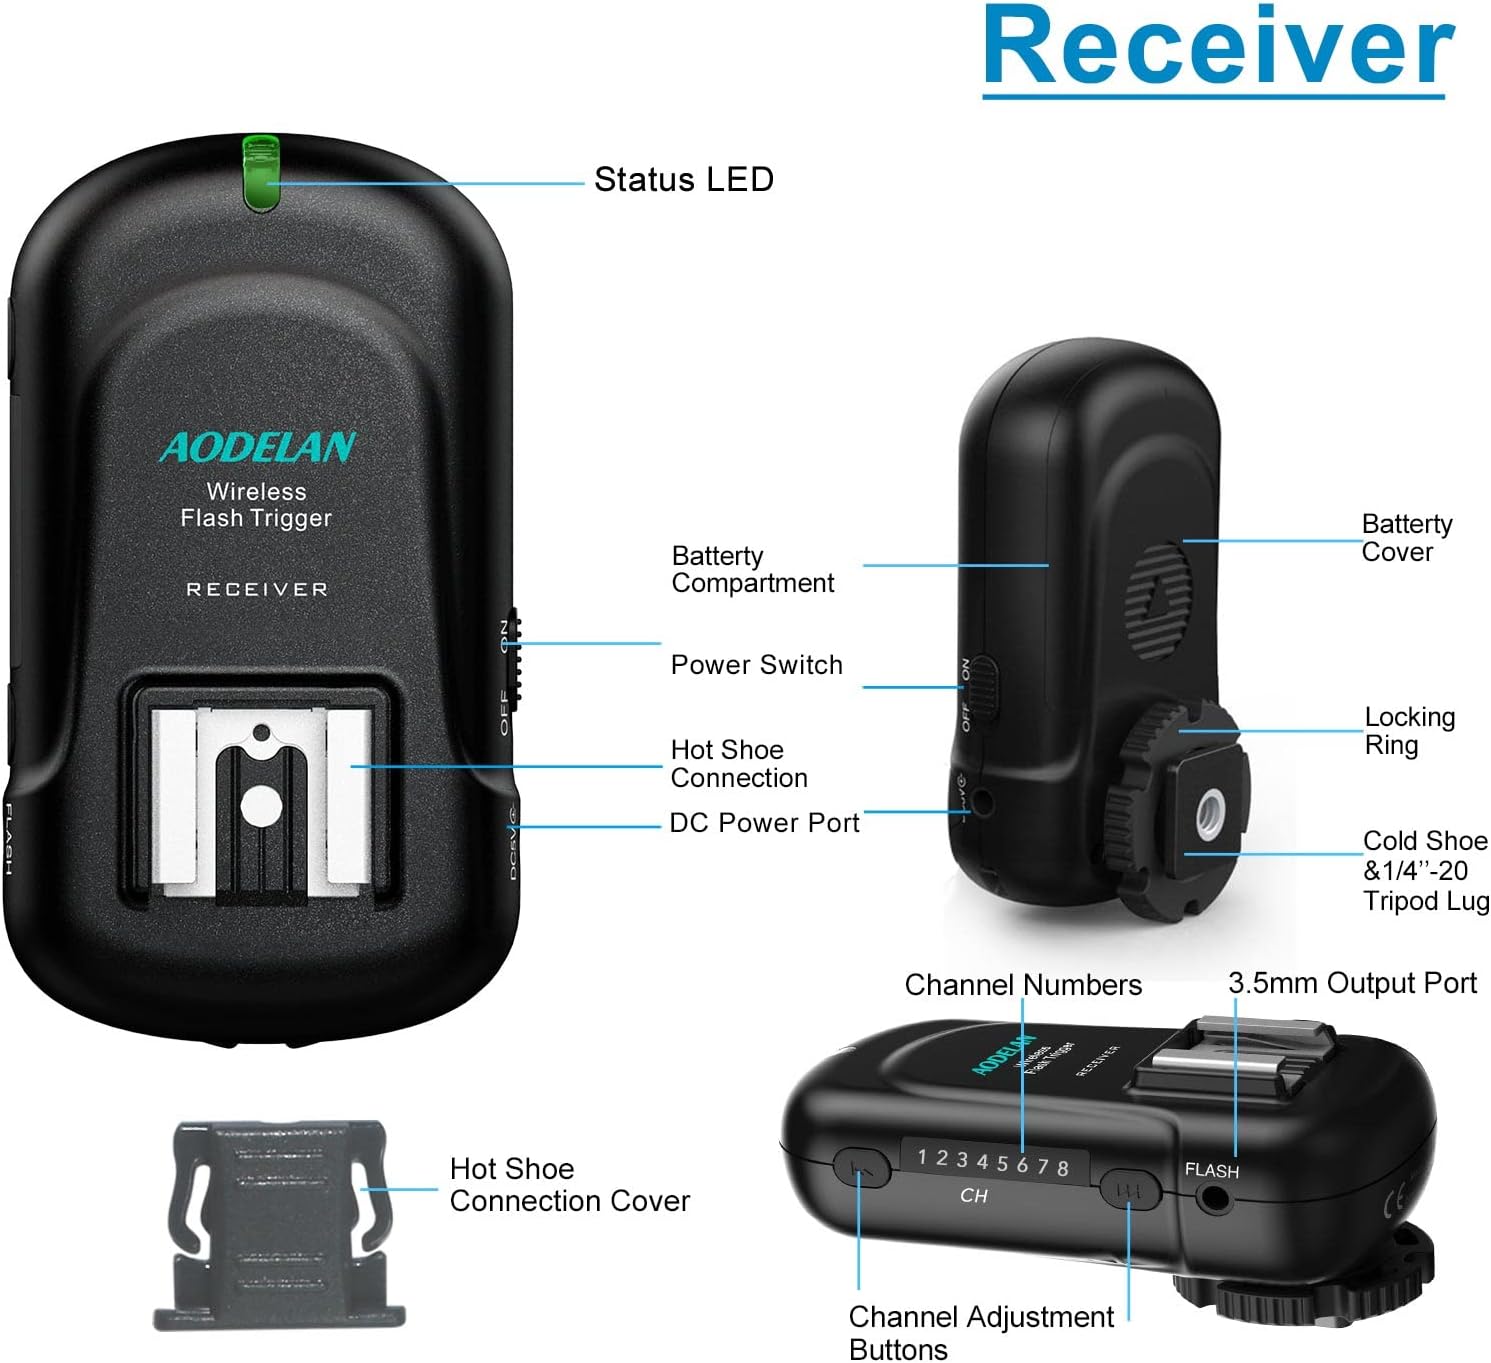
Image: Front, side, and bottom views of the receiver, detailing its controls and features.
Video: A brief demonstration of the AODELAN Wireless Flash Trigger Transmitter and Receiver in action, showcasing its functionality.
6. Maintenance
- Cleaning: Use a soft, dry cloth to clean the exterior of the units. Do not use liquid cleaners or solvents.
- Storage: When not in use for extended periods, remove the batteries from both the transmitter and receiver to prevent leakage. Store the units in the provided carrying pouch in a cool, dry place.
- Handling: Avoid dropping the units or exposing them to extreme temperatures, humidity, or strong magnetic fields.
7. Troubleshooting
| Problem | Possible Cause | Solution |
|---|---|---|
| Flash not firing | 1. Batteries are low or incorrectly inserted. 2. Transmitter and receiver on different channels. 3. Flash unit not in Manual mode. 4. Range exceeded. | 1. Replace batteries or check polarity. 2. Set both units to the same channel. 3. Switch flash unit to Manual mode. 4. Reduce distance between units. |
| Intermittent firing | 1. Interference from other 2.4GHz devices. 2. Weak battery. 3. Obstructions between units. | 1. Change to a different channel. 2. Replace batteries. 3. Ensure clear line of sight or reduce obstructions. |
| LED indicators not lighting up | 1. Unit not powered on. 2. Dead batteries. | 1. Slide power switch to 'ON'. 2. Replace batteries. |
8. Specifications
- Product Dimensions: 1.97 x 3.46 x 1.57 inches
- Item Weight: 9.9 ounces
- Item Model Number: AODELAN
- Frequency: 2.4 GHz
- Channels: 8
- Max Sync Speed: 1/250s
- Effective Range: Up to 200m (656 ft)
- Power Source: 2x AAA batteries per unit (not included)
- Compatibility: Most hot shoe flashes (except Sony), cameras with standard hot shoe or 3.5mm ports.

Image: Visual representation of the 656ft effective transmission distance and 2.4G wireless control.
9. Warranty and Support
AODELAN products are designed for reliability and performance. For specific warranty details, please refer to the warranty card included with your product or visit the official AODELAN website.
If you encounter any issues or have questions regarding your AODELAN Wireless Flash Trigger, please contact AODELAN customer support for assistance. We are committed to providing the best service to our customers.