Jardibric PNR16
Jardibric Faucet Irrigation Programmer
Model: PNR16
Introduction
This manual provides comprehensive instructions for the installation, operation, and maintenance of your Jardibric PNR16 Faucet Irrigation Programmer. Designed for efficient and flexible watering, this device allows you to automate your garden's irrigation needs, ensuring optimal hydration for your plants while conserving water.
Setup
Battery Installation
The Jardibric PNR16 requires 2 new 1.5V AA alkaline batteries (not included) for operation. To install them:
- Open the battery compartment cover located at the back of the device.
- Insert the 2 AA batteries, ensuring correct polarity (+/-).
- Once the batteries are in place, there may be a brief delay of 1 to 5 seconds before the internal valve (solenoid type) initializes and opens.
- Securely replace the battery compartment cover.
Connection to Faucet
Connect the programmer to your outdoor faucet and then attach your irrigation hose.
- Ensure your faucet has a 20 x 27 mm (3/4") thread.
- Screw the top connector of the Jardibric PNR16 programmer onto the faucet until it is hand-tight. Do not overtighten.
- Connect your irrigation hose (e.g., garden hose, drip irrigation line) to the outlet at the bottom of the programmer, typically using a quick connection fitting.

Image: Installation diagram showing the programmer connected to a faucet and an optional rain detector with a rain barrel setup.
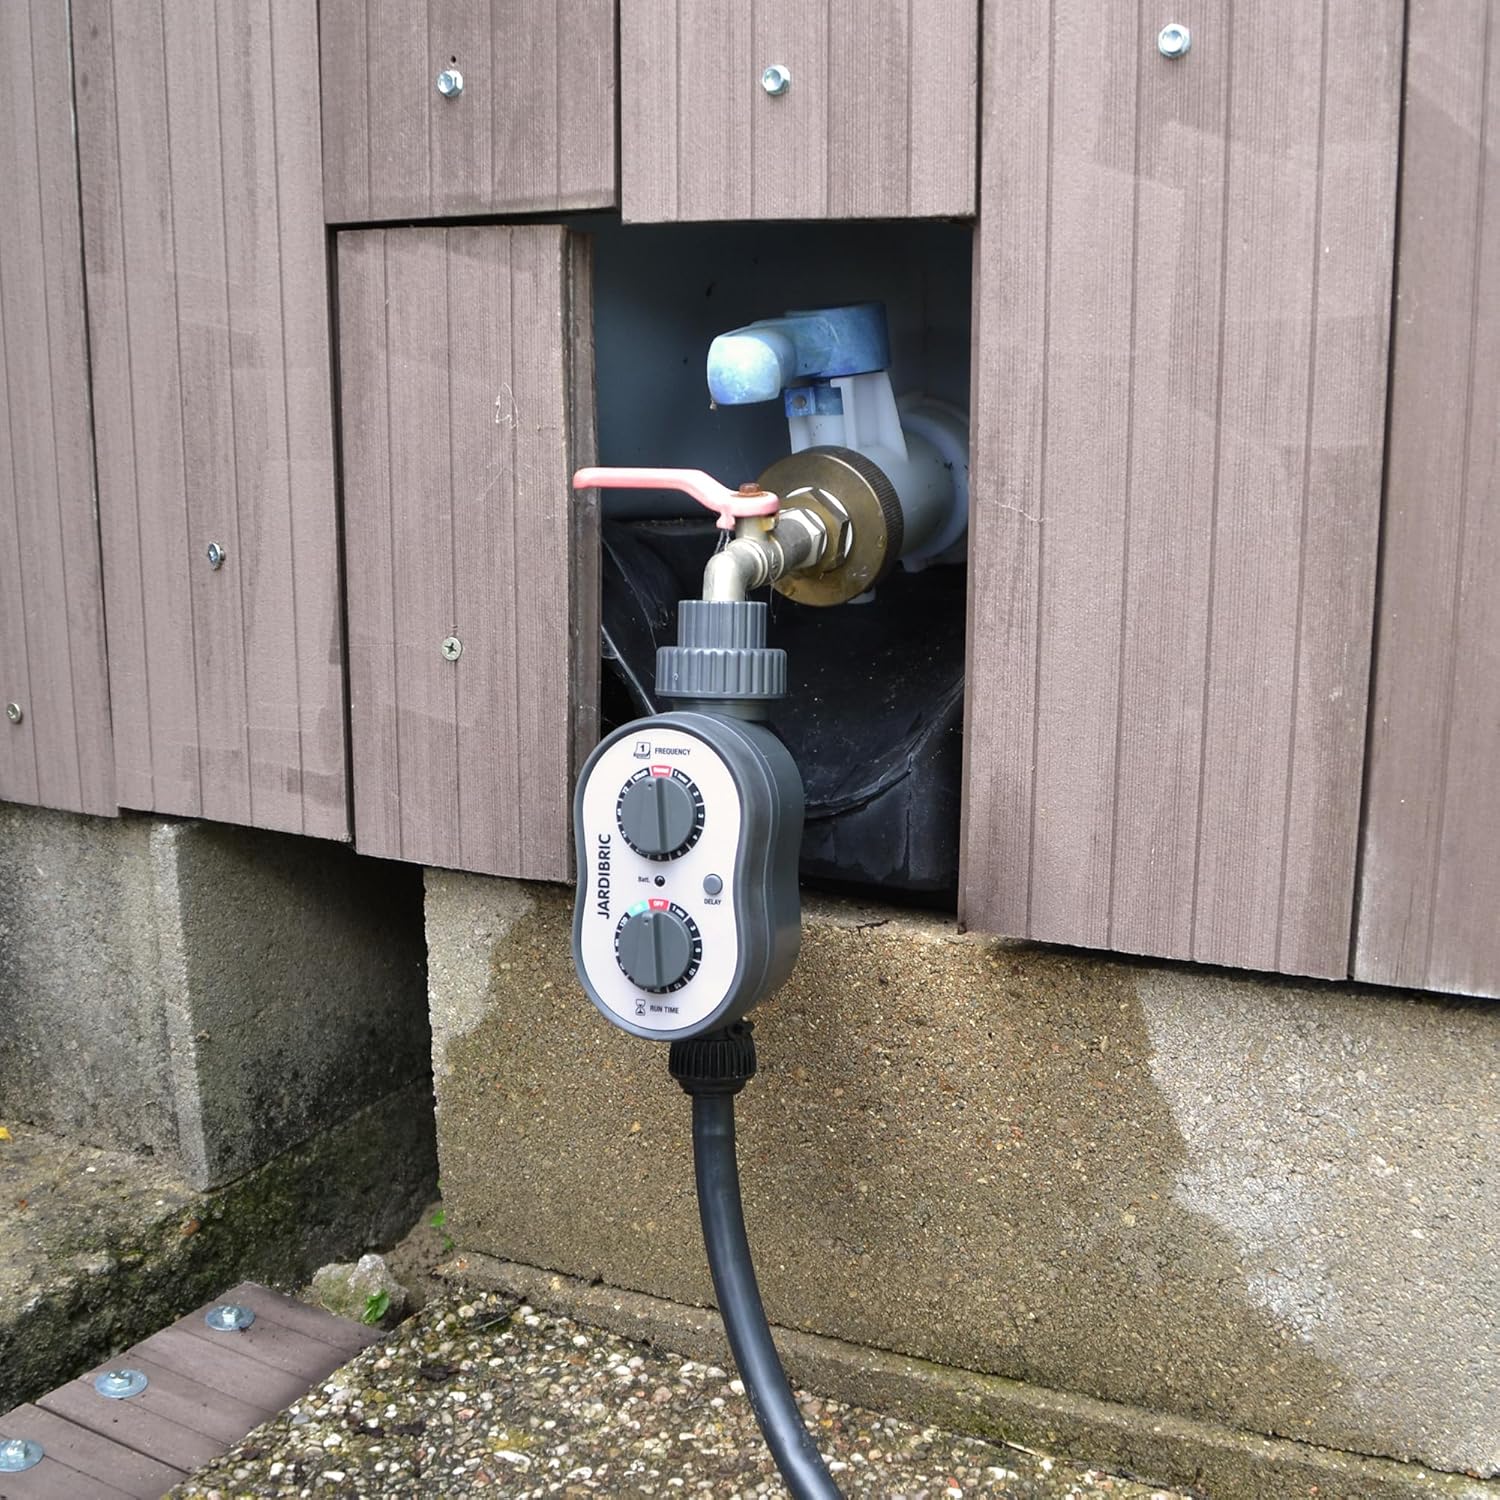
Image: The Jardibric PNR16 Irrigation Programmer installed and connected to an outdoor faucet and hose, ready for use.
Operating Instructions
The Jardibric PNR16 programmer features two main dials for setting the watering frequency and run time, along with a delay button for advanced scheduling.

Image: Labeled diagram of the programmer highlighting the Frequency dial, Run Time dial, and Delay button.
Setting Watering Frequency
The top dial, labeled 'FREQUENCY', controls how often the watering cycle occurs. Rotate the dial to select your desired interval:
- Options range from 1 hour to 7 days.
- Available settings include 1, 2, 3, 4, 6, 8, 12, 24, 48, 72 hours, and 1 week.
- The 'Reset' option will clear any current programming and stop watering.
Setting Watering Run Time
The bottom dial, labeled 'RUN TIME', determines the duration of each watering session. Rotate the dial to select the desired length:
- Options range from 1 minute to 2 hours.
- Available settings include 1, 2, 3, 5, 10, 15, 20, 30, 60, 90, 120 minutes.

Image: Visual representation of customizable watering duration, from 1 minute to 2 hours, suitable for various garden types.
Delay Function
The 'DELAY' button allows you to postpone the start of the programmed watering cycle. Pressing this button will typically add a delay to the next scheduled watering. Refer to the specific programming options for detailed delay settings and how they interact with your chosen frequency.
Example Programming
To set the programmer to water every day for 10 minutes:
- Turn the 'FREQUENCY' dial to 24 hours.
- Turn the 'RUN TIME' dial to 10 minutes.
The watering will commence after the initial delay determined by the 'FREQUENCY' setting (i.e., 24 hours from the moment of setting) and will then repeat daily.
Programming Options
With 110 available programming options, this programmer offers extensive flexibility to adjust watering according to various parameters such as duration, frequency, and specific watering days. Experiment with different combinations to find the optimal schedule for your garden's needs.
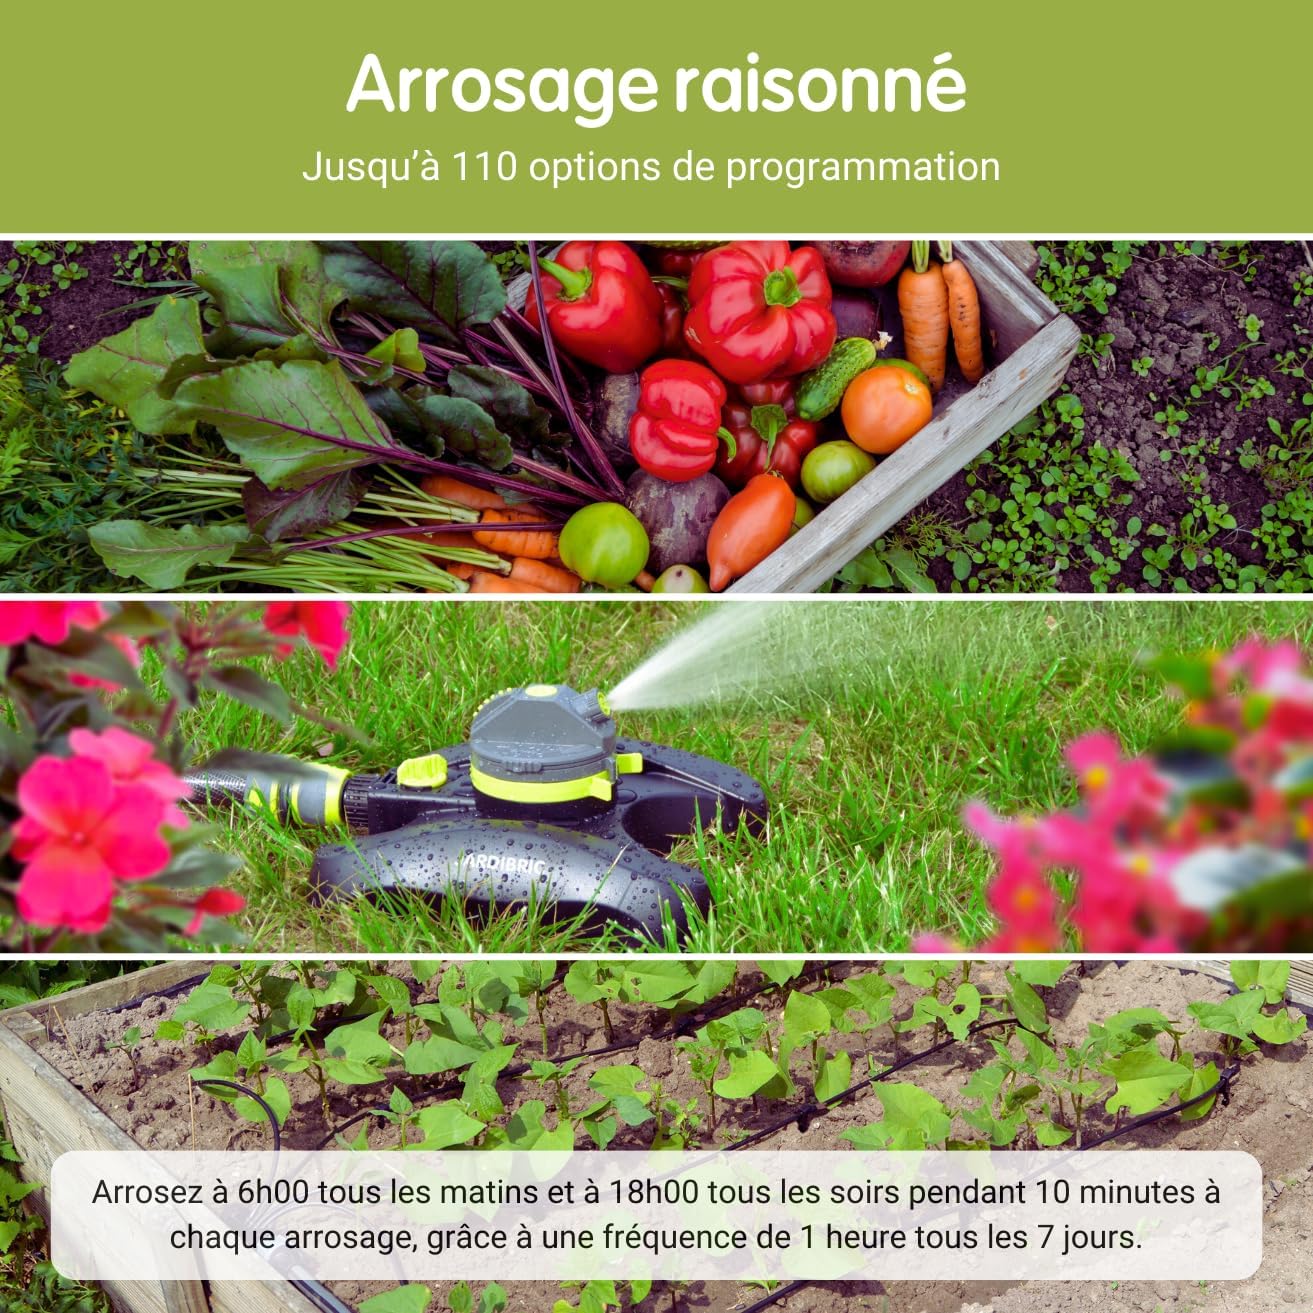
Image: Examples of reasoned watering, including a vegetable garden, a sprinkler system, and drip irrigation, all manageable with the programmer.
Maintenance
Weather Resistance
This programmer is designed for outdoor use and is generally weather-resistant. It is suitable for installation in your garden or outdoor space. However, it is important to note that it is not frost-resistant. Prolonged exposure to freezing temperatures can damage the internal components.
Winter Storage
During winter months or periods when freezing temperatures are expected, it is highly recommended to:
- Remove the programmer from the faucet.
- Drain any remaining water from the unit.
- Remove the batteries to prevent corrosion.
- Store the programmer in a dry, frost-free location (e.g., garage, shed, basement) to ensure its longevity and proper function for subsequent seasons.
Troubleshooting
- Device Not Working or Not Programming:
Ensure batteries are new and correctly inserted with proper polarity. After battery insertion, there might be a 1-5 second delay before the valve initializes. If the device still does not respond, try replacing the batteries with a fresh set. - Water Leakage or Continuous Flow:
If the device leaks from connections or water flows continuously when it should be off, first check that the connection to the faucet and hose is secure and properly sealed. Ensure the rubber washers are in place and not damaged. Internal damage can sometimes cause continuous flow; if the issue persists after checking connections, the unit may need replacement. - Protective Cover Difficult to Open:
If the plastic protective cover becomes stiff or difficult to open, apply gentle, even pressure around the edges. Avoid excessive force to prevent cracking or breaking the cover. Ensure no dirt or debris is lodged in the seal. - Low Water Pressure Operation:
This programmer is designed to function effectively even with low water pressure, operating within a range of 0 to 8 bar. This makes it suitable for various water sources, including rain harvesting systems. - Rain Detector Compatibility:
The programmer is compatible with external rain detectors (e.g., Jardibric DP13, sold separately). Connecting a rain detector will automatically interrupt watering cycles during rainfall, contributing to water conservation.

Image: The programmer installed on a faucet, illustrating its compatibility with low-pressure systems, such as those connected to rain barrels.
Specifications
| Feature | Specification |
|---|---|
| Model Number | PNR16 |
| Operating Pressure | 0 to 8 bar |
| Number of Ways | 1 |
| Adjustable Duration | 1 minute to 2 hours |
| Adjustable Frequency | 1 hour to 7 days |
| Programming Options | 110 |
| Power Source | 2 x 1.5V AA alkaline batteries (not included) |
| Material | Plastic |
| Color | Grey |
| Package Dimensions | 24 x 16.5 x 9 cm |
| Product Weight | 500 g |
| Compatibility | Rain detectors, drip irrigation systems |
Warranty and Support
For specific warranty information, terms, and conditions, please refer to the product packaging or any documentation included with your purchase. In case of technical issues or questions not covered in this manual, please contact Jardibric customer service directly. Keep your proof of purchase for any warranty claims.

Image: Front view of the Jardibric PNR16 Faucet Irrigation Programmer, showcasing its two control dials.

Image: The Jardibric PNR16 Irrigation Programmer with its clear protective cover closed, providing protection to the dials.
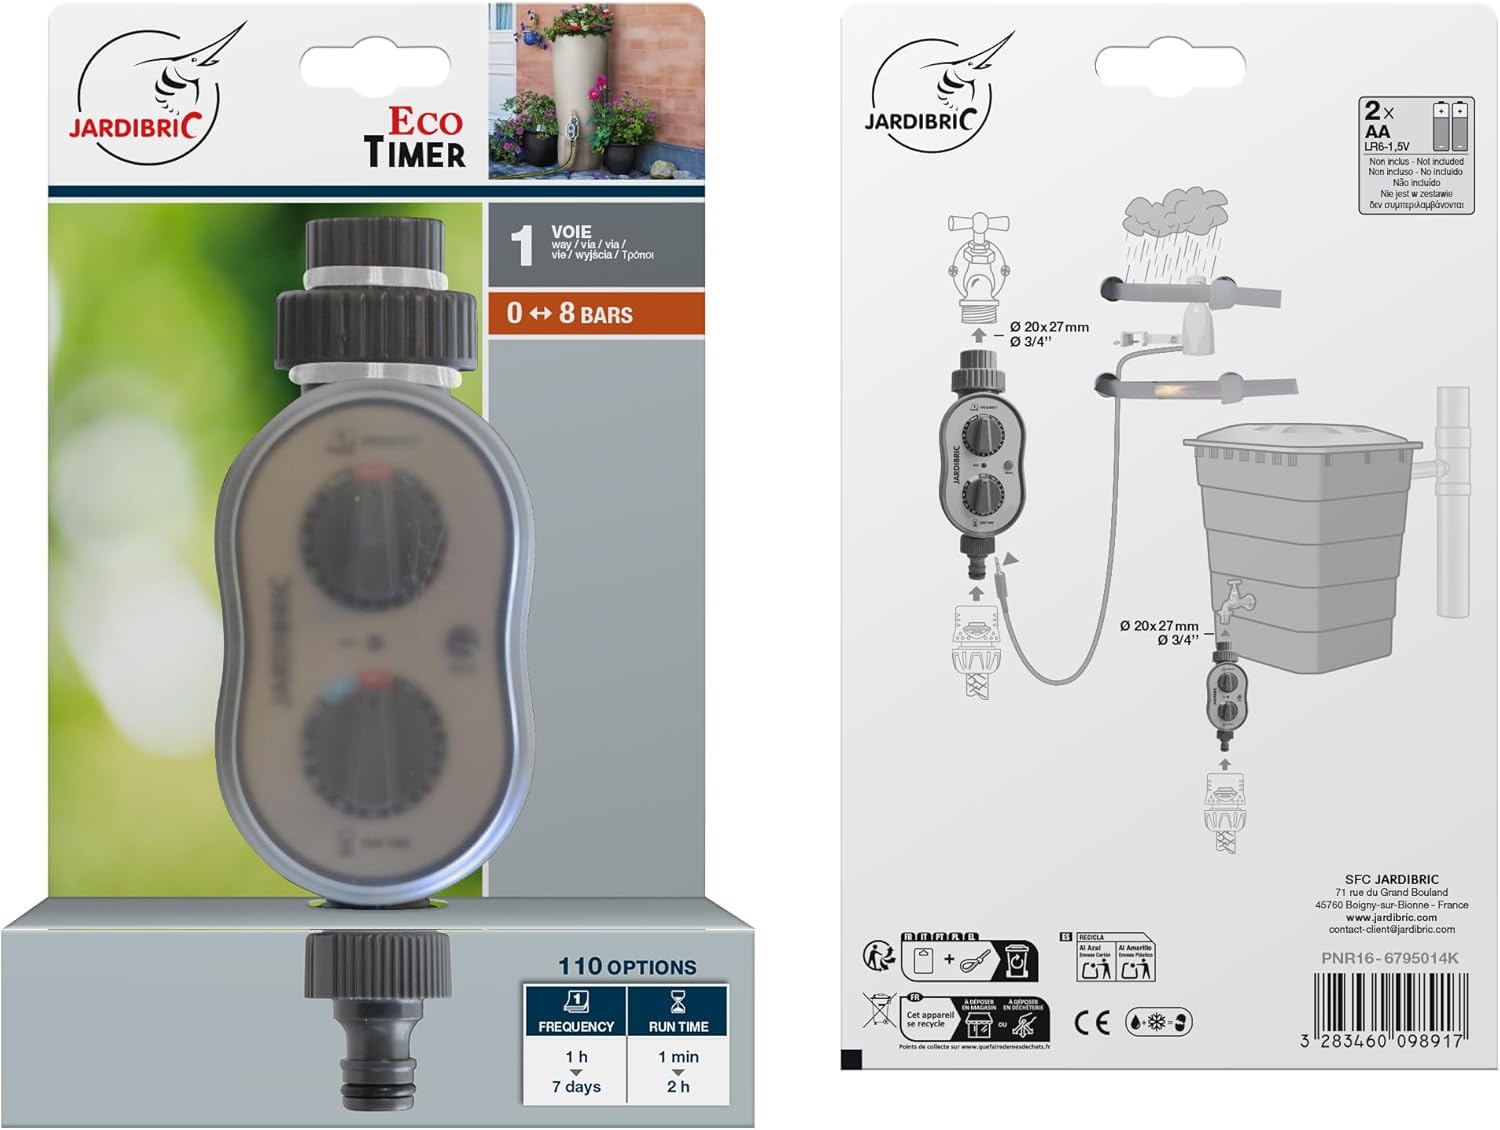
Image: The product packaging, displaying key features and a simplified installation diagram.
Ask a question about this manual
Ask about setup, troubleshooting, compatibility, parts, safety, or missing instructions. Manuals+ will review the question and use this page’s manual context to help answer it.