Introduction
This manual provides detailed instructions for the setup, operation, and maintenance of your AUNMAS hws8g0vnk1-01 Digital LED Alarm Clock. This device features a digital time display, alarm with snooze function, temperature and humidity monitoring, and a time projection feature. Please read this manual thoroughly before using the product to ensure proper function and longevity.
Important Safety Information
- Do not expose the device to extreme temperatures, direct sunlight, or high humidity.
- Avoid dropping or subjecting the device to strong impacts.
- Use only the specified power adapter or batteries.
- Keep the device away from water or other liquids.
- Do not attempt to disassemble or repair the device yourself. Contact qualified service personnel.
Product Overview
Familiarize yourself with the components and controls of your digital alarm clock.
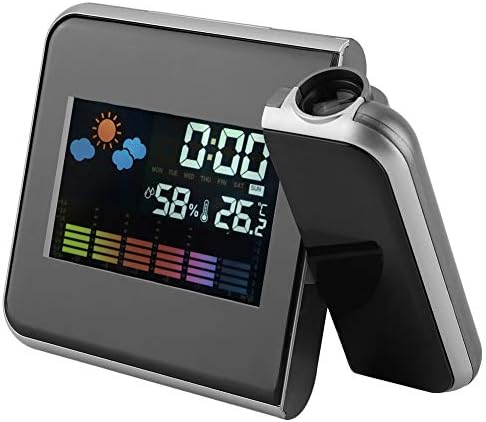
Figure 1: Front view of the AUNMAS hws8g0vnk1-01 Digital LED Alarm Clock, displaying time, humidity, temperature, and weather icons.

Figure 2: Rear view of the alarm clock, showing control buttons, battery compartment, and power input.
Control Buttons and Ports:
- MODE: Used to enter setup modes for time, alarm, etc.
- UP / DOWN: Used to adjust values during setup.
- MAX / MIN: Displays maximum/minimum temperature and humidity.
- SNZ: Activates the snooze function for the alarm.
- Probe Hole: For external sensors (if applicable, not included).
- Power Supply (AAA*2): Battery compartment for backup power.
- External Power Interface (DC 4.5V): For connecting the USB power cable.
- Supporting Base: Provides stability for the clock.
Setup
Powering the Device
The alarm clock can be powered via a USB cable or by AAA batteries for backup.
- USB Power: Connect the provided USB cable to the "External Power Interface (DC 4.5V)" on the back of the clock and plug the other end into a compatible USB power adapter (not included) or a USB port.
- Battery Backup: Open the battery compartment on the back of the clock and insert 2 AAA batteries (not included), ensuring correct polarity. Batteries provide backup for settings in case of power loss, but the display may turn off to conserve power when running on batteries alone.
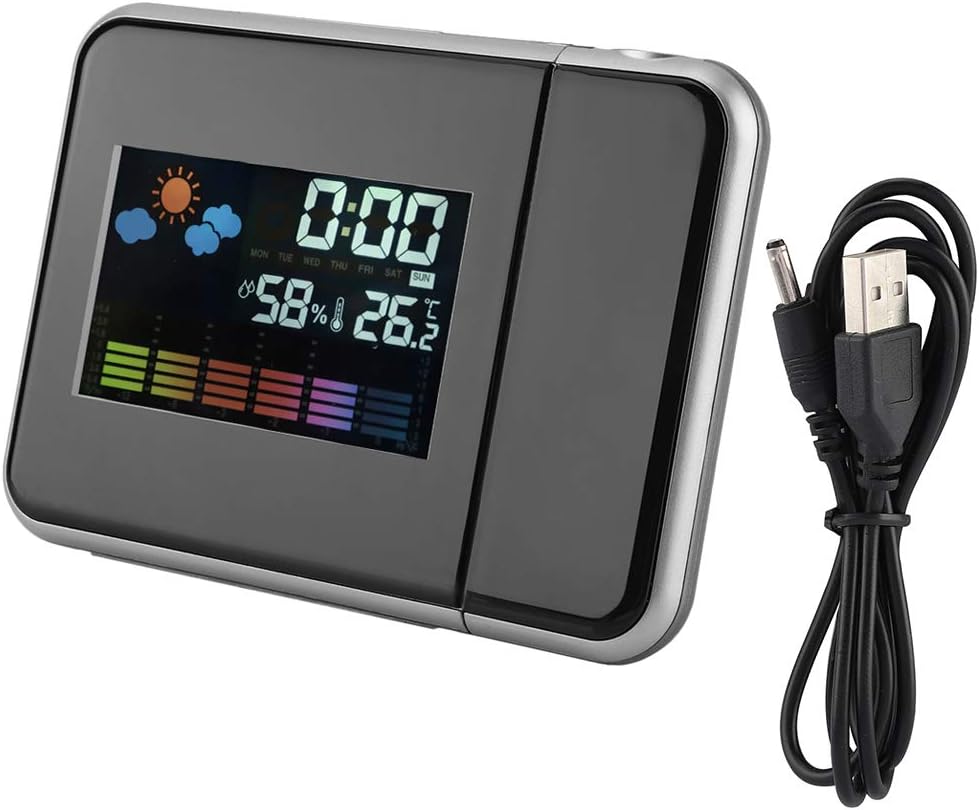
Figure 3: The alarm clock connected via its USB power cable.
Operating Instructions
Setting Time and Date
- Press the MODE button repeatedly until the time display starts flashing.
- Use the UP and DOWN buttons to adjust the hour.
- Press MODE again to move to minutes, then use UP and DOWN to adjust.
- Continue pressing MODE to cycle through year, month, and day settings, adjusting each with UP and DOWN.
- Once all settings are correct, press MODE one last time or wait a few seconds for the settings to save automatically.
Setting the Alarm
- Press the MODE button until the alarm icon appears and the alarm time starts flashing.
- Use the UP and DOWN buttons to set the desired alarm hour.
- Press MODE again to set the alarm minutes using UP and DOWN.
- Press MODE one last time or wait for the settings to save.
- To activate/deactivate the alarm, refer to the specific icon on the display or a dedicated alarm toggle button if present (not explicitly labeled in image, typically part of MODE cycle or a separate switch).
Snooze Function
When the alarm sounds, press the SNZ button to temporarily silence the alarm. The alarm will sound again after a short interval (typically 5-10 minutes).
Temperature and Humidity Display
The clock automatically displays the current indoor temperature and humidity. The unit may cycle between Celsius and Fahrenheit or have a dedicated button for switching (not explicitly labeled). Pressing the MAX/MIN button will display the highest and lowest recorded temperature and humidity values since the last reset.
Time Projection Feature
The clock can project the time onto a wall or ceiling.
- Locate the projector lens on the side of the clock.
- Adjust the angle of the projector lens to direct the time display to your desired surface. The projection angle can be rotated up to 180 degrees.
- The optimal projection distance is between 1 to 5 meters (39.37 to 196.85 inches).

Figure 4: The alarm clock demonstrating its time projection feature.
Maintenance
- Cleaning: Wipe the clock's surface with a soft, dry cloth. Do not use abrasive cleaners or solvents.
- Battery Replacement: If using battery backup, replace AAA batteries when the display becomes dim or settings are not retained during power outages. Ensure correct polarity when inserting new batteries.
- Storage: If storing the clock for an extended period, remove the batteries to prevent leakage.
Troubleshooting
| Issue | Possible Cause | Solution |
|---|---|---|
| Display turns off or resets when unplugged. | No battery backup or depleted batteries. | Install 2 fresh AAA batteries for backup power. The display may still turn off on battery power to save energy, but settings will be retained. |
| Temperature/humidity readings are inaccurate. | Clock placed near heat sources, vents, or in direct sunlight. | Relocate the clock to a stable environment away from direct heat, cold, or drafts. Allow time for readings to stabilize. |
| Time projection is blurry or unclear. | Incorrect focus or distance. | Adjust the focus ring on the projector lens (if available) and ensure the projection distance is within 1 to 5 meters. |
| Alarm does not sound. | Alarm is not activated or volume is too low. | Ensure the alarm is set and activated (check for alarm icon on display). Check for any volume settings (if applicable). |
Specifications
| Feature | Detail |
|---|---|
| Brand | AUNMAS |
| Model Number | hws8g0vnk1-01 |
| Dimensions (L x W x H) | 16 x 12 x 7 cm (approximately 6.3 x 4.7 x 2.8 inches) |
| Weight | 10 g (0.35 oz) |
| Material | Plastic |
| Power Source | USB Cable (DC 4.5V) / 2 x AAA Batteries (backup) |
| Display Type | Digital |
| Special Features | Humidity Display, Time Projection, Temperature Display, Alarm, Snooze |
| Intended Use | Indoor |
Warranty and Support
For warranty information or technical support, please refer to the retailer's return policy or contact the seller directly through your purchase platform. Keep your purchase receipt as proof of purchase.