1. Product Overview
The DTA A316316-2 Rear CV Axles are designed for specific Arctic Cat Prowler ATV models, providing reliable performance for both rear left and right applications. These axles are manufactured to meet OE quality standards, ensuring a precise fit and straightforward installation. They feature high-quality steel center shafts, premium neoprene boots for excellent temperature tolerance, and are pre-assembled with specially formulated moly grease to reduce friction and resist high temperatures.
1.1 Compatibility
- 2009 Arctic Cat Prowler 550
- 2010-2014 Arctic Cat Prowler XT550
- 2006-2008 Arctic Cat Prowler 650
- 2006-2009 Arctic Cat Prowler XT650
- 2009 Arctic Cat Prowler XT700
- 2011-2014 Arctic Cat Prowler XTX700
- 2014-2015 Arctic Cat Prowler HDX500
- 2011-2015 Arctic Cat Prowler HDX700
- 2009-2014 Arctic Cat Prowler XTZ1000
1.2 Key Features
- QS 9000 and ISO 9002 certified manufacturing for quality assurance.
- Precision threads and splines for proper fit and easy installation.
- High-quality steel center shaft construction.
- Premium grade neoprene boots with excellent tolerance to high and low temperatures.
- Specially formulated moly grease to resist high temperatures and reduce friction.
- Includes new dust shields, ABS rings, and axle nut where applicable.
2. Installation Guide
Installation of CV axles requires mechanical knowledge and specialized tools. It is highly recommended that installation be performed by a qualified technician. Improper installation can lead to premature failure of the axle or other vehicle components.
2.1 Safety Precautions
- Always wear appropriate personal protective equipment (PPE), including safety glasses and gloves.
- Ensure the vehicle is securely supported on jack stands or a lift before beginning work.
- Disconnect the battery to prevent accidental electrical activation.
- Refer to your vehicle's service manual for specific torque specifications and procedures.
2.2 Pre-Installation Checklist
- Verify that the new DTA A316316-2 axles match the original axles in length and spline count.
- Inspect the new axles for any shipping damage.
- Gather all necessary tools, including wrenches, sockets, torque wrench, pry bar, and axle nut socket.
2.3 General Installation Steps (Consult Vehicle Service Manual for Details)
- Lift and secure the vehicle. Remove the wheel and tire assembly.
- Remove the axle nut and any retaining clips or cotter pins.
- Disconnect suspension components as needed to allow the axle to be removed from the hub and differential.
- Carefully remove the old CV axle. Be prepared for differential fluid leakage if applicable.
- Clean the mating surfaces on the differential and hub.
- Insert the new DTA A316316-2 CV axle into the differential, ensuring it is fully seated.
- Guide the outer spline into the hub assembly.
- Reassemble suspension components.
- Install the new axle nut and torque to the manufacturer's specifications. Install new cotter pin if required.
- Reinstall the wheel and tire assembly. Lower the vehicle.
- Check differential fluid level and top off if necessary.

Image 1: View of the DTA A316316-2 Rear CV Axle, showing the differential side with splines and boot.
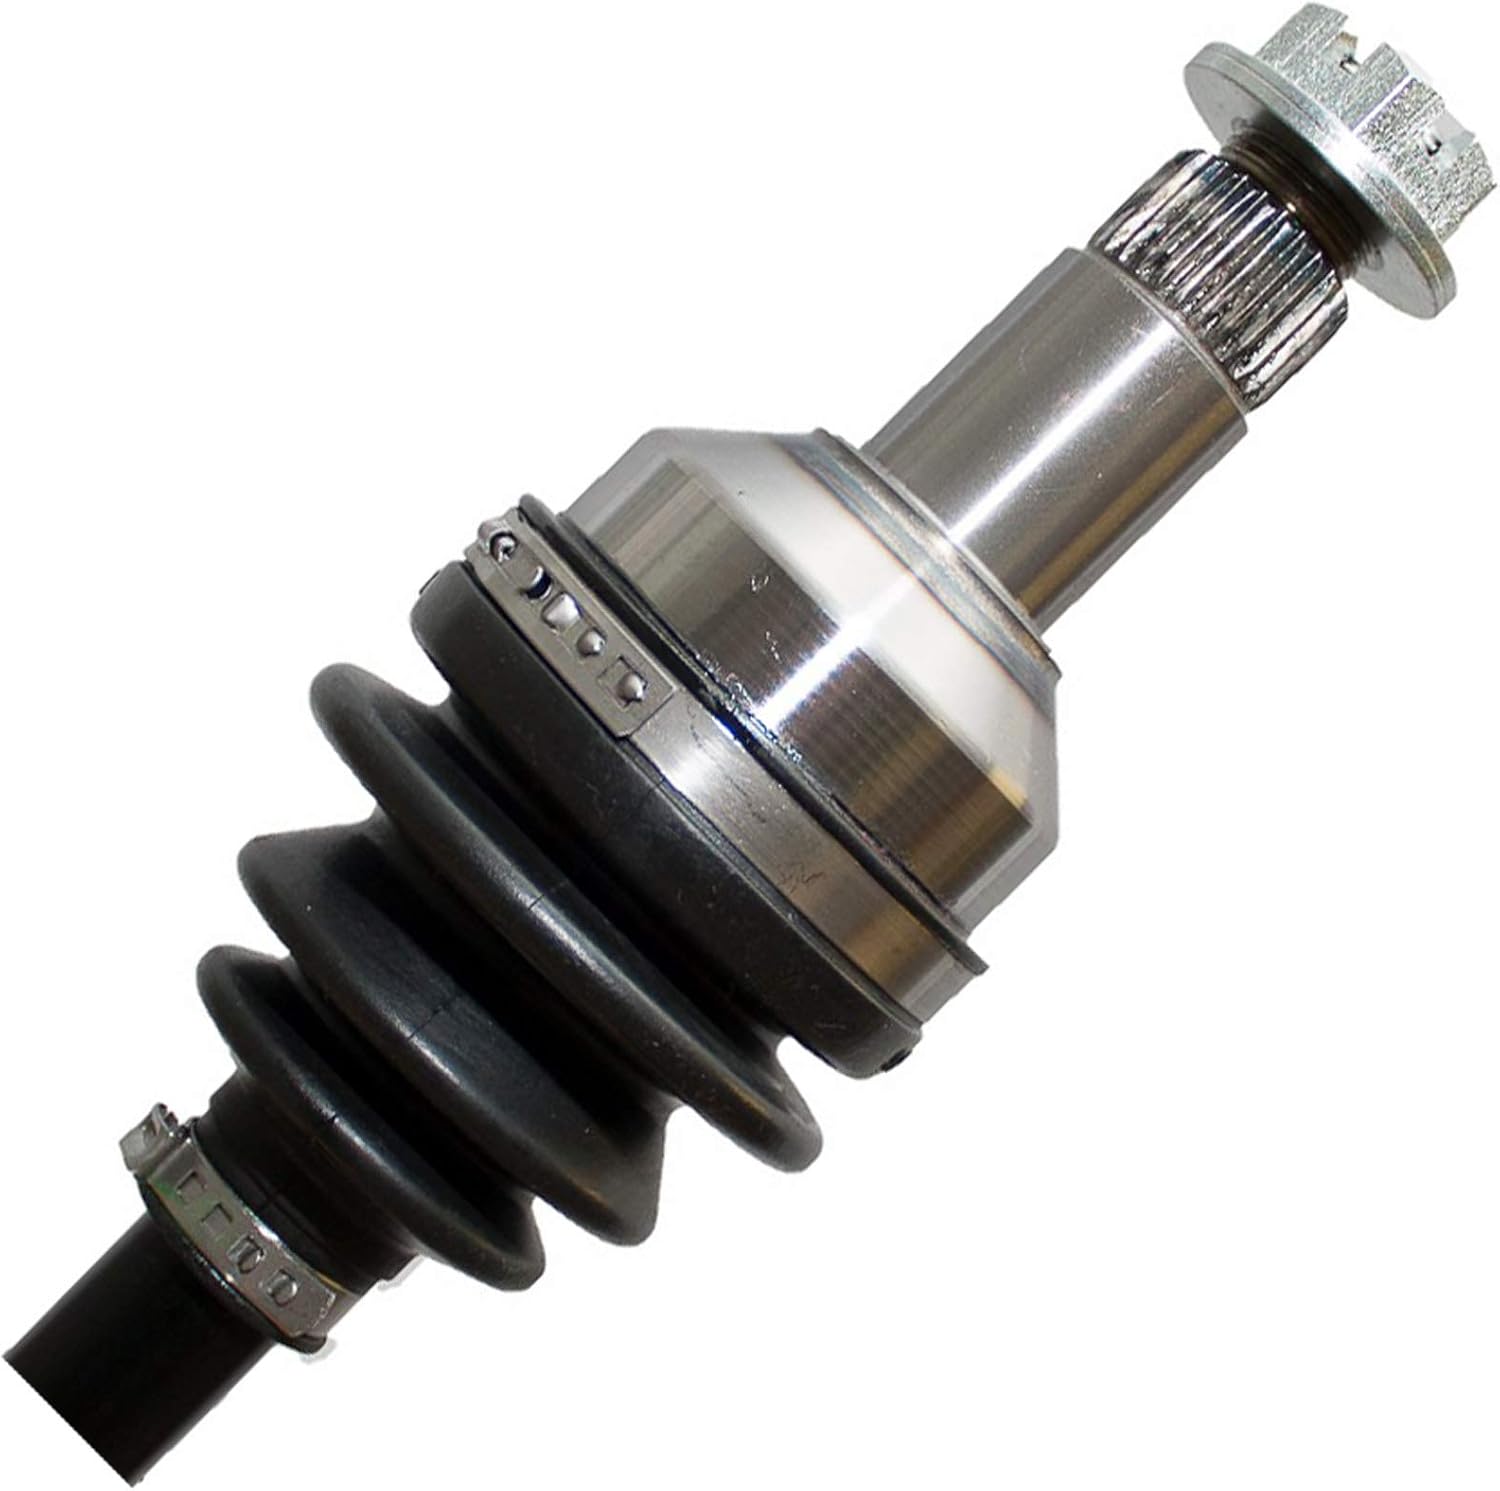
Image 2: View of the DTA A316316-2 Rear CV Axle, showing the wheel hub side with axle nut and splines.

Image 3: Graphic highlighting the design of a new Constant Velocity Axle.
3. Operation and Performance
Once properly installed, the DTA A316316-2 CV axles will transmit power smoothly from the differential to the wheels. You should experience quiet operation and consistent power delivery. Any unusual noises, vibrations, or loss of power after installation should be investigated immediately.
4. Maintenance
Regular inspection of your CV axles can help extend their lifespan and prevent unexpected failures.
4.1 Inspection Schedule
- Inspect CV axle boots during every oil change or routine service.
- Check for any signs of grease leakage around the boots or joints.
- Listen for clicking, popping, or grinding noises, especially when turning or accelerating.
4.2 Boot Integrity
The neoprene boots protect the CV joints from dirt, water, and debris while retaining the lubricating grease. If a boot is torn, cracked, or damaged, the joint will quickly fail. Replace damaged boots promptly or consider replacing the entire axle if the joint has been exposed to contaminants for an extended period.
5. Troubleshooting
If you experience issues after installing or during the use of your DTA CV axles, consider the following common problems and potential causes:
- Clicking or Popping Noise (especially when turning): Often indicates a worn or damaged outer CV joint.
- Clunking Noise (when shifting from drive to reverse): May suggest excessive play in the inner CV joint or differential.
- Vibration (during acceleration): Could be caused by a worn inner CV joint, an unbalanced axle, or improper installation.
- Grease Leaks: Indicates a damaged or improperly clamped boot. Address immediately to prevent joint failure.
If troubleshooting steps do not resolve the issue, consult a qualified mechanic or contact DTA customer support.
6. Technical Specifications
| Specification | Detail |
|---|---|
| Manufacturer | DRIVE TECH AMERICA |
| Brand | DTA |
| Model Number | A316316 |
| Item Weight (approx.) | 18 pounds |
| Package Dimensions (approx.) | 30 x 10 x 5 inches |
| Certifications | QS 9000, ISO 9002 |
| Material | High quality steel center shaft, Neoprene boots |
| Lubricant | Specially formulated moly grease |
7. Warranty Information
DTA A316316-2 Rear CV Axles come with a 1-year / 12,000-mile limited product warranty. This warranty covers defects in materials and workmanship under normal use and service. Please retain your proof of purchase for warranty claims. The warranty does not cover damage due to improper installation, abuse, neglect, or modification.
7.1 Customer Support
For technical assistance, warranty claims, or any questions regarding your DTA product, please contact the manufacturer or your authorized dealer. Provide your product model number (A316316) and purchase details when seeking support.