1. Introduction
Thank you for choosing the LE LEMATEC AS118-2 Pneumatic Sandblasting Gun. This tool is designed for efficient removal of rust, paint, and corrosion from various surfaces including metal, wood, and glass. It operates with an air compressor and supports a wide range of abrasive media. Please read this manual thoroughly before operation to ensure safe and effective use of the product.

Figure 1.1: The LE LEMATEC AS118-2 Sandblasting Gun and its packaging, illustrating the product's design and key features.
2. Safety Information
Always observe the following safety precautions to prevent injury or damage to the tool:
- Personal Protective Equipment (PPE): Always wear appropriate PPE, including safety glasses or a face shield, gloves, and a respirator or dust mask to protect against airborne particles. Hearing protection is also recommended.
- Ventilation: Use the sandblasting gun in a well-ventilated area to avoid inhaling dust and fumes.
- Air Compressor: Ensure your air compressor meets the minimum requirements (4 CFM, up to 150 PSI) and is properly maintained. Never exceed the maximum rated pressure of the sandblasting gun.
- Abrasive Media: Use only recommended abrasive media. Ensure media is dry and free of contaminants.
- Secure Workpiece: Secure the item being blasted to prevent movement during operation.
- Children and Bystanders: Keep children and bystanders away from the work area.
- Disconnect Air Supply: Always disconnect the air supply before performing any maintenance, cleaning, or changing accessories.
3. Package Contents
Verify that all items are present in the package:
- LE LEMATEC AS118-2 Sandblasting Gun
- Ceramic Nozzle
- Steel Pick-up Tube
- 6 ft. Air Hose (3/8 ID)
- Coupler
- User Manual
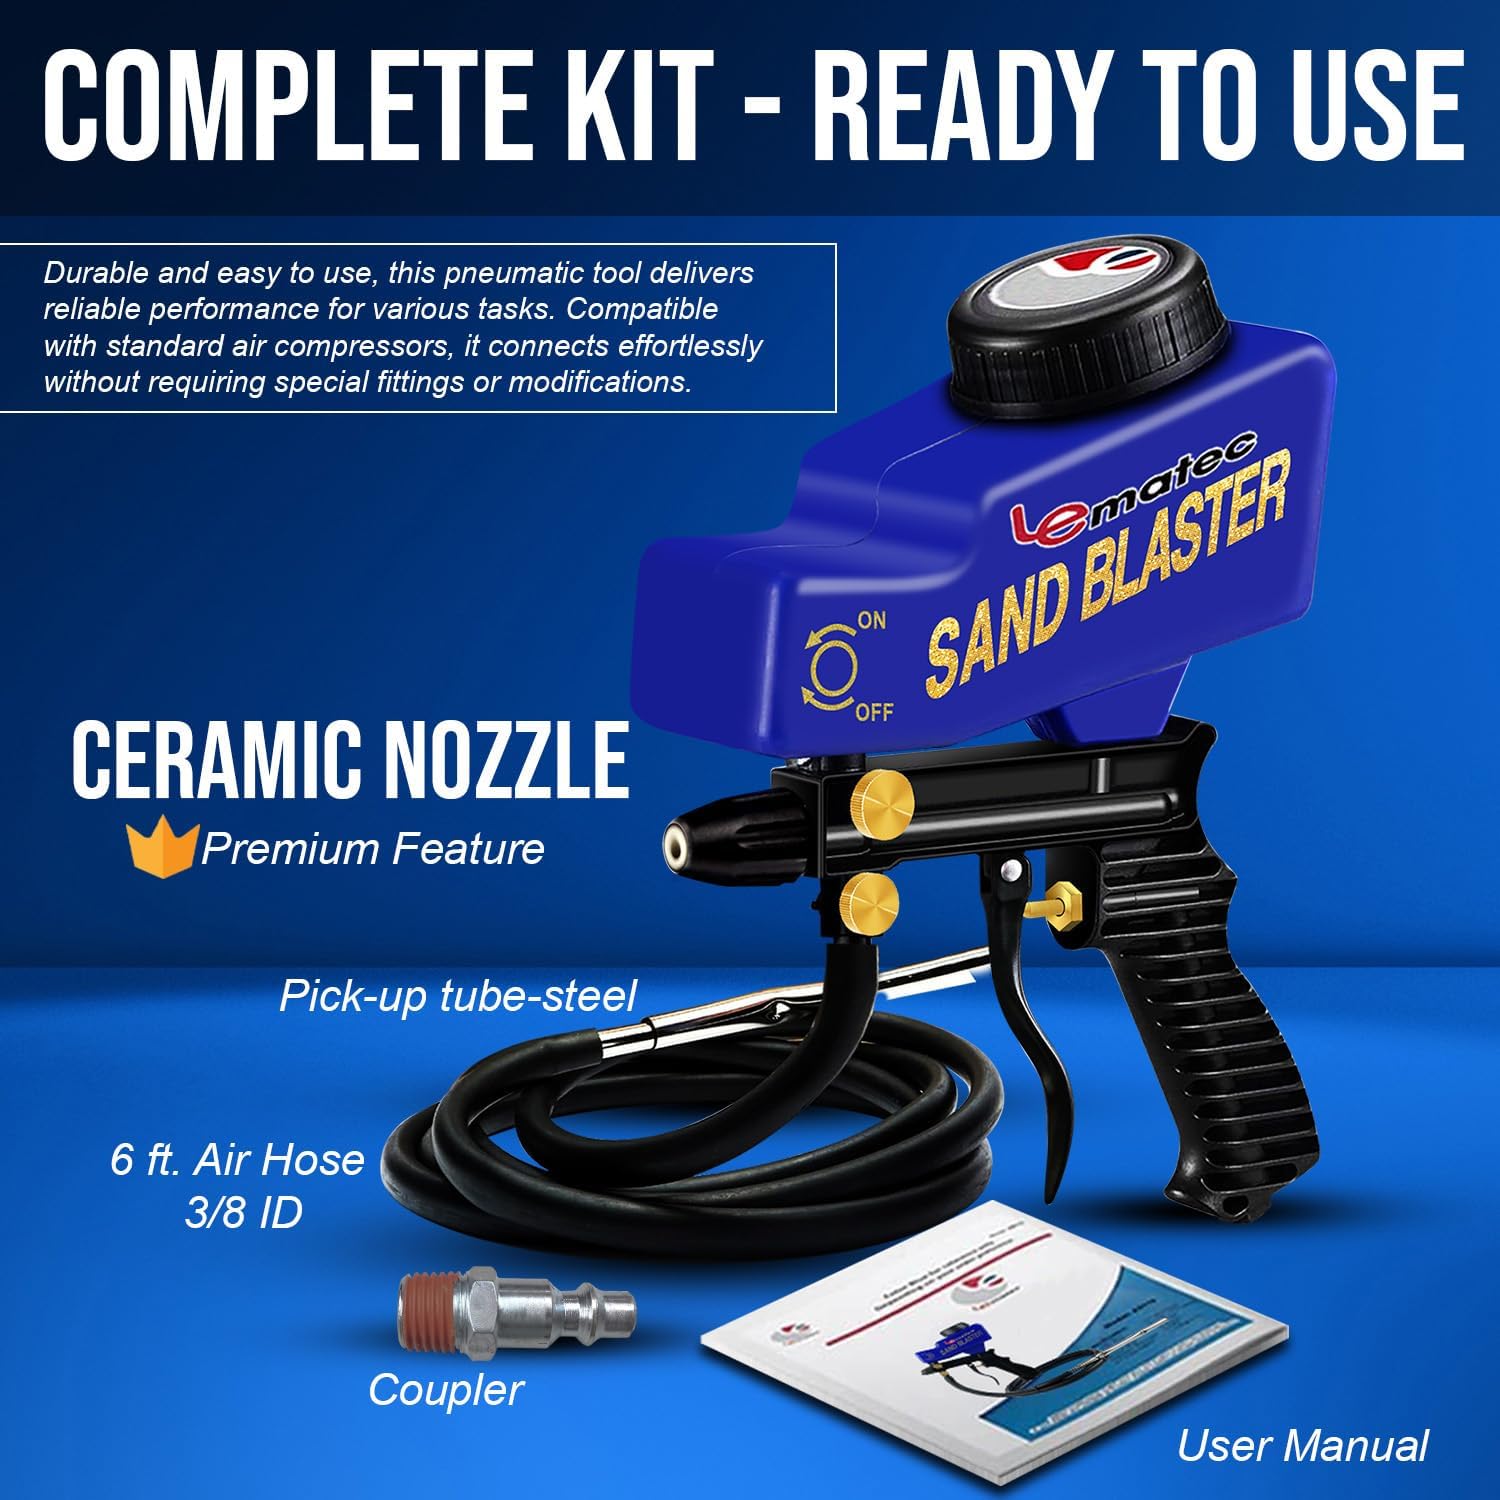
Figure 3.1: The complete kit, including the sandblasting gun, ceramic nozzle, pick-up tube, air hose, coupler, and user manual.
4. Product Overview
The AS118-2 features a dual-feed technology, combining gravity feed for smaller tasks and siphon feed for larger projects. It includes two control regulators for adjusting media flow and air pressure.

Figure 4.1: Illustration of the dual feed technology, showing both gravity and siphon feed options for versatile use.

Figure 4.2: Detail of the ceramic nozzle, a premium feature, along with key product specifications.
5. Setup
- Connect Air Supply: Attach the provided coupler to the air inlet of the sandblasting gun. Connect the air hose from your compressor to the coupler. Ensure all connections are secure to prevent air leaks.
- Choose Feed Method:
- Gravity Feed: For smaller tasks, fill the top-mounted hopper with your chosen abrasive media.
- Siphon Feed: For larger projects, attach the steel pick-up tube to the gun and place the other end into a container of abrasive media.
- Select Abrasive Media: The gun is compatible with various media such as aluminum oxide, silicon carbide, mineral slag, and baking soda. Choose the appropriate media for your application. Ensure the media is dry and free of clumps.
- Air Compressor Requirements: A compressor with a minimum of 4 CFM (Cubic Feet per Minute) and capable of delivering up to 150 PSI (Pounds per Square Inch) is required for optimal performance. Avoid using pancake compressors or portable units under 5 gallons for continuous operation.

Figure 5.1: Guidance on air compressor compatibility, highlighting suitable upright compressors and unsuitable pancake compressors.
6. Operating Instructions
- Prepare Work Area: Ensure the work area is clear, well-ventilated, and that all necessary safety precautions are in place.
- Adjust Air Pressure: Connect the air supply and set your compressor to the desired pressure, typically between 90-120 PSI for most applications. The gun can handle up to 150 PSI.
- Adjust Media Flow: Use the two control regulators on the gun to fine-tune the media flow and air pressure for optimal results. Start with a lower flow and gradually increase until the desired effect is achieved.
- Begin Blasting: Hold the gun at an appropriate distance from the surface (typically 6-12 inches) and at an angle that allows for effective material removal without excessive rebound. Depress the trigger to begin blasting.
- Technique: Use consistent, overlapping strokes to ensure even coverage and avoid creating uneven surfaces. For delicate work like glass etching, use baking soda as media and adjust pressure accordingly.
- Rust Removal: The tool is highly effective for removing rust from automotive parts, chassis, and other metallic surfaces.
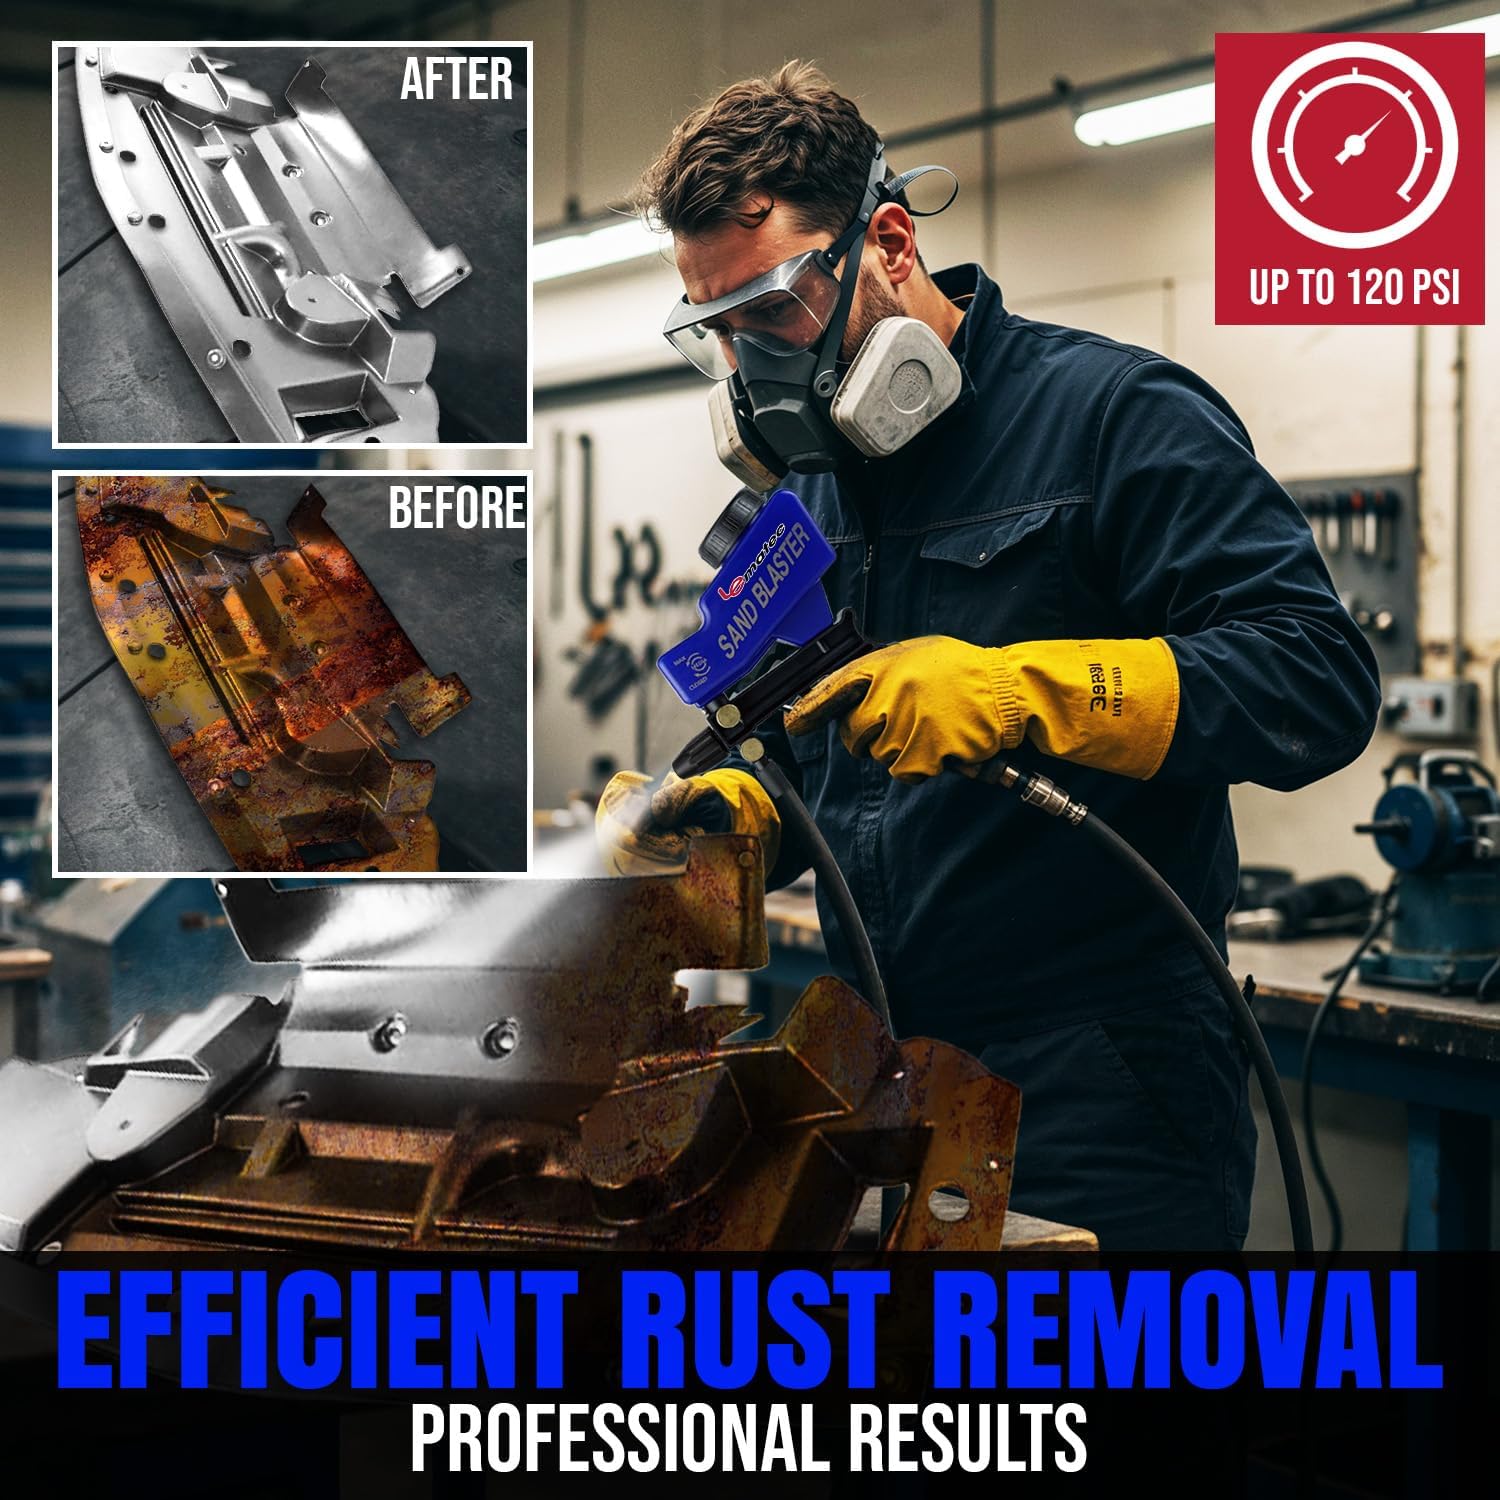
Figure 6.1: Visual demonstration of efficient rust removal, showing a rusted metal part before and after treatment with the sandblasting gun.

Figure 6.2: The sandblasting gun transforming a rusted surface to a restored, clean finish, demonstrating its precise cleaning power on various materials.

Figure 6.3: Examples of the sandblasting gun's versatility across different applications, such as automotive restoration, furniture refinishing, glass etching, and cleaning small parts.
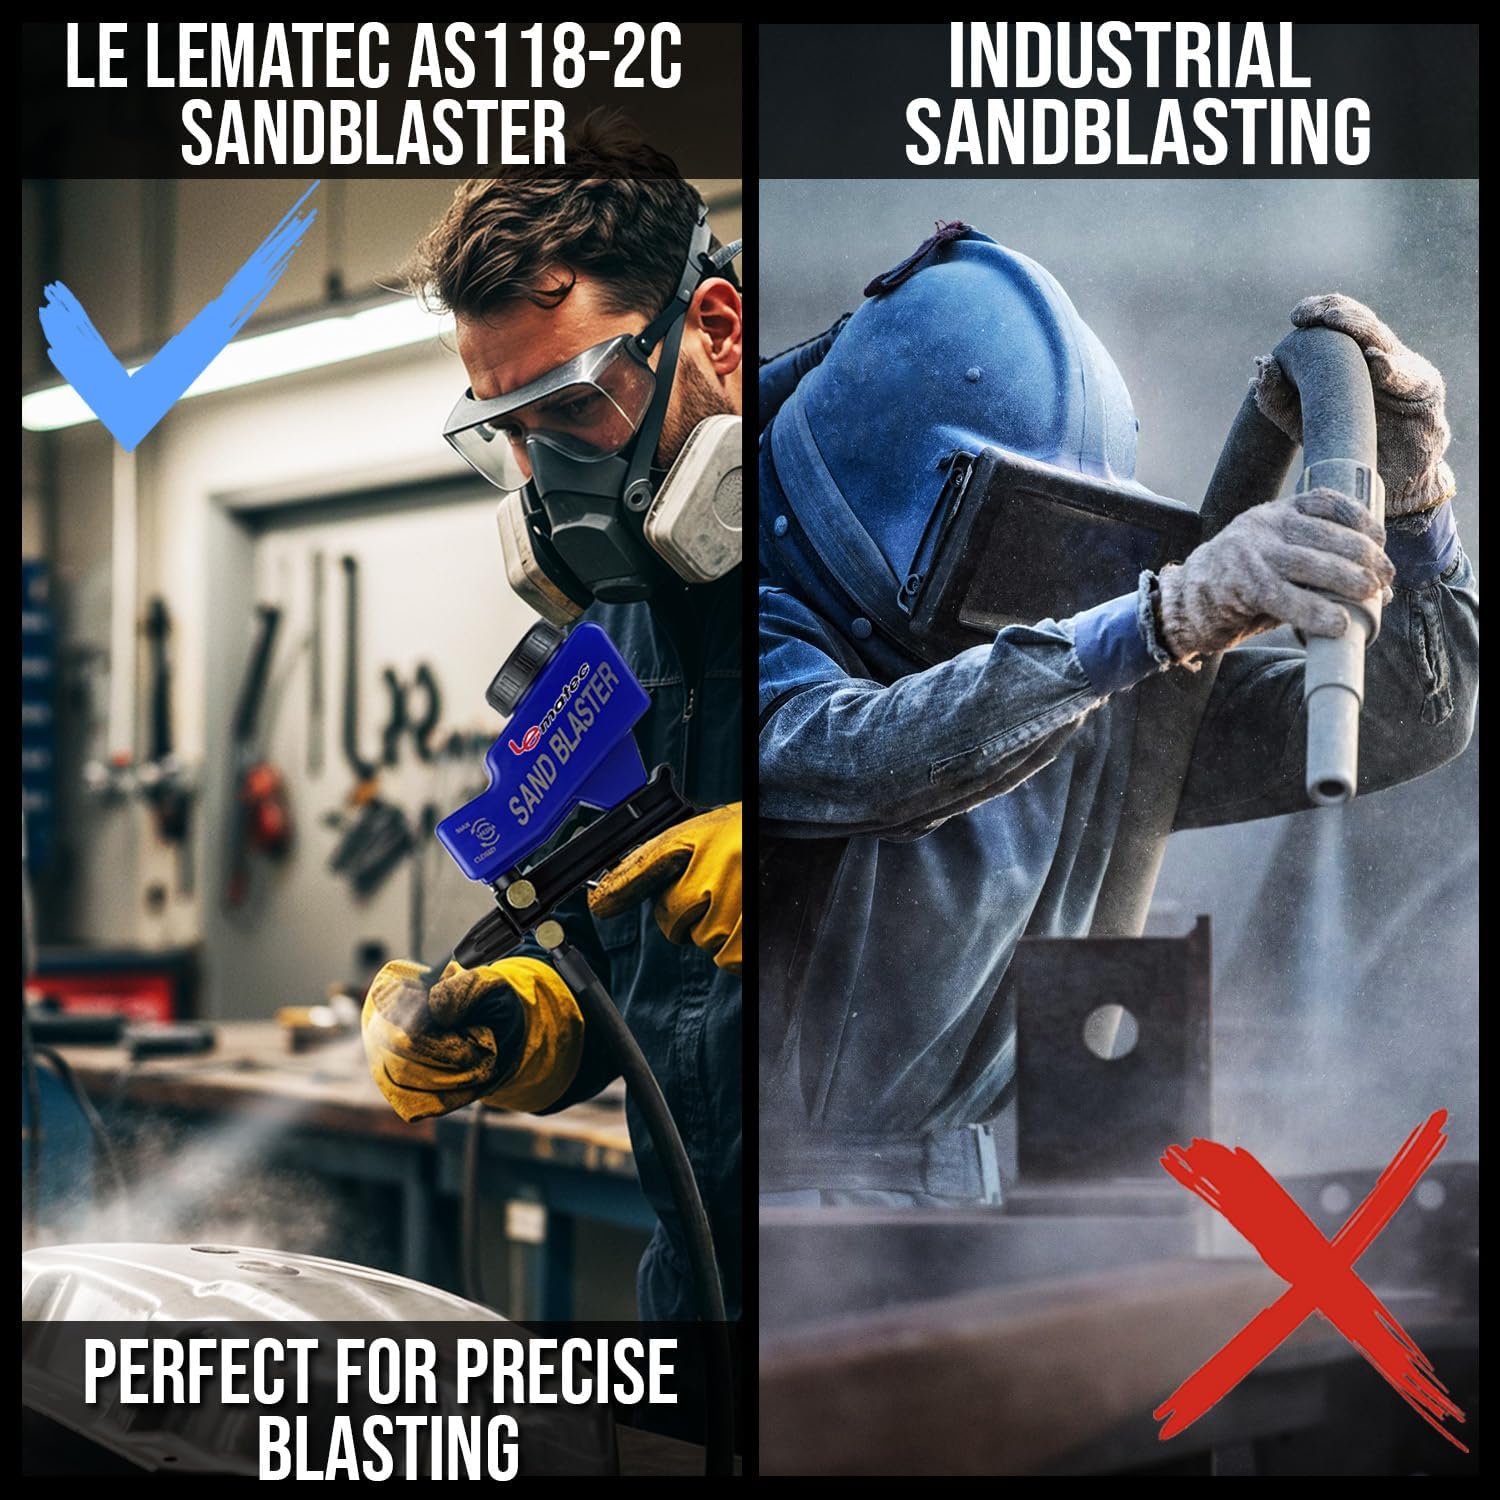
Figure 6.4: Highlighting the LE LEMATEC AS118-2's suitability for precise blasting tasks, distinguishing it from heavy industrial sandblasting.
Operating Video
Video 6.1: A demonstration of the pneumatic sandblaster in action, showing its use for cleaning various surfaces and removing rust.
7. Maintenance
- Cleaning: After each use, empty any remaining abrasive media from the hopper or pick-up tube. Disconnect the air supply and thoroughly clean the gun, especially the nozzle and internal passages, to prevent clogging.
- Nozzle Inspection: Regularly inspect the ceramic nozzle for wear. Replace worn nozzles to maintain optimal blasting performance.
- Lubrication: Apply a few drops of pneumatic tool oil to the air inlet before and after each use to lubricate internal components and prolong tool life.
- Storage: Store the sandblasting gun in a clean, dry place, away from moisture and extreme temperatures.
8. Troubleshooting
| Problem | Possible Cause | Solution |
|---|---|---|
| No abrasive flow or weak flow |
|
|
| Inconsistent blasting pattern |
|
|
| Air leaks |
|
|
9. Specifications
| Feature | Detail |
|---|---|
| Model Number | AS118-2 |
| Brand | LE LEMATEC |
| Weight | 0.99 kg (approximately 2.18 lbs) |
| Hose Length | 7 feet (approximately 2.13 meters) |
| Air Requirement | Minimum 4 CFM |
| Maximum PSI | 150 PSI (recommended operating 90-120 PSI) |
| Compatible Grit Types | Fine, Medium, Course (e.g., aluminum oxide, silicon carbide, mineral slag, baking soda) |
| Power Source | Air-powered (requires external air compressor) |
| Nozzle Type | Ceramic |
| Dimensions (L x W x H) | 20 x 8.5 x 8 cm (approximately 7.87 x 3.35 x 3.15 inches) |
10. Warranty and Support
For warranty information, technical support, or to purchase replacement parts, please refer to the contact information provided on the product packaging or visit the official LE LEMATEC website. Keep your purchase receipt as proof of purchase.