1. Introduction
This manual provides instructions for the Weelye RX74 24V Control Box Receiver, also compatible with RX30 24V systems. This control box is designed as a replacement part for children's electric ride-on cars. It features a built-in slow start function, eliminating the need for additional slow starter installations.
2. Compatibility
The Weelye RX74 24V control box is specifically designed for certain children's ride-on toys. To ensure compatibility, it is crucial to verify that the appearance and model number of this control box match your original unit. The RX74 24V model is equivalent to the RX30 24V model.

Image: Comparison of RX30 24V and RX74 24V labels, indicating their equivalence.
Before installation, always check the condition of your vehicle's battery and ensure all battery cables are properly connected. This control box is intended for 24V systems.
3. Installation
- Preparation: Before beginning installation, ensure the ride-on car's power is completely off and the battery is disconnected.
- Locate Original Control Box: Open your electric ride-on car to access the existing control box. Note its connections and mounting position.
- Disconnect Wiring: Carefully disconnect all wiring harnesses from the old control box. Pay attention to the orientation and type of each connector.
- Remove Old Control Box: Unmount the old control box from its position.
- Install New Control Box: Mount the Weelye RX74 24V control box in the same location.
- Connect Wiring: Reconnect all wiring harnesses to the new control box. Refer to the wiring diagram below for proper connections. Ensure the 7-pin four-sided socket is correctly inserted.

Image: Detailed wiring diagram for the Weelye RX74 24V control box. This image illustrates connections for steering motor, drive motors (1 and 2), power supply, and the 7-pin connector for high/low speed switch, forward, back, ground wire, power output, and battery positive.
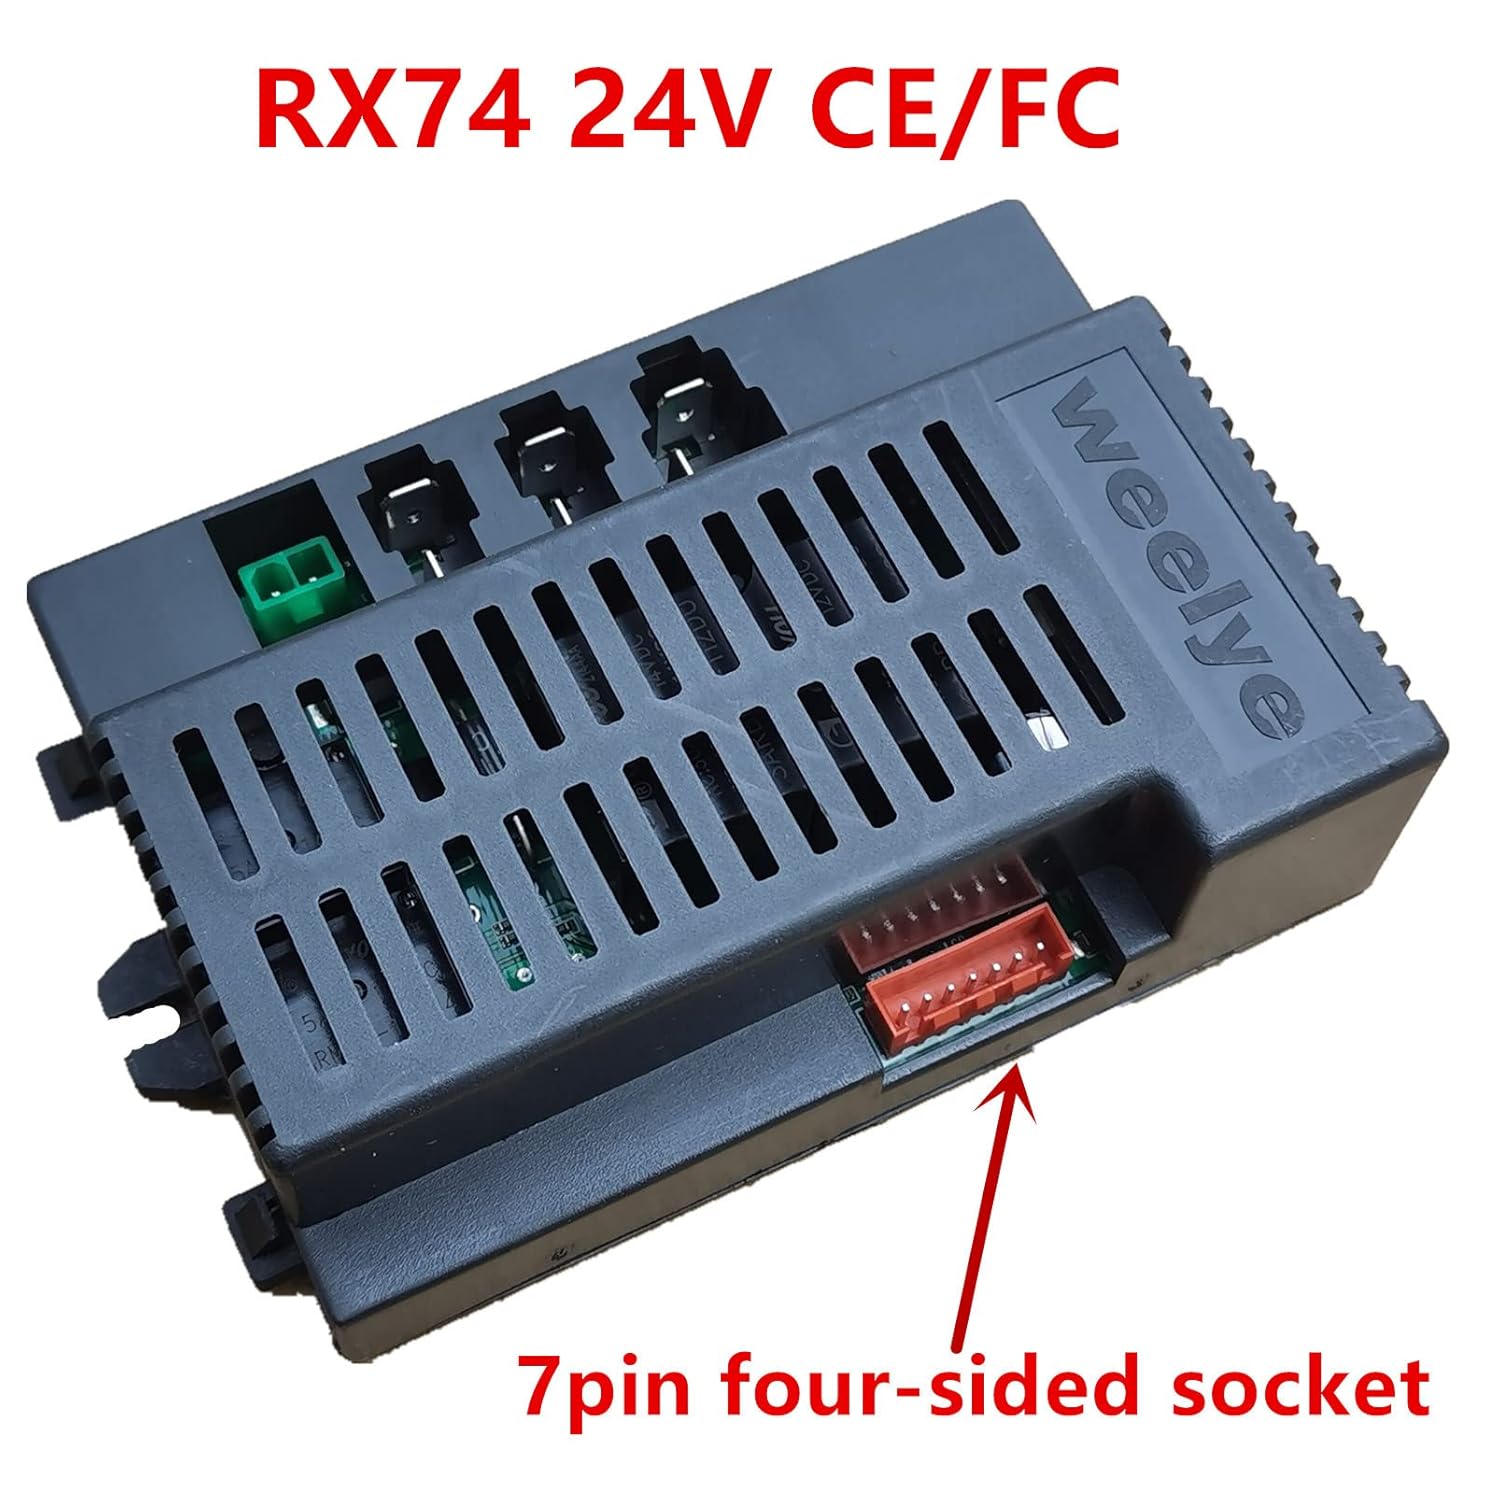
Image: Close-up view of the 7-pin four-sided socket on the Weelye RX74 24V control box, indicating its location for proper connection.
- Secure Connections: Double-check all connections to ensure they are secure and correctly seated.
- Initial Frequency Matching: For the first use, or after replacing the battery, the control box needs to be paired with the remote control. Refer to the remote control's manual for specific frequency matching instructions.
4. Operation
- Power On: Connect the vehicle's battery and turn on the main power switch.
- Slow Start Function: This control box includes a slow start feature, which provides a gradual acceleration to prevent sudden jolts, enhancing safety and comfort for the rider. No separate slow starter is required.
- Remote Control: The control box supports 2.4G Bluetooth connectivity for remote control operation. Ensure your remote control is properly paired as described in the installation section.
- Speed Control: If your ride-on car has a high/low speed switch, it will interact with this control box to regulate the vehicle's speed.
5. Troubleshooting
| Problem | Possible Cause | Solution |
|---|---|---|
| Vehicle does not power on or move after installation. |
|
|
| Vehicle powers on but stops intermittently, especially under load (e.g., in grass). |
|
|
| Steering or drive motors are not responding. |
|
|
6. Specifications
- Model: WEELYE-24V (RX74 24V / RX30 24V)
- Operating Voltage: 24 Volts (DC)
- Current Rating: 40 Amps
- Wattage: 960 watts
- Connectivity Protocol: Bluetooth (2.4G)
- Connector Type: Plug In
- Terminal Type: Solder
- Operation Mode: ON-NONE-ON
- Control Method: Touch (via remote)
- International Protection Rating: IP65
- Dimensions (L x W x H): 5 x 3.6 x 1.8 inches
- Item Weight: 6.7 ounces
- Compatible Devices: Electric Ride-On Cars (Power Wheel, Ride On Toy Cars)
7. Warranty and Support
For warranty information and technical support, please contact the seller or manufacturer directly. Keep your purchase receipt as proof of purchase. Do not attempt to repair the control box yourself, as this may void any applicable warranty.