1. Introduction
The LAUNCH CR319 is a handheld On-Board Diagnostics II (OBD2) code reader designed to assist in diagnosing vehicle engine issues. It provides access to various diagnostic functions to help users identify and clear trouble codes, monitor vehicle performance data, and check emission readiness status. This manual provides detailed instructions for the proper use and maintenance of your CR319 device.
2. Product Overview
2.1 Key Features
- Full OBD2 Functions: Supports all 10 OBD2 test modes.
- DTC Lookup Library: Built-in database with over 3000 code definitions.
- Multilingual Support: Available in English, Portuguese, Russian, Italian, Spanish, French, and German.
- Plug and Play: No batteries or charger required; powered directly from the vehicle's OBD2 port.
- Compact Design: Easy to handle and store.
2.2 Device Components
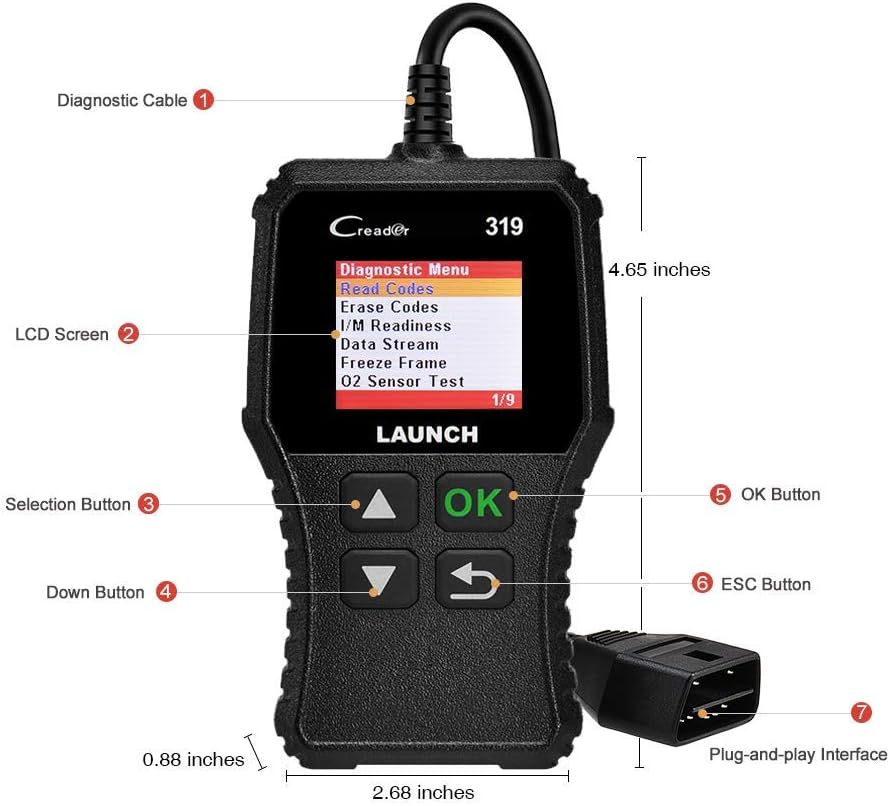
The image above illustrates the main components of the LAUNCH CR319 OBD2 Scanner. Key parts include the Diagnostic Cable (1) for connecting to the vehicle, the LCD Screen (2) for displaying information, Selection Buttons (3) for navigation, the Down Button (4), the OK Button (5) for confirmation, the ESC Button (6) to return to the previous screen, and the Plug-and-Play Interface (7) which is the OBD2 connector.
3. Setup
- Locate the OBD2 Port: The OBD2 port is typically located under the dashboard on the driver's side of the vehicle. Refer to your vehicle's owner's manual if you cannot locate it.
- Connect the Scanner: Plug the CR319's diagnostic cable connector firmly into the vehicle's OBD2 port. The device will power on automatically.
- Start the Vehicle: Turn the vehicle's ignition to the 'ON' position (engine off) or start the engine, depending on the diagnostic function you intend to perform.
4. Operating Instructions
After connecting the CR319 to your vehicle, the main menu will appear. Use the Up/Down selection buttons to navigate through the options and the OK button to confirm a selection. The ESC button returns to the previous screen.
4.1 Read Codes
This function retrieves Diagnostic Trouble Codes (DTCs) from the vehicle's computer. These codes indicate specific issues detected by the vehicle's self-diagnostic system.
- From the main menu, select 'Diagnose'.
- Select 'Read Codes'.
- The scanner will display any stored, pending, or permanent codes along with their descriptions.
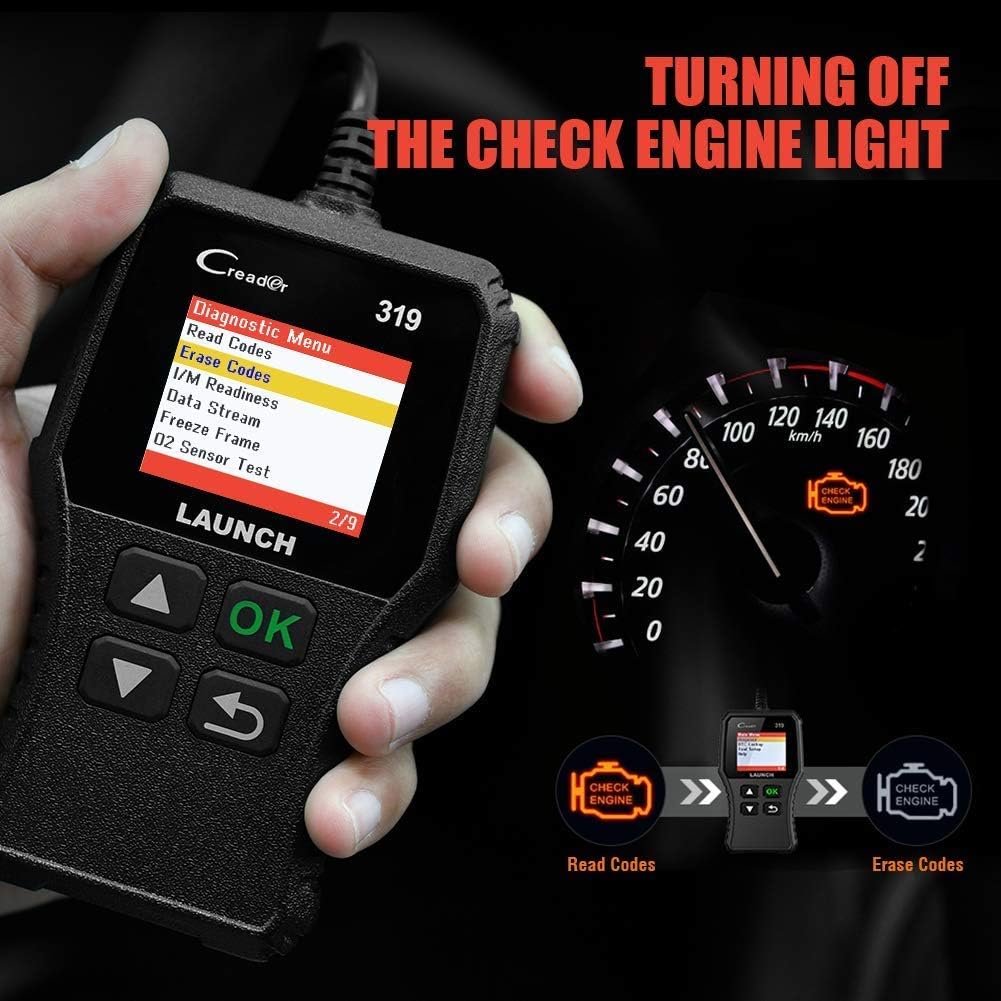
4.2 Clear Codes
This function erases DTCs from the vehicle's computer and turns off the Check Engine Light (MIL). Ensure any underlying issues are resolved before clearing codes, as they may reappear.
- From the main menu, select 'Diagnose'.
- Select 'Erase Codes'.
- Confirm the action when prompted. The Check Engine Light should turn off.
4.3 I/M Readiness
This function checks the status of the vehicle's emission-related monitoring systems to determine if they are ready for an emissions test.
- From the main menu, select 'Diagnose'.
- Select 'I/M Readiness'.
- The screen will display the status of various monitors (e.g., Misfire Monitor, Fuel System Monitor). 'OK' or 'Complete' indicates the monitor has run and passed; 'INC' or 'Incomplete' means the monitor has not yet run or completed its diagnostic cycle.
4.4 Data Stream (Live Data)

This function displays real-time operational data from the vehicle's engine control unit (ECU). This data can include engine RPM, vehicle speed, oxygen sensor readings, coolant temperature, and more.
- From the main menu, select 'Diagnose'.
- Select 'Data Stream'.
- Use the Up/Down buttons to scroll through the various data parameters.
4.5 Freeze Frame
When an emission-related fault occurs, the vehicle's computer records a snapshot of operating conditions at the time of the fault. This data is called Freeze Frame data.
- From the main menu, select 'Diagnose'.
- Select 'Freeze Frame'.
- Review the recorded parameters to understand the conditions under which the fault occurred.
4.6 DTC Lookup

This feature allows you to manually enter a Diagnostic Trouble Code and view its definition from the scanner's internal database.
- From the main menu, select 'DTC Lookup'.
- Use the navigation buttons to input the desired DTC.
- Press 'OK' to view the code definition.
4.7 Other OBD2 Functions
The CR319 also supports the following OBD2 functions, accessible through the 'Diagnose' menu:
- O2 Sensor Test: Retrieves oxygen sensor monitor test results for the most recently completed tests.
- EVAP System Test (Mode 8): Initiates a test of the Evaporative Emission Control System.
- On-Board Monitor Test (Mode 6): Retrieves test results for emission-related powertrain components and systems that are not continuously monitored.
- Vehicle Information: Displays the vehicle identification number (VIN), calibration ID (CALID), and calibration verification number (CVN).
5. Compatibility

The LAUNCH CR319 OBD2 Scanner is compatible with most American, European, and Asian vehicles manufactured from 1996 and newer that are OBDII-compliant. It supports all standard OBDII protocols, including KWP2000, ISO9141, J1850 VPW, J1850 PWM, and CAN (Controller Area Network).
5.1 Supported Vehicles
- 12V Gasoline cars.
- Vehicles compliant with OBDII standards (1996 US-based, 2000 EU-based, and newer Asian cars).
5.2 Not Supported Vehicles
- Diesel cars.
- 24V Heavy duty vehicles.
- Hybrid vehicles.
- Electric vehicles.
6. Specifications
| Feature | Specification |
|---|---|
| Model | CR319 |
| Display | Color LCD |
| Operating Voltage | 9-18V (via OBD2 port) |
| Supported Protocols | KWP2000, ISO9141, J1850 VPW, J1850 PWM, CAN |
| Dimensions (L x W x H) | 1.5 x 6 x 10.8 inches |
| Weight | 7.4 ounces |
| Operating Temperature | 0°C to 50°C (32°F to 122°F) |
| Storage Temperature | -20°C to 70°C (-4°F to 158°F) |
| Supported Languages | English, Portuguese, Russian, Italian, Spanish, French, German |
7. Troubleshooting
7.1 Device Does Not Power On
- Ensure the diagnostic cable is securely connected to the vehicle's OBD2 port.
- Verify the vehicle's ignition is in the 'ON' position or the engine is running.
- Check the vehicle's fuse for the OBD2 port (consult your vehicle's owner's manual).
7.2 Communication Error with Vehicle
- Confirm the vehicle is OBDII-compliant (generally 1996 and newer for gasoline vehicles).
- Ensure the diagnostic cable is properly connected.
- Turn off the ignition, wait 10 seconds, then turn it back to 'ON' and try again.
- If possible, test the scanner on another compatible vehicle to rule out a device malfunction.
7.3 Codes Cannot Be Cleared
- Ensure the vehicle's ignition is in the 'ON' position (engine off).
- If the underlying fault that triggered the code is still present, the code may not clear or will reappear immediately. Address the vehicle's issue first.
8. Maintenance
- Cleaning: Use a soft, dry cloth to clean the device. Avoid abrasive cleaners or solvents.
- Storage: Store the scanner in a clean, dry environment away from extreme temperatures and direct sunlight.
- Cable Care: Do not pull the cable forcefully or bend it sharply. Inspect the cable for damage before each use.
9. Warranty and Support
For warranty information, technical support, or service inquiries, please contact LAUNCH customer support. Refer to the product packaging or the official LAUNCH website for the most current contact details.


