Cooler Master MasterBox Q500L
Cooler Master MasterBox Q500L User Manual
Model: MasterBox Q500L
1. Product Overview
The Cooler Master MasterBox Q500L is a versatile ATX mini tower case designed for flexible system builds. Its modular design allows for various orientations and efficient space utilization, supporting a range of hardware configurations.

Figure 1.1: Front-left view of the MasterBox Q500L, showcasing the transparent side panel and the unique patterned magnetic dust filter on the front.
2. Setup and Orientation
The MasterBox Q500L offers flexible orientation options, allowing it to be positioned vertically or horizontally. This adaptability is facilitated by rubberized thumbscrews that double as feet.
2.1 Movable I/O Panel
The I/O panel is designed to be movable, ensuring accessibility regardless of the case's orientation or internal hardware configuration. It can be relocated to multiple positions on the case.

Figure 2.1: Internal view of the MasterBox Q500L, highlighting the movable I/O panel on the right side.
2.2 Power Supply Bracket
A versatile PSU bracket allows the power supply to adapt to different clearance requirements and motherboard form factors. It can be shifted vertically for radiator or graphics card clearance, and also repositioned for Mini-ITX systems.

Figure 2.2: Close-up internal view showing the power supply mounting area at the top-front of the chassis, designed for full-size ATX power supplies.
3. Components and Storage
3.1 Motherboard Support
The internal layout accommodates standard ATX motherboards. For ATX builds, the PSU mounts to the top-front. For Mini-ITX builds, the PSU can be placed in the conventional bottom-rear position for enhanced front panel ventilation.
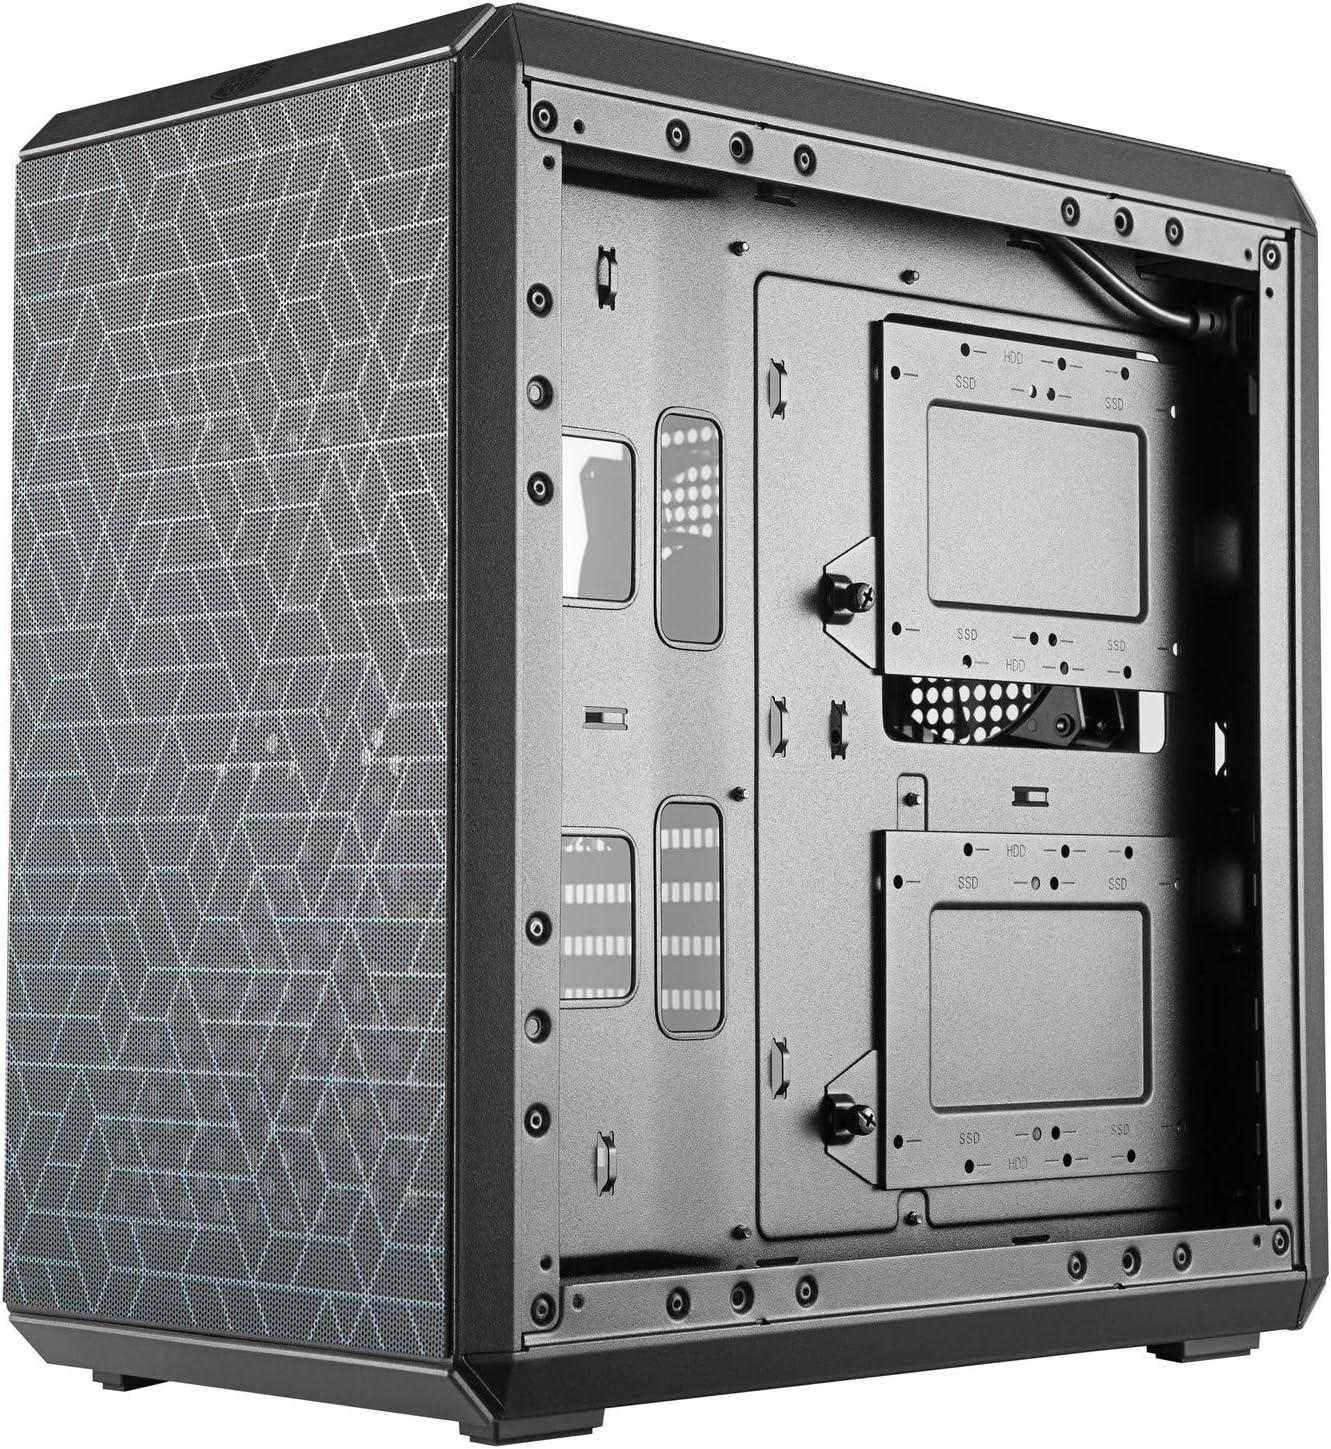
Figure 3.1: Rear internal view of the case, showing the motherboard tray and the mounting points for storage drives.
3.2 Storage Options
The case includes two storage caddies, each capable of mounting either two 2.5" drives or one 3.5" drive. This allows for flexible storage configurations:
- Up to four 2.5" drives
- Up to two 3.5" drives
- A combination of two 2.5" drives and one 3.5" drive
3.3 Cable Management
Behind the motherboard tray, 27-30mm of space is provided for efficient cable management. The entire perimeter serves as a channel for routing cables, contributing to a clean internal build.
4. Cooling System
The MasterBox Q500L features a fully perforated chassis, including the top, front, rear, and bottom panels, to support diverse fan and radiator configurations for optimal airflow.
4.1 Fan and Radiator Support
- Bottom: Supports up to two 120mm fans.
- Rear: Supports one 120mm fan or one 120mm radiator.
- Top: Supports up to two 120mm/140mm fans or one 120/240mm radiator.

Figure 4.1: Top view of the MasterBox Q500L, illustrating the perforated panel for enhanced airflow and cooling options.
5. Maintenance
5.1 Magnetic Dust Filters
The case is equipped with magnetic dust filters on the top and front panels. These filters feature a unique design and are easily removable for quick cleaning. Rubber stoppers prevent the filters from sliding.
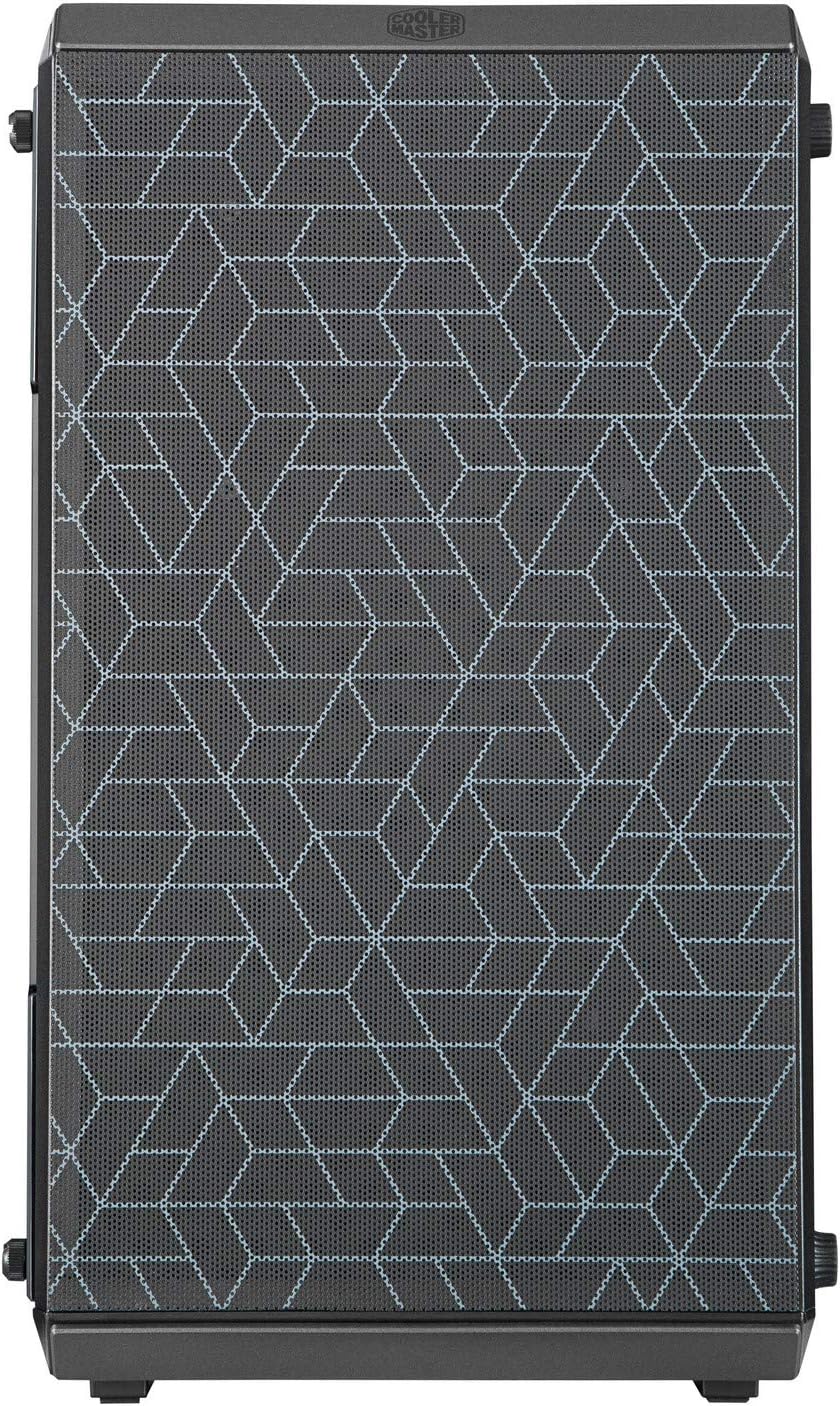
Figure 5.1: Front view of the MasterBox Q500L, highlighting the patterned magnetic dust filter.
To clean the dust filters:
- Gently pull the magnetic dust filter away from the case.
- Clean the filter using a soft brush or by rinsing it with water. Ensure it is completely dry before reattaching.
- Align the filter with the panel and allow the magnets to secure it back in place.
6. Specifications
| Feature | Specification |
|---|---|
| Brand | Cooler Master |
| Model Name | MasterBox Q500L |
| Item Model Number | MCB-Q500L-KANN-S00 |
| Case Type | Mini-Tower |
| Motherboard Compatibility | ATX |
| Dimensions (LxWxH) | 18.5 x 17.32 x 11.02 inches |
| Item Weight | 8.43 pounds |
| USB 3.0 Ports | 2 |
| USB 2.0 Ports | 2 |
| Power Supply Mounting Type | Top Front Mount |
| Cooling Method | Air |
7. Troubleshooting
For common issues, please refer to the following:
- No Power: Ensure all power cables are securely connected to the power supply, motherboard, and wall outlet. Verify the power supply switch is in the 'ON' position.
- Fan Noise: Check if fans are properly mounted and free from obstructions. Ensure dust filters are clean to maintain optimal airflow.
- Component Fit: Refer to the specifications section for maximum GPU length and radiator support. Adjust the PSU bracket as needed for clearance.
- I/O Panel Not Working: Confirm the I/O panel cables are correctly connected to the motherboard headers.
If problems persist, please contact Cooler Master support.
8. Warranty and Support
Cooler Master products are backed by a manufacturer's warranty. For detailed warranty information, product registration, and technical support, please visit the official Cooler Master website or contact their customer service department.
For further assistance, you may also refer to the product's official support page or contact your retailer.