
ECCPP CO29001C
ECCPP A/C Compressor Clutch Assembly Kit Instruction Manual
Model: CO29001C | Brand: ECCPP
1. Introduction
This instruction manual provides comprehensive guidance for the ECCPP A/C Compressor Clutch Assembly Kit, model CO29001C. This kit is designed to restore the air conditioning function in compatible vehicles by replacing the essential components of the A/C compressor clutch. Please read this manual thoroughly before installation and operation to ensure proper function and longevity of the product.
2. Product Overview and Components
The ECCPP A/C Compressor Clutch Assembly Kit includes the necessary parts to repair or replace a faulty A/C compressor clutch. The main components are the pulley with bearing, front plate, and electromagnetic coil.
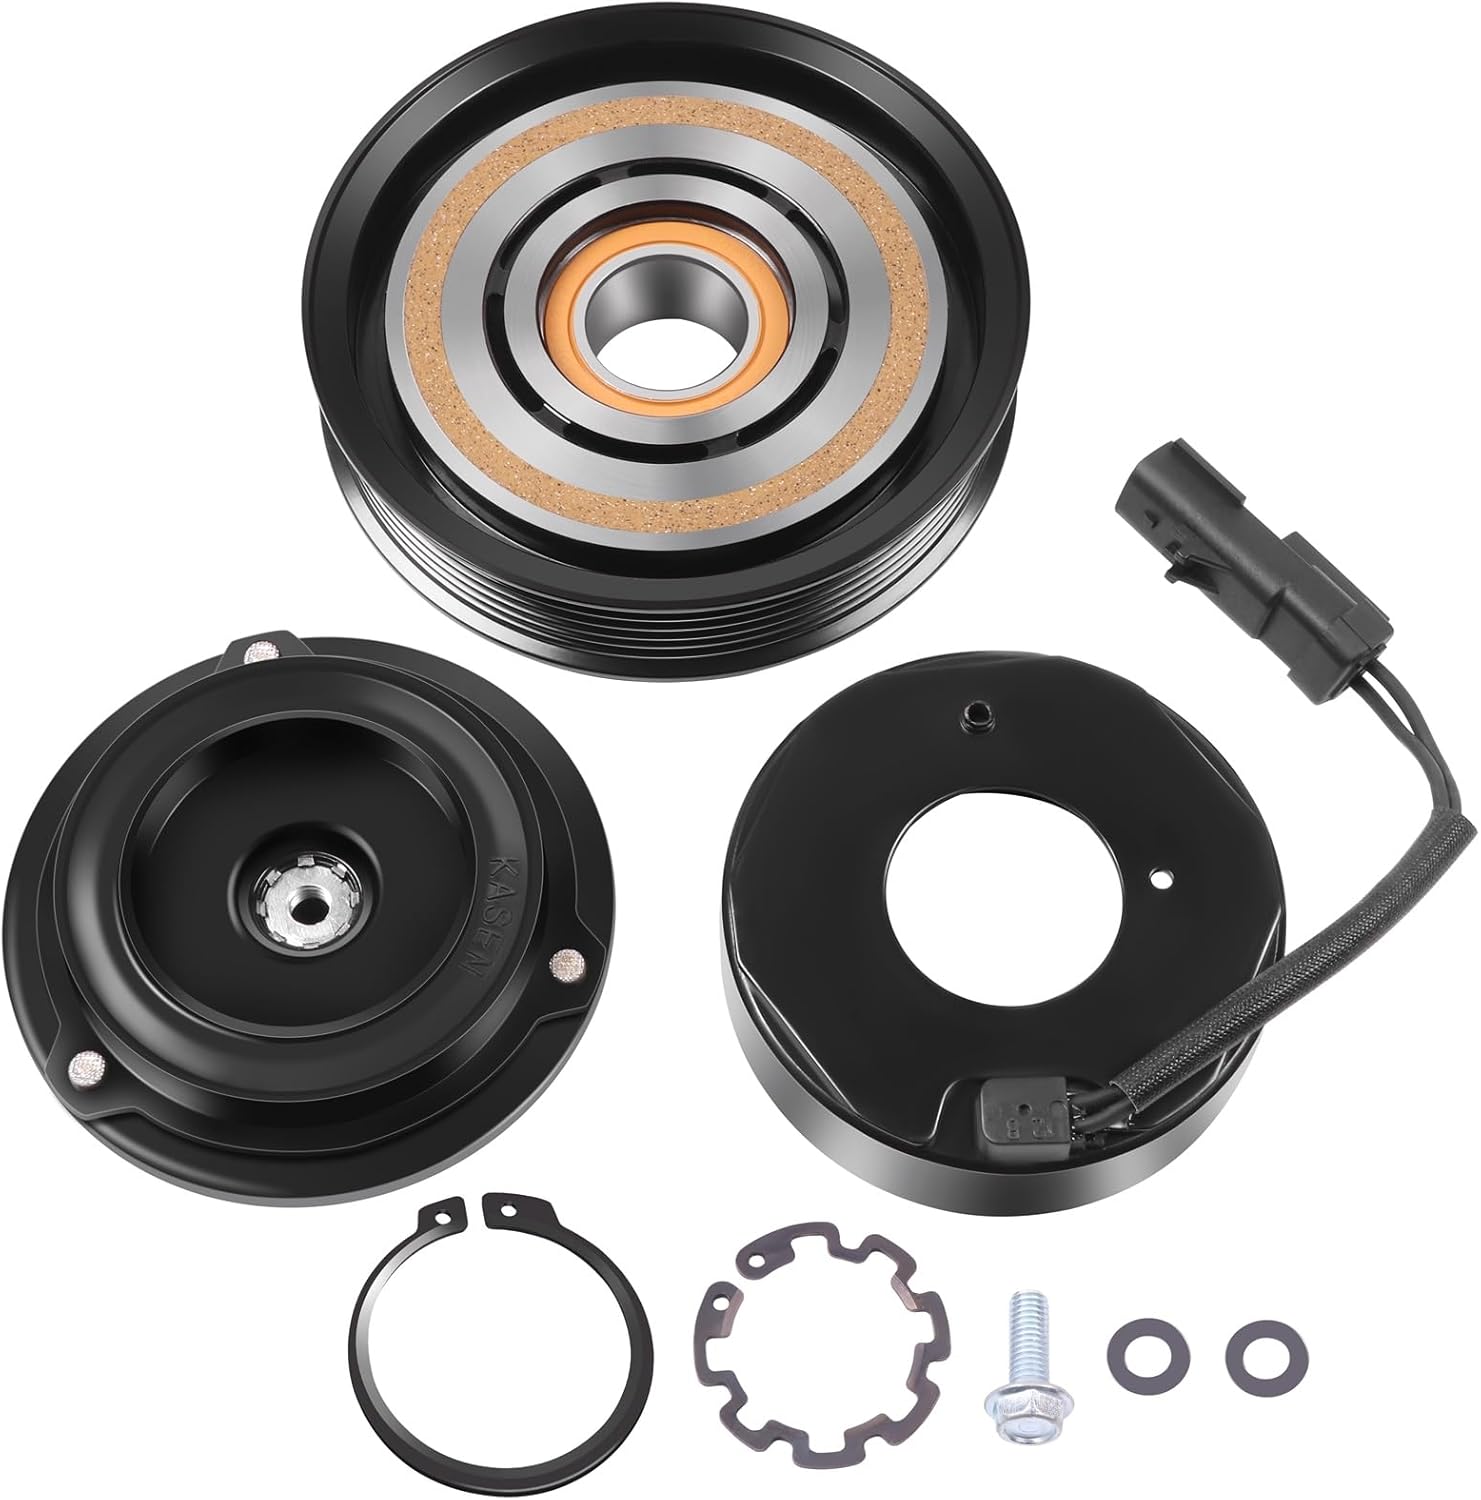
Image: Complete ECCPP A/C Compressor Clutch Assembly Kit showing the pulley, front plate, electromagnetic coil, and associated hardware.
Key features of this assembly include:
- Meet OEM Standard: Designed to meet or exceed original equipment manufacturer standards.
- Stability: Engineered for stable and reliable performance.
- Durability: Constructed with sturdy aluminum for long-term use and corrosion resistance.
- Operational Safety: Manufactured with strict quality control to ensure safe operation.

Image: Visual representation of the ECCPP A/C Clutch highlighting its adherence to OEM standards, stability, durability, and operational safety.
The robust design aims to solve common issues such as abnormal noise and lack of cooling, ensuring efficient air conditioning.

Image: Close-up views of the clutch components, emphasizing corrosion resistance, noise reduction, excellent workmanship, high quality, imported bearings, and pure copper coil.
3. Specifications
| Specification | Value |
|---|---|
| Brand | ECCPP |
| Item Weight | 5.73 pounds |
| Product Dimensions | 6.3 x 5.91 x 2.17 inches |
| Item Model Number | 104175-5211-1501112282 (CO29001C) |
| Manufacturer Part Number | 104175-5211-1501112282 |
| OEM Part Numbers | 5005441AA, 5005441AC, 5005441AD, 5005441AI, 5005440AA, 5005440AC, 5005441AH, 1521612, 1521903, 4710522, 4710536, C533R, 78374, 77374, 97334, 98334 |
| Pulley Grooves | 6 |
| Pulley Diameter | 130 mm |
| Compressor Type | 10S20H |

Image: Product view emphasizing OEM standard and listing compatible OEM part numbers.
4. Vehicle Compatibility
This A/C compressor clutch coil assembly kit is compatible with the following vehicle models:
- 2001-2002 Chrysler Grand Voyager 3.8L
- 2001-2007 Chrysler Town & Country 3.3L
- 2001-2007 Chrysler Town & Country 3.8L
- 2001-2007 Chrysler Voyager 3.3L
- 2001-2007 Dodge Caravan 3.3L
- 2001-2007 Dodge Grand Caravan 3.3L
- 2001-2007 Dodge Grand Caravan 3.8L
- 2000 Plymouth Grand Voyager 3.3L
- 2000 Plymouth Voyager 3.3L
Please verify your vehicle's year, make, and model carefully to ensure proper fitment before installation.

Image: Application chart detailing compatible vehicle years, makes, and models.
5. Installation Instructions
Safety First: Always wear appropriate safety goggles and use proper tools during installation. If you are unsure about any step, consult a qualified automotive technician.
The following steps outline the general procedure for installing the A/C compressor clutch assembly. Specific vehicle procedures may vary.
- Step 1: Remove Clutch Rotor: First, wear goggles and use a puller to remove the existing clutch rotor.
- Step 2: Remove Bearing: Remove the bearing from the clutch rotor.
- Step 3: Measure Gap: Measure the gap between the friction surfaces of the compressor clutch. This is crucial for proper engagement and disengagement.
- Step 4: Ohm Check Coil: Perform an Ohm check on the one-wire AC compressor clutch coil, which is grounded through the compressor body, to ensure it is functioning correctly.
- Step 5: Remove Clutch Plate and Hub: After removing the bolts or nuts, hold the clutch hub with a suitable tool, and remove the clutch plate and hub with a puller.

Image: Diagram illustrating the five key steps for A/C clutch installation.
Important Note on Oil:

Image: Visual warning against excessive oil addition to the AC compressor.
The internal parts of the compressor are lubricated during production, and this item is pre-filled with oil upon delivery. Therefore, there is no need to add oil during initial use. Excessive oil addition may damage the AC compressor.

Image: Reminder to clean system components during compressor replacement.
When replacing a new compressor, please clean the pipes, radiators, and evaporators, and separate and clean the pipes in the system. Compressor damage can occur if the system is not cleaned and installed properly.
6. Operating Principles
The A/C compressor is a vital component of your vehicle's air conditioning system. It converts mechanical power into energy to compress refrigerant, which is then circulated throughout the system to provide cooling.
Video: An animated demonstration of the ECCPP AC Compressor's function, showing how it drives away hot summer and provides strong cooling by circulating refrigerant through the vehicle's air conditioning system.
The compressor is responsible for delivering air conditioning refrigerant to the entire vehicle's air conditioning system, which then pushes the cooling air back into the vehicle cabin, ensuring a comfortable experience regardless of outside temperatures.

Image: Depiction of the ECCPP AC Compressor with Clutch, emphasizing its strong cooling capabilities and stable operation.

Image: An internal cutaway view of an AC compressor, illustrating its components and how it achieves strong cooling with low noise and efficient operation.
7. Maintenance
To ensure the optimal performance and longevity of your ECCPP A/C Compressor Clutch Assembly, consider the following maintenance points:
- Regular System Checks: Periodically inspect the entire A/C system for any signs of leaks, loose connections, or unusual noises.
- Refrigerant Levels: Ensure proper refrigerant levels are maintained. Low refrigerant can cause the compressor to work harder and potentially fail.
- Belt Inspection: Check the serpentine belt that drives the compressor for wear, cracks, or proper tension. A worn or loose belt can affect clutch engagement.
- System Cleanliness: As mentioned in installation, ensure the A/C system's pipes, radiators, and evaporators are clean, especially when replacing components, to prevent contamination and damage.

Image: Information regarding the pre-filled oil content (approx. 130ml) in the compressor, indicating no additional oil is needed.
Remember, the compressor is pre-filled with approximately 130ml of oil. Do not add additional oil during initial use, as this can lead to vibration or damage to the compressor.
8. Troubleshooting
If you encounter issues with your A/C system after installing the clutch assembly, refer to the common problems and potential solutions below:

Image: Visual guide to common A/C system problems including blowing warm air, system not working, and overcharge.
- Blowing Warm Air: This can be caused by overhigh air suction pressure, overlow discharge pressure, or inconsistent pressure from the compressor to the refrigerant.
- A/C Not Working: If the AC compressor has voltage but is not engaging, it may indicate a compressor clutch failure.
- Overcharge: Symptoms include insufficient voltage received by the AC compressor clutch coil, overheating of internal winding, or slippage of the hub against the pulley.
For more detailed diagnostics, consider the following pressure readings and their implications:

Image: Detailed chart for analyzing A/C system problems based on high and low pressure readings, with recommended actions.
- High 250 Low 50: Overcharged system or condenser issue. Recharge system and inspect condenser for blockage.
- High 160 Low 10: Evaporator frosted or low pressure piping faulty, or expansion valve issue. Check and replace as required.
- High 225 Low 80: Expansion valve too wide open, heat sensitizing tube faulty, or too much refrigerant. Recharge system.
- High 50 Low 50: Clutch engages then disengages. Check wiring, run power straight to compressor to test.
- High 150 Low 30: Water in the system. Evacuate for 30 mins, dry and refill.
- High 125 Low 30: Not recharged enough or too much oil. Check amount of refrigerant/oil.
- High 200 Low 70: Blockage in system. Find blockage and replace.
- High 150 Low >10: Expansive valve open or leak. Check valve or complete dye test.
- High 100 Low 100: Compressor does not engage. Check wiring.
Note: The most ideal pressure readings are around 150 High and 35 Low.

Image: Comparison showing the benefits of a properly functioning AC system after installation, including comfortable driving and no noise, contrasting with high temperature and slow cooling before.
9. Warranty and Support
ECCPP is committed to providing high-quality automotive parts. This A/C compressor clutch assembly is manufactured and tested to ensure reliability and performance. While specific warranty details are not provided in this manual, ECCPP products typically come with a quality guarantee. For any product-related inquiries, technical assistance, or warranty claims, please contact ECCPP customer support through their official channels or the retailer from whom the product was purchased.
You can find more information and contact details by visiting the ECCPP Store on Amazon.
no relevant documents
Ask a question about this manual
Ask about setup, troubleshooting, compatibility, parts, safety, or missing instructions. Manuals+ will review the question and use this page’s manual context to help answer it.