ELECTROPRIME RENSHPTUN10035
ELECTROPRIME Mini Full HD 1080P DV Sport Action Camera User Manual
Model: RENSHPTUN10035
1. Introduction
Thank you for choosing the ELECTROPRIME Mini Full HD 1080P DV Sport Action Camera. This compact and portable device is designed for high-definition video recording and still photography, suitable for various applications including sports, car DVR, and general surveillance. Please read this manual carefully to ensure proper use and optimal performance of your camera.
Key features include:
- Full HD 1080P and 720P video recording.
- 12MP still image capture.
- Compact and portable design.
- Motion detection recording.
- Support for TV OUT and USB 2.0 connectivity.
- TF card storage support (up to 32GB).
2. What's in the Box
Please check the contents of your package. If any items are missing or damaged, contact your retailer.
- 1 x ELECTROPRIME Mini Camcorder
- 1 x USB Cable
- 1 x Mount
- 1 x Clip
- 1 x User Manual (this document)
- 1 x Battery (pre-installed or separate)
3. Product Overview and Specifications
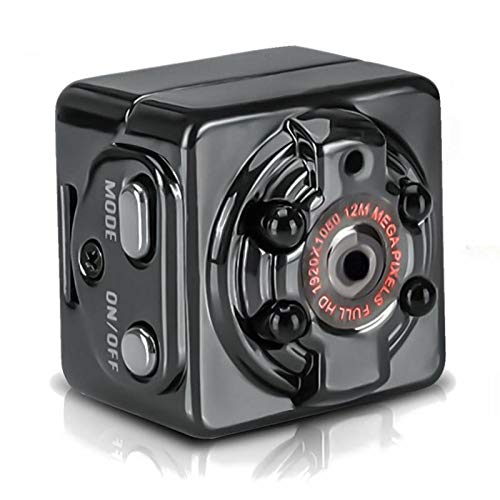
Figure 3.1: Front view of the ELECTROPRIME Mini Action Camera, showing the lens, mode button, and power button.
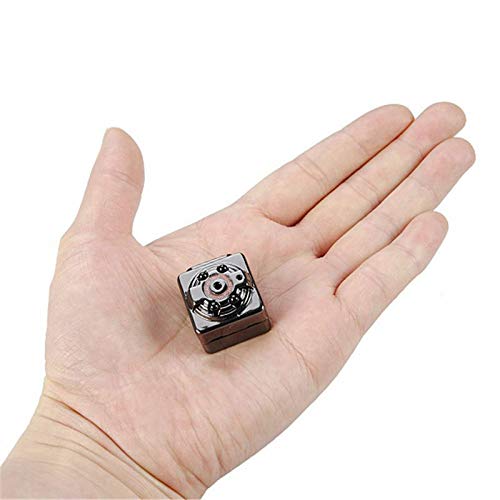
Figure 3.2: The compact size of the camera, shown held in an average adult hand.
Technical Specifications:
| Feature | Specification |
|---|---|
| Video Format | AVI |
| Image Proportion | 4:3 |
| Video Coding | M-JPEG |
| Picture Format | JPG |
| Video Resolution Ratio | 1280x720P, 1920x1080P |
| Video Frame Rate | 30 fps |
| Photo Resolution | 12MP (4032x3024) |
| Player Software | Operating system's built-in or mainstream video player software |
| Support System | Windows me/2000/xp/2003/vista; Mac OS; Linux |
| Working Time | Approx. 100 minutes |
| Charging Voltage | DC-5V |
| Interface Type | Mini 8Pin USB |
| Storage Support | TF card (up to 32GB, not included) |
| Battery Capacity | 200mAh |
| Battery Type | High capacity polymer lithium electricity |
4. Setup Guide
4.1 Charging the Battery
Before first use, fully charge the camera's internal battery. Connect the camera to a USB power source (e.g., computer USB port or a 5V USB wall adapter) using the provided Mini 8Pin USB cable. The indicator light will show charging status (specific light behavior not provided, typically red for charging, off/blue for full).
- Charging Voltage: DC-5V
- Charging Time: Approximately 2-3 hours for a full charge.
- Working Time: Approximately 100 minutes on a full charge.
4.2 Inserting a TF Card
The camera requires a TF (microSD) card for storing recordings and photos. The card is not included.
- Locate the TF card slot on the camera.
- Gently insert a TF card (Class 10 or higher recommended, up to 32GB) into the slot until it clicks into place. Ensure the card is inserted in the correct orientation.
- To remove the card, gently push it in again until it springs out.
Note: Always power off the camera before inserting or removing the TF card to prevent data corruption.
4.3 Attaching the Mount/Clip
The camera comes with a mount and clip for versatile placement.
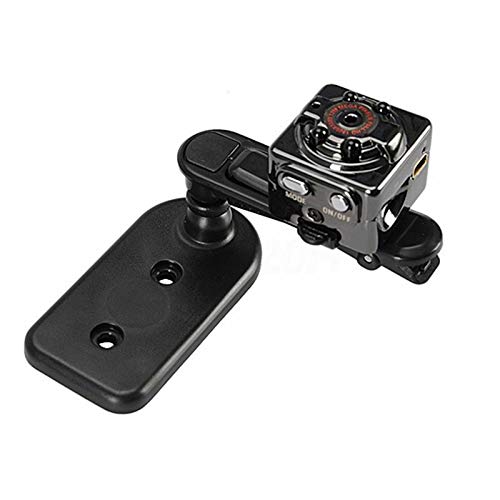
Figure 4.1: Camera attached to its multi-directional mount.
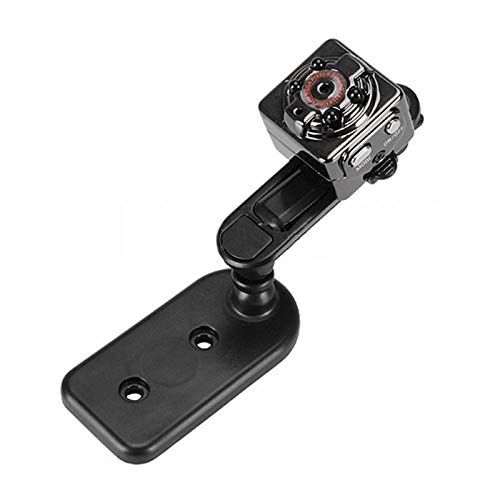
Figure 4.2: Another view of the camera with the mount, demonstrating its flexibility.
Attach the camera to the mount or clip as needed for your desired recording angle or placement (e.g., on a dashboard, clothing, or flat surface).
5. Operating Instructions
5.1 Powering On/Off
- Power On: Press and hold the "ON/OFF" button for a few seconds until the indicator light illuminates.
- Power Off: Press and hold the "ON/OFF" button for a few seconds until the indicator light turns off.
5.2 Switching Modes
The camera typically has different modes for video recording (720P, 1080P), photo capture, and motion detection. Use the "MODE" button to cycle through these modes.
- Press the "MODE" button briefly to switch between modes. The indicator lights will change to indicate the current mode (refer to the camera's specific light patterns, usually detailed in the included mini manual).
5.3 Video Recording
The camera supports 1280x720P and 1920x1080P video resolutions.
- Enter Video Mode: Power on the camera and press the "MODE" button until you are in the desired video recording mode (e.g., 720P or 1080P).
- Start Recording: Press the "ON/OFF" button once to start recording. The indicator light will typically flash to indicate recording is in progress.
- Stop Recording: Press the "ON/OFF" button once again to stop recording. The indicator light will return to a steady state.
5.4 Taking Photos
The camera can capture 12MP (4032x3024) still images.
- Enter Photo Mode: Power on the camera and press the "MODE" button until you are in photo capture mode.
- Take Photo: Press the "ON/OFF" button once to take a picture. The indicator light may flash briefly.
5.5 Motion Detection Recording
The camera can automatically start recording when motion is detected.
- Enter Motion Detection Mode: Power on the camera and press the "MODE" button until you are in motion detection video mode (available for 720P and 1080P).
- Activate Motion Detection: The camera will automatically enter standby for motion detection. When motion is detected within its field of view, it will begin recording. Recording will stop automatically after a period of no motion.
5.6 Connecting to a Computer
You can connect the camera to a computer to transfer files or use it as a webcam (if supported by the specific model).
- Ensure the camera is powered off.
- Connect the camera to your computer using the provided Mini 8Pin USB cable.
- The camera should be recognized as a removable disk. You can then access the recorded video and photo files.
5.7 Connecting to a TV (TV OUT)
The camera supports TV OUT for connecting to a TV monitor.
- Connect the camera to your TV using an appropriate AV cable (not typically included, may require a specific Mini 8Pin USB to AV cable).
- Switch your TV's input to the correct AV channel.
- The camera's display (if any) or output will be mirrored on the TV.
6. Maintenance
- Cleaning: Use a soft, dry cloth to clean the camera body. For the lens, use a specialized lens cleaning cloth and solution. Avoid harsh chemicals.
- Storage: Store the camera in a cool, dry place away from direct sunlight and extreme temperatures.
- Battery Care: For optimal battery life, avoid fully discharging the battery frequently. If storing for extended periods, charge the battery to about 50% every few months.
- Data Backup: Regularly back up your important video and photo files from the TF card to a computer or external storage device.
7. Troubleshooting
| Problem | Possible Cause | Solution |
|---|---|---|
| Camera does not power on. | Battery is depleted. | Charge the camera for at least 2-3 hours. |
| Cannot record video/take photos. | No TF card inserted or card is full/corrupted. | Insert a TF card, format the card, or replace with a new one. |
| Poor video/photo quality. | Lens is dirty; insufficient lighting; incorrect mode. | Clean the lens; ensure adequate lighting; check if you are in the correct resolution mode. |
| Camera freezes or becomes unresponsive. | Software glitch; low battery. | Press and hold the power button to force a shutdown, then restart. Ensure battery is charged. |
| Computer does not recognize the camera. | Faulty USB cable; camera not powered off before connecting; driver issue. | Try a different USB cable/port; ensure camera is off before connecting; try on a different computer. |
8. Warranty and Support
This product comes with a 7 Day Warranty from the date of purchase. Please retain your purchase receipt as proof of purchase.
The warranty covers manufacturing defects. It does not cover damage caused by misuse, accidents, unauthorized modifications, or normal wear and tear.
For technical support or warranty claims, please contact ELECTROPRIME customer service through the retailer where you purchased the product or refer to the contact information provided on the product packaging.
Please note: Specifications and product appearance are subject to change without prior notice for improvement purposes.
no relevant documents