1. Important Safety Instructions
Please read this manual carefully before operating the appliance and keep it for future reference. Failure to follow these instructions may result in electric shock, fire, or serious injury.
- This appliance is for household use only. Do not use it for commercial purposes.
- Ensure the voltage indicated on the appliance matches your local power supply before connecting.
- Do not immerse the appliance, power cord, or plug in water or other liquids.
- Keep the appliance away from heat sources, direct sunlight, and flammable materials.
- Always unplug the appliance before cleaning, maintenance, or if it is not in use.
- Do not operate the appliance with a damaged cord or plug, or after the appliance malfunctions or has been damaged in any manner.
- Children should be supervised to ensure they do not play with the appliance.
- Ensure adequate ventilation around the appliance to prevent overheating. Maintain a minimum clearance of 15 cm on all sides.
- Use only potable water in the water reservoir.
2. Product Overview
The Klarstein Clearcube Ice Maker is designed to produce clear ice cubes efficiently for your home. It features a 2.5-liter water capacity and can produce up to 13 kg of ice per day.
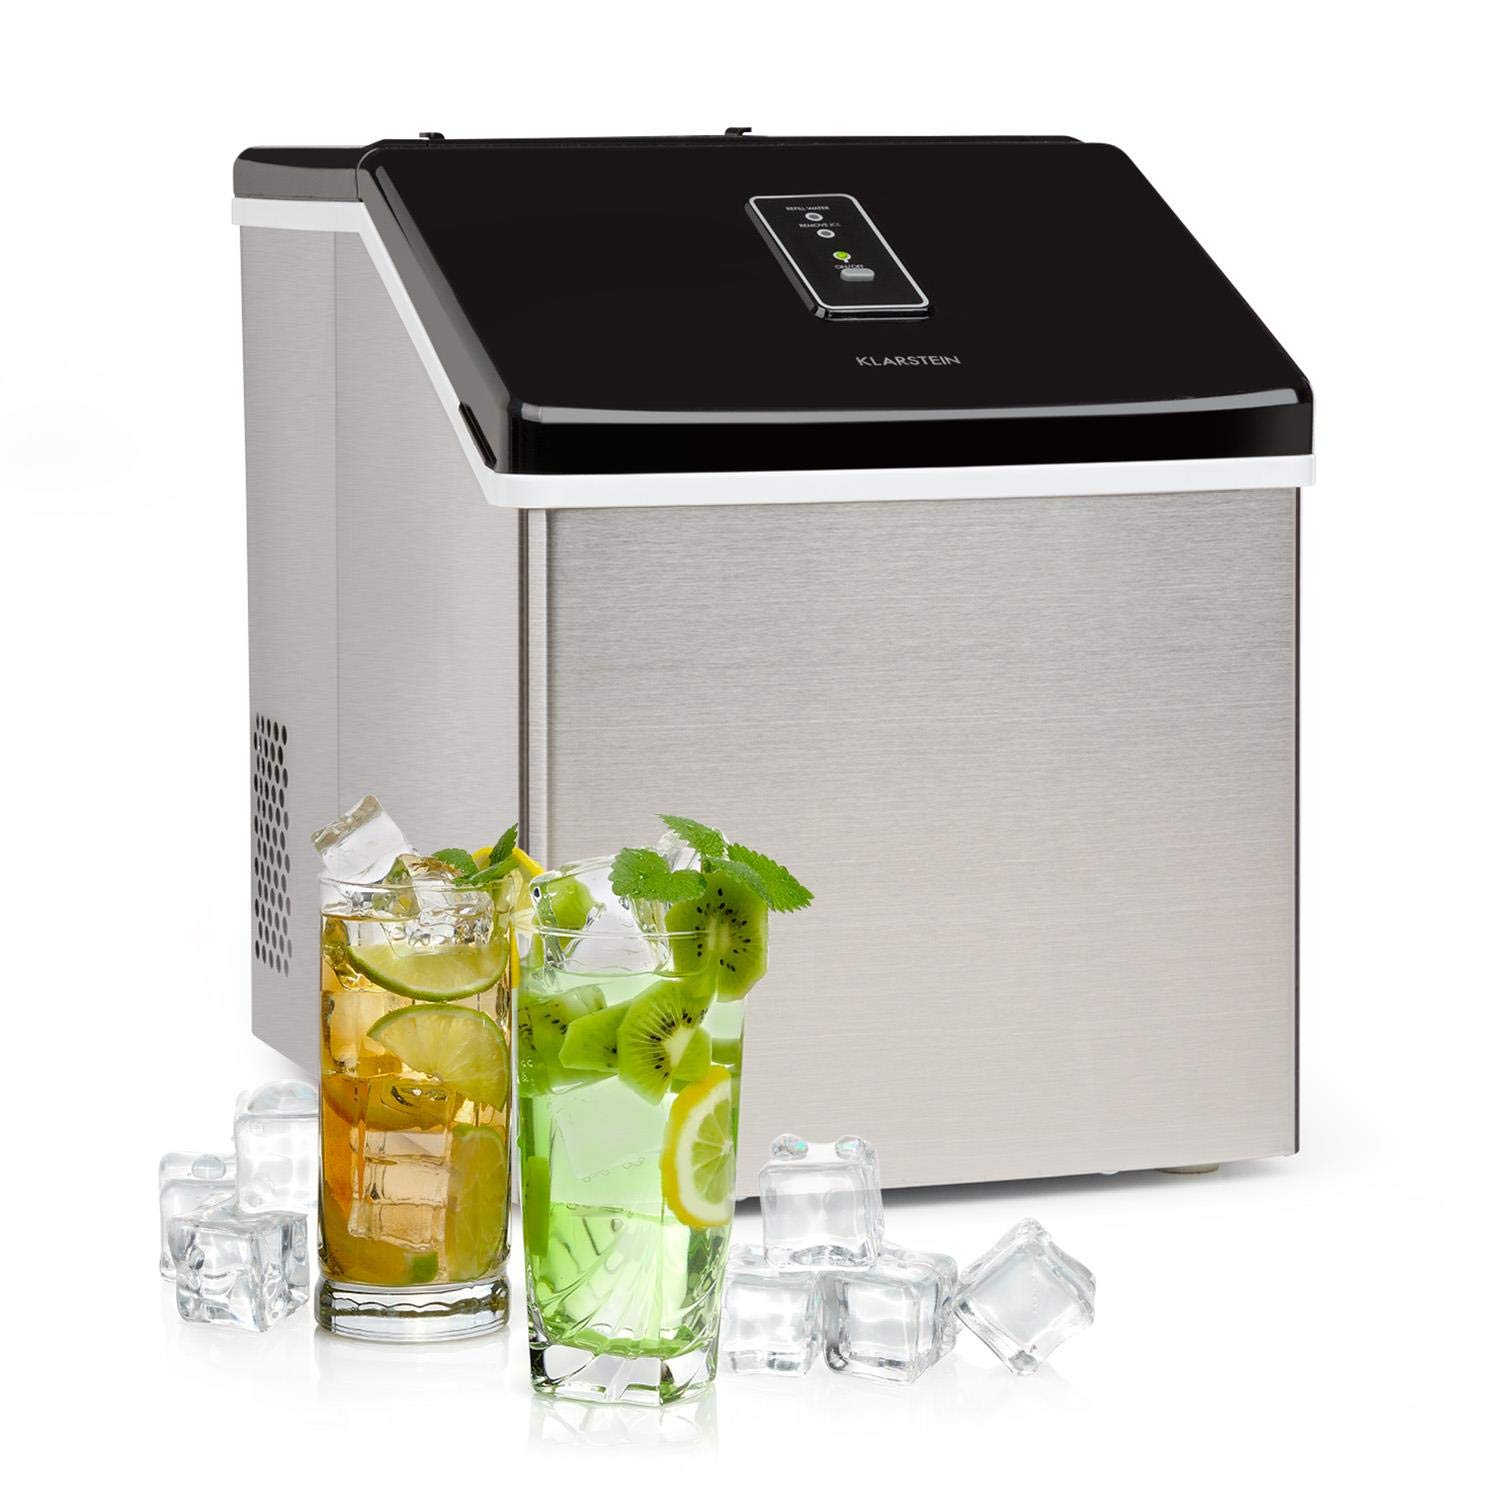
Figure 2.1: Klarstein Clearcube Ice Maker in a modern kitchen environment.
3. Setup and Installation
3.1 Unpacking
- Carefully remove the ice maker from its packaging.
- Remove all packaging materials, including any tape or protective films.
- Check for any damage during transit. If the appliance is damaged, do not operate it and contact customer support.
3.2 Placement
- Place the ice maker on a stable, level surface.
- Ensure there is sufficient space around the unit for proper ventilation (at least 15 cm on all sides). Avoid enclosed spaces.
- Do not place the appliance near heat sources (e.g., ovens, radiators) or in direct sunlight.
- Ensure the ambient temperature is between 10°C and 32°C for optimal performance.

Figure 3.1: Appliance dimensions (approx. 29 x 36 x 37 cm).
3.3 Initial Cleaning
- Before first use, clean the interior of the ice maker with a soft cloth and warm water with a mild detergent.
- Rinse thoroughly and wipe dry.
- Allow the appliance to stand upright for at least 2 hours before plugging it in.
4. Operating Instructions
4.1 Filling the Water Reservoir
- Open the lid of the ice maker.
- Fill the water reservoir with potable water up to the MAX fill line. Do not overfill.
- Close the lid securely.
4.2 Starting Ice Production
- Plug the appliance into a grounded power outlet.
- Press the 'START' button on the LED touch control panel.
- The ice maker will begin its cycle. The first batch of ice cubes typically takes about 10 minutes.
- The machine produces approximately 24 cubes per cycle and up to 13 kg of ice in 24 hours.
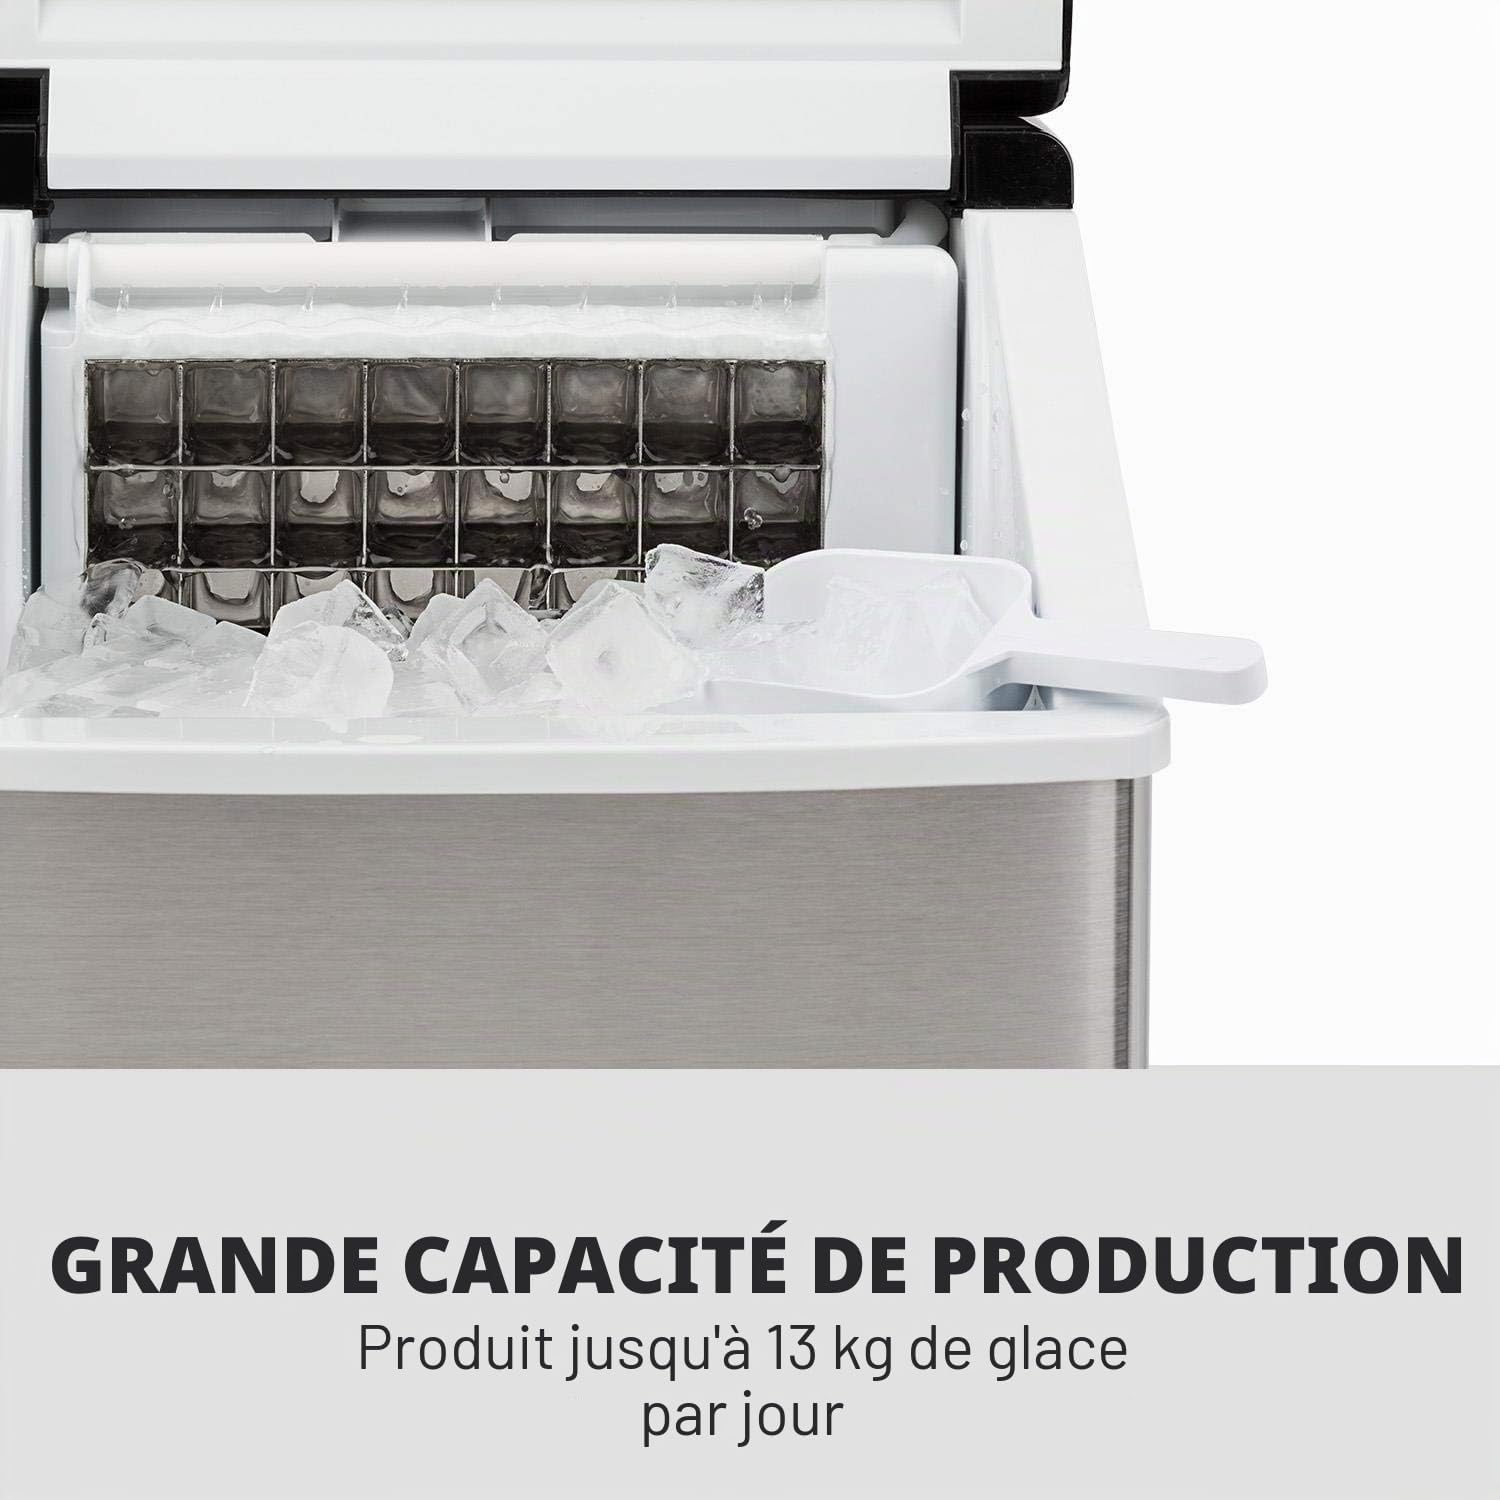
Figure 4.1: Ice production process inside the machine.
4.3 Ice Quality
The Klarstein Clearcube is designed to produce transparent ice cubes, which are aesthetically pleasing and melt slower than opaque ice.

Figure 4.2: The machine produces clear, transparent ice cubes.
4.4 Safety Alarms
- Water Shortage Alarm: An alarm will sound and an indicator light will illuminate when the water reservoir is low. Refill the reservoir to continue ice production.
- Ice Full Alarm: An alarm will sound and an indicator light will illuminate when the ice basket is full. Remove ice to resume production.

Figure 4.3: Enjoying refreshing beverages with freshly made ice.
5. Maintenance and Cleaning
Regular cleaning and maintenance will ensure the longevity and optimal performance of your ice maker.
5.1 Daily Cleaning
- Unplug the appliance before cleaning.
- Remove the ice basket and clean it with warm water and a mild detergent. Rinse and dry thoroughly.
- Wipe the exterior of the appliance with a soft, damp cloth. The stainless steel casing is easy to clean.
5.2 Interior Cleaning and Descaling
- For thorough cleaning, drain any remaining water from the reservoir. Refer to the appliance's specific draining mechanism (usually a drain plug at the bottom or back).
- Clean the interior water tank and ice-making components with a solution of water and vinegar or a specialized ice maker cleaning solution.
- Run a few cycles with clean water to rinse out any cleaning solution residue. Discard the ice produced during these rinsing cycles.
- Dry all interior surfaces before storing or resuming use.

Figure 5.1: Cleaning the interior of the ice maker with a soft cloth.
6. Troubleshooting
If you encounter issues with your ice maker, please consult the following table before contacting customer support.
| Problem | Possible Cause | Solution |
|---|---|---|
| Ice maker does not turn on. | No power supply. | Check if the power cord is securely plugged in and the outlet is functional. |
| No ice production. | Water reservoir empty. | Fill the water reservoir with potable water. |
| Ambient temperature too high. | Move the ice maker to a cooler location. | |
| Ice cubes are small or misshapen. | Water temperature too high. | Use colder water. |
| Mineral buildup. | Perform a descaling cycle as per maintenance instructions. | |
| Ice cubes are stuck or blocked. | Ice accumulation in the dispenser area. | Carefully remove any blocked ice. Ensure the ice basket is correctly positioned. |
| Machine is noisy. | Normal operation sounds (compressor, fan). | Some noise is normal. Ensure the unit is on a level surface to minimize vibrations. |
| Water leakage. | Drain plug not properly sealed. | Check the drain plug at the bottom/back of the unit and ensure it is securely closed. |
7. Specifications
| Feature | Specification |
|---|---|
| Brand | KLARSTEIN |
| Model Name | Klarstein Clearcubew |
| Dimensions (D x W x H) | 37 cm x 29 cm x 36 cm |
| Ice Production Capacity | Up to 13 kg / 24 hours |
| Power | 120 Watts |
| Voltage | 220-240 Volts |
| Refrigerant | R600a |
| Item Weight | 10.8 Kilograms |
| Country of Origin | China |
8. Warranty and Support
8.1 Warranty Information
This Klarstein appliance comes with a warranty for spare parts availability in the EU for 1 year. Please retain your proof of purchase for warranty claims.
8.2 Customer Support
For technical assistance, warranty claims, or spare parts, please contact your retailer or the Klarstein customer service department. Refer to your purchase documentation for specific contact details.
You can also find additional information and support on the official Klarstein website: www.klarstein.fr
A detailed user manual in PDF format is available for download: Download PDF Manual