1. Important Safety Information
Please read all instructions carefully before using the blender. Failure to follow these instructions may result in electric shock, fire, or serious injury.
General Safety Precautions
- Always unplug the blender from the electrical outlet when not in use, before assembling or disassembling parts, and before cleaning.
- Do not immerse the motor base in water or other liquids.
- Avoid contact with moving parts.
- Do not operate any appliance with a damaged cord or plug, or after the appliance malfunctions or has been dropped or damaged in any manner.
- The use of attachments not recommended or sold by the manufacturer may cause fire, electric shock, or injury.
- Do not use outdoors.
- Do not let cord hang over edge of table or counter, or touch hot surfaces.
- Keep hands and utensils out of the container while blending to reduce the risk of severe injury to persons or damage to the blender. A scraper may be used but only when the blender is not running.
- Blades are sharp. Handle with care.
- Always operate blender with lid in place.
- This appliance is not intended for use by persons (including children) with reduced physical, sensory or mental capabilities, or lack of experience and knowledge, unless they have been given supervision or instruction concerning use of the appliance by a person responsible for their safety.
Electrical Safety
This appliance has a polarized plug (one blade is wider than the other). To reduce the risk of electric shock, this plug is intended to fit into a polarized outlet only one way. If the plug does not fit fully into the outlet, reverse the plug. If it still does not fit, contact a qualified electrician. Do not attempt to modify the plug in any way.
2. Product Components
Familiarize yourself with the parts of your Oster Classic Series 8-Speed Blender:
- Motor Base: Contains the motor and control panel.
- 6-Cup Glass Jar: The main blending container.
- Lid: Seals the jar during operation.
- Filler Cap: A removable cap in the lid for adding ingredients while blending.
- Blade Assembly: Consists of the Crush Pro 4® 4-point stainless steel blade, sealing gasket, and bottom cap.

Figure 2.1: Assembled Oster Classic Series 8-Speed Blender with empty glass jar.
This image displays the complete blender unit, including the motor base, the 6-cup glass jar, and the lid with its filler cap. Various fresh fruits are arranged around the base, indicating its use for preparing beverages and food.
3. Setup Instructions
Before First Use
- Unpack the blender and all its components.
- Wash the glass jar, lid, filler cap, and blade assembly in warm, soapy water. Rinse thoroughly and dry.
- Wipe the motor base with a damp cloth. Do not immerse the motor base in water.
Assembly
- Place the sealing gasket onto the blade assembly.
- Insert the blade assembly into the bottom opening of the glass jar.
- Screw the bottom cap onto the jar, ensuring it is tightened securely to prevent leaks.
- Place the assembled jar onto the motor base, ensuring it is seated correctly.
- Place the lid onto the glass jar, and insert the filler cap into the lid opening.
4. Operating Instructions
Preparing Ingredients
- Cut solid ingredients into small pieces (approximately 1-inch cubes) for optimal blending.
- Always add liquids first, then soft ingredients, then hard ingredients, and finally ice.
- Do not overfill the blender jar. The maximum capacity for liquids is 6 cups.
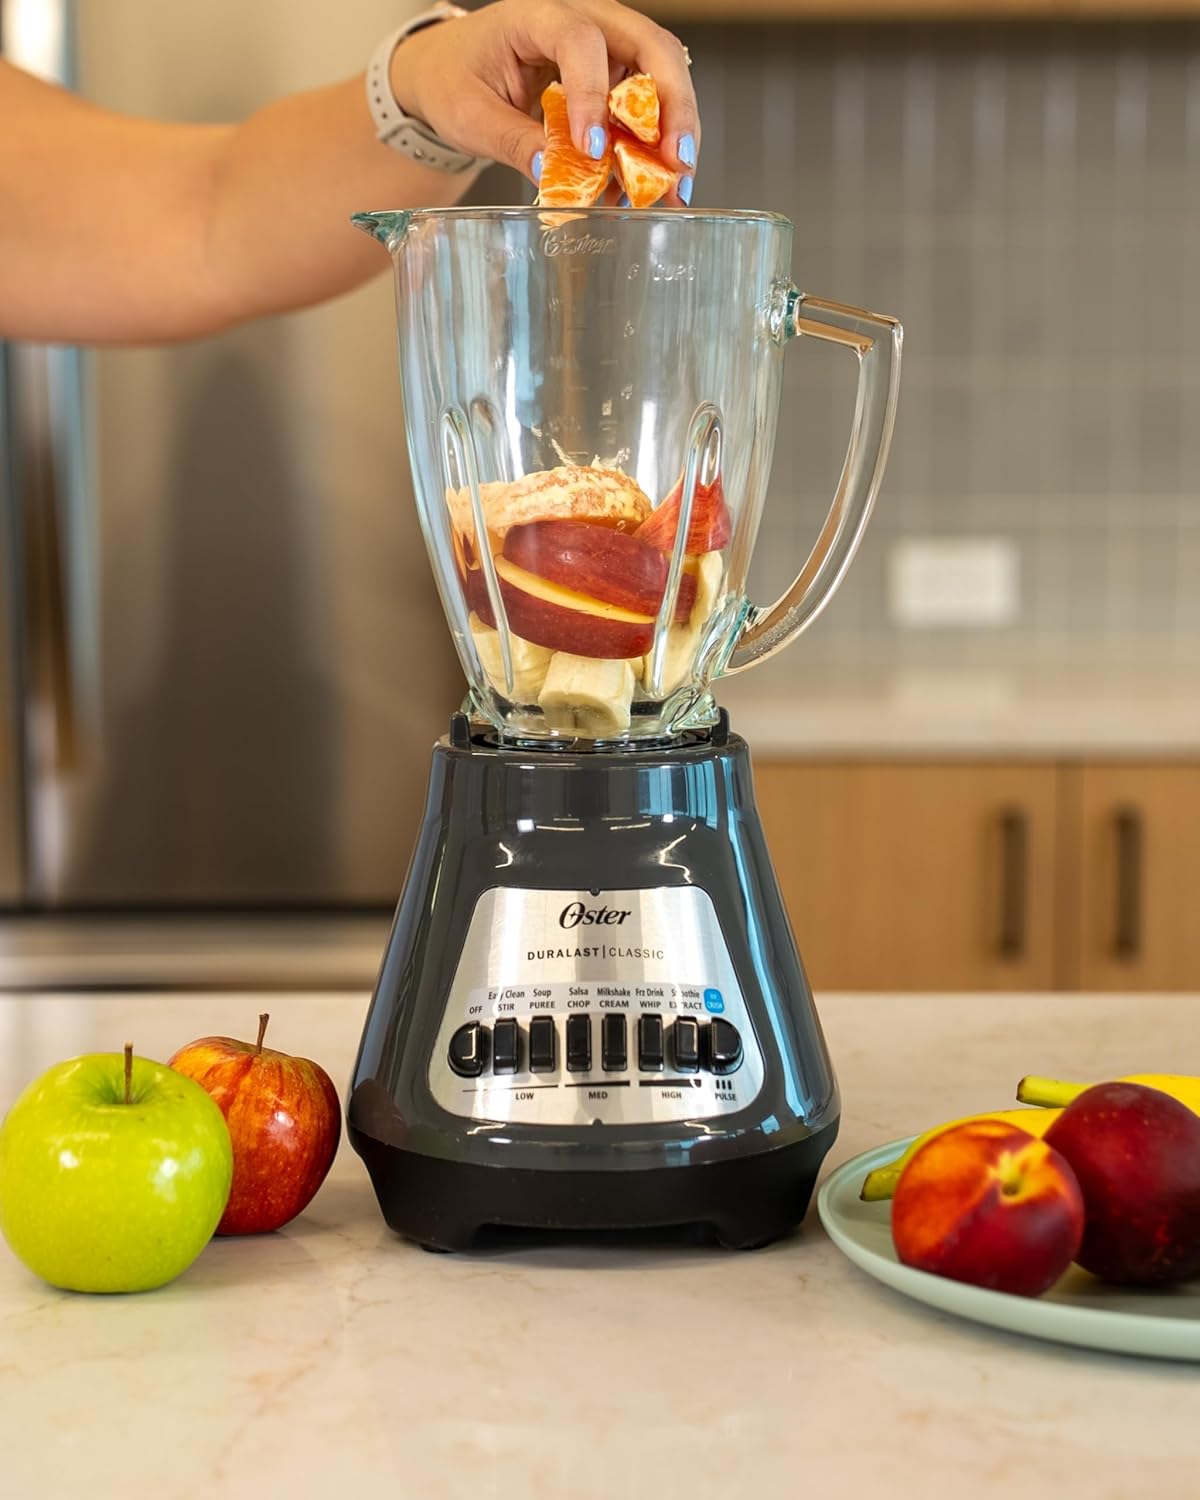
Figure 4.1: Adding ingredients to the blender jar.
This image shows a hand carefully placing orange segments into the blender's glass jar, which already contains other fruits like bananas and apple slices, demonstrating the process of loading ingredients.
Blending Process
- Ensure the blender is properly assembled and the lid is securely in place.
- Plug the power cord into a 220V electrical outlet.
- Select the desired speed setting using the push-button controls on the motor base. The blender offers 8 speeds, including specific functions like 'Ice Crush' and 'Pulse'.
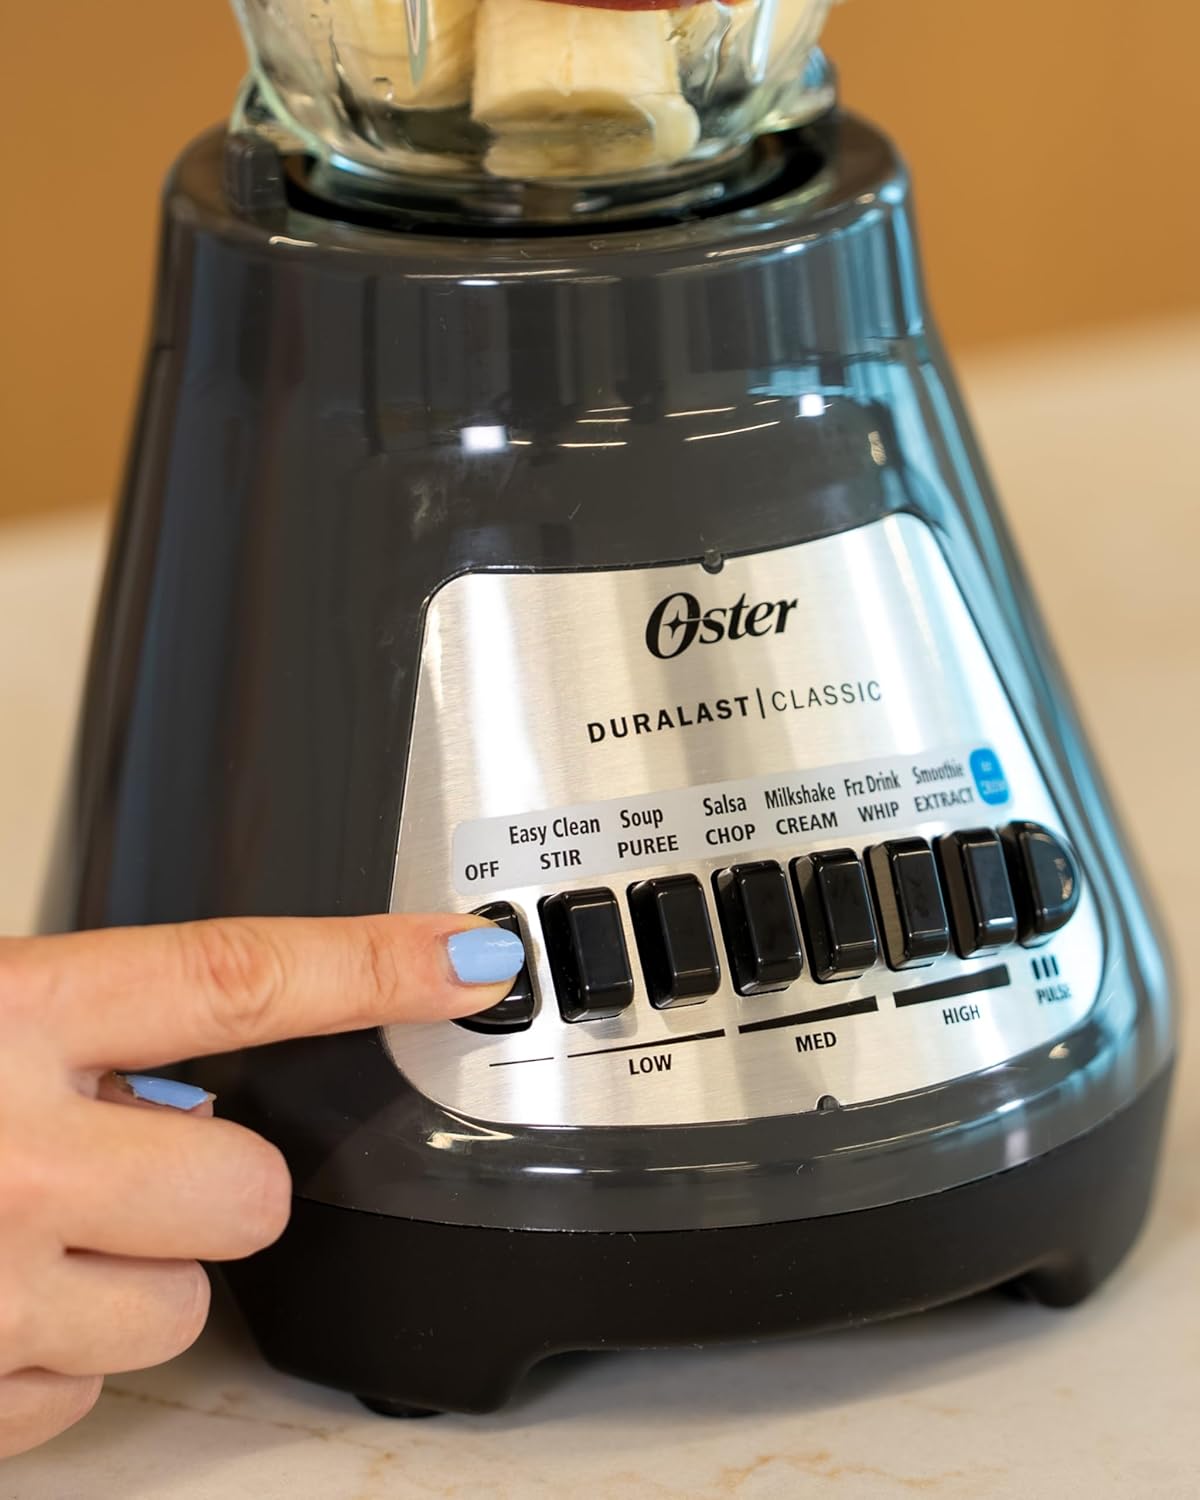
Figure 4.2: Operating the blender controls.
This image illustrates a user's hand pressing one of the control buttons on the blender's base, highlighting the push-button interface for speed selection and function activation.
- For continuous blending, press the desired speed button (Low, Med, High).
- For short bursts of power, use the 'Pulse' button. Release the button to stop.
- For crushing ice, use the dedicated 'Ice Crush' setting.

Figure 4.3: Blender in operation with fruits and ice.
This image shows the blender actively processing a mixture of colorful fruits and ice cubes within its glass jar, demonstrating its blending capability.

Figure 4.4: Blender prepared with ice and fruit.
This image displays the blender with its glass jar filled with ice and various fruits, indicating it is ready to begin the blending process.
5. Cleaning and Maintenance
Regular cleaning ensures optimal performance and extends the life of your blender.
Daily Cleaning
- Unplug the blender from the power outlet.
- Disassemble the glass jar, blade assembly, lid, and filler cap.
- Wash these parts in warm, soapy water. The glass jar, lid, and blade assembly are also dishwasher safe.
- Wipe the motor base with a damp cloth. Never immerse the motor base in water or any other liquid.
- Dry all parts thoroughly before reassembling or storing.

Figure 5.1: Blender components in a dishwasher.
This image shows the disassembled components of the Oster blender, specifically the glass jar, blade assembly, and lid, arranged within a dishwasher rack, indicating their dishwasher-safe nature for convenient cleaning.
Storage
Store the blender in a clean, dry place. Ensure the power cord is neatly wrapped and not kinked.
6. Troubleshooting Guide
If you encounter issues with your blender, refer to the following common problems and solutions:
| Problem | Possible Cause | Solution |
|---|---|---|
| Blender does not turn on. | Not plugged in; power outlet not working; jar not seated correctly; motor overheated. | Ensure plug is firmly in a working outlet; check circuit breaker; ensure jar is securely placed on base; allow motor to cool for 15-20 minutes. |
| Ingredients are not blending smoothly. | Too little liquid; too many ingredients; ingredients too large; blade assembly not tight. | Add more liquid; reduce ingredient quantity; cut ingredients into smaller pieces; ensure blade assembly is securely tightened. |
| Blender leaks from the bottom of the jar. | Blade assembly not tight; gasket missing or improperly placed; gasket damaged. | Tighten blade assembly securely; ensure gasket is correctly seated; replace damaged gasket. |
| Burning smell during operation. | Overloading the motor; continuous operation for too long. | Reduce ingredient load; do not operate continuously for more than 3 minutes; allow motor to cool. If smell persists, discontinue use and contact customer support. |
7. Technical Specifications
- Brand: Oster
- Model Number: BLSTMEGG00000
- Color: Gray
- Number of Speeds: 8
- Capacity: 6 Cups (Glass Jar)
- Container Material: Glass
- Blade Material: Stainless Steel (Crush Pro 4® 4-point)
- Power Source: Corded Electric
- Voltage: 220 Volts
- Controls Type: Push Button, Manual Speed Control
- Product Dimensions: 8.8"D x 10.2"W x 13.8"H
- Item Weight: 6.78 pounds
- UPC: 034264492592
8. Warranty & Support
Warranty Information
This Oster Classic Series 8-Speed Blender comes with a standard manufacturer's warranty. For specific details regarding warranty coverage, duration, and terms, please refer to the warranty card included with your product packaging or visit the official Oster website.
Customer Support
For technical assistance, replacement parts, or any other inquiries, please contact Oster Customer Service. You can find contact information on the official Oster website or through the documentation provided with your blender.
Oster Official Website: www.oster.com


