Introduction
This manual provides detailed instructions for the safe and effective use of your AUBNICO Handheld Electric Sewing Machine, Model B07PZWX7P2. This compact and lightweight device is designed for quick repairs and alterations, offering convenience for home use or travel. Please read this manual thoroughly before operating the machine to ensure proper function and longevity.
Parts Overview
Familiarize yourself with the components of your handheld sewing machine:

Figure 1: Overview of the Handheld Sewing Machine components. Key parts include the Set Screw, Thread Hole, Tension Control, Power Switch (with safety lock), Bobbin Holder, Rotary Wheel, Presser Foot, and Battery Jar.
- Set Screw: Used to secure or adjust certain components.
- Thread Hole: The point where the thread passes through before reaching the needle.
- Tension Control: Adjusts the tightness of the stitch.
- Power Switch (safety lock): Activates and deactivates the machine, includes a safety lock feature.
- Bobbin Holder: Secures the thread bobbin.
- Rotary Wheel: Manually moves the needle up and down for initial threading or adjustments.
- Presser Foot: Holds the fabric firmly in place during sewing.
- Battery Jar: Compartment for battery installation.
Setup
1. Battery Installation
The machine requires 4 x AA batteries (not included) or a DC6V power adapter (not included). Ensure correct polarity when inserting batteries.
- Locate the battery compartment (Battery Jar) on the side of the machine.
- Slide open the battery compartment cover.
- Insert 4 AA batteries, ensuring the positive (+) and negative (-) terminals align with the markings inside the compartment.
- Close the battery compartment cover securely.
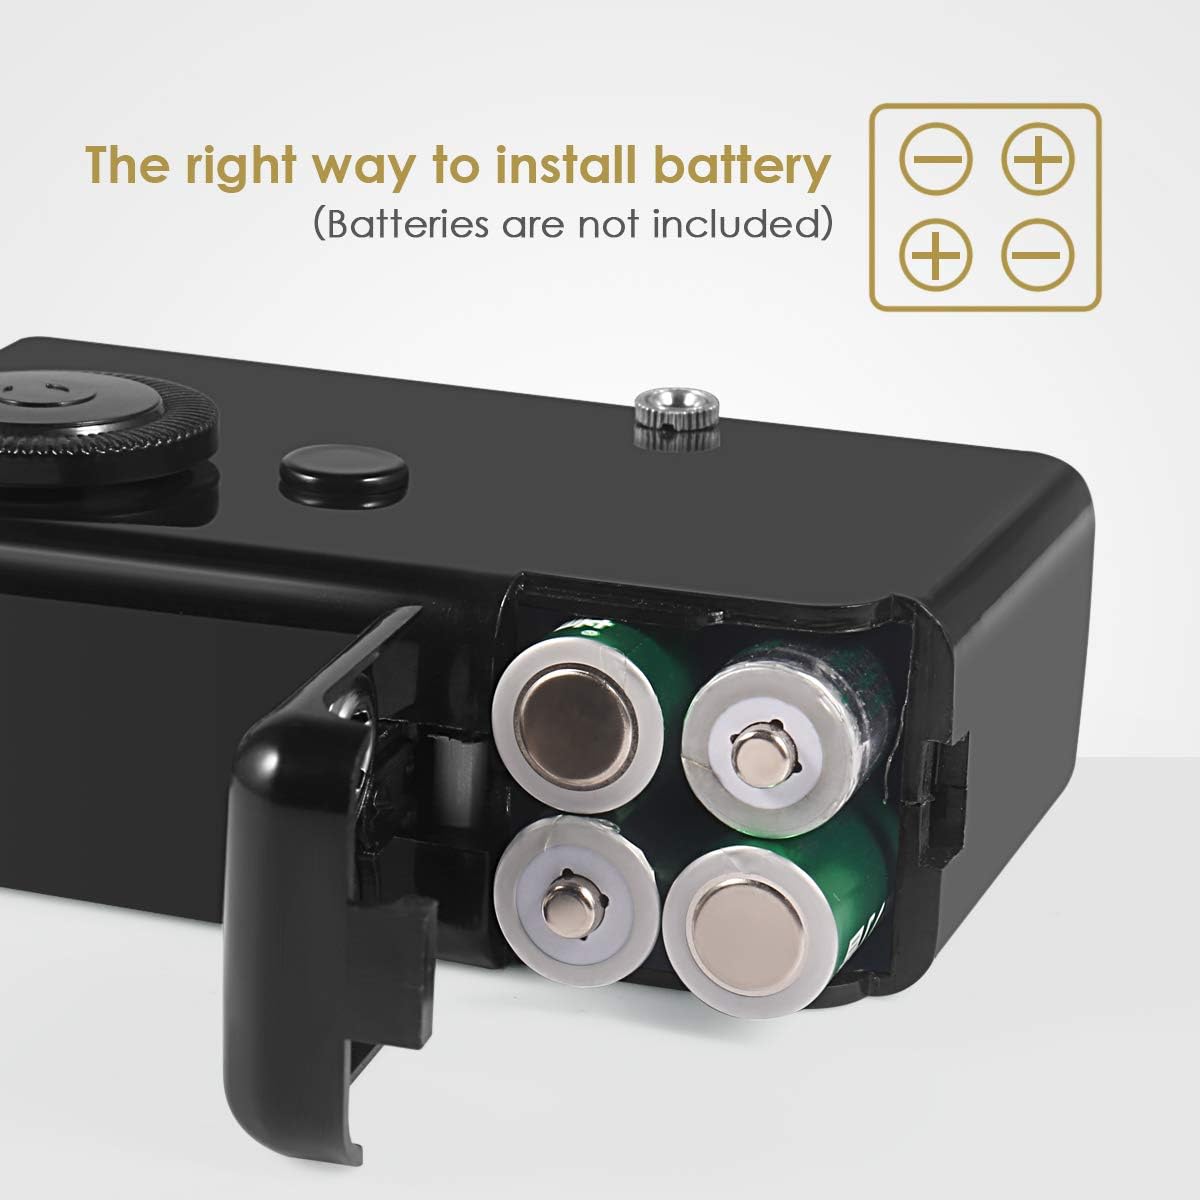
Figure 2: Proper battery installation. Ensure batteries are inserted with correct polarity. Do not mix old and new batteries or different brands.
Important: Do not mix batteries of different brands or combine old and new batteries. If using a power adapter, ensure it is DC6V and compatible with the machine's input.
2. Threading the Machine
Follow these steps to properly thread your sewing machine:
- Ensure the machine is turned off and the needle is in its highest position (use the Rotary Wheel if needed).
- Place the thread bobbin onto the Bobbin Holder.
- Guide the thread through the Thread Hole.
- Pass the thread through the tension control mechanism.
- Thread the needle from front to back.

Figure 3: Step-by-step guide for threading and initial operation. (1) Threading path, (2) Placing fabric under the pressure plate, (3) Pressing the switch to sew, (4) Knotting the thread after sewing.
Operating Instructions
1. Preparing to Sew
- Lift the presser foot.
- Place the fabric under the presser foot, ensuring the needle is positioned where you want to start sewing.
- Lower the presser foot to hold the fabric in place.
- Ensure the fabric thickness is approximately 1.8mm. The machine is not suitable for very thick or very thin fabrics.
2. Starting to Sew
- Unlock the safety lock on the Power Switch.
- Press the Power Switch to start the machine. The machine will begin stitching.
- Gently guide the fabric with one hand while the machine sews. Do not pull or push the fabric forcefully.
- Adjust the Tension Control as needed to achieve the desired stitch tightness.

Figure 4: Handheld sewing machine in use, demonstrating its portability and ease of handling for quick repairs.
3. Finishing a Stitch
- Once you have completed your seam, press the Power Switch to turn off the machine.
- Lift the presser foot and carefully remove the fabric.
- Cut the thread, leaving a tail of a few inches.
- Since this is a single-thread sewing machine, you must manually tie a knot at the end of each seam to prevent unraveling.
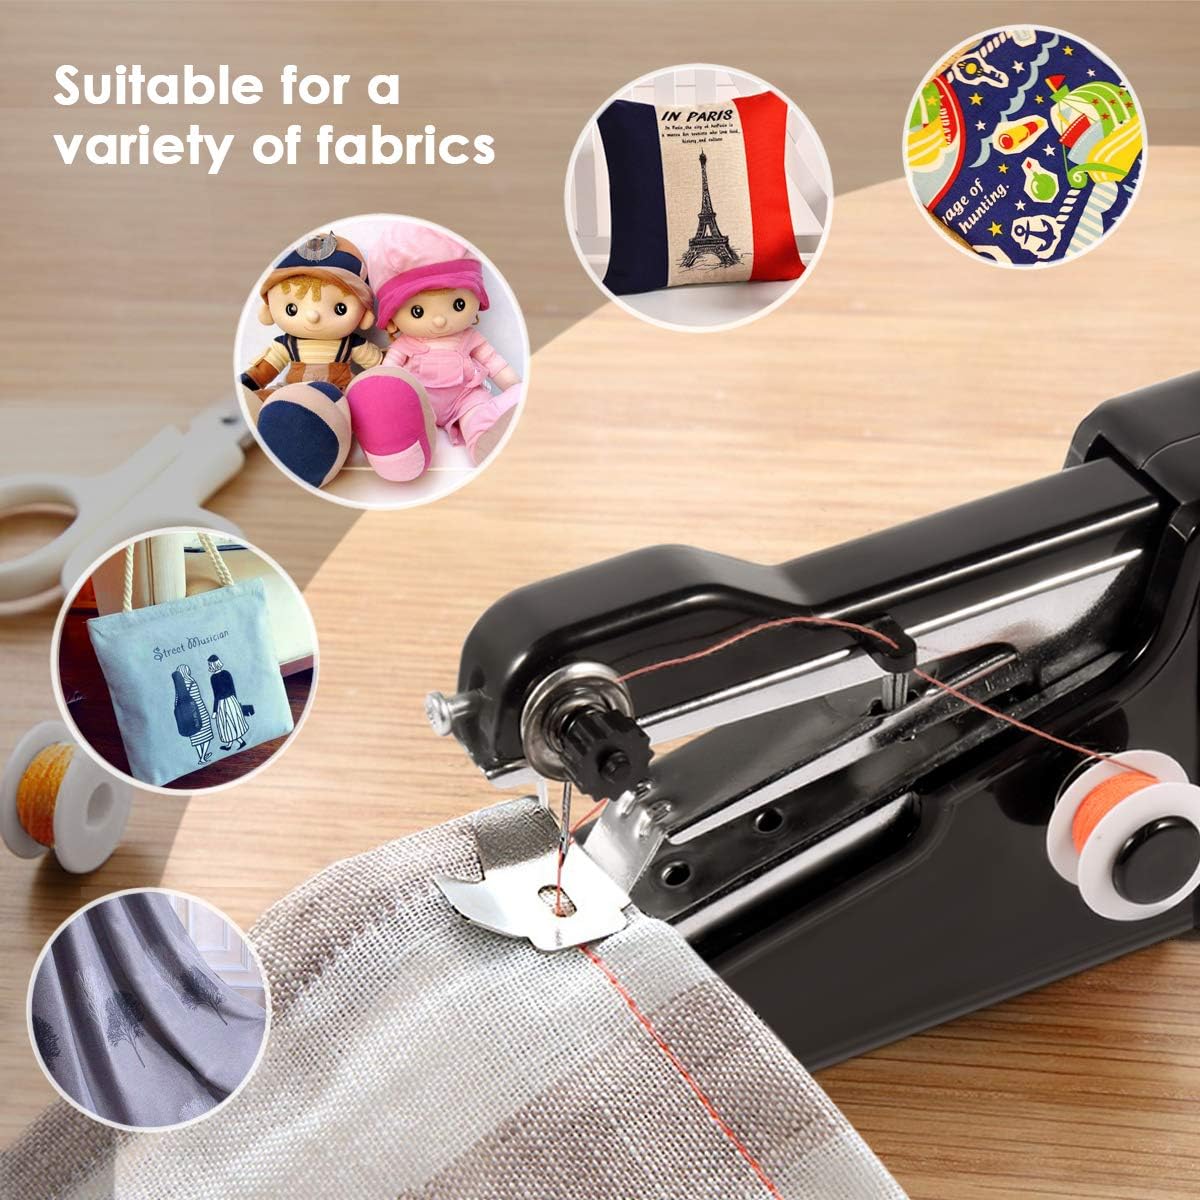
Figure 5: The machine is suitable for a variety of fabrics, as shown with different textile samples.
Maintenance
- Cleaning: Regularly clean lint and dust from the needle area and presser foot using a small brush or soft cloth.
- Needle Replacement: If the needle becomes dull or bent, replace it with a new, compatible needle. Ensure the machine is off and batteries are removed before changing the needle.
- Storage: Store the machine in a dry place, away from direct sunlight and extreme temperatures. Remove batteries if storing for extended periods.
Troubleshooting
| Problem | Possible Cause | Solution |
|---|---|---|
| Machine not stitching or stitching poorly. | Incorrect threading, low batteries, dull needle, fabric too thick/thin. | Re-thread the machine carefully. Replace batteries. Change the needle. Ensure fabric thickness is appropriate (around 1.8mm). |
| Thread breaks frequently. | Incorrect tension, poor quality thread, needle bent or dull. | Adjust tension control. Use good quality thread. Replace the needle. |
| Stitches unravel after sewing. | This is a single-thread machine. | Always tie a knot manually at the end of each seam to secure the stitches. |
| Machine runs slowly or stops. | Low batteries, motor overheating. | Replace batteries. If the motor feels hot, wait for a moment for it to cool down before resuming use. |
If the product cannot work smoothly after attempting these solutions, please contact customer support for assistance.
Specifications
- Brand: AUBNICO
- Model: B07PZWX7P2
- Color: Black
- Material: Metal
- Power Source: 4 x AA Batteries (not included) or DC6V Power Adapter (not included)
- Item Weight: 9.6 ounces
- Package Dimensions: 8.9 x 5.8 x 2.2 inches
- UPC: 671072339161
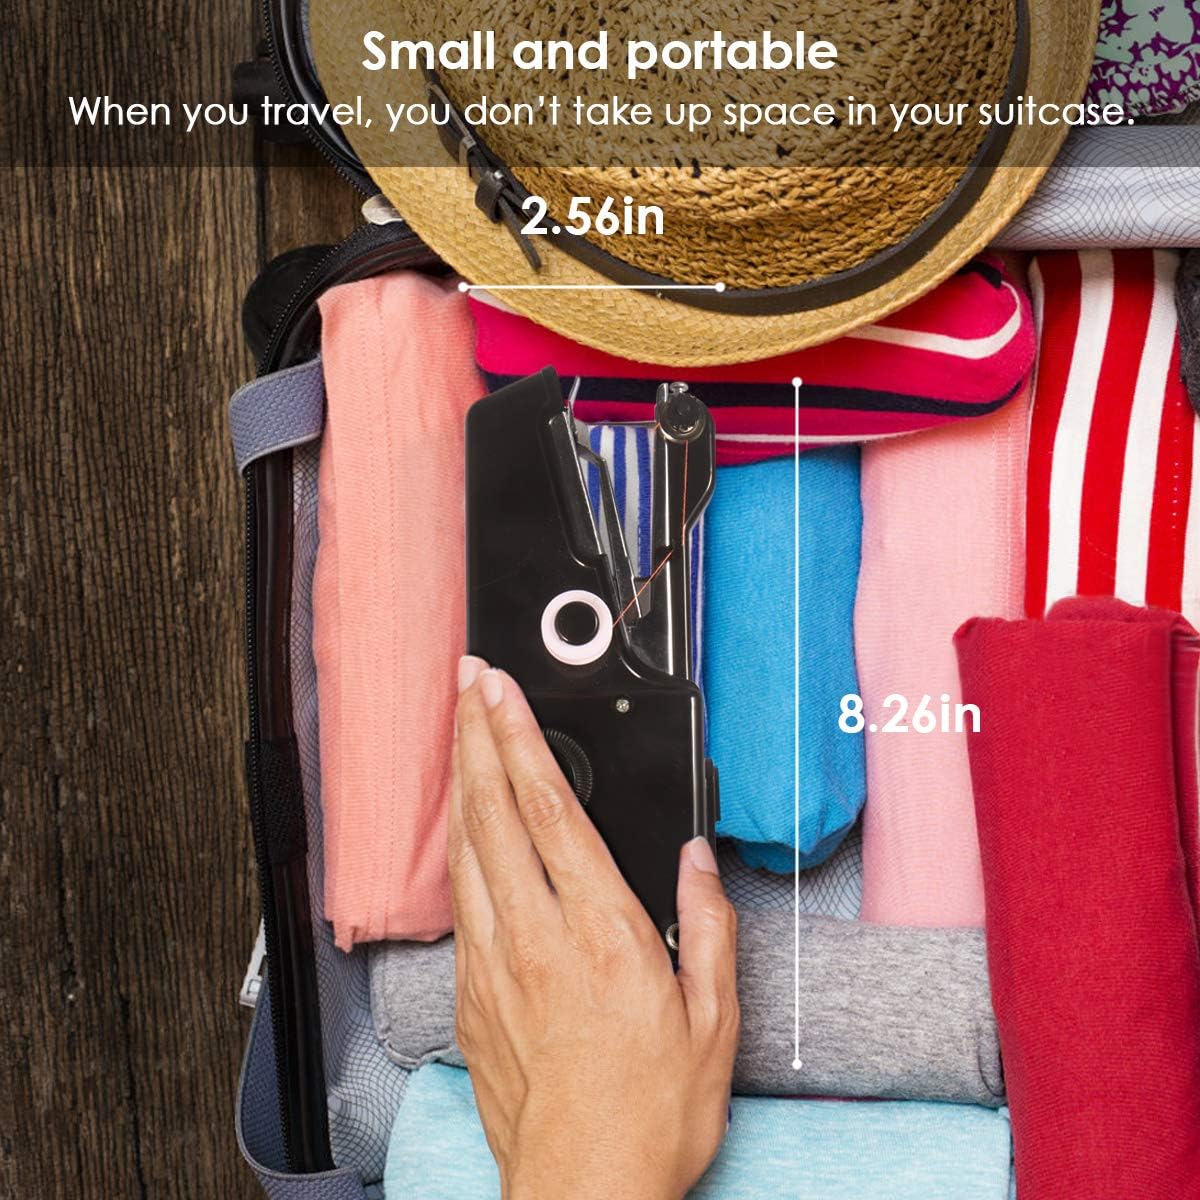
Figure 6: The compact design (2.56in x 8.26in) makes the machine highly portable and suitable for travel.
Warranty and Support
For warranty information or technical support, please refer to the contact details provided with your purchase or visit the official AUBNICO website. If you did not receive a user manual, an electronic edition can be provided upon request.