
Introduction
This manual provides essential information for the safe and efficient installation, operation, and maintenance of your Elica ESTRAIBILE GR/F/60 built-in range hood. Please read these instructions carefully before using the appliance and retain them for future reference.
Important Note: The decorative panel for the front of the hood is NOT included and must be supplied separately to match your kitchen cabinetry.
Safety Information
Always follow basic safety precautions when using electrical appliances to reduce the risk of fire, electric shock, and injury to persons.
- Ensure the electrical installation complies with local regulations.
- Do not operate the hood if the power cord or plug is damaged.
- This appliance is not intended for use by persons (including children) with reduced physical, sensory or mental capabilities, or lack of experience and knowledge, unless they have been given supervision or instruction concerning use of the appliance by a person responsible for their safety.
- Children should be supervised to ensure that they do not play with the appliance.
- Never leave frying food unattended as fats and oils can ignite.
- Clean the grease filters regularly to prevent grease build-up, which can be a fire hazard.
- Do not flambé under the range hood.
- Ensure adequate ventilation in the room when the range hood is used simultaneously with gas or other fuel-burning appliances.
Setup and Installation
The Elica ESTRAIBILE GR/F/60 is designed for built-in installation within a kitchen cabinet. Professional installation is recommended.
Unpacking
Carefully remove the range hood from its packaging. Inspect the appliance for any damage that may have occurred during transit. Do not install a damaged appliance. The package includes the grease filter and a light bulb.
Mounting
This hood is an integrated type, meaning it is designed to be installed directly into a kitchen cabinet. Ensure the cabinet dimensions are compatible with the hood's measurements. The hood operates on a 220-240V electrical supply.
- Prepare the cabinet opening according to the provided installation template (if available, refer to the separate installation guide).
- Secure the hood within the cabinet using appropriate fasteners.
- Connect the exhaust ducting. The hood supports recirculating ventilation, which requires carbon filters (sold separately or included, check packaging). For ducted extraction, connect to an external exhaust system.
- Connect the electrical supply. Ensure the power is off at the main circuit breaker before making any electrical connections.
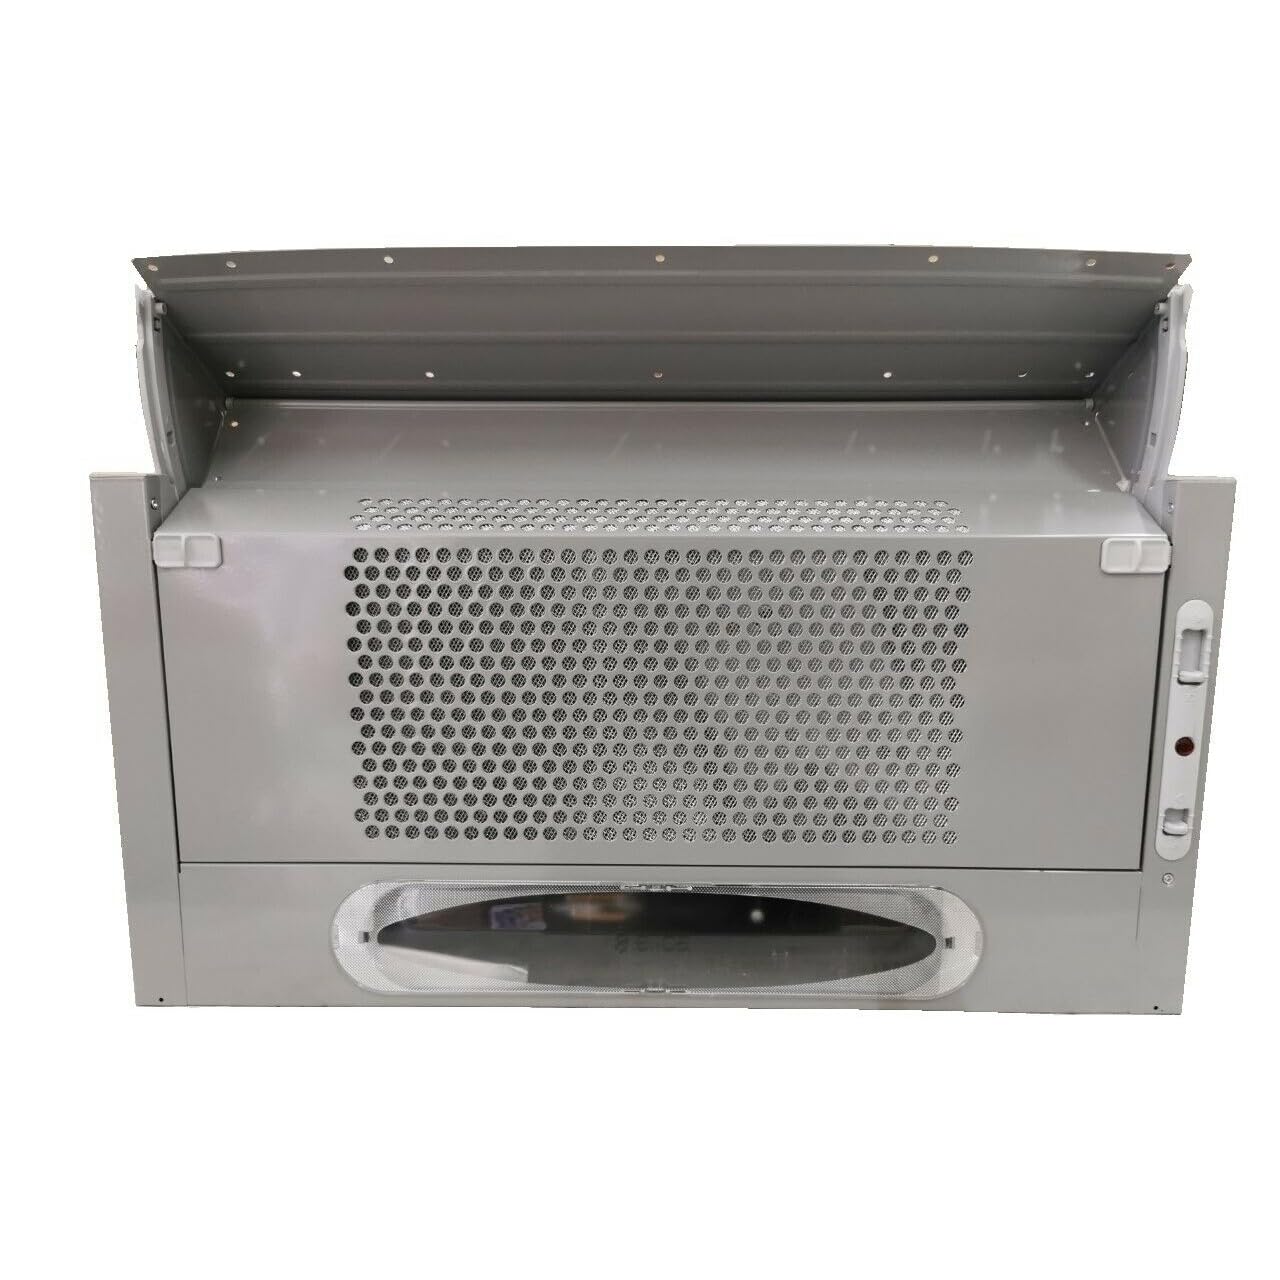
Image: Top view of the Elica ESTRAIBILE GR/F/60 built-in range hood. This image illustrates the main body of the hood, including the circular exhaust opening at the top and the extendable front panel in a partially open position. The internal grilles for air intake are visible, along with mounting points on the sides and top surface.
Operation
Your Elica range hood features a pull-out control mechanism and LED lighting for efficient cooking ventilation.
Activating the Hood
To activate the hood, gently pull the front panel outwards. This action typically engages the fan and lights automatically, depending on the model's specific configuration.
Fan Speed Control
The hood offers 3 fan speeds to suit various cooking needs. The controls are typically slide switches or buttons located on the front panel. Adjust the speed as follows:
- Speed 1: For light cooking, simmering, or minimal odors.
- Speed 2: For general cooking and moderate steam/odors.
- Speed 3: For heavy frying, grilling, or strong odors.
LED Lighting
The hood is equipped with LED lighting to illuminate your cooking area. A dedicated switch or button controls the lights. Press to turn on/off.
Deactivating the Hood
To turn off the hood, push the front panel back into its closed position. The fan and lights will typically deactivate automatically.
Maintenance
Regular maintenance ensures optimal performance and extends the lifespan of your range hood.
Cleaning the Grease Filters
The aluminum grease filters capture airborne grease particles. They should be cleaned regularly (approximately every 2-4 weeks, depending on usage) to maintain efficiency and prevent fire hazards.
- Ensure the hood is turned off and disconnected from the power supply.
- Locate and remove the grease filters. Refer to the specific mechanism for your model (usually clips or latches).
- Wash the filters by hand in hot water with a mild detergent, or in a dishwasher on a low-temperature cycle. Avoid using abrasive cleaners.
- Allow the filters to dry completely before reinserting them.
Replacing Carbon Filters (for Recirculating Mode)
If your hood is operating in recirculating mode, it uses carbon filters to remove odors. These filters cannot be washed and must be replaced approximately every 3-6 months, depending on usage.
- Ensure the hood is turned off and disconnected from the power supply.
- Remove the grease filters to access the carbon filters.
- Remove the old carbon filters and dispose of them responsibly.
- Install new carbon filters, ensuring they are correctly seated.
- Reinstall the grease filters.
Cleaning the Exterior
Clean the stainless steel exterior with a soft cloth and a non-abrasive cleaner specifically designed for stainless steel. Avoid harsh chemicals or abrasive pads that can scratch the surface.
Replacing the Light Bulb
The hood uses LED lighting. If a bulb needs replacement, ensure the hood is disconnected from power. Consult a qualified technician or refer to the detailed service manual for specific instructions on LED module replacement.
Troubleshooting
Before contacting customer service, please check the following common issues:
| Problem | Possible Cause | Solution |
|---|---|---|
| Hood does not turn on. | No power supply; front panel not fully extended. | Check power connection and circuit breaker. Ensure the front panel is fully pulled out. |
| Low suction power. | Clogged grease filters; clogged carbon filters (recirculating mode); improper ducting. | Clean or replace filters. Check ducting for obstructions or leaks. |
| Excessive noise. | Loose components; fan obstruction; improper installation. | Check for loose parts. Ensure no objects are obstructing the fan. Verify correct installation. |
| Lights not working. | Faulty LED module; electrical connection issue. | Check light switch. If LED module is faulty, contact service. |
Specifications
| Feature | Detail |
|---|---|
| Brand | Elica |
| Model Number | T LUX GR (PRF0154623) |
| Color | Stainless Steel |
| Special Features | LED Lighting, Noise Reduction |
| Airflow Capacity | 260 Cubic Meters per Hour |
| Material | Aluminum |
| Noise Level | 64 Decibels |
| Mounting Type | Integrated (Built-in) |
| Control Type | Pull-out Effect Control |
| Number of Speeds | 3 |
| Light Source | LED |
| Electrical Power | 2400 Watts |
| Filter Type | Carbon (for recirculation), Grease Filter (Aluminum) |
| Ventilation Type | Recirculating (can also be ducted) |
| Smart Home Compatibility | Not compatible with smart home systems |
| Finish | Stainless Steel |
| Item Shape | Pyramid |
| Hood Design | Wall-mounted Hood |
| Included Components | Grease filter, Light bulb |
| Manufacturer | Elica |
| Manufacturer Part Number | 67014905/3 |
| Item Weight | 22 Kilograms |
| EU Spare Part Availability | 5 Years |
Note on "Hood Design: Wall-mounted Hood" and "Item Shape: Pyramid": While the product is an integrated/built-in type, these specifications might refer to the internal fan unit's design or a broader product category. The primary mounting type for this specific model is integrated.
Warranty and Support
Elica provides a commitment to spare part availability for 5 years within the EU. For warranty claims, technical assistance, or to purchase spare parts, please contact Elica customer support or your authorized dealer.
For further information, you may visit the official Elica store: Elica Store on Amazon.it