Introduction
The UniqueFire 1605 T67 IR Illuminator Flashlight is designed to enhance night vision capabilities. It utilizes a 940nm infrared LED, which emits light invisible to the human eye, making it ideal for covert observation when paired with a night vision device. This illuminator features advanced IR BLACK LED technology, offering high efficiency and low thermal resistance with 5 watts of optical power. Its zoomable lens allows for adjustable focus, and the quick dimmer switch provides precise brightness control.
Note: This is an infrared illuminator, not a standard visible light flashlight. It requires a night vision device to see its emitted light.
Safety Information
- Eye Safety: Do not look directly into the IR beam. Although invisible to the naked eye, prolonged direct exposure to infrared light can be harmful to vision.
- Battery Safety: Use only recommended battery types. Ensure correct polarity during installation. Do not mix old and new batteries, or different types of batteries. Remove batteries if the device will not be used for an extended period.
- Heat: The flashlight may generate heat during extended use. Handle with care.
- Water Resistance: While the device is IPX65 water-resistant, it is not designed for submersion. Avoid prolonged exposure to heavy rain or water.
Package Contents
Verify that all items are present in your package:
- 1x UniqueFire 1605 T67 940nm IR Flashlight
- 1x Remote Pressure Switch
- 1x Mounting Bracket
Setup
1. Battery Installation
Unscrew the tail cap of the flashlight. Insert one compatible battery (e.g., 18650 rechargeable lithium-ion battery, not included) with the positive (+) end facing towards the head of the flashlight. Screw the tail cap back on securely.
Note: Please refer to your product packaging for the exact battery type and quantity required for your specific model, as specifications may vary.
2. Attaching the Remote Pressure Switch
Replace the standard tail cap with the remote pressure switch tail cap. Ensure it is screwed on tightly to maintain electrical contact and water resistance.
3. Mounting the Flashlight
Use the provided mounting bracket to attach the flashlight to your desired night vision scope or rail system. Ensure the mount is securely fastened to prevent movement during use.
Operating Instructions
1. Power On/Off
Press the tail switch fully once to turn the flashlight ON or OFF. If using the remote pressure switch, press the button to activate the light.
2. Brightness Adjustment

The tail switch allows for quick and precise brightness adjustment.
When the light is ON, rotate the tail switch (or the dimmer control on the remote switch, if applicable) to adjust the brightness level from 5% to 95%. This allows for fine-tuning the illumination intensity.
3. Focus Adjustment (Zoom Function)

Rotate the lens head to adjust the beam from a wide flood to a focused spotlight.
Rotate the head of the flashlight to adjust the beam. Turning it clockwise or counter-clockwise will change the focus from a wide flood illumination to a tight, long-range spotlight. This feature is designed for optimal performance with night vision devices at various distances.
4. Lens and LED Module Replacement

Follow these steps to replace the lens or LED module.
- Unscrew the anti-glare shroud from the front of the light.
- Carefully remove the glass lens.
- Using pliers, unscrew the LED pill (lamp base) counter-clockwise and remove it.
- Unscrew the head of the light from the body.
- Choose the desired size of the replacement head (e.g., 38mm, 50mm, 67mm, 75mm) and screw it onto the flashlight body. (Note: Replacement heads must be purchased separately).
- Choose the desired LED color/wavelength module (e.g., IR850nm, IR940nm, Green, Red, White) and screw it into the base of the light.
Maintenance
Cleaning
Wipe the flashlight body with a soft, damp cloth. For the lens, use a lens cleaning cloth and solution to avoid scratches. Do not use abrasive cleaners or solvents.
Battery Care
Ensure batteries are charged using a compatible charger. If the flashlight is not used for an extended period, remove the battery to prevent leakage and damage.
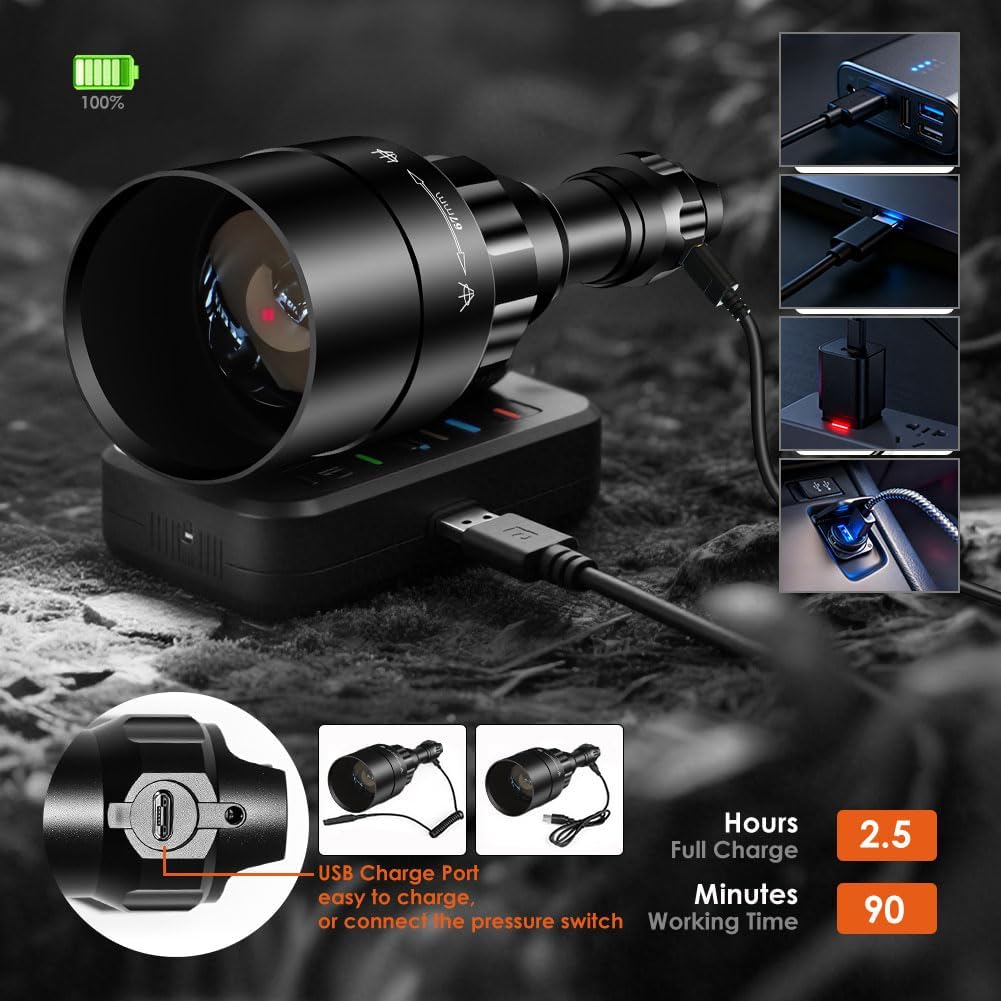
The flashlight features a USB charging port for convenience.
Storage
Store the flashlight in a cool, dry place away from direct sunlight and extreme temperatures.

The IPX65 rating ensures the flashlight is resistant to water splashes and dust.
Troubleshooting
- Flashlight Not Turning On:
- Check if the battery is inserted correctly with the correct polarity.
- Ensure the battery is charged.
- Tighten the tail cap and head of the flashlight to ensure proper electrical contact.
- Dim or Weak Light:
- The battery may be low and requires charging.
- Ensure the lens is clean and free from obstructions.
- IR Light Not Visible:

Infrared light is not visible to the naked eye and requires a night vision device.
- Remember that 940nm IR light is invisible to the human eye. It can only be seen through a night vision device (e.g., night vision scope, NVS, NVG DIY, camera phones that don't block IR).
Specifications
| Feature | Specification |
|---|---|
| Brand | UniqueFire |
| Model Number | 1605_T67_940nm Set |
| Light Source Type | LED (940nm IR) |
| Light Source Wattage | 5 Watts |
| Material | Aircraft Aluminum Alloy |
| Special Features | Adjustable Focus, Long Range, Rechargeable, Weatherproof |
| Water Resistance Level | IPX65 (Waterproof) |
| Light Path Distance | Approximately 50-400+ Meters (400+ Yards) with focused beam |
| Item Weight | 174 Grams |
| Item Dimensions (L x W x H) | 8.98"L x 2.75"W x 1.38"H |
| Runtime | Up to 50,000 Hours (LED lifetime) |
Warranty and Support
Warranty Information
The manufacturer's warranty typically covers defects in materials and workmanship. Please note that man-made damage is generally not covered under warranty.
Customer Support
For further assistance, technical support, or warranty claims, please visit the official UniqueFire store or contact their customer service directly.
UniqueFire Store: https://www.amazon.com/stores/UniqueFire/page/7EF1CE46-C64A-4F20-A1F2-1BBC574ED334


