1. Introduction
This manual provides essential instructions for the safe and efficient installation, operation, and maintenance of your Southbend Range Model 4361D Commercial Gas Range. This appliance is designed for commercial use in professional kitchen environments. Please read this manual thoroughly before operating the unit and retain it for future reference.
1.1 Safety Information
- WARNING: Improper installation, adjustment, alteration, service, or maintenance can cause property damage, injury, or death. Read the installation, operating, and maintenance instructions thoroughly before installing or servicing this equipment.
- This appliance must be installed by a qualified installer in accordance with all local codes, or in the absence of local codes, with the National Fuel Gas Code, ANSI Z223.1/NFPA 54, Natural Gas and Propane Installation Code, CSA B149.1, or Propane Storage and Handling Code, CSA B149.2 as applicable.
- Keep appliance area clear and free from combustible materials, gasoline, and other flammable vapors and liquids.
- Do not obstruct the flow of combustion and ventilation air.
- Never use the appliance for space heating.
- Ensure adequate ventilation in the kitchen area.
2. Setup and Installation
The Southbend Range 4361D is a heavy-duty commercial appliance. Professional installation is required to ensure safe and proper operation.
2.1 Unpacking and Inspection
- Carefully remove the appliance from its packaging.
- Inspect the unit for any shipping damage. Report any damage immediately to the carrier and your dealer.
- Retain all packaging materials for inspection if damage is found.
2.2 Location and Clearance
- Install the range on a level, non-combustible surface.
- Maintain adequate clearances from combustible walls and materials as specified by local codes.
- Ensure proper ventilation is available, typically through a commercial exhaust hood system.
2.3 Gas Connection
- The appliance is factory-set for either Natural Gas or LP Gas. Verify the gas type matches your supply.
- A qualified technician must connect the appliance to the gas supply line.
- Install a manual gas shut-off valve in an accessible location upstream of the appliance.
- Perform a leak test on all gas connections using a soap solution. Never use an open flame.
2.4 Leveling
The range is equipped with 6-inch stainless steel legs. Adjust the feet on these legs to ensure the unit is perfectly level. Proper leveling is crucial for even cooking and safe operation.
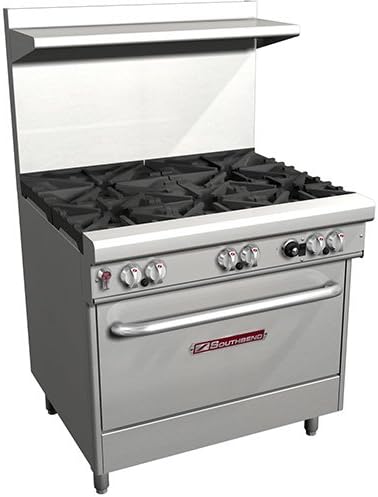
Figure 2.4.1: Front view of the Southbend Range 4361D Commercial Gas Range, showing the six top burners, control knobs, and oven door.
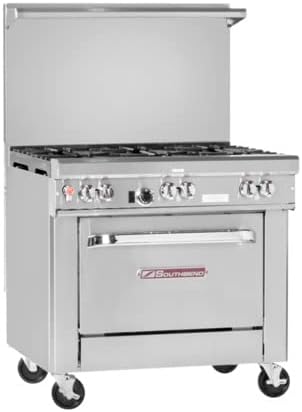
Figure 2.4.2: Side view of the Southbend Range 4361D, illustrating the overall structure and optional casters for mobility.
3. Operating Instructions
3.1 Top Burners (6 Burners)
- Ensure the gas supply to the range is open.
- Push in and turn the desired burner control knob counter-clockwise to the "PILOT" position (if equipped with standing pilot) or "IGNITE" position (for electronic ignition).
- If using a standing pilot, light the pilot with a long match or lighter. Hold the knob in for a few seconds after ignition to allow the thermocouple to heat up.
- Once the pilot is lit, turn the knob further counter-clockwise to the desired flame setting (LOW to HIGH).
- To turn off, turn the knob clockwise to the "OFF" position.
The burners feature a dual-tube, non-clog design and removable 12"Wx12"D cast iron grates, capable of holding a 14" stock pot. A removable one-piece drip tray is located under the burners for easy cleaning.
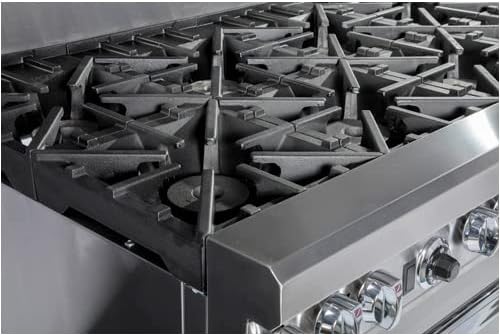
Figure 3.1.1: Detailed view of the heavy-duty cast iron grates and sealed burners on the Southbend Range 4361D.

Figure 3.1.2: View of the burner assembly with grates removed, showing the dual-tube design and gas ports.

Figure 3.1.3: The removable one-piece drip tray located beneath the burners for easy cleaning and maintenance.
3.2 Standard Oven (1 Oven)
- Ensure the gas supply to the range is open.
- Open the oven door.
- Push in and turn the oven thermostat knob to the desired temperature setting (range: +250°F to +500°F).
- The oven pilot will ignite automatically (or may require manual ignition depending on the model's ignition system).
- Allow the oven to preheat to the set temperature.
- To turn off, turn the thermostat knob to the "OFF" position.
The oven features a durable porcelain enamel interior measuring 26"Wx26-1/2"Dx14"H, designed to accommodate full-size sheet pans front-to-back or side-to-side. It includes two-position, non-removable rack guides and one rack per oven.

Figure 3.2.1: Interior view of the standard oven, showing the porcelain enamel finish and adjustable rack.
4. Maintenance and Cleaning
Regular cleaning and maintenance will extend the life and maintain the performance of your Southbend Range 4361D.
4.1 Daily Cleaning
- Exterior Surfaces: Wipe down stainless steel surfaces with a damp cloth and mild detergent. Dry thoroughly to prevent water spots. Do not use abrasive cleaners or steel wool.
- Cast Iron Grates: Remove grates and clean with a stiff brush and hot soapy water. For stubborn residue, a non-abrasive scouring pad can be used. Ensure grates are completely dry before replacing.
- Drip Tray: Remove the one-piece drip tray and empty any debris. Wash with hot soapy water and dry thoroughly.
- Oven Interior: Wipe out spills and food particles from the porcelain enamel interior after each use, once the oven has cooled. For baked-on food, use a commercial oven cleaner suitable for porcelain enamel, following the product instructions carefully.
4.2 Periodic Maintenance
- Inspect gas connections for leaks periodically.
- Ensure burner ports are clear of debris for optimal flame performance.
- Check oven door gasket for wear and tear; replace if damaged to maintain heat efficiency.
- Schedule professional inspection and service annually to ensure all components are functioning correctly and safely.
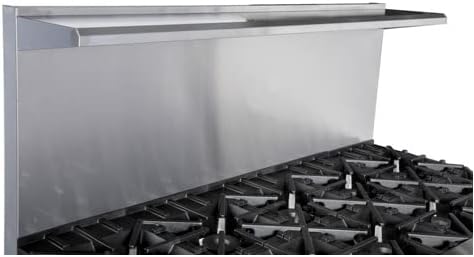
Figure 4.1.1: The stainless steel backsplash, which should be cleaned regularly along with other exterior surfaces.
5. Troubleshooting
Before calling for service, review the following common issues and solutions. Only qualified service personnel should attempt repairs.
| Problem | Possible Cause | Solution |
|---|---|---|
| Burner will not light. | Gas supply off; clogged burner port; faulty igniter/pilot. | Check gas shut-off valve; clean burner ports; contact service technician. |
| Oven not heating. | Gas supply off; thermostat set incorrectly; faulty pilot/igniter. | Check gas supply; verify thermostat setting; contact service technician. |
| Uneven cooking in oven. | Oven not level; improper rack placement; faulty thermostat. | Level the appliance; ensure proper air circulation around food; contact service technician. |
| Gas odor detected. | Gas leak. | IMMEDIATELY shut off gas supply, ventilate area, and contact gas company/qualified technician. Do not operate appliance. |
6. Specifications
Key technical specifications for the Southbend Range 4361D Commercial Gas Range.
| Feature | Detail |
|---|---|
| Model Name | 4361D |
| Part Number | 692-051-NAT |
| Brand | Southbend Range |
| Overall Dimensions (WxDxH) | 36"W x 34"D x 59.5"H (including 6" stainless steel legs) |
| Weight | 535 lbs. |
| Installation Type | Freestanding |
| Fuel Type | Gas (Natural Gas or LP Gas) |
| Number of Burners | 6 |
| Burner Type | Sealed, Dual-tube, Non-clog design |
| Burner BTU (Natural Gas) | 33,000 BTU per burner |
| Burner BTU (LP Gas) | 24,000 BTU per burner |
| Grates | Removable 12"Wx12"D cast iron |
| Oven Type | Standard Oven |
| Oven Interior Dimensions (WxDxH) | 26"W x 26.5"D x 14"H |
| Oven Interior Material | Porcelain Enamel |
| Oven Temperature Range | +250°F to +500°F |
| Oven BTU (Natural Gas) | 45,000 BTU |
| Oven BTU (LP Gas) | 40,000 BTU |
| Oven Racks | 1 rack, two-position non-removable guides |
| Control Console | Knob |
| Material Type | Stainless Steel |
7. Warranty and Support
For specific warranty details, please refer to the warranty card included with your appliance or contact your authorized Southbend Range dealer. The dual-tube, non-clog burner design carries a lifetime warranty. For technical support, service, or to order replacement parts, please contact your authorized Southbend Range service provider or visit the official Southbend Range website.
Contact Information: Please refer to your purchase documentation or the manufacturer's official website for the most current contact details for customer support and authorized service centers.