1. Introduction
This manual provides detailed instructions for the installation, operation, and maintenance of the Jectse XTM024 Digital Electric Meter. This device is designed for accurate measurement of active energy consumption in 3-phase, 4-wire AC systems. Please read this manual thoroughly before installation and use to ensure proper function and safety.
2. Safety Information
Warning: Installation and maintenance of this device should only be performed by qualified electricians. Failure to follow these safety guidelines may result in electric shock, fire, or damage to the equipment.
- Always disconnect power before installing or servicing the meter.
- Ensure all wiring connections are secure and correct according to the wiring diagram.
- Do not operate the meter in environments exceeding specified temperature and humidity limits.
- Protect the meter from dust, corrosive gases, salt fog, condensation, and insects.
- Do not attempt to open or repair the meter yourself. Contact qualified personnel for service.
3. Product Features
The Jectse XTM024 Digital Electric Meter offers the following key features:
- Accurate Measurement: Directly and accurately measures active energy consumption in 3-phase, 4-wire systems. Conforms to GB/T17215.321-2008 and IEC62053 international standards (Grade 1 or 2).
- LCD Display: Features a 6+2 digit LCD for clear display of total power consumption.
- DIN Rail Installation: Designed for easy and standard 35mm DIN rail mounting.
- High Reliability: Exhibits good anti-electromagnetic interference, low power consumption, high precision, high overload capacity, and long operational life.
- Compact Design: Small volume, light weight, and aesthetically pleasing appearance.
4. Specifications
| Parameter | Value |
|---|---|
| Reference Voltage | 3 x 220/380V |
| Reference Current | 3 x 20(80A) |
| Accuracy Level | 1.0 |
| Rated Frequency | 50Hz / 60Hz |
| Constant Pulse | 400imp / kWh |
| Display | LCD 6 + 2 digits |
| Power Consumption | ≤2W, 10VA |
| Starting Current | 0.004Ib |
| Operating Temperature | -20 °C ~ 55 °C |
| Storage Temperature | -25 °C ~ 70 °C |
| Operating Voltage | 0.9-1.1 Rated Voltage |
| Utmost Voltage | 0.8-1.15 Rated Voltage |
| Average Humidity Value of Year | ≤75% |
| Type | Three Phase Four Wire Electronic Type |
| Dimensions | Approx. 10.1 x 7.6 x 6.5 cm (3.97 x 2.99 x 2.55 inches) |
| Weight | Approx. 415g |
5. Installation
The Jectse XTM024 meter is designed for 35mm DIN rail mounting indoors. Ensure the installation environment meets the specified conditions (temperature, humidity, absence of corrosive gases, dust, etc.).
5.1 Mounting the Meter
The meter features a standard DIN rail clip on its underside for easy attachment to a 35mm DIN rail.
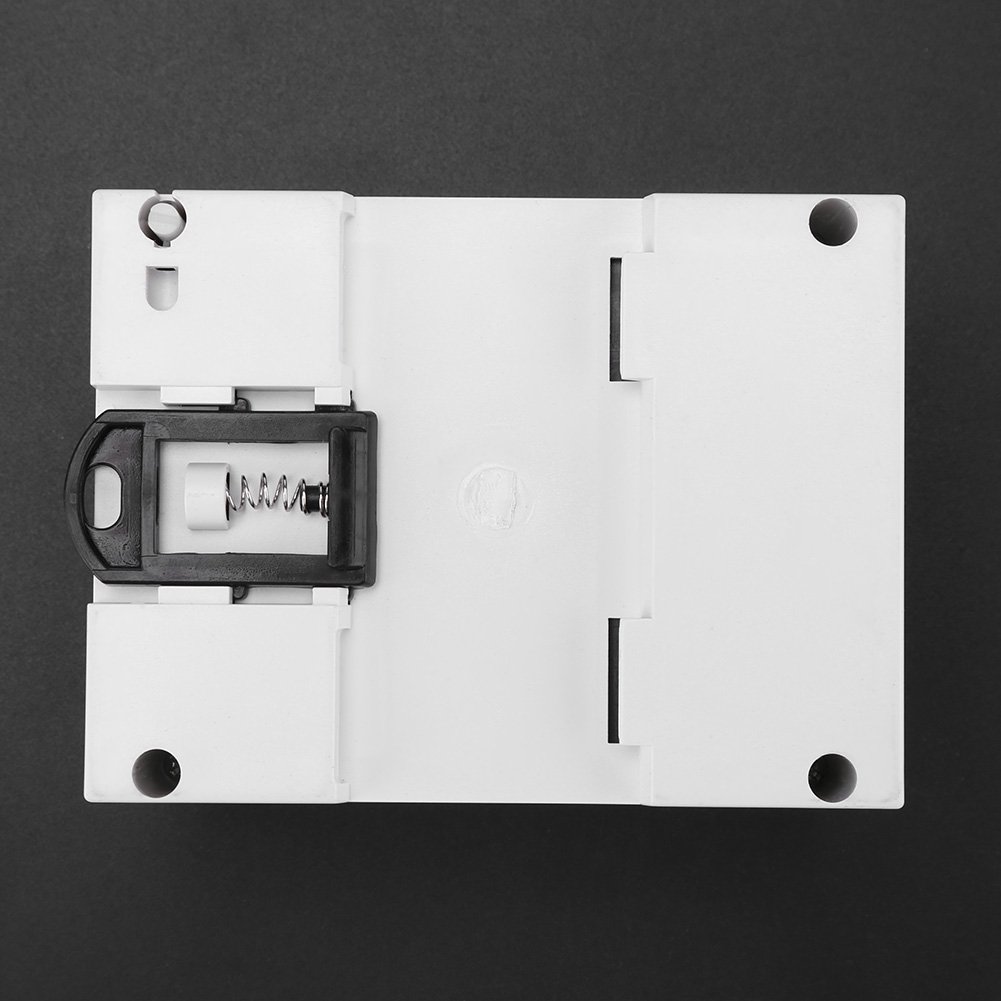
Image: Bottom view of the meter, highlighting the spring-loaded clip for DIN rail attachment.
- Ensure the DIN rail is securely mounted in a suitable enclosure.
- Align the meter's top groove with the top edge of the DIN rail.
- Press the meter downwards and inwards until the bottom clip engages with the DIN rail.
- Verify the meter is firmly seated and does not wobble.
5.2 Wiring Connections
Refer to the wiring diagram on the meter for correct connections. The meter is designed for a 3-phase, 4-wire system.

Image: Rear view of the meter displaying the terminal block and a clear wiring diagram for 3-phase, 4-wire connection.
- Input Terminals (L1, L2, L3, N): Connect the incoming 3-phase, 4-wire power supply to the corresponding input terminals (1, 3, 5, 7).
- Output Terminals (L1, L2, L3, N): Connect the load to the corresponding output terminals (2, 4, 6, 8).
- Ensure all wires are properly stripped and inserted into the terminals, then securely tightened to prevent loose connections and arcing.
- Double-check all connections against the diagram before restoring power.
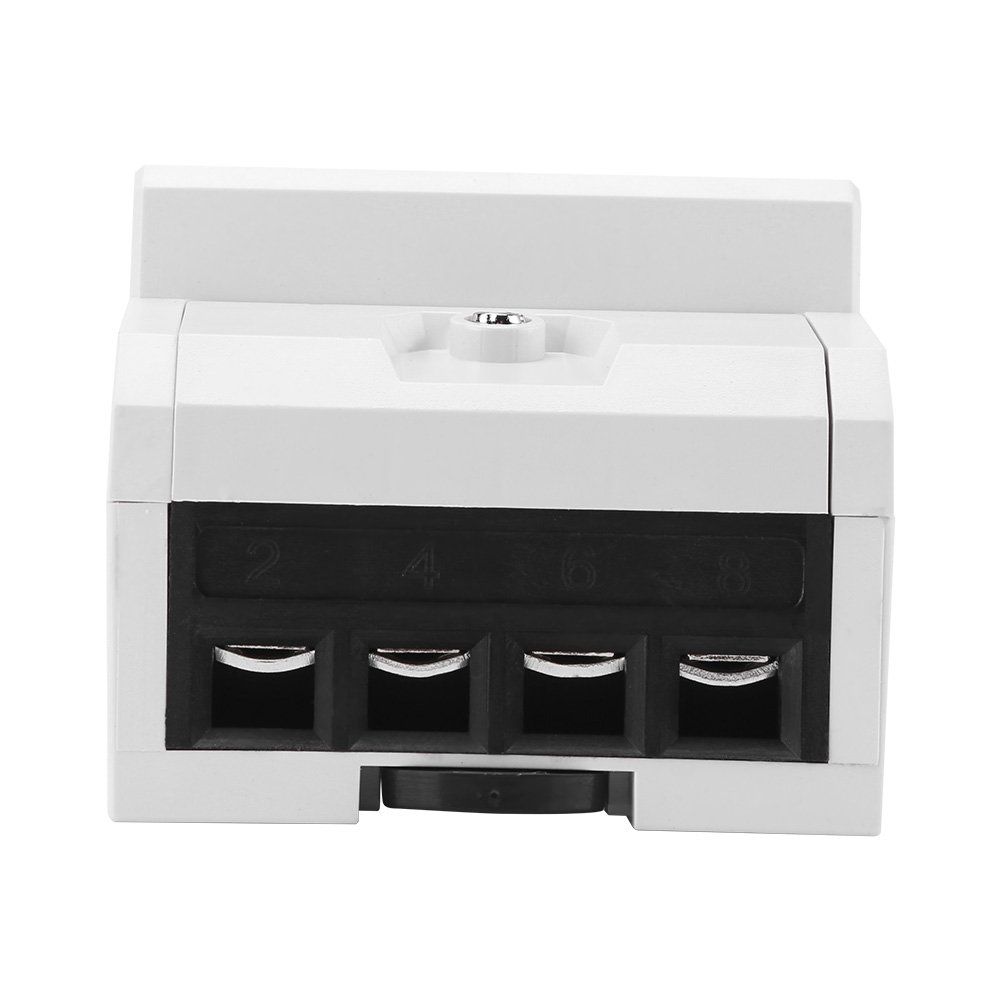
Image: Bottom view of the meter, showing the four pairs of terminal openings for secure wire connections.
6. Operation
Once properly installed and powered, the meter will automatically begin measuring energy consumption.
6.1 LCD Display
The 6+2 digit LCD displays the total accumulated active energy consumption in kilowatt-hours (kWh).
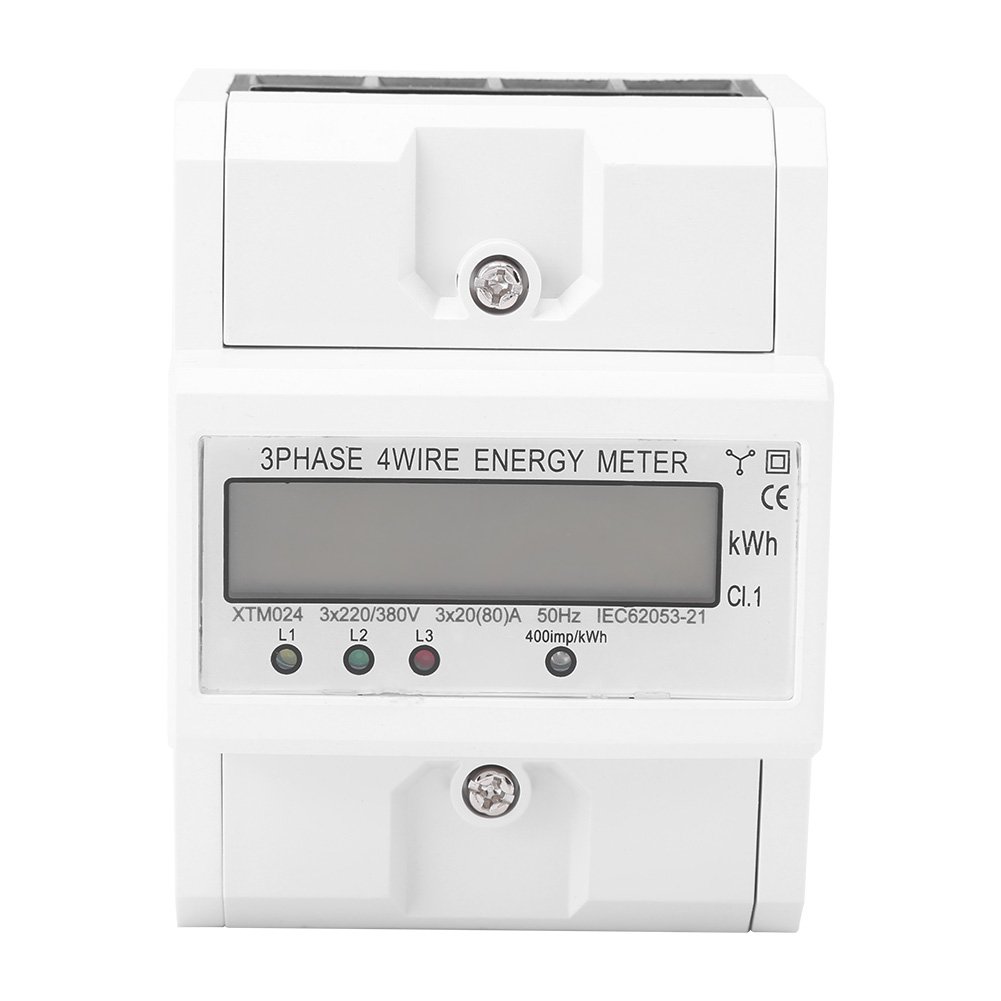
Image: Front view of the meter, clearly showing the LCD screen displaying energy readings and the L1, L2, L3 indicator lights.
- The large digits represent whole kWh units, and the smaller digits (after the decimal point) represent fractions of a kWh.
- Indicator lights (L1, L2, L3) typically illuminate to show the presence of voltage on each phase.
- A pulse indicator (often labeled "kWh" or with a flashing LED) will flash at a rate proportional to the energy being consumed (400 imp/kWh).
The meter is designed for continuous operation and does not typically require user interaction beyond reading the display.
7. Maintenance
The Jectse XTM024 Digital Electric Meter is designed for long-term, maintenance-free operation under normal conditions.
- Cleaning: Periodically clean the exterior of the meter with a soft, dry cloth. Do not use abrasive cleaners or solvents.
- Inspection: Regularly inspect the meter and its connections for any signs of damage, loose wiring, or overheating. Address any issues promptly by disconnecting power and consulting a qualified electrician.
- Environmental Control: Ensure the operating environment remains within the specified temperature and humidity ranges and is free from excessive dust or corrosive elements.
No internal user-serviceable parts are present. Do not attempt to open the meter casing.
8. Troubleshooting
If the meter is not functioning as expected, consider the following basic troubleshooting steps:
- No Display/No Power:
- Check if the main power supply to the meter is active.
- Verify all wiring connections are secure and correct according to the diagram.
- Ensure no circuit breakers or fuses upstream of the meter have tripped.
- Incorrect Readings:
- Confirm that the meter type (3-phase, 4-wire) matches your electrical system.
- Re-check all wiring connections for proper phase and neutral assignments.
- Ensure the load is connected correctly to the output terminals.
- Indicator Lights Not On:
- If specific phase indicator lights (L1, L2, L3) are off, check the voltage presence on that particular phase.
If troubleshooting steps do not resolve the issue, contact a qualified electrician or the product supplier for assistance. Do not attempt internal repairs.
9. Warranty and Support
For warranty information, please refer to the terms and conditions provided at the time of purchase or contact your retailer. Jectse products are designed for reliability and performance.
For technical support or inquiries, please visit the official Jectse website or contact their customer service department. When contacting support, please have your product model (XTM024) and purchase details readily available.

Image: Jectse brand logo, representing the manufacturer of this electric meter.