
Product Overview
This user manual provides instructions for the EVERNICE Thread Tension Assembly, part number 401-03925 (40103925). This component is designed for industrial sewing machines, specifically compatible with Juki models DNU-1541-7, LU-1508N, LU-1509N, LU-1510N, LU-1510N-7, LS-1340, LS-1341, LS-1342, and LS-1342-7. The thread tension assembly is a critical part of the sewing machine, responsible for regulating the resistance applied to the upper thread, which directly impacts stitch quality.
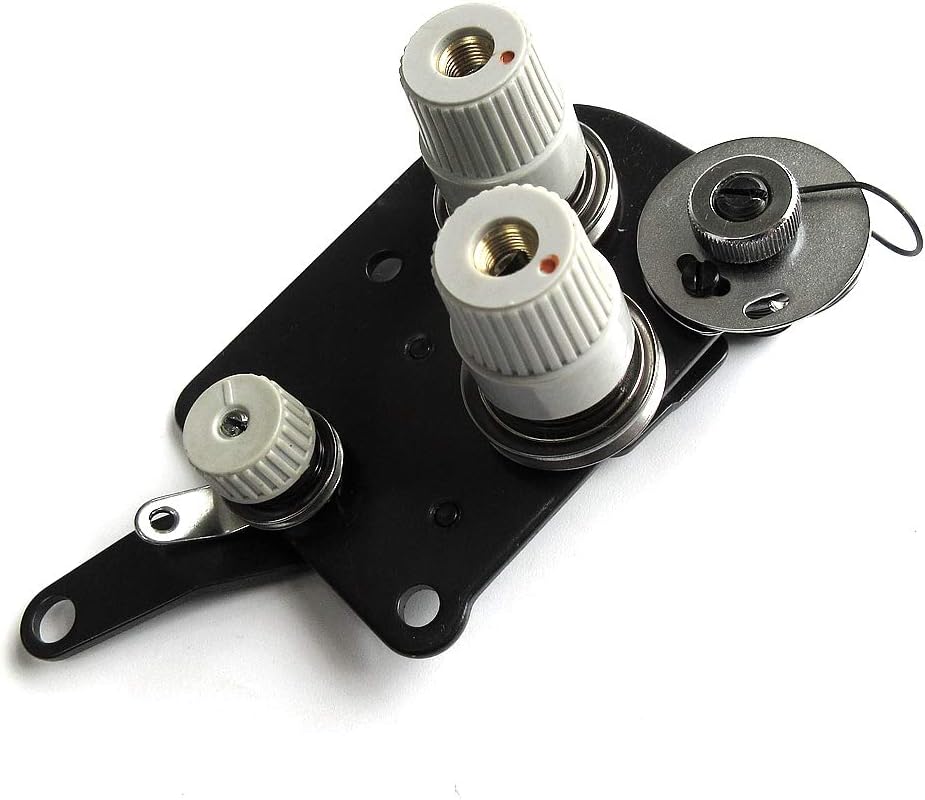
Figure 1: Front view of the EVERNICE Thread Tension Assembly for Juki industrial sewing machines. This image highlights the primary components including the main tension discs and the thread guide.
Setup and Installation
Proper installation of the thread tension assembly is crucial for optimal sewing performance. Refer to your specific Juki sewing machine's service manual for detailed instructions on removing the old assembly and installing the new one.
- Preparation: Ensure the sewing machine is powered off and unplugged from the electrical outlet.
- Access: Locate the existing thread tension assembly on your Juki sewing machine. This is typically found near the needle bar or thread path.
- Removal (if replacing): Carefully unthread the machine. Use appropriate tools to loosen and remove any screws or fasteners securing the old tension assembly. Note the orientation and connection points.
- Installation: Position the new EVERNICE thread tension assembly (Part # 401-03925) in the correct orientation. Align the mounting holes with those on the machine frame.
- Secure: Fasten the assembly using the appropriate screws. Do not overtighten.
- Thread Path: Ensure all thread guides and tension discs are clear and properly aligned for the thread path.

Figure 2: Another perspective of the EVERNICE Thread Tension Assembly, illustrating the various components from a different angle, useful for understanding mounting points.
Operating and Tension Adjustment
The thread tension assembly controls the amount of resistance applied to the upper thread as it feeds through the machine. Correct tension is vital for balanced stitches.
- Initial Setting: Begin with the tension dial set to a medium position, typically indicated by a numerical scale.
- Test Stitch: Sew a test seam on a scrap piece of fabric similar to your project material.
- Examine Stitch:
- If the bobbin thread appears straight on the top side of the fabric, the upper thread tension is too tight. Decrease the tension by turning the dial to a lower number.
- If the upper thread appears straight on the underside of the fabric, the upper thread tension is too loose. Increase the tension by turning the dial to a higher number.
- For a balanced stitch, the upper and bobbin threads should meet evenly within the fabric layers, forming a neat, consistent stitch on both sides.
- Fine-Tuning: Make small adjustments and re-test until the desired stitch quality is achieved. Different fabrics and thread types may require slight tension variations.

Figure 3: Side profile of the EVERNICE Thread Tension Assembly, illustrating the internal spring mechanism that provides resistance to the thread.
Maintenance
Regular maintenance ensures the longevity and proper function of your thread tension assembly.
- Cleaning: Periodically clean the tension discs and surrounding areas. Lint and thread residue can accumulate between the discs, affecting tension consistency. Use a small brush or compressed air to remove debris.
- Inspection: Inspect the tension springs and discs for any signs of wear, damage, or corrosion. Worn discs can lead to inconsistent tension.
- Lubrication: Consult your sewing machine's manual regarding lubrication points. Generally, the tension assembly itself does not require lubrication, but ensure surrounding moving parts are properly oiled if recommended.

Figure 4: Underside view of the EVERNICE Thread Tension Assembly, showing the mounting plate and the reverse side of the tension components.
Troubleshooting
Common issues related to thread tension and their potential solutions:
| Problem | Possible Cause | Solution |
|---|---|---|
| Skipped Stitches | Incorrect thread tension, bent needle, improper threading. | Adjust tension, replace needle, re-thread machine carefully. |
| Loopy Stitches (top or bottom) | Upper or bobbin tension too loose/tight, lint in tension discs. | Clean tension discs, adjust tension (increase for loose, decrease for tight). |
| Thread Breaking | Tension too tight, poor quality thread, burrs on thread path. | Loosen tension, use quality thread, inspect thread path for rough spots. |
| Uneven Stitches | Inconsistent tension, worn tension discs. | Clean tension discs, ensure proper threading, consider replacing assembly if discs are worn. |
Specifications
| Brand | EVERNICE |
| Model Number | JU401-03925 |
| Part Number | 401-03925 (40103925) |
| Compatibility | Juki DNU-1541-7, LU-1508N, LU-1509N, LU-1510N, LU-1510N-7, LS-1340, LS-1341, LS-1342, LS-1342-7 Industrial Sewing Machines |
| ASIN | B07PVYNMV2 |
Warranty and Support
Specific warranty information for this EVERNICE product (Part # 401-03925) is not provided in the product details. For warranty claims or technical support, please contact the seller, Evernice sewing machine, directly through the platform where the purchase was made or refer to any documentation included with your purchase.
For general inquiries regarding Juki sewing machine operation or service, please consult your machine's official user manual or contact Juki authorized service centers.