
1. Safety Instructions
Always observe basic safety precautions when using electric tools to reduce the risk of fire, electric shock, and personal injury. Read all instructions before operating this tool.
- Work Area Safety: Keep your work area clean and well-lit. Cluttered or dark areas invite accidents. Do not operate power tools in explosive atmospheres, such as in the presence of flammable liquids, gases, or dust.
- Electrical Safety: Power tool plugs must match the outlet. Never modify the plug in any way. Do not abuse the cord. Never use the cord for carrying, pulling, or unplugging the power tool. Keep cord away from heat, oil, sharp edges, or moving parts.
- Personal Safety: Always wear eye protection. Use safety glasses, goggles, or a face shield. Wear hearing protection when operating the tool for extended periods. Dress properly. Do not wear loose clothing or jewelry. Keep your hair, clothing, and gloves away from moving parts.
- Tool Use and Care: Do not force the power tool. Use the correct power tool for your application. Disconnect the plug from the power source before making any adjustments, changing accessories, or storing power tools.
2. Product Overview
The Skil Hammer Drill 6604 is a versatile 570W electric tool designed for drilling and screwing tasks in various materials. Its compact and ergonomic design ensures comfortable use, even in confined spaces.

Figure 2.1: Skil Hammer Drill 6604, a 570W compact and lightweight tool.
Key Features:
- 570W Motor: Provides ample power for various drilling and screwing applications.
- Compact and Ergonomic Design: Facilitates use in tight spaces and reduces user fatigue.
- Variable Speed Switch: Allows precise control over drilling speed for different materials.
- Reversible Function: Enables both screwing and unscrewing operations.
- Impact/Non-Impact Selector: Easily switch between standard drilling and hammer drilling modes for masonry.

Figure 2.2: Close-up view of the drill chuck for bit installation.
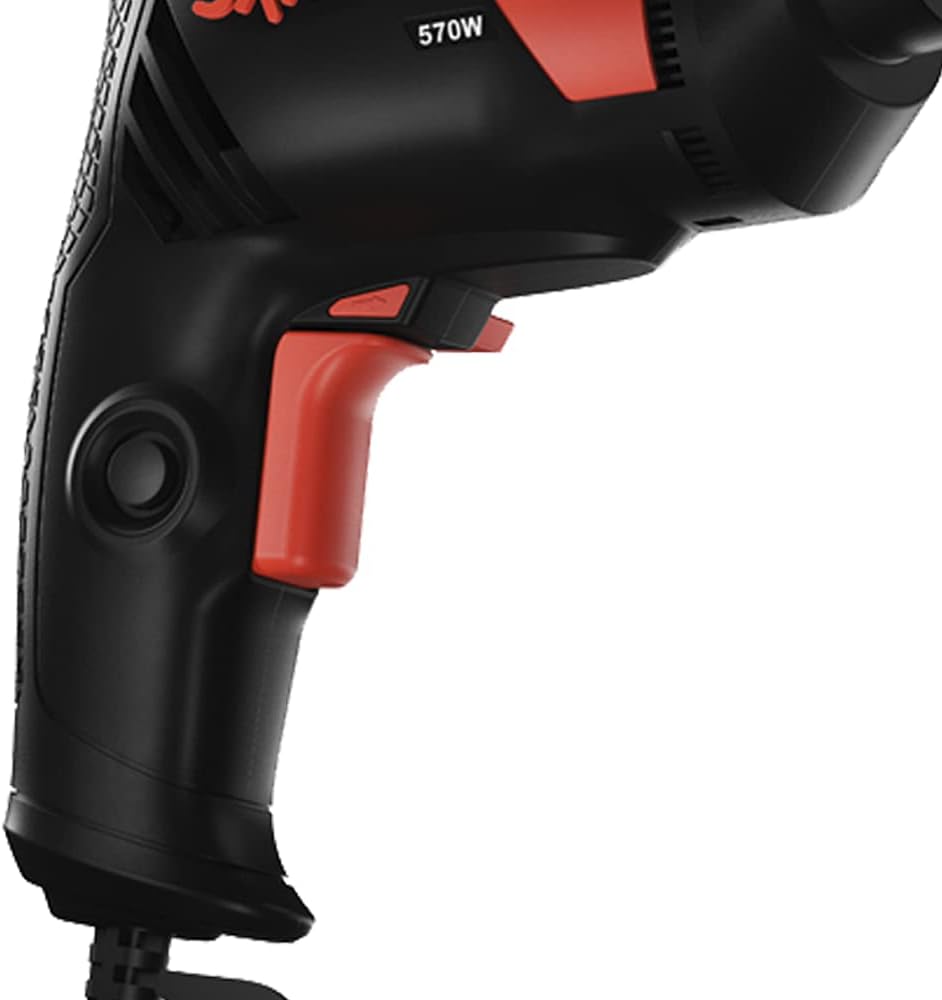
Figure 2.3: The ergonomic trigger and handle design.
3. Setup
3.1 Installing Drill Bits or Screwdriver Bits
- Ensure Power is Disconnected: Always unplug the tool from the power outlet before installing or removing bits.
- Open the Chuck: Insert the chuck key into the holes on the chuck and turn counter-clockwise to open the jaws.
- Insert the Bit: Place the desired drill bit or screwdriver bit into the chuck jaws. Ensure the bit is centered and fully inserted.
- Tighten the Chuck: Turn the chuck key clockwise to securely tighten the jaws around the bit. Ensure the bit is firmly held to prevent slippage during operation. Remove the chuck key immediately after tightening.

Figure 3.1: Properly inserting and securing a drill bit in the chuck.
4. Operating Instructions
4.1 Powering On/Off and Variable Speed Control
- To Start: Press the trigger switch. The speed is variable depending on how far the trigger is pressed.
- To Stop: Release the trigger switch.
- Continuous Operation: For continuous operation, press the trigger switch and then press the lock-on button (Figure 4.1). To release, press the trigger switch again.

Figure 4.1: The variable speed trigger and lock-on button.

Figure 4.2: Close-up of the lock button for continuous operation.
4.2 Reversible Function
The direction of rotation can be changed using the forward/reverse switch, typically located above the trigger. Push the switch to the left for forward rotation (drilling/screwing in) and to the right for reverse rotation (unscrewing/removing bits).
4.3 Impact/Non-Impact Drilling Selector
This tool features a selector switch to choose between standard rotary drilling and hammer drilling. For drilling into wood, metal, or plastic, select the non-impact (drill icon) mode. For drilling into masonry, concrete, or brick, select the impact (hammer icon) mode.
4.4 Drilling and Screwing
- Drilling: Hold the tool firmly. Apply steady, even pressure. Start at a low speed and increase as the bit engages the material.
- Screwing: Use appropriate screwdriver bits. Start at a low speed to prevent stripping the screw head or damaging the workpiece.

Figure 4.3: Hammer drill in action, drilling into a wall.

Figure 4.4: The drill being used for a screwing application.
5. Maintenance
Regular maintenance ensures the longevity and safe operation of your Skil Hammer Drill.
- Cleaning: Keep the ventilation openings clean and free from dust. Use a soft, damp cloth to clean the tool casing. Do not use harsh chemicals or abrasive cleaners.
- Cord Inspection: Regularly inspect the power cord for damage. If damaged, have it replaced by a qualified service technician.
- Chuck Maintenance: Keep the chuck jaws clean. Periodically apply a small amount of light oil to the chuck threads to ensure smooth operation.
- Storage: Store the tool in a dry, secure place, out of reach of children.
6. Troubleshooting
If you encounter issues with your hammer drill, refer to the following common problems and solutions:
| Problem | Possible Cause | Solution |
|---|---|---|
| Tool does not start | No power supply; Damaged cord/plug; Faulty switch | Check power outlet; Inspect cord/plug for damage; Contact service center if switch is faulty. |
| Reduced power or speed | Low voltage; Worn carbon brushes (if applicable); Overload | Ensure proper voltage; Have brushes checked by service; Reduce load on tool. |
| Bit slips in chuck | Chuck not tightened properly; Worn chuck jaws; Incorrect bit shank | Retighten chuck with key; Replace chuck if worn; Use bits with correct shank. |
| Excessive vibration/noise | Damaged internal components; Loose parts | Stop use immediately and contact a service center. |
7. Specifications
| Feature | Specification |
|---|---|
| Brand | Skil |
| Model Number | F0126604AA |
| Power | 570W |
| Voltage | 127 Volts |
| Power Source | Electric Cable |
| Product Dimensions (L x W x H) | 22 x 6.6 x 16.6 centimeters |
| Product Weight | 1.5 Kilograms |
| Material | Elastomer, Metal, Polyamide |
| Maximum Chuck Size | 10 Millimeters |
| Included Components | 1 Hammer Drill, 1 chuck key, 1 cardboard box |
| Manufacturer | Robert Bosch |
8. Warranty and Support
8.1 Warranty Information
This Skil Hammer Drill 6604 comes with a 1-year warranty from the date of purchase. This warranty covers defects in materials and workmanship under normal use. Please retain your proof of purchase for warranty claims.
8.2 Customer Support
For technical assistance, service, or to inquire about replacement parts, please contact Skil customer support. Refer to the contact information provided in your product packaging or visit the official Skil website for regional support details.


