Klein 6812
Theo Klein Bosch Unlimited Toy Vacuum Cleaner Instruction Manual
Model: 6812
1. Introduction
Thank you for choosing the Theo Klein Bosch Unlimited Toy Vacuum Cleaner. This product is designed to provide children aged 3 years and up with an engaging and realistic play experience, encouraging imaginative role-play in household chores. This manual contains important information regarding the assembly, safe operation, and maintenance of your toy vacuum cleaner. Please read it thoroughly before use and retain it for future reference.
2. Safety Information
WARNING! CHOKING HAZARD - Small parts. Not suitable for children under 3 years due to small components that could be swallowed.
- Adult supervision is recommended during play.
- Ensure all parts are securely assembled before allowing children to play.
- Do not use this toy with actual liquids or fine dust, as it is not designed for real cleaning and could be damaged.
- Keep packaging materials away from children to prevent suffocation hazards.
3. Package Contents
Please check the package contents to ensure all items are present:
- Main Vacuum Unit (with integrated dust container and handle)
- Extension Tube
- Floor Nozzle with Roller
- Crevice Tool

Figure 3.1: All components included in the package.
4. Assembly Instructions
Follow these steps to assemble your toy vacuum cleaner:
- Attach the Extension Tube: Insert the top end of the extension tube into the designated opening on the main vacuum unit until it clicks securely into place.
- Attach the Floor Nozzle: Connect the bottom end of the extension tube to the floor nozzle. Ensure it is firmly attached.
- Optional: Attach Crevice Tool: For detailed cleaning play, the crevice tool can be attached directly to the main unit or the extension tube by removing the floor nozzle.

Figure 4.1: The Theo Klein Bosch Unlimited Toy Vacuum Cleaner fully assembled.
5. Operating Instructions
The Theo Klein Bosch Unlimited Toy Vacuum Cleaner is designed for realistic play with interactive features.
5.1 Powering On/Off
- Locate the power button on the main unit's handle.
- Press the power button to turn the vacuum cleaner on. A green indicator light will illuminate, and the toy will produce realistic vacuum sounds.
- Press the power button again to turn the vacuum cleaner off.

Figure 5.1: Power button with green indicator light.
5.2 Vortex Function
The toy vacuum features a simulated vortex function within its dust container, where small beads swirl to mimic real vacuuming action.
- When the vacuum is powered on, the beads inside the transparent dust container will begin to swirl, creating a visual effect of suction.
- This feature enhances the imaginative play experience.

Figure 5.2: Dust container with simulated vortex action.
5.3 Using the Attachments
- Floor Nozzle: Use the floor nozzle for general floor cleaning play. It features a rotatable design and rollers for smooth movement across surfaces.
- Crevice Tool: The crevice tool is ideal for reaching simulated tight spaces or corners during play.

Figure 5.3: Toy vacuum in use on a rug.
6. Maintenance
Proper care will ensure the longevity of your toy vacuum cleaner.
6.1 Emptying the Dust Container
- To empty the dust container, locate the release mechanism on the main unit.
- Carefully detach the dust container from the main unit.
- Open the container and empty any collected play debris.
- Reattach the dust container securely until it clicks into place.

Figure 6.1: Detaching the dust container for emptying.
6.2 General Cleaning
- Wipe the exterior surfaces of the toy with a soft, damp cloth.
- Do not immerse the toy in water or use harsh cleaning agents.
- Ensure the toy is completely dry before storing.
7. Troubleshooting
If you encounter any issues with your toy vacuum cleaner, please refer to the following common solutions:
- Toy not turning on: Ensure batteries are correctly installed and not depleted. Replace batteries if necessary. (Note: Battery type not specified in product data, typically AA or AAA for toys of this nature).
- Vortex function not working: Check if the toy is powered on. Ensure the dust container is securely attached.
- Parts not fitting together: Verify that you are using the correct parts and aligning them properly as shown in the assembly instructions. Do not force parts together.
8. Specifications
| Feature | Detail |
|---|---|
| Model Number | 6812 |
| Product Dimensions (Assembled) | 6.3 x 6.3 x 31.5 inches (approximately 80 cm in height) |
| Item Weight | 2.32 pounds |
| Recommended Age | 3 years and up |
| Manufacturer | Theo Klein |
| Material | Durable Plastic |
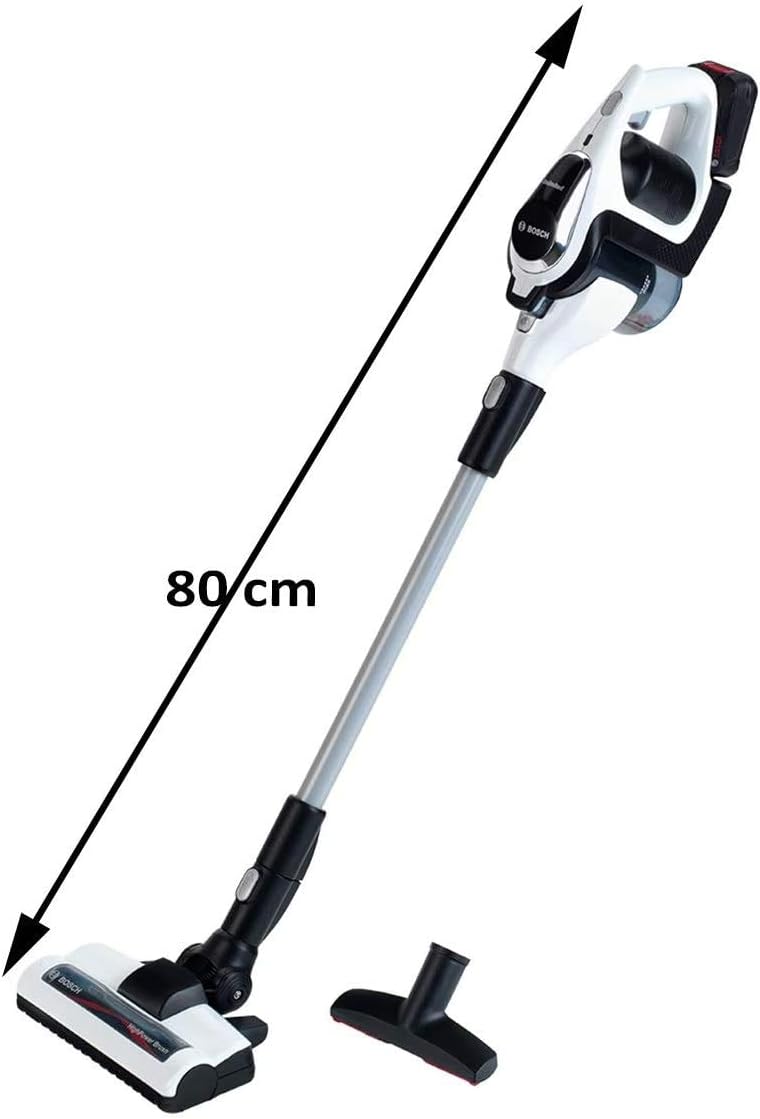
Figure 8.1: Approximate dimensions of the assembled toy vacuum cleaner.
9. Warranty and Support
As a toy product, specific warranty details may vary by retailer or region. For any questions regarding product defects or operational issues not covered in this manual, please contact the manufacturer, Theo Klein, or the retailer from whom the product was purchased. Please retain your proof of purchase for any warranty claims.
Ask a question about this manual
Ask about setup, troubleshooting, compatibility, parts, safety, or missing instructions. Manuals+ will review the question and use this page’s manual context to help answer it.