Introduction
This instruction manual provides essential information for the safe and proper assembly, operation, and maintenance of your STORE FIXTURES DIRECT Frameless Counter Top Glass Showcase. Please read this manual thoroughly before installation and retain it for future reference. This product is designed for displaying items on a counter top and features a secure locking mechanism.
Safety Information
- Tempered Glass: This product uses tempered glass, which is designed to be safer than regular glass. However, handle all glass panels with care to prevent breakage.
- Assembly Required: This unit requires assembly. Follow all steps carefully. It is recommended that two people assemble the unit to ensure safety and ease of handling.
- Stable Placement: Always place the assembled showcase on a flat, stable, and level surface to prevent tipping.
- Weight Capacity: Do not overload shelves. Distribute weight evenly.
- Children and Pets: Keep children and pets away from the unit during assembly. Once assembled, ensure the unit is stable and secure.
Package Contents
Verify that all components listed below are present and undamaged before beginning assembly. If any parts are missing or damaged, contact customer support.
- Black Laminate Base (1 unit per showcase)
- Tempered Glass Panels (sides, front, back, top)
- Fixed Glass Shelves (2 per showcase)
- Lock Mechanism with Keys (1 set per showcase)
- Assembly Hardware (connectors, screws, shelf supports)

Image 1: Fully assembled Frameless Counter Top Glass Showcase. This image shows the overall structure with glass panels, shelves, and the base.
Setup and Assembly Instructions
Assembly of this glass showcase requires careful attention to detail. It is recommended to have a clean, flat workspace and assistance from another person.
- Unpack Components: Carefully remove all parts from the packaging. Place them on a soft, protected surface to prevent scratches.
- Position the Base: Place the black laminate base in the desired location for the showcase. Ensure it is stable and level.
- Attach Side and Back Glass Panels: Secure the side and back tempered glass panels to the base using the provided hardware. Follow the diagrams in the included printed manual for specific connector placement.
- Install Fixed Glass Shelves: Insert the two fixed glass shelves into their designated positions. The unit features three tiers of space: 7.75" H between the base and the first shelf, 7.25" H for the middle tier, and 7" H for the top tier. Each glass shelf measures 12.25" x 11.25".
- Attach Front Glass Panel and Top: Secure the front tempered glass panel and the top glass panel using the remaining hardware. Ensure all connections are snug but do not overtighten.
- Install Lock Mechanism: Attach the lock mechanism to the front glass door and the base as shown in the diagram. Test the lock for proper function.
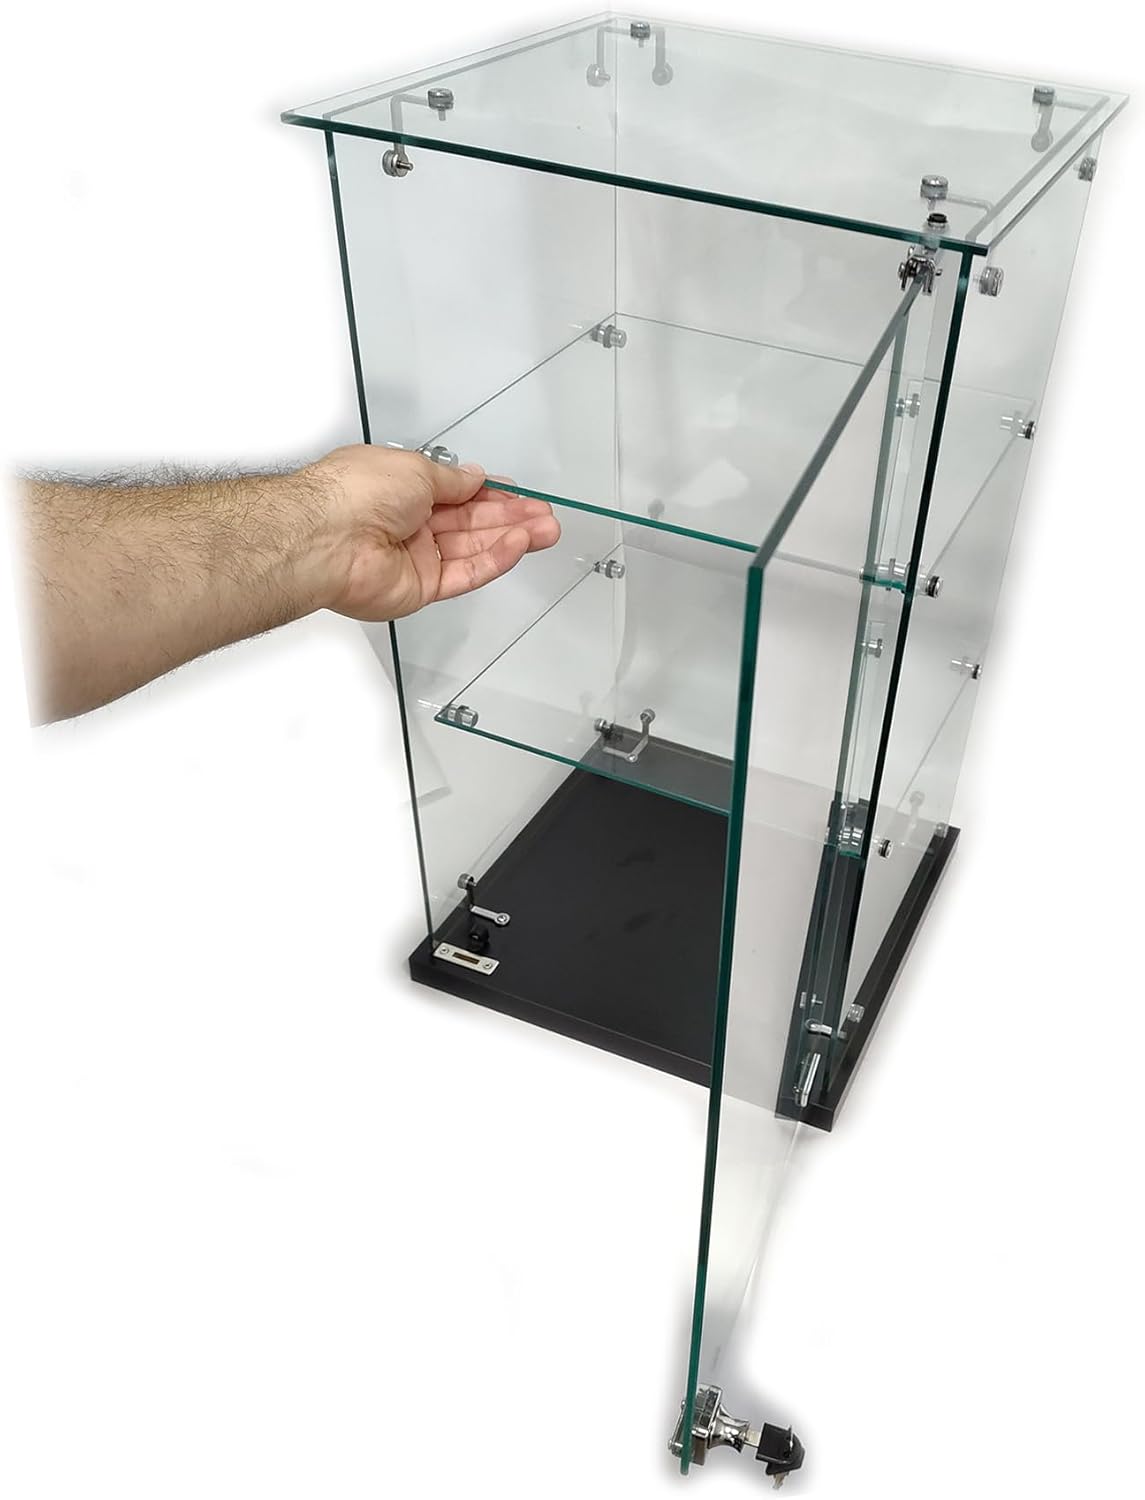
Image 2: Illustrates the process of carefully placing a glass shelf into the pre-installed supports within the showcase.
Assembly and Feature Overview Video
Video 1: This official video provides a visual guide to the assembly process and highlights key features of the Frameless Counter Top Glass Showcase, including the shelves and locking mechanism.
Operating Instructions
Using the Lock Mechanism
The showcase is equipped with a lock to secure your displayed items.
- To Lock: Insert the key into the lock cylinder located on the front glass door near the base. Turn the key clockwise until the locking bolt extends and secures the door. Remove the key.
- To Unlock: Insert the key into the lock cylinder. Turn the key counter-clockwise until the locking bolt retracts. The door can now be opened.

Image 3: A detailed view of the lock mechanism and accompanying keys, demonstrating how to secure the display case.
Maintenance
- Cleaning Glass: Use a soft, lint-free cloth and a non-abrasive glass cleaner to clean the glass surfaces. Avoid harsh chemicals that may damage the glass or hardware.
- Cleaning Base: Wipe the black laminate base with a damp cloth and mild detergent if necessary. Dry immediately.
- Hardware Check: Periodically check all screws and connectors to ensure they remain tight. Do not overtighten.
- Lock Care: If the lock mechanism becomes stiff, a small amount of graphite lubricant can be applied to the keyhole.
Troubleshooting
| Problem | Possible Cause | Solution |
|---|---|---|
| Showcase is wobbly or unstable. | Uneven surface; loose assembly hardware. | Ensure the showcase is on a level surface. Check and tighten all assembly screws. |
| Glass door does not close properly. | Misaligned hinges; obstruction. | Check for any obstructions. Verify that the glass panels are correctly aligned and hinges are properly secured. |
| Lock mechanism is stiff or difficult to operate. | Lack of lubrication; minor misalignment. | Apply a small amount of graphite lubricant to the keyhole. Ensure the door is fully closed when attempting to lock. |
Specifications
| Feature | Detail |
|---|---|
| Model Number | A-CTSC1313-2 |
| Overall Dimensions (H x W x D) | 23.75" H x 14" W x 14" D |
| Shelf Dimensions | 12.25" x 11.25" (each) |
| Tier Heights | Bottom to 1st shelf: 7.75" H 1st to 2nd shelf: 7.25" H 2nd shelf to top: 7" H |
| Material | Tempered Glass, Black Laminate Base |
| Security | Integrated Lock with Keys |
| Unit Count | 2 (This manual covers one unit, product sold as 2-pack) |

Image 4: Dimensional diagram of the showcase, indicating height, width, and depth measurements.
Warranty and Support
For warranty information, technical support, or to order replacement parts, please refer to the contact information provided with your purchase or visit the official STORE FIXTURES DIRECT website. Keep your proof of purchase for warranty claims.