1. Introduction
This manual provides detailed instructions for the proper installation, operation, and maintenance of your YXQ DC 0-20A Analog Current Panel Ammeter, Model 65C5-A. Please read this manual thoroughly before use to ensure safe and efficient operation.
The YXQ 65C5-A is an analog ammeter designed for measuring DC current in the range of 0-20A. It features a clear, easy-to-read scale and a fine-tuning button for precise dial adjustment. This device is suitable for various auto circuit measurement and testing applications.

Figure 1: Front view of the YXQ DC 0-20A Analog Current Panel Ammeter, showing the clear analog dial and zero adjustment screw.
2. Product Features
- Measuring Range: DC 0-20A
- Accuracy: Class 2.5
- Meter Panel Size: Approximately 3.5 x 3.5 x 2.5 inches (89 x 89 x 65 mm) (L*W*T)
- Mount Size: 2.7 x 2.7 inches (70 x 70 mm)
- Operating Temperature: -20°C to +50°C
- Relative Humidity: ≤85%
- Net Weight: 100g
- Clear and easy-to-read analog scale
- Includes a button for fine-tuning the dial (zero adjustment)
3. Technical Specifications
| Specification | Value |
|---|---|
| Product Name | Analog Ammeter |
| Model No. | 65C5-A |
| Measuring Current Range | DC 0-20A |
| Accuracy | Class 2.5 |
| Meter Panel Size (Approx) | 3.5 x 3.5 x 2.5 inches (89 x 89 x 65 mm) (L*W*T) |
| Mount Size | 2.7 x 2.7 inches (70 x 70 mm) |
| Work Temperature | -20°C ~ +50°C |
| Relative Humidity | ≤85% |
| Net Weight | 100g |
| Material | Plastic, Electronic component |
| Manufacturer | YXQ |
4. Setup and Installation
4.1 Unpacking
Carefully remove the ammeter and any included accessories from its packaging. Inspect the unit for any signs of damage during transit. If any damage is found, do not proceed with installation and contact customer support.
4.2 Mounting
The ammeter is designed for panel mounting. Ensure you have a suitable opening of 2.7 x 2.7 inches (70 x 70 mm) for installation. Use the provided mounting parts to secure the ammeter firmly in place.
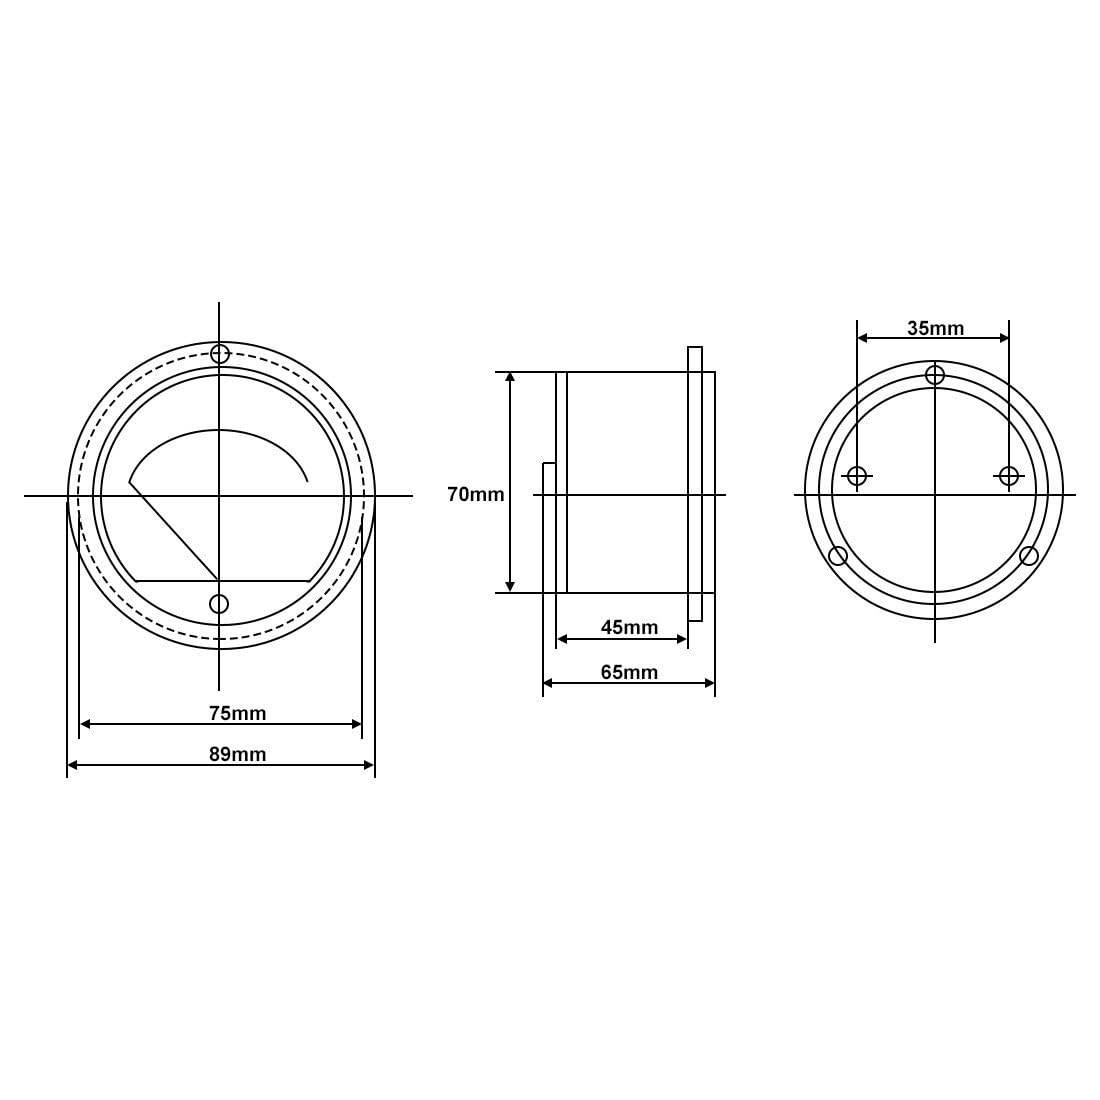
Figure 2: Dimensional drawing showing the mounting and overall dimensions of the ammeter.
4.3 Wiring
Important: This ammeter requires an external 20A 75mV shunt for proper operation, which is not included with the product. Connecting the ammeter directly to a high current circuit without a shunt will result in damage to the meter.
Connect the ammeter in series with the circuit you wish to measure, ensuring the external shunt is correctly installed. The ammeter has two terminals on the back for connection.
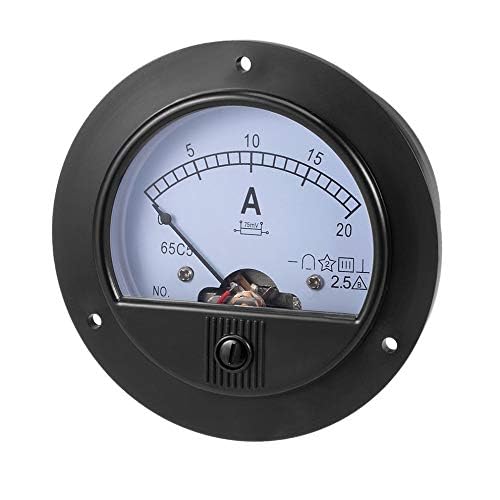
Figure 3: Rear view of the ammeter, illustrating the two screw terminals for electrical connections.
Video 1: This video demonstrates the unboxing, zero adjustment, and basic circuit connection for an analog current panel, similar to the YXQ 65C5-A ammeter. It provides a visual guide for initial setup.
5. Operating Instructions
5.1 Zero Adjustment
Before taking any measurements, ensure the pointer is at the '0' position on the scale. If it is not, use a small screwdriver to gently turn the zero-position adjuster located on the front cover of the meter until the needle aligns with '0'.
5.2 Taking Measurements
Once the ammeter is correctly installed with the appropriate shunt and the zero is adjusted, apply power to the circuit. The needle will move along the scale to indicate the DC current flowing through the circuit. Read the value directly from the scale.
6. Maintenance
- Cleaning: Use a soft, dry cloth to clean the meter panel. Avoid using abrasive cleaners or solvents that could damage the plastic.
- Handling: The device should not be subjected to strong impacts or excessive shaking, as this can affect its accuracy and internal components.
- Storage: Store the ammeter in a dry environment within the specified operating temperature range when not in use.
7. Troubleshooting
- Pointer not at zero: Use the zero-position adjuster on the front cover to reset the needle to '0' before use.
- No reading or incorrect reading:
- Ensure the ammeter is correctly wired in series with the circuit.
- Verify that an appropriate 20A 75mV external shunt is installed and correctly connected. Direct connection without a shunt will cause incorrect readings or damage.
- Check all connections for looseness or corrosion.
- Confirm that the circuit has power and current is flowing.
- Damaged or erratic pointer movement: This may indicate internal damage. Avoid further use and consider replacement.
8. Warranty and Support
For warranty information or technical support, please refer to the product packaging or contact the retailer from whom you purchased the product. Keep your purchase receipt as proof of purchase.