Introduction
This manual provides detailed instructions for the safe and effective use of your Panasonic LUMIX G DC-GF9K Mirrorless Camera. Please read this manual thoroughly before using your camera and keep it for future reference. Understanding the camera's features and functions will help you capture high-quality images and videos.

Image: Front view of the Panasonic LUMIX G DC-GF9K camera with the 12-32mm lens attached, showcasing its compact design and orange leather-tone finish.
1. Setup
1.1 Unpacking and Checking Contents
Before starting, ensure all components are present in the package:
- Panasonic LUMIX G DC-GF9K Camera Body
- LUMIX G VARIO 12-32mm / F3.5-5.6 ASPH. / MEGA O.I.S. Lens
- Battery Pack
- AC Adaptor
- USB Connection Cable
- Shoulder Strap
1.2 Battery Installation and Charging
- Open the battery compartment cover located at the bottom of the camera.
- Insert the battery pack with the contacts facing the correct direction until it clicks into place.
- Close the battery compartment cover.
- Connect the camera to the AC adaptor using the USB cable for charging. The charge indicator will illuminate during charging.

Image: Side view of the camera, highlighting the HDMI and USB charging ports. The USB port is used for connecting the camera to the AC adaptor for battery charging.
1.3 Memory Card Installation
A memory card (SD, SDHC, or SDXC) is required to store images and videos. Insert the memory card into the designated slot in the battery compartment, ensuring the correct orientation.
1.4 Lens Attachment
- Remove the body cap from the camera and the rear lens cap from the lens.
- Align the mounting marks on the lens and the camera body.
- Attach the lens by turning it clockwise until it clicks into place.
1.5 Initial Settings
Upon first power-on, the camera will prompt you to set the language, date, and time. Follow the on-screen instructions to complete these initial configurations.
2. Operating the Camera
2.1 Power On/Off and Basic Controls
To power on the camera, slide the power switch. The camera features a mode dial, shutter button, and various function buttons for control.

Image: Top view of the camera, displaying the mode dial with various shooting modes such as Program (P), Aperture Priority (A), Shutter Priority (S), Manual (M), and Scene (SCN).
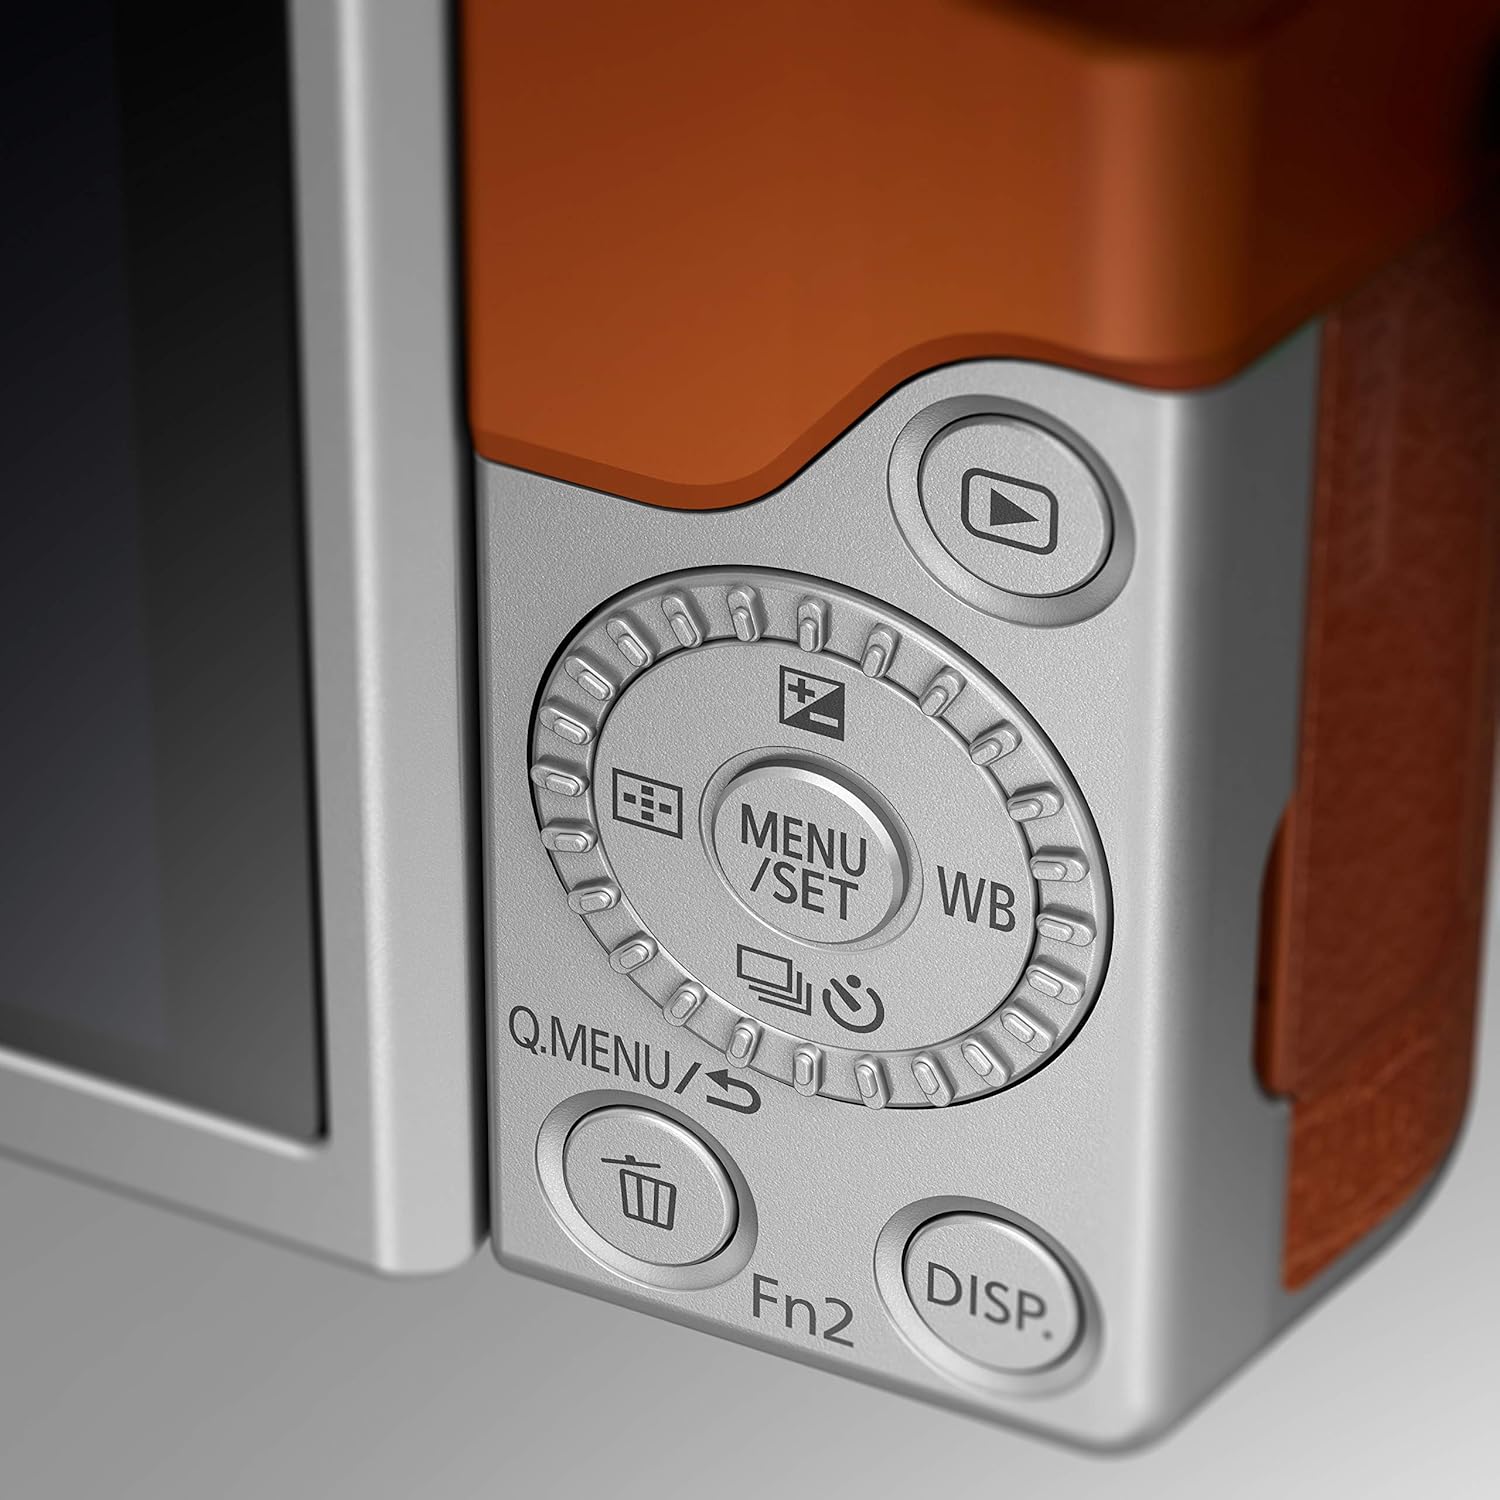
Image: Close-up of the camera's rear controls, including the menu/set button, directional pad, quick menu button, delete button, and display button.
2.2 Taking Photos
Rotate the mode dial to select your desired shooting mode (e.g., Intelligent Auto for beginners, P/A/S/M for advanced users). Press the shutter button halfway to focus, then fully to capture the image.

Image: The Panasonic LUMIX G DC-GF9K camera with its built-in flash unit popped up, ready for use in low-light conditions.
2.3 4K PHOTO Features
The LUMIX GF9K offers 4K PHOTO mode, allowing you to extract 8-megapixel still images from 4K video footage. This is ideal for capturing fast-moving subjects or fleeting moments. Access this feature via the mode dial or function buttons.

Image: Close-up of the Fn3 function button on the top plate of the camera, which can be customized for quick access to various features, including 4K PHOTO modes.
2.4 Selfie Functions
The 180-degree tiltable monitor facilitates easy self-portraits. When the monitor is flipped up, the camera automatically enters selfie mode. Utilize features like hands-free shutter, background control, and beauty functions (Soft Skin, Slimming) for enhanced selfies.
2.5 Wi-Fi Connectivity
The camera features built-in Wi-Fi for easy image sharing. Download the 'Panasonic Image App' on your smartphone or tablet to transfer photos, control the camera remotely, and upload to social media.
3. Maintenance
3.1 Cleaning the Camera and Lens
- Use a soft, dry cloth to clean the camera body.
- For the lens, use a lens brush to remove dust, then a lens cleaning cloth with a specialized lens cleaning solution. Avoid touching the lens surface directly.
- Do not use organic solvents such as thinner or benzene.
3.2 Battery Care
To prolong battery life, avoid exposing it to extreme temperatures. Store the battery in a cool, dry place when not in use. Charge the battery fully before extended storage and periodically recharge it every 6-12 months.
3.3 Storage
When storing the camera for long periods, remove the battery and memory card. Store the camera in a dry, well-ventilated area, ideally with a desiccant to prevent mold and mildew.
4. Troubleshooting
If you encounter issues with your camera, refer to the following common problems and solutions:
- Camera does not power on: Ensure the battery is charged and correctly inserted. Check if the battery contacts are clean.
- Cannot take pictures: Verify that a memory card is inserted and has sufficient free space. Check the lens cap is removed and the lens is extended (if applicable).
- Images are blurry: Check focus settings. Ensure the lens is clean. Use a higher shutter speed in low light or when shooting moving subjects.
- Wi-Fi connection issues: Ensure the 'Panasonic Image App' is installed and updated. Check camera and smartphone Wi-Fi settings.
For more detailed troubleshooting, please consult the full electronic manual available on the Panasonic support website.
5. Specifications
Key technical specifications for the Panasonic LUMIX G DC-GF9K Mirrorless Camera:
| Feature | Specification |
|---|---|
| Brand | Panasonic |
| Model Name | LUMIX (DC-GF9KGC-D) |
| Maximum Webcam Image Resolution | 16 MP |
| Photo Sensor Technology | MOS |
| Compatible Mountings | Micro Four Thirds |
| Supported File Format | JPEG, RAW |
| Image Stabilisation | Digital |
| Optical Zoom | 2.4 x |
| Expanded ISO Minimum | 100 |
| Metering Description | Evaluative |
| Batteries | 1 Lithium Ion batteries required (included) |
| Product Dimensions | 9.2 x 28.4 x 16.6 cm; 40 g |
6. Warranty and Support
For information regarding product warranty, please refer to the warranty card included with your purchase or visit the official Panasonic website. For technical support, driver downloads, and additional resources, please visit the Panasonic support page:
Please have your model number (DC-GF9K) and serial number ready when contacting support.