1. Introduction
This manual provides detailed instructions for the setup, operation, and maintenance of your Tech 21 SansAmp Richie Kotzen Signature RK5 Fly Rig V2. This multi-effects pedal is designed to offer a comprehensive range of guitar tones and effects in a compact, all-analog unit. Please read this manual thoroughly before using the device to ensure proper function and longevity.
2. Safety Information
- Power Supply: Use only the included 9V DC Universal Power Supply (Model #DC9). Using an incorrect power supply may damage the unit and void the warranty.
- Moisture: Do not expose the unit to water or excessive moisture.
- Ventilation: Ensure proper ventilation around the unit. Do not block any openings.
- Cleaning: Disconnect power before cleaning. Use a dry, soft cloth.
- Servicing: Do not attempt to service the unit yourself. Refer all servicing to qualified personnel.
3. Package Contents
Verify that all items are present in your package:
- Tech 21 SansAmp Richie Kotzen Signature RK5 Fly Rig V2 Multi-Effects Pedal
- 9V DC Universal Power Supply (Model #DC9)
- 3 MXR Patch Cables
- Dunlop Pick Pack (variety pack of 12 picks)
4. Setup
Follow these steps to set up your RK5 Fly Rig V2:
- Power Connection: Connect the included 9V DC power supply to the "9V IN" jack on the rear of the unit. Plug the power supply into a suitable AC outlet.
- Instrument Input: Connect your guitar or other instrument to the "IN" jack on the rear of the unit using a standard 1/4-inch instrument cable.
- Output Connection:
- For connection to a guitar amplifier, connect the "OUT" 1/4-inch jack to your amplifier's input.
- For direct connection to a mixer, recording interface, or PA system, use the XLR output with a balanced XLR cable. Ensure the ground lift switch is set appropriately to avoid hum.
- For headphone use, press the "Headphone" button next to the 1/4-inch output. This switches the 1/4-inch output into headphone mode.
- Effect Loop (Optional): If using external effects, connect the "SEND" jack to the input of your external effect pedal(s) and the output of your external effect pedal(s) to the "RETURN" jack.

Figure 1: Rear panel connections of the RK5 Fly Rig V2, including IN, SEND, RETURN, OUT, and 9V IN jacks.
5. Controls and Features
The RK5 Fly Rig V2 features a comprehensive set of controls for shaping your tone. The unit is divided into several sections: SansAmp, OMG Overdrive, Reverb/Delay/Roto, and Boost.
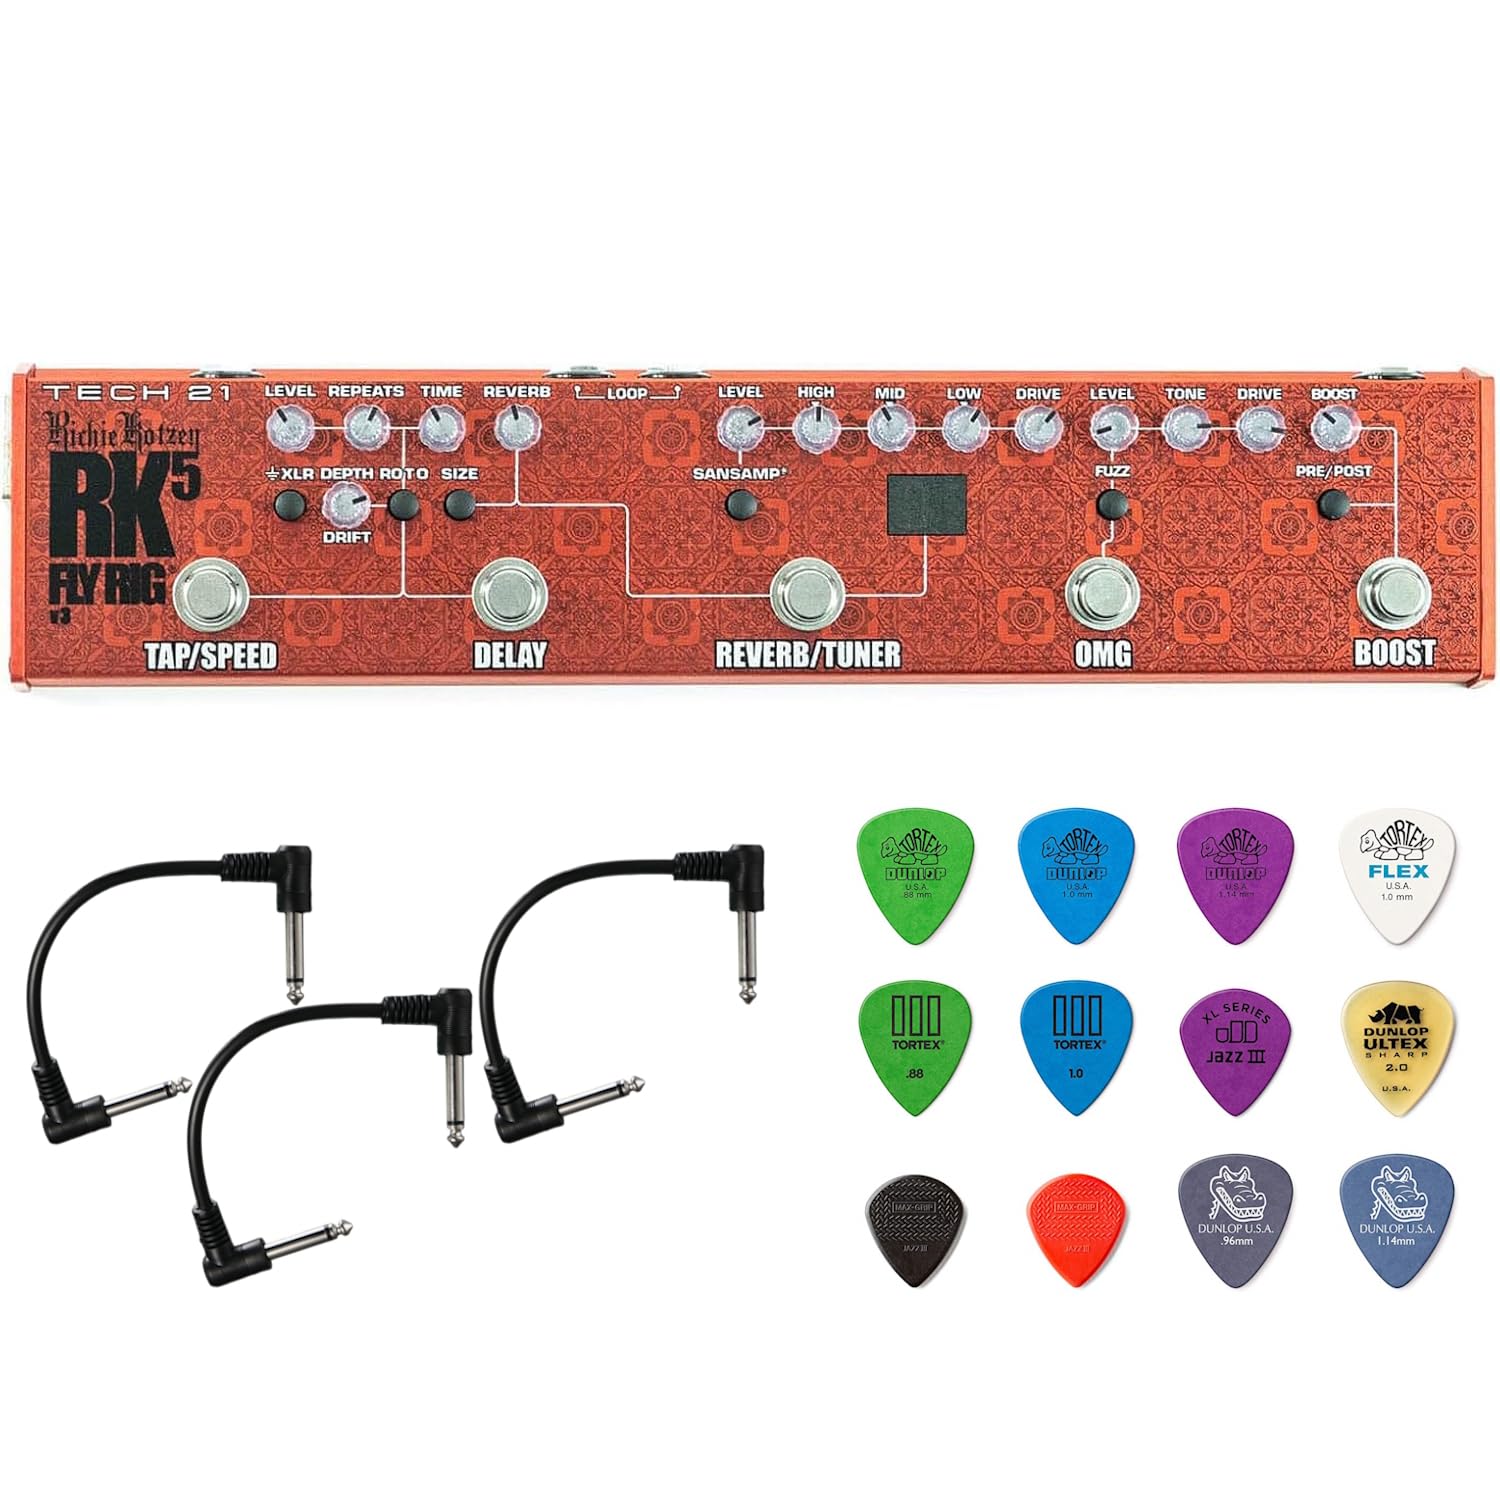
Figure 2: Overview of the RK5 Fly Rig V2's top panel controls.
5.1. SansAmp Section
The SansAmp section provides the core amplifier emulation, allowing you to run directly into mixers, PA systems, or augment your existing amplifier setup. It includes a 3-band active EQ.
- LEVEL: Controls the overall output volume of the SansAmp section.
- HIGH: Adjusts the treble frequencies.
- MID: Adjusts the midrange frequencies.
- LOW: Adjusts the bass frequencies.
- DRIVE: Controls the amount of gain and overdrive.

Figure 3: Detailed view of the SansAmp, Reverb/Tuner, and Delay sections.
5.2. OMG Overdrive Section
Richie Kotzen's signature OMG Overdrive provides a wide range of overdrive tones, from clean boost to aggressive distortion.
- LEVEL: Controls the output volume of the OMG section.
- TONE: Shapes the overall tonal character of the overdrive.
- DRIVE: Adjusts the amount of overdrive/gain.
- FUZZ Switch: Engages a fuzz-style tone, making the overdrive thicker and woolier.
- COMP Switch: Activates an old-school, all-analog, FET-based compression, offering a warmer, more transparent, and musical compression.
5.3. Reverb/Delay/Roto Section
This section offers versatile time-based effects.
- REVERB: A single, continuously-variable control for dialing in the desired amount of reverb.
- DELAY: Voiced for vintage tape echo sounds.
- TIME: Adjusts the delay time.
- REPEATS: Controls the number of delay repeats.
- DRIFT: Adds a random, unpredictable element to the delay modulation.
- ROTO: Changes the Delay function into a rotating speaker effect. When ROTO is active, the Tap Tempo footswitch controls the speed, ramping up from slow to fast. The DRIFT control then manages the distance of the virtual microphone to the rotating speaker, adding a tremolo-like volume modulation at maximum settings.
5.4. Boost Section
The Boost section provides additional volume or drive.
- BOOST: Provides up to 12dB of clean boost.
- PRE/POST Switch: Determines whether the boost is applied before (Pre) or after (Post) the other effects. Use Pre to beef up drive and distortion, or Post to increase overall volume for solos.

Figure 4: Detailed view of the OMG Overdrive and Boost sections.
5.5. Footswitches
- TAP/SPEED: Used for setting the tempo of the Delay effect or the speed of the ROTO effect.
- DELAY: Engages/disengages the Delay/Roto effect.
- REVERB/TUNER: Engages/disengages the Reverb effect. Hold to activate the Chromatic Tuner.
- OMG: Engages/disengages the OMG Overdrive section.
- BOOST: Engages/disengages the Boost function.
5.6. Other Features
- XLR Output with Ground Lift: Provides a balanced output for direct connection to mixing consoles or PA systems. The ground lift switch helps eliminate hum.
- Headphone Button: Switches the 1/4-inch output to headphone mode for silent practice.
- Effect Loop: Allows for integration of external effects pedals into the signal chain.
- Phantom Power for RK Killer Wail Wah: The unit is pre-configured to provide phantom power for the Tech 21 Signature RK Killer Wail wah pedal.
6. Operating Instructions
To begin using your RK5 Fly Rig V2:
- Ensure all connections are secure as described in the Setup section.
- Turn on your amplifier or mixing console.
- Engage the desired effects by pressing their respective footswitches. The LED indicators will illuminate when an effect is active.
- Adjust the knobs within each section to sculpt your desired tone. Experiment with the SansAmp EQ, OMG Overdrive settings, and Delay/Reverb parameters.
- For the Chromatic Tuner, hold down the REVERB/TUNER footswitch. The display will show the note being played.
- To set the tempo for Delay or ROTO, tap the TAP/SPEED footswitch multiple times at your desired rhythm.
7. Maintenance
- Cleaning: Use a soft, dry cloth to clean the exterior of the unit. Do not use abrasive cleaners or solvents.
- Storage: Store the unit in a dry, cool place away from direct sunlight when not in use.
- Cable Care: Regularly check all cables for damage. Replace any frayed or damaged cables immediately.

Figure 5: Example of an MXR patch cable included in the bundle.
8. Troubleshooting
| Problem | Possible Cause | Solution |
|---|---|---|
| No power/Unit does not turn on | Incorrect power supply; Power cable not connected; Outlet not working | Ensure correct 9V DC power supply is used and properly connected. Check power outlet. |
| No sound output | Incorrect cable connections; Amplifier off; Volume knobs set to zero; Headphone mode active | Verify all instrument and output cables are correctly connected. Check amplifier power and volume. Ensure relevant LEVEL knobs on the RK5 are not at zero. If using an amplifier, ensure Headphone mode is off. |
| Hum or noise | Ground loop; Faulty cables; Nearby interference | If using XLR output, try engaging the Ground Lift switch. Replace any suspected faulty cables. Move unit away from other electronic devices. |
| Effect not engaging | Footswitch not pressed firmly; Internal issue | Ensure footswitch is pressed completely. If problem persists, contact customer support. |
9. Specifications
- Model: RK5 Fly Rig V2
- Dimensions: 12.5 inches (L) x 2.5 inches (W) x 1.25 inches (H)
- Weight: 20.7 ounces
- Power: 9V DC, 150mA (Model #DC9 Universal Power Supply included)
- Input Impedance: 1/4-inch 1megOhm
- Output Impedance: 1/4-inch low impedance
- Audio Output Effects: Delay, Reverb, Fuzz, Overdrive, Boost, Rotary Speaker Mode
- Signal Format: Analog
- Housing: Rugged, all-metal
10. Warranty and Support
For warranty information and technical support, please refer to the official Tech 21 website or contact your authorized dealer. Keep your purchase receipt as proof of purchase.