Introduction
This manual provides essential instructions for the setup, operation, and maintenance of your Hamzer 61-Key Electronic Keyboard Piano. Please read this manual thoroughly before using the product to ensure proper function and longevity. This set is designed for beginner to intermediate-level users, offering a comprehensive learning experience with lighted keys and various sound options.
Important Safety Information
- Ensure the power adapter is correctly connected to a suitable power outlet.
- Do not expose the keyboard to water or excessive moisture.
- Keep the product away from direct sunlight and heat sources.
- Use only the provided accessories (power adapter, microphone, headphones) or approved replacements.
- Supervise children during use to prevent accidents.
- Disconnect power during thunderstorms or when not in use for extended periods.
Package Contents
Verify that all items are present in your package:
- Hamzer 61-Key Electronic Keyboard Piano
- Adjustable H-Style Keyboard Stand
- Padded Piano Bench
- Microphone with 4' cord
- Headphones
- Keynote Stickers (for white and black keys)
- DC 9V Power Adapter
- Owner's Manual

Image: Hamzer 61-Key Electronic Keyboard Piano with all included accessories.
Setup Instructions
1. Assembling the Keyboard Stand
The H-style stand is designed for stability and adjustability. Assemble the stand according to the diagrams in the separate stand assembly guide. Ensure all screws are tightened securely. The stand offers three height settings: 22", 24.5", and 27". Adjust to your preferred height before placing the keyboard.

Image: Adjustable H-Style Keyboard Stand with height options.
2. Assembling the Piano Bench
The padded piano bench provides comfortable seating. Assemble the bench by unfolding its legs and ensuring it is stable. It supports up to 220 lbs. The bench is also adjustable to 19", 20.5", or 21.5".

Image: Padded Piano Bench with adjustable height options.
3. Placing the Keyboard
Carefully place the 61-key electronic keyboard onto the assembled stand. Ensure it is centered and stable before proceeding.
4. Powering the Keyboard
The keyboard can be powered in two ways:
- DC 9V Adapter: Plug the included DC 9V adapter into the power input jack on the back of the keyboard and then into a wall outlet.
- Batteries: For portable use, insert 6 AA batteries (not included) into the battery compartment located on the underside of the keyboard.
5. Connecting Accessories
- Microphone: Plug the microphone's 3.5mm jack into the microphone input port.
- Headphones: Plug the headphones' 3.5mm jack into the headphone output port for private practice.
- Keynote Stickers: For visual learning, apply the transparent keynote stickers to the white and black keys as indicated on the sticker sheets. These stickers help identify notes and simplify learning.

Image: Included microphone and headphones.

Image: Optional keynote stickers for learning.
Operating Instructions
1. Power On/Off
Press the POWER button to turn the keyboard on or off. The digital display will illuminate.
2. Adjusting Volume
Use the MASTER VOL controls to adjust the overall volume of the keyboard.
3. Selecting Timbres (Sounds)
The keyboard features 255 Timbres. Use the number pad or the dedicated timbre selection buttons to choose different instrument sounds (e.g., Acoustic Grand Piano, Electric Guitar, Violin).
4. Selecting Rhythms
Choose from 255 rhythms to accompany your playing. Use the number pad or rhythm selection buttons to select a rhythm (e.g., Pop Rock, Jazz, Disco).
5. Demonstration Songs
The keyboard includes 24 demonstration songs. Press the DEMO SONG button to cycle through and play these pre-recorded melodies.
6. Lighted Keys Learning System
Engage the KEY LIGHTING feature to activate the lighted keys. When playing a demonstration song or using the FOLLOW mode, the keys will light up to guide you on which notes to press. This feature is particularly useful for beginners.
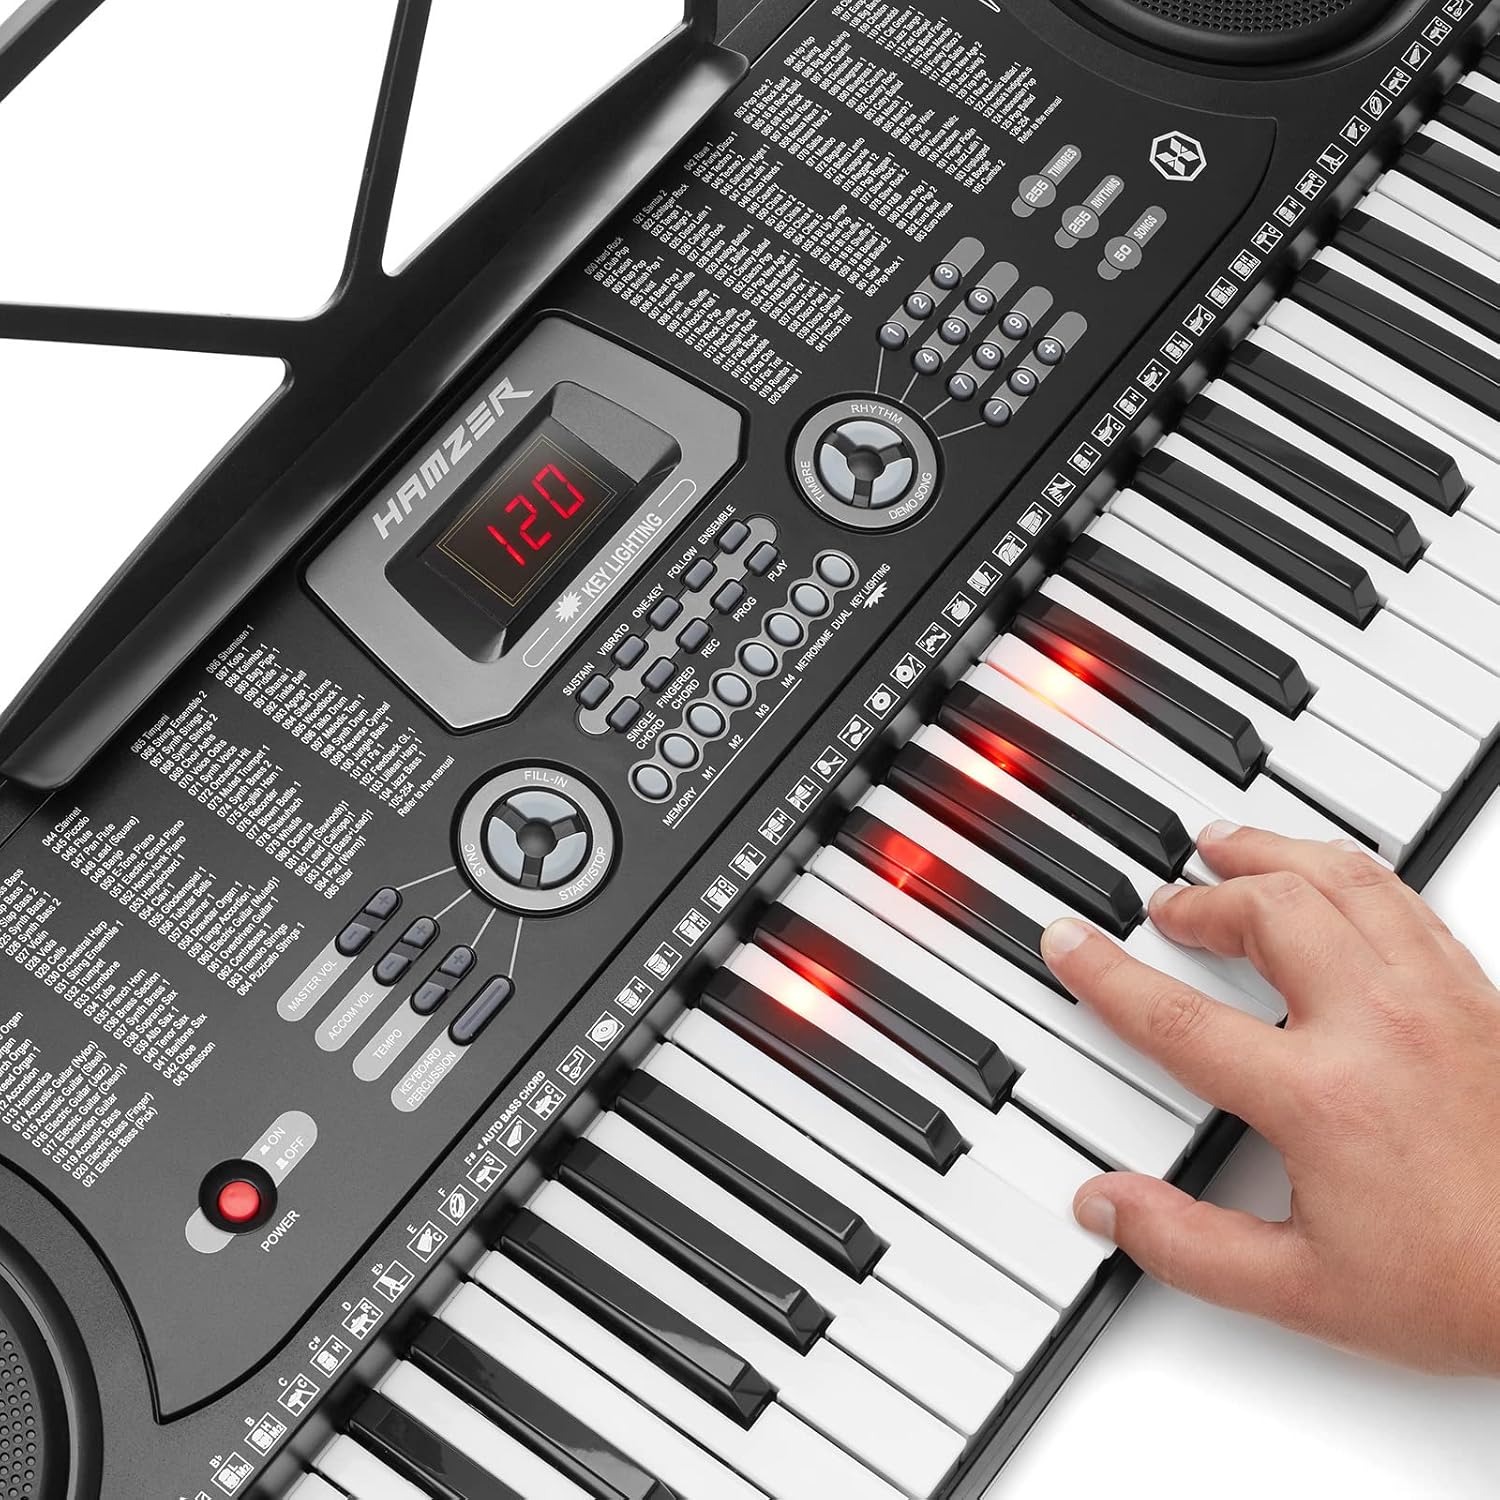
Image: Lighted keys feature in action.
7. Recording and Playback
Use the REC button to record your playing. Press PLAY to listen to your recorded performance. This function is useful for self-assessment and improvement.
8. Special Effects
Enhance your music with built-in effects:
- Sustain: Holds notes longer.
- Vibrato: Adds a pulsating effect to notes.
- Ensemble: Creates a richer, fuller sound.
Product Demonstrations
No official product videos from the seller are available for embedding based on the provided criteria.
Maintenance
- Cleaning: Wipe the keyboard and accessories with a soft, dry cloth. Do not use abrasive cleaners or solvents.
- Storage: When not in use, store the keyboard in a cool, dry place away from direct sunlight and extreme temperatures.
- Battery Replacement: If using batteries, replace all 6 AA batteries simultaneously when power diminishes.
Troubleshooting
| Problem | Possible Cause | Solution |
|---|---|---|
| No power | Power adapter not connected, batteries drained, or power outlet issue. | Check power adapter connection. Replace batteries if using battery power. Test power outlet with another device. |
| No sound | Volume too low, headphones connected, or speaker issue. | Increase master volume. Disconnect headphones if sound is desired from speakers. |
| Keys not lighting up | Key lighting feature is off or not in a learning mode. | Ensure KEY LIGHTING is enabled and a demonstration song or FOLLOW mode is active. |
| Microphone/Headphones not working | Incorrectly plugged in or faulty accessory. | Ensure accessories are fully plugged into the correct 3.5mm jacks. Test with another compatible accessory if available. |
Specifications
- Model: KEY-UNIT-411HSL-BLK
- Keys: 61 (Lighted)
- Timbres: 255
- Rhythms: 255
- Keyboard Percussions: 61
- Demonstration Songs: 24
- Effects: Vibrato, Sustain, Ensemble
- Chords: Single-fingered, Fingered Auto-bass
- Connectivity: 3.5mm Jack (Microphone In, Headphone Out, Audio Input)
- Power Source: DC 9V Adapter (included) or 6 AA Batteries (not included)
- Keyboard Dimensions: 33.5"D x 13"W x 4"H
- Keyboard Weight: 11 lbs
- Stand Height Settings: 22", 24.5", 27"
- Bench Height Settings: 19", 20.5", 21.5"
- Bench Weight Capacity: Up to 220 lbs
Warranty and Support
For warranty information, product support, or to purchase replacement parts, please refer to the contact information provided with your purchase documentation or visit the official Hamzer website. Keep your purchase receipt as proof of purchase for warranty claims.
Additional protection plans may be available for purchase. Please check with your retailer for details.